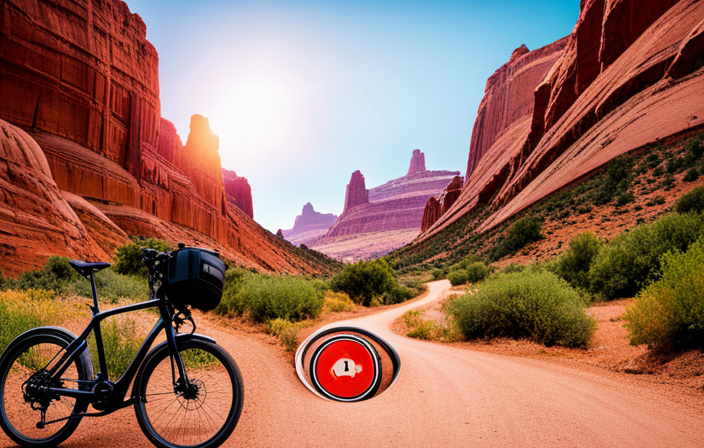
I’m here to show you how to transform your electric bike tire into a showstopper with a vibrant red color! Get ready to turn heads as you ride with style and flair.
In this guide, I’ll take you through the step-by-step process of creating a red tire that’s bound to make a statement. From gathering the necessary materials to applying the perfect coat of primer, I’ve got you covered.
So, let’s dive in and unleash your inner bike customizer!
Key Takeaways
- Removing the tire from the rim is the first step in the process.
- Cleaning the tire surface thoroughly before painting is important for optimal adhesion.
- Applying a primer and base coat is necessary to create a smooth and vibrant base for the paint.
- Applying multiple coats of color and clear coat sealant will ensure a durable and vibrant red tire.

Schwinn Sporterra RX Gravel Bike, 700c Mens and Womens Bike, 14-Speed Drop Bar Gravel Bicycle, Mechanical Disc Brakes, Rigid Fork, Aerodynamic Riding Position, Quick Release Seat Post, Adult Bicycle
GRAVEL BICYCLE: Enjoy next level riding with the Sporterra RX by Schwinn. With 700c wheels, this mens and...
As an affiliate, we earn on qualifying purchases.
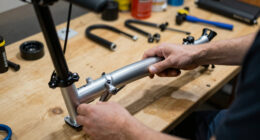
Gather Materials and Tools
To gather materials and tools for making the electric bike red tire, you’ll need a tire, red paint, paintbrush, sandpaper, and a clear coat sealant. Choosing the right paint color is essential to achieve the desired look for your electric bike tire.
Red paint, with its vibrant and eye-catching hue, will make your bike stand out from the crowd. Once you have the paint, it’s important to prepare the tire surface before applying it. Start by cleaning the tire thoroughly to remove any dirt, dust, or grease that may hinder paint adhesion. Next, use sandpaper to roughen the surface slightly, ensuring better paint adherence. Be careful not to damage the tire or remove too much rubber. After sanding, wipe away any residue with a clean cloth. This step is crucial for the paint to bond properly with the tire.
With the tire surface prepared, you can now move on to the next section, which involves removing the tire from the rim, allowing for easier painting and sealing.

ZTZ 700C Road Bike Wheelset, Ultralight Aluminum Alloy 30mm Road Bike Wheel, 20H Front/24H Rear High-Strength Bike Rims, 700c Clincher, Rim Brake, Compatible 8-12 Speed Cassettes (Front+Rear Wheels)
Featherweight and Strong: This 700c road bike wheelset is crafted from high-strength aluminum alloy with 20H front/24H rear...
As an affiliate, we earn on qualifying purchases.
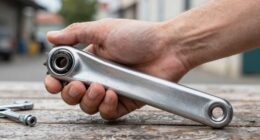
Remove the Tire from the Rim
First, you’ll need to gather the necessary tools for removing the tire from the rim. You’ll need a set of tire levers, which are small, curved tools designed to help pry the tire off the rim. Additionally, having a pump on hand will be useful for deflating the tire before removal.
To start, position the bike upside down or in a bike stand so that the wheel is easily accessible. Begin by deflating the tire completely by removing the valve cap and depressing the valve stem. Next, insert the tire levers between the tire bead and the rim, about two inches apart. Use the levers to pry the bead up and over the rim, being careful not to damage the inner tube. Once the first section of the bead is detached, move the levers a few inches to the side and repeat the process. Continue this motion around the entire circumference of the tire until one side of the bead is completely off the rim.
To transition into the subsequent section about cleaning the tire surface, it’s important to ensure that the tire is completely free from the rim. Inspect the rim to ensure there are no remaining sections of the bead still attached. Once the tire is removed, it’s time to clean the tire surface.

Mongoose Men's Elroy Adventure Bike 700C Wheel Bicycle, Blue, 54cm frame size
Versatile adventure touring bike features capable adventure bike geometry, a sleek alloy frame and steel fork for the...
As an affiliate, we earn on qualifying purchases.
Clean the Tire Surface
Now that you’ve successfully removed the tire from the rim, it’s time to clean the surface of the tire. This step is crucial to ensure proper adhesion of the paint and to achieve a smooth finish.
To begin, gather the necessary materials: a bucket of warm water, mild detergent, a sponge or soft cloth, and a tire brush. Before cleaning, it is important to remove any loose dirt or debris from the tire. This can be done by using a brush or simply wiping it with a cloth.
Once the tire is free from loose dirt, mix the mild detergent with warm water in the bucket. Dip the sponge or cloth into the soapy water and gently scrub the tire surface. Pay attention to areas with stubborn stains or grime, using the tire brush to remove them.
Rinse the tire thoroughly with clean water and allow it to dry completely before proceeding to the next step.
With the tire surface clean and dry, it is now time to prepare it for the application of primer. This will ensure better adhesion and enhance the longevity of the paint job. Applying primer to the tire will create a smooth and even base for the final coat of paint.

AVASTA 700C Road Adult Step-Over Gravel Hybrid Bike Bicycle for Men Woman Male Female,Lightweight Aluminum Alloy Frame with 21-Speed Gearing for City Commuting,Dual Disc Brakes,19 inch Frame,White
🚴♂️【Durable Aluminum Alloy Frame】This lightweight yet strong frame is built to last, offering a perfect balance of durability...
As an affiliate, we earn on qualifying purchases.
Apply Primer to the Tire
Once the tire surface is clean and dry, you’ll need to apply primer for better adhesion and a longer-lasting paint job. Primer application techniques are crucial for achieving a professional finish on your electric bike tire.
The first step is to choose the right color for your tire. Consider the overall look and theme of your bike, as well as any personal preferences. Once you have selected the color, it’s time to prepare the primer. Shake the can thoroughly to ensure proper mixing of the components.
Hold the can about 6-8 inches away from the tire, and begin spraying in a steady, sweeping motion. Apply a thin, even coat of primer, making sure to cover the entire surface. Take care to avoid any drips or runs. If needed, you can apply multiple coats, allowing each coat to dry for a few minutes before applying the next.
Once the primer is applied, let it dry completely before moving on to the next step of the process. This will ensure optimal adhesion and a smooth base for painting.
Let the Primer Dry
To achieve the best results, you should wait patiently for the primer to dry completely before proceeding to the next step. Properly applying primer to a bike tire is crucial for achieving a flawless red paint job. Here are some tips to ensure that your primer application is done correctly:
-
Clean the tire surface: Before applying the primer, make sure to thoroughly clean the tire surface. Remove any dirt, grease, or debris using a mild detergent and water. Allow the tire to dry completely before moving on to the next step.
-
Shake the primer can: Shake the primer can vigorously for about one minute to ensure that the contents are well mixed. This will help achieve a consistent and even application.
-
Apply the primer: Hold the can about 6-8 inches away from the tire and apply a thin, even coat of primer. Start from the top and work your way down, ensuring full coverage. Avoid over-spraying to prevent drips or runs.
Allow the primer to dry completely according to the manufacturer’s instructions. Once the primer is dry, you can proceed to apply the base coat of paint without delay.
Apply the Base Coat
You should begin applying the base coat by using smooth, even strokes from top to bottom, ensuring full coverage without any drips or runs. It is important to choose the right shade of base coat that matches your desired color for the electric bike tires. To achieve the best results, I recommend using a high-quality automotive paint specifically designed for rubber surfaces. This will ensure durability and a professional finish.
Applying multiple coats is essential for a vibrant and long-lasting color. After the first coat has dried, check for any areas that may need additional coverage and apply a second coat if necessary. It is important to follow the manufacturer’s instructions regarding drying time between coats to ensure proper adhesion and a smooth finish.
To keep track of your progress and ensure even application, you can use the following table as a guide:
| Area | First Coat | Second Coat | Third Coat |
|---|---|---|---|
| Front Tire | X | ||
| Rear Tire | X | X | |
| Sidewalls | X | X | X |
Once you have completed applying the desired number of coats, let the base coat dry completely. This will ensure a solid foundation for the next step, which is the application of the color coat.
Let the Base Coat Dry
After applying the base coat to my electric bike’s tire, it is crucial to let it dry properly before moving on to the next step. This is an essential part of the process to achieve a smooth and flawless finish. Here are some tips for achieving a smooth base coat finish and the importance of using proper ventilation during the drying process:
-
Allow Sufficient Drying Time:
Ensure that you give the base coat enough time to dry completely. This will prevent any smudging or unevenness when you move on to applying the red paint.
Check the manufacturer’s instructions for the recommended drying time. It may vary depending on the type of paint used. -
Proper Ventilation:
During the drying process, it is crucial to have proper ventilation in the area where you are working. This will help in expediting the drying time and ensure that the paint cures evenly.
Open windows or use fans to improve air circulation and remove any fumes. This will also prevent the accumulation of harmful chemicals in the air. -
Avoid Touching or Disturbing the Surface:
While the base coat is drying, refrain from touching or disturbing the surface. This can leave fingerprints or marks, compromising the smoothness of the finish.
With the base coat properly dried, it is now time to apply the red paint, which will give my electric bike’s tire a vibrant and eye-catching look.
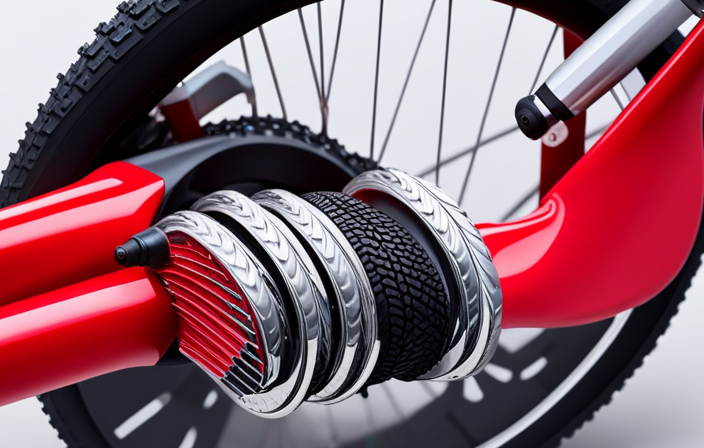
Apply the Red Paint
Now that the base coat is dry, it’s time to start applying the vibrant red paint for a bold and eye-catching finish. Before we begin, it is important to take a few safety precautions.
Make sure you are working in a well-ventilated area to avoid inhaling any fumes. Additionally, wear protective gloves and goggles to protect your skin and eyes from any potential splatters or spills.
To apply the red paint, start by shaking the can thoroughly to ensure the color is well-mixed. Hold the can about 6-8 inches away from the tire and apply a thin and even coat. It is better to apply multiple thin coats rather than one thick coat to achieve a smooth and professional finish. Allow each coat to dry completely before applying the next one.
If you prefer a different color for your electric bike tires, there are alternative options available. You can choose from a variety of vibrant colors such as blue, green, or even yellow to match your personal style and preferences. Just make sure to follow the same application process as described above.
Once you have applied the desired number of coats, let the red paint dry completely. This will ensure that the color sets properly and avoids any smudging or smearing. Patience is key at this stage, as rushing the drying process may result in a less durable finish.
With the red paint now dry, we can move on to the next step of the process.
Let the Red Paint Dry
Once the red paint is dry, we can proceed to the next stage of the process. The drying time of the red paint is crucial for achieving a smooth and even finish on the electric bike’s tires. It is recommended to allow the paint to dry for at least 24 hours to ensure proper adhesion and durability.
During the drying time, it is important to avoid any contact or interference with the painted surface. This includes keeping the bike away from dust, dirt, and moisture, as they can ruin the paint job. Additionally, it is essential to provide adequate ventilation in the drying area to help speed up the drying process.
If you prefer alternative colors for your electric bike tires, you can explore various options. Consider vibrant shades like blue, green, or yellow to add a unique touch to your bike. Just ensure that the chosen color is compatible with the type of paint and primer you have used.
Now that the red paint is dry, we can move on to the next phase of the process: applying a clear coat. This protective layer will not only enhance the appearance of the tires but also safeguard them from scratches and UV damage.
Apply a Clear Coat
Before you apply the clear coat, it’s important to ensure that the surface is clean and free from any dust or debris. This will help to achieve a smooth and glossy finish on your electric bike tire.
When choosing the right clear coat for your tire, there are a few factors to consider. First, you want to make sure that it is compatible with the type of paint you used for the base coat. If you used an enamel paint, for example, you should choose a clear coat that is specifically designed for enamel paints.
Additionally, you want to look for a clear coat that offers UV protection to prevent fading and yellowing over time. It’s also important to choose a clear coat that is durable and resistant to scratches, as your bike tire will be exposed to various elements and conditions.
Once you have chosen the right clear coat, it’s time to apply it to your electric bike tire. Start by shaking the can well to ensure proper mixing of the clear coat. Then, hold the can about 8-12 inches away from the tire and apply a thin, even coat. Make sure to cover the entire surface of the tire, including the sidewalls.
Allow the clear coat to dry completely before moving on to the next step.
Let the Clear Coat Dry
To ensure a smooth and glossy finish on your tire, you should allow the clear coat to dry completely. Drying techniques play a crucial role in achieving a professional look and enhancing the durability of the coating. Here are five key points to keep in mind during the drying process:
- Temperature control: Maintain an optimal temperature range of 70-80°F (21-27°C) to facilitate faster drying and prevent any unwanted reactions.
- Ventilation: Proper airflow is essential to remove excess moisture and promote even drying. Consider using fans or opening windows to ensure adequate ventilation.
- Time: Allow sufficient time for the clear coat to dry. The drying time may vary depending on the brand and specific product instructions, but typically ranges from 24 to 48 hours.
- Avoid contact: Refrain from touching or moving the tire during the drying period to prevent smudges or fingerprints on the surface.
- Multiple coats: If desired, apply additional coats of clear coat after each layer has fully dried. This technique enhances the depth and richness of the finish.
Reinstall the Tire on the Rim
You can now attach the tire back onto the rim after it has dried completely. The reinstalling process is straightforward, but it’s essential to follow the correct steps to ensure a secure fit.
Begin by placing the tire onto the rim, aligning the valve stem with the hole on the rim. Push the tire onto the rim, starting from one side and working your way around until the entire tire is seated. Use your hands to push the tire onto the rim, ensuring it is evenly distributed.
If you encounter any resistance or difficulty during this process, check for any debris or foreign objects that may be preventing the tire from seating properly. Additionally, make sure the rim tape is in good condition and properly centered.
Troubleshooting common issues, such as difficulty fitting the tire onto the rim or the tire not seating properly, may require using tire levers to assist in the installation.
Once the tire is securely on the rim, you can move on to the next step: inflating the tire to the recommended pressure.
Inflate the Tire to the Recommended Pressure
Once the tire has been securely attached to the rim, it’s important to inflate it to the recommended pressure. Maintaining the optimal tire pressure for electric bikes is crucial for both performance and safety. Electric bike tires typically require a higher pressure compared to regular bicycles due to the additional weight and power of the motor.
Advantages of using a higher pressure for electric bike tires:
- Increased efficiency: Higher tire pressure reduces rolling resistance, allowing the bike to glide smoothly and use less energy.
- Enhanced speed: With optimal tire pressure, electric bikes can reach higher speeds, making your rides more enjoyable.
- Improved stability: Properly inflated tires offer better grip and control, especially when navigating corners or uneven surfaces.
To maintain the optimal tire pressure, here are some tips:
- Check the recommended pressure indicated on the side of the tire.
- Use a reliable tire pressure gauge to measure the current pressure.
- Inflate the tire gradually, adding small bursts of air and checking the pressure frequently.
- Regularly inspect the tires for any signs of wear or damage.
By following these tips, you can ensure that your electric bike’s tire pressure is always at the optimal level, providing a smooth and safe riding experience.
Now, let’s move on to testing the tire for proper functioning by…
Test the Tire for Proper Functioning
Now, it’s time to check if the tire is functioning properly by examining its tread and looking for any signs of damage.
Testing the tire is an important step in ensuring a safe and smooth ride on your electric bike.
To begin, inspect the tread for any uneven wear patterns, as this could indicate an alignment issue or improper inflation.
Use your fingers to feel for any cuts, bulges, or punctures on the tire surface. These could potentially lead to a blowout or loss of traction.
Additionally, pay attention to the sidewalls of the tire, looking for any cracks or tears. These can weaken the tire’s structure and compromise its performance.
If any damage is detected, it is crucial to address it promptly by either repairing or replacing the tire.
Troubleshooting tips include checking the tire pressure with a gauge to ensure it matches the recommended PSI.
Furthermore, conduct a visual inspection of the valve stem to verify it is not bent or damaged.
By following these testing techniques and troubleshooting tips, you can be confident in the functionality and safety of your electric bike tire.
Now, you can enjoy your stylish red electric bike tire!
Enjoy Your Stylish Red Electric Bike Tire!
After inspecting and testing the functionality of your stylish red electric bike tire, you can now confidently hit the road and enjoy a smooth ride.
The vibrant color of the tire not only adds a touch of style to your bike, but also provides several advantages that make it a great choice for any cyclist. Here are three reasons why colored bike tires are a must-have:
-
Enhanced visibility: The bright red color of the tire makes you more visible to other road users, increasing your safety during rides. Whether you’re cycling in low-light conditions or sharing the road with vehicles, the eye-catching color ensures that you stand out, reducing the risk of accidents.
-
Personal expression: Colored bike tires allow you to showcase your personality and style. With a variety of vibrant colors available, you can choose a tire that matches your bike or complements your overall look. It’s a simple yet effective way to make a statement and stand out from the crowd.
-
Added customization: Stylish tire accessories, like colored bike tires, give you the opportunity to personalize your ride. Whether you want to match your bike to your favorite sports team or simply add a pop of color to your daily commute, colored tires allow you to customize your bike and make it uniquely yours.
Frequently Asked Questions
Can I use any type of primer for painting my electric bike tire?
No, you shouldn’t use acrylic paint instead of primer for painting your electric bike tire. Acrylic paint lacks the necessary adhesive properties to properly adhere to the tire surface. It’s important to use a suitable primer specifically designed for tire painting.
When it comes to the best brands for electric bike tire paint, some reputable options include Krylon Fusion, Rust-Oleum, and Dupli-Color. These brands offer durable and long-lasting tire paint specifically formulated for outdoor use.
How long does it usually take for the primer to dry?
The drying time of primer for electric bike tires can vary depending on the specific product used. However, on average, it typically takes around 30 minutes to 1 hour for the primer to dry completely.
It is important to note that this timeframe may be influenced by factors such as temperature and humidity. When choosing the best primer for electric bike tires, opt for a product specifically designed for rubber surfaces to ensure adhesion and durability.
Is it necessary to apply a clear coat after the red paint?
Yes, it’s necessary to apply a clear coat after the red paint on the electric bike tires.
The clear coat provides several benefits. It protects the painted surface from scratches, UV damage, and fading. Additionally, it adds a glossy finish, enhancing the overall look of the tires.
Alternatives to clear coat for protecting painted tires include using a tire sealant or a high-quality tire wax. However, these alternatives may not offer the same level of long-lasting protection as a clear coat.
How long should I let the clear coat dry before reinstalling the tire on the rim?
Before reinstalling the tire on the rim, it is crucial to allow the clear coat to dry completely. This ensures a durable and long-lasting finish.
The drying time for clear coat can vary depending on the brand and application techniques used. However, a general rule of thumb is to allow the clear coat to dry for at least 24 hours. This allows the clear coat to fully cure and adhere to the rubber surface, preventing any damage or peeling.
When painting on rubber surfaces, it is important to follow best practices such as proper surface preparation and using a suitable primer for better adhesion.
What is the recommended pressure for inflating the electric bike tire?
The recommended pressure for inflating an electric bike tire is typically indicated on the sidewall of the tire itself. It is important to adhere to this recommended pressure as it ensures optimal performance and safety.
Proper tire maintenance is crucial for a smooth and efficient ride. Regularly checking the tire pressure and adjusting it accordingly will not only extend the lifespan of the tire but also enhance the overall riding experience.
Conclusion
So there you have it, folks! By following these simple steps, you can transform your ordinary electric bike tire into a stunning, eye-catching red masterpiece.
With just a few materials and tools, you’ll have a tire that not only looks stylish but also functions perfectly.
Imagine the envy of others as they see you riding around on your electric bike with its vibrant red tire.
It’s time to make a statement and stand out from the crowd.
Get ready to turn heads and enjoy your new, stylish ride!