
So, you’re interested in building your own electric bike with a 775 motor? Well, you’ve come to the right place. In this article, I’ll guide you through the step-by-step process of creating your very own DIY electric bike.
From gathering the necessary materials and tools to installing the motor and connecting it to the controller, we’ll cover it all.
Get ready to dive into the world of electric bike building and experience the joy of riding on your own creation. Let’s get started!
Key Takeaways
- Choose a lithium-ion battery with high capacity and voltage rating
- Select a frame that provides stability and support for the motor and battery
- Connect the motor to the controller for control and efficiency
- Follow safety precautions and regularly maintain the bike for optimal performance.
Gather the Necessary Materials and Tools
You’ll need to gather all the necessary materials and tools for building your electric bike with a 775 motor. The first step is to choose the right battery for your electric bike. It is essential to select a battery that can provide sufficient power for your motor and give you a decent range. Look for a lithium-ion battery with a high capacity and voltage rating. This will ensure that your electric bike performs optimally and lasts longer.
Maximizing the efficiency of your electric bike is crucial for a smooth and enjoyable ride. Besides the battery, you’ll need other components like a motor controller, throttle, and wiring harness. These parts work together to regulate the power flow and control the speed of your electric bike.
Additionally, you’ll require various tools such as a wrench, screwdriver, wire cutters, and a soldering iron. These tools will help you assemble the different components and ensure a secure and reliable connection.
Once you have gathered all the necessary materials and tools, you can proceed to choose the right frame for your electric bike. The frame plays a vital role in providing stability and support for the motor and battery. Consider factors like weight, material, and design to find a frame that suits your needs and preferences.
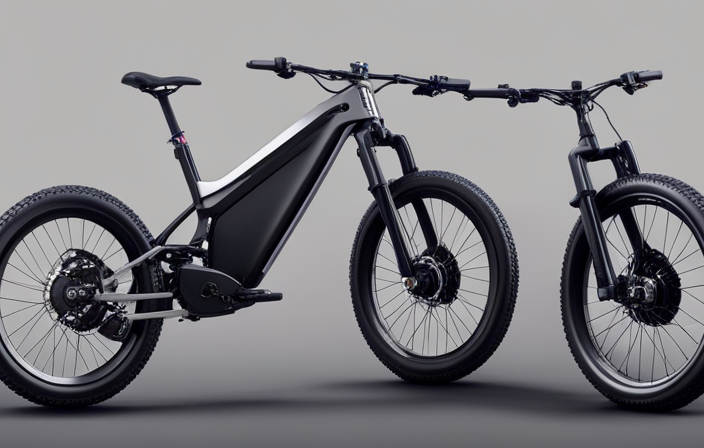
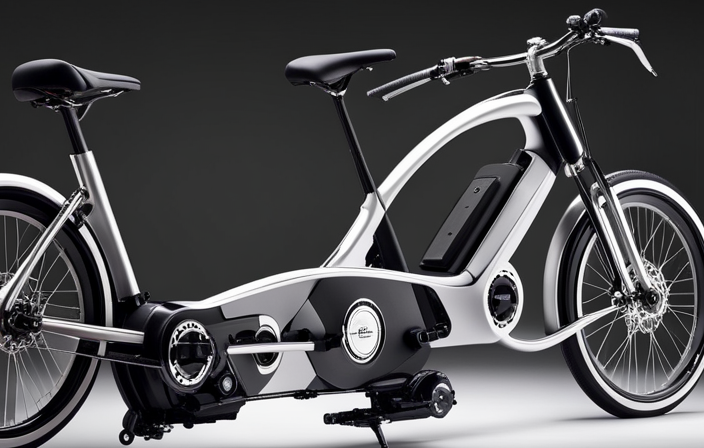
Choose the Right Frame for Your Electric Bike
When choosing the right frame for your e-bike, it’s important to consider factors such as durability, weight, and compatibility with the components you plan to use.
The frame of an electric bike plays a crucial role in determining its performance and overall riding experience. One of the key considerations is whether to opt for a lightweight frame or a more durable one.
Lightweight frames are typically made from materials like carbon fiber or aluminum, which offer the advantage of reducing the overall weight of the bike. This can make the bike easier to handle and maneuver, especially when climbing hills or navigating tight corners.
On the other hand, durable frames are often constructed from materials like steel or titanium, which provide enhanced strength and resistance to wear and tear. These frames are ideal for riders who prioritize longevity and stability over weight savings.
Additionally, when choosing a frame, it’s important to consider the compatibility with the components you plan to use. Different frames have different mounting options and specifications for things like motor and battery placement. Therefore, it’s crucial to ensure that the frame you choose can accommodate the specific components you intend to use.
Lastly, customization options should also be considered. Some frames offer more flexibility for customization, allowing you to adjust things like seat height, handlebar position, and frame geometry to suit your preferences. This can greatly enhance your riding comfort and overall experience.
Now that we have chosen the right frame for our electric bike, the next step is to install the 775 motor onto the frame.
Install the 775 Motor onto the Frame
To install the 775 motor onto the frame, start by ensuring that you have all the necessary tools and equipment ready. You will need a wrench, screwdriver, and mounting brackets that are compatible with your frame.
Begin by positioning the motor in the desired location on the frame. Take note of the mounting technique recommended by the manufacturer, as this may vary depending on the specific motor model. Secure the motor to the frame using the mounting brackets and screws provided. Make sure the motor is firmly attached and does not wobble or move when pressure is applied.
Pay attention to the positioning tips provided in the motor’s installation manual, as proper alignment is crucial for optimal performance. Once the motor is securely mounted onto the frame, you can proceed to the next step of connecting the motor to the controller. This will allow you to control the speed and power of the motor, ensuring a smooth and efficient ride.
Connect the Motor to the Controller
Once the motor is securely attached to the frame, it’s time to connect it to the controller for optimal control and performance. This step is crucial in ensuring that the motor functions properly and communicates effectively with the controller.
Here are the steps to connect the motor to the controller:
-
Locate the motor controller installation area on the frame. This is usually near the handlebars or under the seat.
-
Identify the motor connection terminals on both the motor and the controller. These terminals are labeled with positive (+) and negative (-) symbols.
-
Take the motor wires and connect them to the corresponding terminals on the controller. Ensure that the positive wire is connected to the positive terminal and the negative wire is connected to the negative terminal.
-
Double-check all the connections to ensure they are secure and properly aligned. Loose connections can lead to poor performance or even motor failure.
By following these steps, you will successfully connect the motor to the controller, allowing for efficient control and operation of your electric bike.
Now, let’s move on to the next section where we will install the batteries and wiring to power the motor.
Install the Batteries and Wiring
Now that the motor is connected to the controller, it’s time to install the batteries and wiring for the next step.
Properly connecting the batteries and wiring in an electric bike is crucial for its functionality and safety. To begin, locate a suitable spot on the bike frame to mount the batteries. Make sure it is secure and protected from any potential damage.
Next, carefully connect the positive and negative terminals of the batteries to the corresponding terminals on the controller. It is important to double-check the polarity to avoid any short circuits or damage to the components. To ensure proper wiring connections, use quality connectors and secure them tightly. It is recommended to use heat shrink tubing to insulate the connections and prevent any potential short circuits.
Additionally, neatly organize the wiring to minimize the risk of tangling or snagging while riding. Once the batteries and wiring are securely connected, you can proceed with mounting the throttle and brake system, which will be covered in the next section.
Mount the Throttle and Brake System
When mounting the throttle and brake system, be sure to carefully follow the manufacturer’s instructions to ensure proper installation and functionality. The mounting position of the throttle and brake system plays a crucial role in the overall performance of your electric bike. Begin by identifying the appropriate location on the handlebar for the throttle and brake levers. Make sure that the mounting position allows for easy access and comfortable operation while riding.
To install the throttle, secure it tightly to the handlebar using the provided clamp or screws. Ensure that it is positioned in a way that allows your hand to rest comfortably on the handlebar grip while still being able to reach the throttle easily. Double-check that the wiring connections for the throttle are properly connected to the controller, following the color-coded instructions provided by the manufacturer.
Similarly, mount the brake levers on the handlebar, ensuring that they are positioned in a way that allows for easy reach and comfortable operation. Make sure to adjust the lever reach according to your preference. Connect the brake wires to the appropriate ports on the controller, ensuring a secure and proper connection.
With the throttle and brake system mounted and wired correctly, you are now ready to install the pedal assist sensor (PAS). This sensor detects your pedaling motion and provides additional power from the motor. By seamlessly integrating with the throttle and brake system, the PAS enhances your riding experience by offering a smooth and efficient electric assistance.
Transitioning into the subsequent section, the installation of the PAS is a crucial step in harnessing the full potential of your electric bike.
Install the Pedal Assist Sensor (PAS)
With the throttle and brake system mounted and wired correctly, you’re ready to install the PAS for a smoother and more efficient riding experience. The Pedal Assist Sensor (PAS) is an essential component that detects your pedaling and provides assistance from the motor accordingly. Here’s how to install it:
-
Locate a suitable position on the bottom bracket of your bike frame to mount the PAS sensor. Ensure it is securely fastened and aligned with the chainring.
-
Connect the PAS sensor to the controller using the provided wiring harness. Make sure the connections are tight and secure.
-
Adjust the sensitivity of the PAS sensor according to your preference. This can usually be done through the controller settings or by adjusting the position of the sensor itself.
When troubleshooting common issues with the PAS, such as inconsistent motor assistance or no assistance at all, there are a few things to check:
-
Ensure all connections between the PAS sensor and the controller are properly connected and secure.
-
Check the wiring for any signs of damage or loose connections.
-
Adjust the sensitivity of the PAS sensor to see if it resolves the issue.
Now that the PAS is installed and functioning correctly, we can move on to the next section: connecting the motor to the wheels.
Connect the Motor to the Wheels
To connect the motor to the wheels, start by attaching the sprocket to the motor shaft. This will allow the motor to transfer its power to the wheels through a chain. Make sure to choose a sprocket size that matches the gear ratio you desire for your electric bike.
Once the sprocket is securely attached, it’s time to connect the wires. Locate the wires coming out of the motor and identify the positive and negative terminals. Connect these wires to the corresponding terminals on the controller, ensuring a secure and tight connection. It is crucial to double-check that the wires are connected correctly to avoid any electrical mishaps.
Once the wires are connected, secure the motor to the frame of the bike using mounting brackets or other suitable methods. This will prevent any unnecessary movement or vibrations during operation.
With the motor securely attached and the wires connected, you are now ready to test and adjust the electric bike’s performance, fine-tuning the speed and acceleration settings to your preference.
Test and Adjust the Electric Bike’s Performance
Once the wires are securely connected, you can now test and fine-tune the performance of your electric bike. It’s important to thoroughly test the bike to ensure its functionality and make any necessary adjustments for optimal performance. Here are some steps to follow:
-
Start by taking the bike for a test ride on a flat, open surface. Pay close attention to how it accelerates and maintains speed.
-
Observe the battery life and range during the test ride. Note any discrepancies between the expected and actual results.
-
Test the brakes to ensure they provide sufficient stopping power. Adjust them if necessary to improve their responsiveness.
After analyzing the test results, you can proceed with performance adjustments. Depending on the findings, you may need to:
-
Fine-tune the motor controller settings to optimize power delivery and efficiency.
-
Adjust the gear ratios to find the right balance between speed and torque.
-
Experiment with different tire pressures to enhance traction and ride comfort.
By carefully testing and making performance adjustments, you can fine-tune your electric bike to meet your specific needs and preferences.
Once you have completed these steps, it is time to move on to the next section: installing lights and reflectors for safety.
Install Lights and Reflectors for Safety
After fine-tuning the performance of my electric bike, it was time to address another important aspect: safety. Installing lights and reflectors would ensure that I could ride my bike confidently, even in low light conditions.
To begin, I selected a set of high-quality lights that would provide ample illumination. I opted for LED lights due to their energy efficiency and bright output. I carefully mounted the front light on the handlebars, ensuring it was securely fastened and pointing straight ahead. For the rear light, I attached it to the seat post, making sure it was visible from multiple angles.
Next, I installed reflectors on various parts of the bike. I placed red reflectors on the rear of the bike and white reflectors on the front and sides. These reflective surfaces would increase my visibility to other road users, especially at night or in adverse weather conditions.
By choosing the right lights and installing reflectors, I significantly enhanced the safety of my electric bike. With these essential safety features in place, I could confidently navigate the roads, knowing that I would be visible to others.
Considering adding accessories for comfort and convenience, it is important to choose items that will enhance the overall riding experience.
Consider Adding Accessories for Comfort and Convenience
When selecting accessories for comfort and convenience, it’s crucial to choose items that will enhance the overall riding experience. Here are some accessorizing options and the benefits of adding accessories to your electric bike:
-
Comfortable Seat: A well-padded and ergonomically designed seat can greatly improve your riding comfort, reducing strain on your back and buttocks during long rides.
-
Panniers or Storage Bags: Adding panniers or storage bags to your electric bike allows you to carry your belongings securely and conveniently. These accessories are especially useful for commuting or grocery shopping trips.
-
Front and Rear Lights: Installing front and rear lights on your electric bike is essential for safe riding, especially during low light conditions. These lights increase your visibility to other road users, improving overall safety.
-
Phone Mount: A phone mount is a useful accessory that allows you to securely attach your smartphone to your electric bike’s handlebars. This enables easy access to navigation, fitness apps, or even for playing music while riding.
By incorporating these accessories, you can enhance your riding experience by ensuring comfort, convenience, and safety.
However, it’s important to ensure proper maintenance and care for your electric bike to keep it in optimal condition and maximize its lifespan.
Ensure Proper Maintenance and Care for Your Electric Bike
Now that we have discussed the importance of adding accessories to enhance the comfort and convenience of your electric bike, it is crucial to shift our focus to the maintenance and care required to keep your electric bike running smoothly.
Regular cleaning and lubrication of the various components of your electric bike is of utmost importance to ensure its longevity and optimal performance.
To start, it is crucial to regularly clean your electric bike to remove any dirt, dust, or debris that may accumulate on the frame, wheels, and other components. This can be done using a mild detergent and water, being careful not to use excessive force or water pressure that could damage sensitive electronic parts.
In addition to cleaning, proper lubrication is essential for the smooth operation of your electric bike’s moving parts. This includes applying lubricant to the chain, gears, and bearings to reduce friction and prevent wear and tear. It is recommended to use lubricants specifically designed for bicycles to ensure compatibility and effectiveness.
Furthermore, it is essential to be able to troubleshoot common issues and perform basic repairs on your electric bike. This includes knowing how to identify and fix problems such as a flat tire, loose or misaligned brakes, or a malfunctioning motor. By familiarizing yourself with the basic components and their functions, you will be better equipped to diagnose and resolve any issues that may arise.
In conclusion, regular maintenance and care are essential for the longevity and optimal performance of your electric bike. By regularly cleaning and lubricating the various components and being able to troubleshoot common issues, you can ensure that your electric bike remains in top condition.
Now, let’s move on to the next section and learn how to ride and enjoy your DIY electric bike.
Ride and Enjoy Your DIY Electric Bike
To fully enjoy your DIY electric bike, it’s important to get comfortable with riding and understanding its features. Riding an electric bike can be a thrilling experience, but it’s crucial to prioritize safety and maintain your bike properly. By doing so, you can ensure a smooth and enjoyable ride every time.
One of the key factors in enjoying your DIY electric bike is regular maintenance. Just like any other vehicle, electric bikes require regular check-ups and upkeep to ensure optimal performance. This includes inspecting the tires, brakes, and battery, as well as lubricating the chain and gears. By staying on top of maintenance tasks, you can prevent any potential issues from arising and prolong the lifespan of your electric bike.
In addition to maintenance, there are many benefits to riding an electric bike. Not only are they eco-friendly, emitting zero emissions, but they also offer a cost-effective transportation solution. Electric bikes can save you money on fuel and parking fees, making them a practical choice for daily commuting. Furthermore, they provide an excellent form of exercise, allowing you to stay active while enjoying the outdoors.
To fully enjoy your DIY electric bike, it’s essential to stay safe and follow local traffic laws. This includes wearing a helmet, using hand signals when turning, and obeying traffic signals. By being a responsible rider, you can ensure your safety and the safety of others on the road.
Now let’s dive into the next section about staying safe and following local traffic laws.
Stay Safe and Follow Local Traffic Laws
It’s important to prioritize safety and follow local traffic laws when riding your DIY electric bike. Wearing protective gear is crucial to ensure your safety while on the road. Always wear a properly fitted helmet to protect your head in case of accidents or falls. Additionally, wearing elbow and knee pads can provide extra protection for your joints. It’s also advisable to wear reflective clothing, especially when riding at night, to make yourself more visible to other motorists.
When navigating traffic on your electric bike, it’s essential to be alert and aware of your surroundings. Observe traffic signals and signs, and signal your intentions clearly to other road users. Maintain a safe distance from vehicles and anticipate their movements to avoid collisions. Keep in mind that electric bikes may not be as fast as cars, so it’s important to ride at a reasonable speed to ensure your safety.
In conclusion, prioritizing safety and following local traffic laws are crucial when riding your DIY electric bike. By wearing protective gear and navigating traffic safely, you can enjoy your ride while minimizing the risks.
Now, let’s move on to the next section where we can share our experiences and inspire others to build their own electric bikes.
Share Your Experience and Inspire Others to Build Their Own Electric Bikes
Sharing my own experiences and inspiring others to build their own DIY electric bikes can be a rewarding way to spread knowledge and encourage others to embrace sustainable transportation options.
Throughout my journey of building an electric bike, I encountered various personal challenges that tested my patience and problem-solving skills. One of the most common issues I faced was troubleshooting electrical problems. When the battery failed to charge or the motor didn’t run smoothly, I had to meticulously check the wiring connections, ensuring they were properly connected and insulated. Sometimes, the issue was a faulty controller or a damaged throttle, requiring replacement or repair.
Another challenge I encountered was finding compatible parts for my specific bike frame. It involved careful measurements and research to ensure that the motor, battery, and other components would fit seamlessly. To troubleshoot these compatibility issues, I sought guidance from online forums and communities, which provided valuable insights and suggestions.
Frequently Asked Questions
How do I choose the right frame for my electric bike?
To choose the right frame for my electric bike, I need to consider the weight and size of the motor and battery. The frame should be sturdy enough to support these components and provide a comfortable riding experience.
What tools and materials do I need to install the 775 motor onto the frame?
To install the 775 motor onto the bike frame, you will need a set of tools including wrenches, screwdrivers, and pliers. Additionally, you will need mounting brackets, bolts, and nuts to secure the motor to the frame.
How do I connect the motor to the controller?
To connect the motor to the controller, first, identify the motor and controller wires. Then, connect the corresponding wires using wire connectors or soldering. If there are any issues, troubleshooting the motor controller may be necessary to ensure proper connection and functionality.
What are the necessary safety precautions when installing the batteries and wiring?
When it comes to battery safety and wiring precautions, it’s crucial to take the necessary steps to prevent accidents. Insulate all wiring properly, use a secure battery holder, and avoid overloading circuits to ensure a safe and efficient electric bike setup.
How do I properly maintain and care for my electric bike?
To properly maintain and care for your electric bike, follow these tips: regularly clean the bike and its components, check and inflate tires, lubricate the chain, inspect brakes and cables, store it in a dry place, and follow the manufacturer’s guidelines for battery charging and storage.
Conclusion
In conclusion, building your own electric bike with a 775 motor is a rewarding and fulfilling project. By following the steps outlined in this article, you can create a reliable and efficient mode of transportation that is both eco-friendly and cost-effective.
Just like a skilled craftsman shaping a masterpiece, you have the power to transform ordinary components into a magnificent electric bike.
So, grab your tools, ignite your creativity, and let the sparks fly as you embark on this electrifying journey. Happy riding!