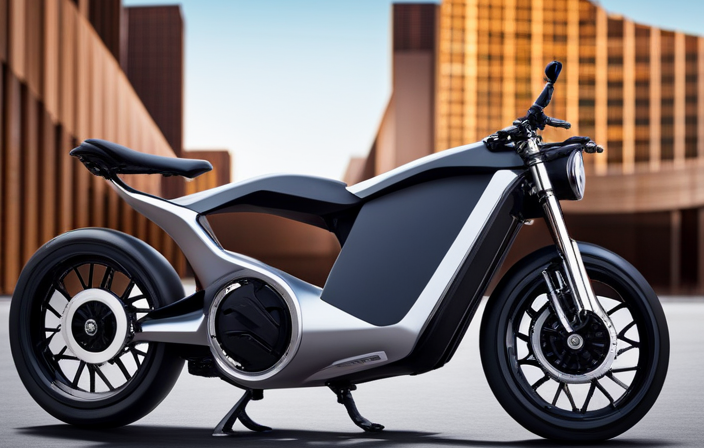
Coincidentally, I stumbled upon an intriguing project: building an electric bike with a DC motor. With the right materials and tools, converting a regular bicycle into an electric-powered machine is not only achievable but also a thrilling DIY adventure.
In this article, I will guide you through each step, from selecting the ideal bike to connecting the motor and battery. Get ready to embark on this technical and precise journey to create your very own electric bike.
Let’s dive in!
Key Takeaways
- Consider battery capacity, lifespan, and compatibility with the motor.
- Choose a sturdy frame with enough space for the battery and controller.
- Properly install the motor without damaging the derailleur or chain.
- Connect all wires securely and double-check all connections for optimal functioning.

Magicshine HORI1300S Bike Headlight, Compatible with Garmin/Wahoo, 1300 Lumens High & Low Beam Front Light, USB-C Rechargeable, IPX6 Waterproof for Night Riding and Urban Cycling-Black
DUAL OPTICS, HIGH & LOW BEAM: Max 1300LM high beam conquers the darkest trails. The anti-glare low beam...
As an affiliate, we earn on qualifying purchases.
Gather the Necessary Materials and Tools
You’ll need to gather all the necessary materials and tools to make an electric bike with a DC motor. When it comes to finding the best battery for your electric bike, there are a few things to consider.
Look for a battery that has a high capacity and long lifespan, as well as one that is lightweight and easy to install. Additionally, make sure the battery is compatible with the DC motor you have chosen.
Troubleshooting common issues with electric bike conversion kits is another important aspect to consider. Familiarize yourself with the kit’s manual and troubleshooting guide, as it will provide valuable information on how to address any potential problems that may arise during the conversion process.
With all the necessary materials and tools in hand, it’s time to move on to the next step: choosing the right bicycle for conversion.

2026 Upgrade 9800Lumen Bike Light for Night Riding,Super Bright 6 LED Headlight,Aluminum 10 Mode Rechargeable Bicycle Light Front and Rear,360°Rotatable Brackt,Waterproof,Runtime 72 hr,Road Shockproof
【700DAYS Support] 】:If your bike light have any problem, please to pass us on through Amazon for the...
As an affiliate, we earn on qualifying purchases.
Choose the Right Bicycle for Conversion
First, consider selecting the appropriate bicycle for your conversion project. Choosing the right frame is crucial as it determines the stability and durability of your electric bike. Look for a sturdy frame made of materials like steel or aluminum that can support the weight of the motor and battery.
Understanding power requirements is also essential. Calculate the power needed based on factors such as your weight, desired speed, and terrain. This will help you determine the appropriate motor size and voltage.
Additionally, make sure the bicycle has enough space to accommodate the battery and controller.
Once you have chosen the right bicycle, you can move on to the next step of the conversion process, which involves removing the rear wheel and installing the motor.

Wahoo KICKR V6 Smart Indoor Trainer
WiFi Connectivity - Offering a robust 2.4 GHz Wi-Fi connection, the new KICKR transfers ride data to your...
As an affiliate, we earn on qualifying purchases.
Remove the Rear Wheel and Install the Motor
After selecting the appropriate bicycle frame, proceed to remove the rear wheel and install the motor. This step is crucial in converting your bicycle into an electric bike.
To install the motor properly, start by loosening the nuts or bolts that hold the rear wheel in place. Once the wheel is loose, carefully slide it out of the dropouts, making sure not to damage the derailleur or chain.
With the wheel removed, position the motor in the same location where the wheel was previously installed. Align the motor with the dropouts and secure it using the appropriate nuts or bolts. Ensure the motor is securely attached to prevent any wobbling or movement during operation.
Now, we can move on to the next step of connecting the motor to the battery and controller, which will provide power to your electric bike.

Garmin Tacx Neo 2T Smart Trainer
Material: metal, plastic
As an affiliate, we earn on qualifying purchases.
Connect the Motor to the Battery and Controller
To connect the motor to the battery and controller, ensure that all the necessary wires are properly connected and secure. Proper wiring is crucial to ensure the efficient operation of the electric bike.
Start by identifying the wires coming from the motor and the corresponding wires from the battery and controller. Connect the positive wire from the motor to the positive terminal of the battery, and the negative wire from the motor to the negative terminal of the battery.
Next, connect the control wires from the motor to the appropriate terminals on the controller. It is important to double-check all connections and make sure they are tight and secure to prevent any loose connections or potential short circuits.
Troubleshooting common connection issues, such as loose wires or incorrect connections, will help ensure the smooth functioning of the electric bike.
Moving forward, we will now discuss how to install the throttle and complete the wiring.
Install the Throttle and Wiring
Installing the throttle and wiring is an essential step in completing the connections for the battery and controller.
To begin, carefully mount the throttle handle on the handlebars, ensuring it is secure and easily accessible while riding.
Next, connect the throttle wires to the controller, making sure to match the corresponding colors. It is crucial to double-check the connections to avoid any potential issues.
If there are any problems with the wiring, such as loose connections or damaged wires, troubleshoot by inspecting each connection and repairing or replacing as necessary.
Additionally, ensure that the throttle is functioning properly by testing it before proceeding to the next section.
With the throttle and wiring successfully installed, it’s time to move on to mounting the battery and controller, which will provide power to the electric bike.
Mount the Battery and Controller
Once the throttle and wiring are securely in place, the next step is mounting the battery and controller. Proper positioning of these components is crucial for optimal performance and safety. Here is a step-by-step guide to help you mount them correctly:
- Choose a location on the bike frame that is secure and easily accessible.
- Place the battery and controller in the selected area, ensuring proper weight distribution.
- Use mounting brackets or straps to secure the battery and controller to the frame tightly.
- Double-check all connections and make sure they are properly insulated to prevent any electrical mishaps.
Securing the components is essential to prevent any unnecessary movements that can damage the electrical system or cause accidents.
Once the battery and controller are securely mounted, we can move on to the next step of testing the electric bike and making any necessary adjustments.
Test the Electric Bike and Make Adjustments
Now, you should test your electric bike and make any necessary adjustments to ensure its optimal performance.
Start by taking your bike for a test ride in a safe and open area. Pay close attention to how the bike accelerates, handles, and brakes. Take note of any irregularities or issues that you may encounter during the test ride.
Once you have completed the test ride, it is time to analyze the test results. Look for any patterns or trends that may indicate areas for improvement. If you notice any problems, use troubleshooting techniques to identify the root cause and make the necessary adjustments.
This may involve checking the wiring connections, adjusting the controller settings, or fine-tuning the throttle response. By analyzing the test results and troubleshooting any issues, you can ensure that your electric bike performs at its best.
In the next section, we will discuss how to install additional features and accessories to enhance your electric bike’s functionality.
Install Additional Features and Accessories
To enhance your electric bike’s functionality, you can add extra features and accessories. Here are some tips for installing LED lights on your electric bike:
-
Choose the right lights: Opt for bright LED lights that are specifically designed for bicycles. They should be waterproof and have a long battery life.
-
Mounting the lights: Attach the front light to the handlebar and the rear light to the seat post. Make sure they are securely fastened to prevent any vibrations.
-
Wiring the lights: Connect the lights to the battery pack using the provided wiring harness. Follow the instructions carefully to ensure proper installation.
-
Test and adjust: Before hitting the road, test the lights to make sure they are working correctly. Adjust the angle and position of the lights for optimal visibility.
Adding a GPS tracker to your electric bike can also be beneficial. It provides security and helps you track your bike in case of theft.
Now that you have installed additional features and accessories, let’s move on to learning about maintenance and safety tips.
Learn about Maintenance and Safety Tips
For better performance and safety, it’s important to familiarize yourself with maintenance and safety tips for your electric bike.
Regular maintenance is crucial to keep your electric bike running smoothly. Make sure to clean your bike regularly to prevent dirt and debris from affecting the motor and battery.
Check the tire pressure frequently and inspect the brakes for any signs of wear. Additionally, lubricate the chain and gears to ensure smooth shifting and reduce friction.
When it comes to safety precautions, always wear a helmet and protective gear while riding. Obey traffic rules and be aware of your surroundings.
Regularly inspect the electrical components to ensure they are functioning properly.
By following these maintenance tips and safety precautions, you can enjoy your DIY electric bike worry-free.
Enjoy Your DIY Electric Bike!
Get ready to have a blast riding your DIY e-bike! As you take your electric bike out for a spin, you’ll experience the numerous benefits it offers. Here are some key advantages of electric bikes:
- Increased speed: With the assistance of a powerful DC motor, you can effortlessly reach higher speeds and cover greater distances.
- Reduced effort: The motor helps you pedal with ease, making uphill climbs and long journeys more manageable.
- Environmentally friendly: Electric bikes emit zero emissions, promoting a cleaner and greener environment.
- Cost-effective: Compared to traditional vehicles, e-bikes require minimal maintenance and are a more affordable transportation option.
- Health benefits: While the motor assists your pedaling, you still get a good workout, improving your cardiovascular health.
In order to enjoy a smooth ride, it’s important to troubleshoot common issues that may arise. Keep an eye out for potential problems such as battery drainage, loose connections, or motor malfunctions. By regularly maintaining your electric bike and addressing any issues promptly, you can ensure a safe and enjoyable riding experience.
Frequently Asked Questions
What are some safety precautions to take when converting a bicycle into an electric bike?
When converting a bicycle into an electric bike, it is crucial to prioritize safety. Wearing protective gear, such as a helmet and pads, is of utmost importance. Additionally, implementing essential electrical safety measures is vital for a successful conversion.
Can any type of bicycle be converted into an electric bike?
Yes, any type of bicycle can be converted into an electric bike using an electric bike conversion kit. Converting a bicycle offers numerous advantages such as increased speed, reduced effort, and extended range.
How long does it usually take to complete the conversion process?
It usually takes several hours to complete the conversion process. When choosing the right battery for your electric bike, consider factors like voltage, capacity, and weight. Troubleshoot common issues like wiring problems or motor malfunctions during the conversion process.
Are there any specific maintenance tasks that need to be performed regularly on an electric bike?
Regular maintenance tasks for an electric bike include following a maintenance schedule for battery charging, inspecting and lubricating the chain, checking tire pressure, and cleaning the bike. Common troubleshooting issues include electrical system malfunctions and motor overheating.
Can the electric bike be used in all weather conditions, such as rain or snow?
Using an electric bike in inclement weather has several benefits. To maintain it in rainy or snowy conditions, apply a waterproof coating to the electrical components, use fenders and mudguards, and regularly clean and lubricate the bike.
Conclusion
Well, there you have it folks! You’re now the proud creator of your very own electric bike. With just a few materials and some handy tools, you’ve transformed an ordinary bicycle into a powerful and efficient mode of transportation.
From choosing the right bike to installing the motor and connecting the necessary components, you’ve mastered the art of DIY electric bike conversion.
Now, get ready to enjoy the thrill and convenience of riding your very own eco-friendly, high-speed electric bike.
Happy riding!