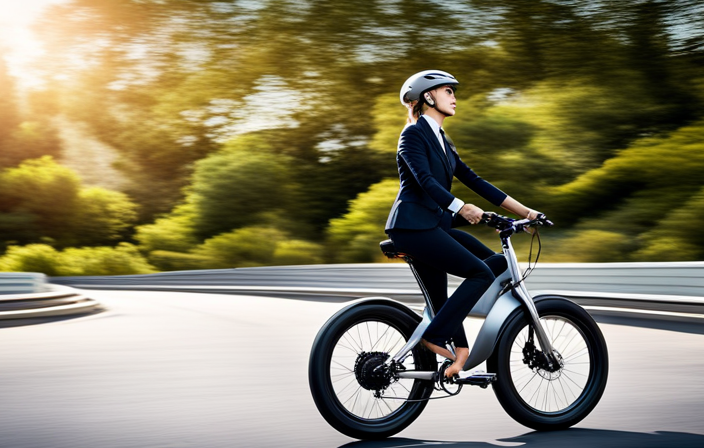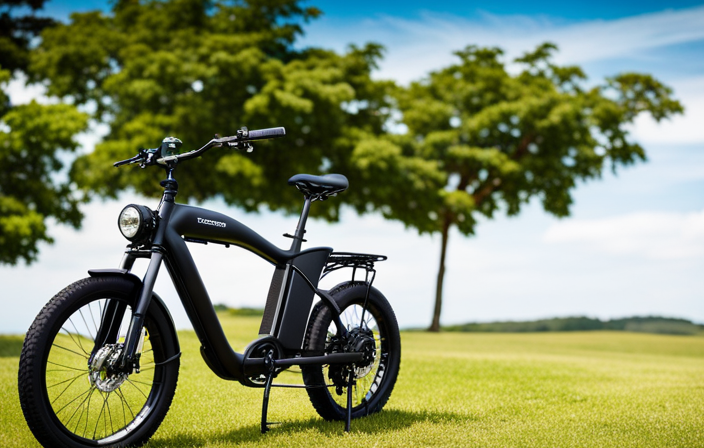

I’ve always been a thrill-seeker, craving the rush of adventure on two wheels. But lately, I’ve found myself yearning for something more, something that combines my love for mountain biking with the power and efficiency of an electric motor.
That’s why I decided to take matters into my own hands and create my very own electric mountain bike. In this article, I’ll guide you through the step-by-step process of transforming your ordinary bike into an electrifying beast that will take your off-road expeditions to new heights.
So, let’s dive in and embark on this electrifying journey together!
Key Takeaways
- Assess the strength and durability of the bike frame, looking for frames made of aluminum or carbon fiber.
- Evaluate the battery capacity to ensure it can cover the desired distance without recharge.
- Choose an electric conversion kit that is compatible with the existing bicycle and meets specific needs and preferences.
- Gather the necessary tools and materials, such as wrench set, pliers, wire stripper, and torque wrench, for the conversion process.
Assess Your Bike’s Suitability for Conversion
You’ll need to assess if your bike’s frame is suitable for conversion into an electric mountain bike. The first thing to consider is the strength and durability of the bike frame. An electric mountain bike requires a sturdy frame that can handle the additional weight and stress of the motor and battery. Look for a frame made of strong materials like aluminum or carbon fiber.
Additionally, you need to evaluate the battery capacity. Determine how much distance you want to cover on a single charge and choose a battery that can meet your needs. A higher capacity battery will allow for longer rides without needing to recharge. Assessing your bike’s frame and battery capacity is crucial to ensure a successful conversion.
Now, let’s move on to choosing the right electric conversion kit.
Choose the Right Electric Conversion Kit
To select the appropriate electric conversion kit, it’s crucial to consider factors such as compatibility with your existing bicycle and desired level of power. Electric conversion kits come in various options, each offering different features and capabilities.
Before making a decision, it’s important to assess your bike’s specifications and determine what type of kit will work best for you. Consider factors such as the motor power, battery capacity, and wheel size compatibility. Are you looking for a kit that provides pedal-assist or throttle-only mode? Do you want a kit that is lightweight and easy to install?
By taking these factors into account, you can choose the right electric conversion kit that meets your specific needs and preferences.
Now that you have decided on the kit, it’s time to gather the necessary tools and materials to begin the conversion process.
Gather the Necessary Tools and Materials
Now, it’s important to gather all the tools and materials you’ll need for the conversion process.
Assessing the suitability of your electric conversion kit is crucial, as it ensures compatibility with your mountain bike.
To begin, you’ll need a wrench set to remove the bike’s existing components. A pair of pliers will also come in handy for any small adjustments.
Additionally, a wire stripper and electrical tape are essential for connecting the wiring. Don’t forget a torque wrench to properly tighten the bolts and a set of Allen keys for various fittings.
Safety should always be a priority, so make sure to wear gloves, safety glasses, and have a fire extinguisher nearby.
With these tools and materials at hand, you’ll be well-prepared to tackle the next step of removing the bike’s existing components seamlessly.
Remove the Bike’s Existing Components
First, gather all the necessary tools and materials for the conversion process, ensuring compatibility with your current components. As a passionate bike enthusiast, I’ve always enjoyed bike modification and repurposing bicycles. Removing the bike’s existing components is a crucial step in this process. It allows for a clean slate and prepares the bike for its new electric transformation. To give you a clear picture, here’s a table showcasing the components you’ll typically encounter during this stage:
| Component | Description |
|---|---|
| Pedals | Remove the existing pedals using a pedal wrench. |
| Chain | Use a chain tool to break the chain and remove it. |
| Crankset | Unscrew the crank bolts and remove the crankset. |
| Derailleurs | Disconnect the derailleurs from the frame. |
| Brakes | Unbolt the brakes and detach them from the bike. |
Now that we’ve removed the bike’s existing components, it’s time to move on to the exciting part: installing the electric motor.
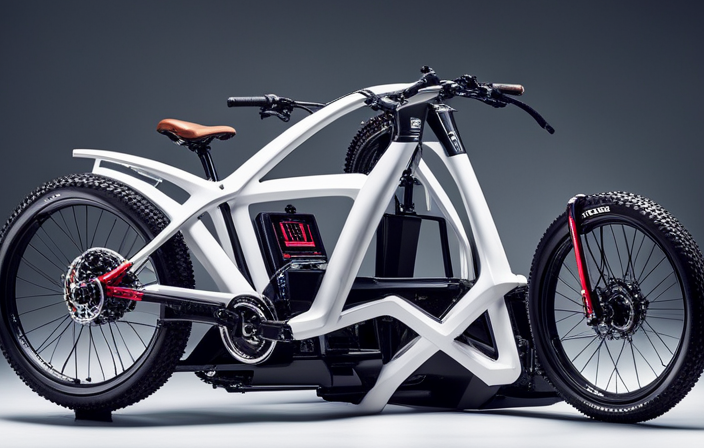
Install the Electric Motor
For this step, you’ll need to gather the necessary tools and materials to install the motor onto your bike’s frame. Installing an electric motor onto your bike can transform it into a powerful and efficient e-bike.
As someone who has installed numerous electric motors on bikes, I can offer you some valuable tips. Firstly, make sure you have the right size motor for your bike’s frame. This will ensure a proper fit and optimal performance.
Additionally, pay attention to the motor’s wiring and connections, as faulty or loose connections can cause issues down the line. Troubleshooting common motor installation issues often involves checking the wiring, ensuring proper alignment, and double-checking all connections.
With these tips in mind, let’s move on to the next step and discuss how to mount the battery securely onto the bike.
Mount the Battery
To securely mount the battery onto your e-bike, you’ll need to locate a suitable spot on the frame that provides easy access and doesn’t interfere with the bike’s balance. The mounting position is crucial as it ensures the battery stays secure even when you’re tackling rough terrains.
Personally, I recommend installing the battery in the center of the frame, close to the downtube. This position helps maintain the bike’s stability and prevents any unwanted shifts in weight distribution.
When choosing a battery, consider its capacity as well. Higher battery capacity allows for longer rides and provides more power to the motor.
Now that the battery is securely mounted, it’s time to wire the electrical system seamlessly, ensuring optimal performance and safety.
Wire the Electrical System
Now that you have the battery securely mounted, it’s important to wire the electrical system properly for optimal performance and safety. Proper wiring techniques are crucial to ensure that power flows smoothly and reliably throughout your electric mountain bike. To help you understand the wiring process, I’ve created a table below outlining the essential connections you’ll need to make:
| Component | Wire Color | Connection |
|---|---|---|
| Motor | Yellow | Connect to Controller |
| Battery | Red | Connect to Controller |
| Throttle | Green | Connect to Controller |
| Controller | Black | Connect to Frame Ground |
When troubleshooting your electrical system, keep in mind a few tips. First, always check for loose connections or damaged wires. Additionally, use a multimeter to test the voltage at different points in the system. This will help identify any potential issues. By following proper wiring techniques and utilizing troubleshooting tips, you’ll ensure that your electric mountain bike’s electrical system is reliable and efficient.
As you wire the electrical system, it’s important to keep in mind that the next step is to test and fine-tune the electric system.
Test and Fine-Tune the Electric System
Before hitting the trails on my newly converted electric mountain bike, I always make sure to thoroughly test and fine-tune the electric system.
The first step is to check for proper functioning of the motor and controller, ensuring that they are running smoothly and efficiently.
Once everything is in working order, I then adjust the settings for power and speed, customizing the bike to my preferred specifications.
Fine-tuning the electric system not only enhances the performance of the bike, but also ensures a safer and more enjoyable riding experience.
Check for Proper Functioning of the Motor and Controller
Make sure you’re checking for proper functioning of the motor and controller to ensure everything is working correctly. As an experienced electric mountain bike enthusiast, I understand the importance of thorough testing procedures and troubleshooting techniques.
Here are three key aspects to consider when assessing the motor and controller:
-
Motor Performance: The motor should run smoothly and provide consistent power delivery, without any strange noises or vibrations. A responsive and efficient motor will enhance your riding experience and boost your confidence on challenging terrains.
-
Controller Functionality: The controller is the brain of the electric system, regulating power output and managing various functions. Ensure that it is functioning properly, allowing you to seamlessly adjust settings and access different modes without any glitches.
-
Battery Compatibility: The motor and controller should be compatible with the battery pack you’re using. Confirm that they work harmoniously together, providing optimal performance and maximizing battery life.
By thoroughly testing and troubleshooting the motor and controller, you can guarantee a reliable and enjoyable riding experience.
Now, let’s move on to adjusting the settings for power and speed.
Adjust the Settings for Power and Speed
To optimize your riding experience, it’s important to adjust the settings for power and speed.
By adjusting the power settings, you can find the perfect balance between performance and efficiency. Increasing the power will give you more torque, allowing you to tackle steep inclines with ease. On the other hand, reducing the power can help conserve battery life for longer rides.
Similarly, adjusting the speed capabilities can enhance your biking experience. Increasing the top speed will allow you to ride faster and cover more ground, while decreasing it can provide better control and stability on tricky terrains.
So, take some time to experiment with different settings and find the perfect combination that suits your riding style.
Once you’ve adjusted the power and speed, it’s time to reinstall the bike’s components, ensuring everything is securely in place for your next adventure.
Reinstall the Bike’s Components
Once you’ve removed the bike’s components, it’s time to reinstall them. This step is crucial in ensuring that your electric mountain bike functions properly and delivers the performance you desire.
As someone who has spent countless hours tinkering with bikes, I can share my expertise on this topic. When reinstalling the bike’s components, it’s important to pay attention to the alignment and tightness of each part. Common installation issues can include misaligned brakes, loose handlebars, and improperly adjusted gears.
To troubleshoot these problems, I recommend double-checking the instruction manual and seeking guidance from experienced riders or mechanics. By taking the time to reinstall the bike’s components correctly, you can avoid potential issues down the line and enjoy a smooth and exhilarating riding experience.
Now that we have covered the installation process, let’s move on to the next important aspect: ensuring proper safety measures.
Ensure Proper Safety Measures
Don’t forget to prioritize safety measures when riding your bike. As an experienced rider, I can’t stress enough the importance of wearing the proper safety equipment and practicing proper riding techniques.
Before hopping on your electric mountain bike, make sure to wear a helmet, knee pads, and elbow pads to protect yourself in case of any accidents or falls.
Additionally, it’s crucial to familiarize yourself with the proper riding techniques, such as maintaining a balanced posture, using your brakes effectively, and being aware of your surroundings.
By incorporating these safety measures into your biking routine, you can ensure a safe and enjoyable riding experience.
Now, let’s dive into the next section and discuss how to practice riding and get comfortable with the electric assist.
Practice Riding and Get Comfortable with the Electric Assist
Get comfortable with the electric assist by gradually increasing the level of assistance while riding. As an experienced rider, I can assure you that practice techniques are key to improving your skills with an electric mountain bike.
Start by familiarizing yourself with the different levels of assistance your bike offers. Begin with a low level and gradually work your way up as you gain more confidence. This will allow you to get used to the power and responsiveness of the electric assist system.
Practice various techniques such as climbing steep hills, navigating tight corners, and descending challenging terrain. With time and dedication, you will become more proficient and comfortable with the electric assist, enabling you to tackle even more demanding trails.
Speaking of trails, let’s now transition into the next section on how to maintain and service your electric mountain bike.
Maintain and Service Your Electric Mountain Bike
Maintaining and servicing your electric mountain bike is crucial for optimal performance and longevity.
One key aspect is regularly checking and charging the battery to ensure it has enough power for your rides.
Additionally, it’s important to clean and lubricate the chain and gears to prevent rust and ensure smooth shifting, enhancing your overall biking experience.
As an experienced rider, I highly recommend incorporating these maintenance tasks into your routine to keep your electric mountain bike in top shape.
Regularly Check and Charge the Battery
Make sure to regularly check and charge the battery on your electric mountain bike. Battery maintenance is crucial for ensuring optimal performance and longevity.
To keep your battery in top shape, follow these simple charging tips. First, always use the charger provided by the manufacturer to avoid any compatibility issues. Make sure to charge the battery fully before each ride, as partial charging can lead to reduced capacity over time. Avoid overcharging by unplugging the charger once the battery is fully charged.
Additionally, it’s important to store the battery at a moderate temperature and avoid extreme heat or cold. By implementing these battery charging tips, you can maximize the lifespan of your electric mountain bike’s battery and enjoy many exciting rides ahead.
Now, let’s move on to the next section and discuss how to clean and lubricate the chain and gears.
Clean and Lubricate the Chain and Gears
After ensuring that my electric mountain bike’s battery is in optimal condition, the next crucial step in maintaining its performance is to clean and lubricate the chain and gears. Regular chain maintenance and gear lubrication not only enhance the bike’s overall efficiency but also extend the lifespan of these essential components. Personally, I find great satisfaction in meticulously caring for my bike, and this process is no exception. By following a few simple steps, I can keep my chain clean and properly lubricated, ensuring smooth and reliable gear shifting. To emphasize the importance of this task, I have created a table to illustrate the benefits of chain maintenance and gear lubrication.
| Benefits of Chain Maintenance and Gear Lubrication |
|---|
| Prevents rust and corrosion |
| Reduces friction and wear |
| Improves shifting performance |
| Prolongs chain and gear life |
With a well-maintained chain and gears, I am ready to take my electric mountain bike to the next level by upgrading and customizing it.
Upgrade and Customize Your Electric Bike
To enhance your electric bike, you can easily upgrade and customize it with new accessories and components. Adding these customization features not only allows you to personalize your bike, but also improves its performance. Here are some ways you can upgrade and customize your electric bike:
-
Customize features:
-
Upgrade the handlebars for a more comfortable riding position
-
Install a suspension seat post to absorb shocks and improve comfort
-
Performance upgrades:
-
Upgrade the battery to increase the range of your electric bike
-
Install a more powerful motor for better acceleration and hill climbing abilities
By customizing and upgrading your electric bike, you can tailor it to your specific needs and preferences, making your riding experience even more enjoyable. So why wait? Start exploring the wide range of accessories and components available to take your electric bike to the next level.
Now, as you join a community and share your electric bike experience, you’ll have even more to talk about with your fellow enthusiasts.
Join a Community and Share Your Electric Bike Experience
When you join a community of electric bike enthusiasts, you’ll have the opportunity to share your experiences and connect with fellow riders.
Being a part of an electric bike community has numerous benefits, especially when it comes to electric bike maintenance. You can learn from experienced riders who have faced similar challenges and gain valuable insights on how to keep your electric bike in top shape.
From tips on battery maintenance to troubleshooting common issues, the collective knowledge of the community is invaluable. Not only will you learn how to take care of your electric bike, but you’ll also have a support network of like-minded individuals who share your passion for electric biking.
Joining a community allows you to tap into a wealth of knowledge and expertise, ensuring that your electric bike stays in optimal condition. So, whether it’s discussing the latest upgrades or sharing maintenance tips, the electric bike community is a valuable resource for any rider.
Now, let’s dive into the thrilling adventures on your electric mountain bike!
Enjoy the Thrilling Adventures on Your Electric Mountain Bike!
Get ready to embark on exhilarating adventures as you explore the rugged terrain on your e-mountain bike! As an experienced rider, I can assure you that there is nothing quite like the thrill of riding through adventurous trails and conquering challenging obstacles.
Here are a few safety precautions to keep in mind before you hit the trails:
- Always wear a helmet to protect your head in case of a fall.
- Make sure your bike is in proper working condition before each ride.
- Familiarize yourself with the trail you plan to ride on and be aware of any potential hazards.
- Ride with a group or let someone know your planned route and expected return time for added safety.
With these safety measures in place, you can confidently explore the trails and experience the joy of riding your e-mountain bike to its fullest potential.
So get out there and let the adventures begin!
Frequently Asked Questions
How do I assess my bike’s suitability for conversion?
To assess my bike’s suitability for conversion, I start by examining its frame, weight capacity, and compatibility with electric components. I thoroughly inspect the brakes, drivetrain, and suspension to ensure they can handle the added power and weight of the modification.
What factors should I consider when choosing the right electric conversion kit?
When choosing the right electric conversion kit, I consider the features of the kit such as motor power, torque, and compatibility with my bike. Additionally, I carefully choose the right battery based on its capacity, weight, and range.
What tools and materials do I need to gather before starting the conversion process?
To convert a regular mountain bike into an electric one, you’ll need a few key tools and materials. These include an appropriate E bike battery, a conversion kit, a wrench set, a torque wrench, and a bike stand. The step-by-step conversion process involves removing the bike’s front wheel, attaching the motor to the fork, mounting the battery and controller, connecting the wires, and adjusting the brakes. With the right tools and materials, you can transform your mountain bike into an electrifying ride.
How do I ensure proper safety measures while installing the electric motor?
When installing an electric motor, safety is crucial. Follow these electric motor installation tips to ensure proper safety precautions. It’s like wearing a helmet while biking; it protects you from potential dangers.
Are there any specific maintenance and servicing tips for electric mountain bikes?
Maintenance tips for electric mountain bikes include regularly cleaning and lubricating the chain, checking tire pressure, and inspecting the battery and motor connections. Common issues to watch for are worn brake pads and loose bolts.
Conclusion
In conclusion, making an electric mountain bike is a fulfilling and rewarding experience.
By assessing your bike’s suitability for conversion, choosing the right conversion kit, and gathering the necessary tools and materials, you can successfully transform your regular bike into an electrifying adventure machine.
Maintaining and servicing your electric mountain bike, upgrading and customizing it, and joining a community will enhance your overall experience.
While some may argue that it’s a complicated process, with determination and passion, anyone can create their own electric mountain bike and enjoy the thrilling adventures that await.
So why wait? Get started on your electrifying journey today!