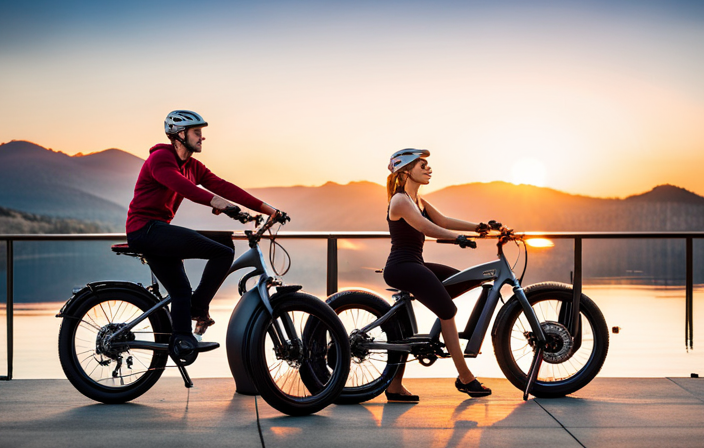
I’ve always loved the thrill of mountain biking, but I’ve often wished I could go even faster and conquer more challenging trails. That’s why I decided to convert my mountain bike into an electric one.
Did you know that electric bike sales have increased by 145% in the past year alone? In this article, I’ll show you step-by-step how to transform your own bike into an electrifying machine.
Get ready to experience a whole new level of excitement on the trails!
Key Takeaways
- Assess the compatibility of the bike frame and components for electric conversion
- Gather the necessary tools and equipment for installation
- Test and troubleshoot the electric bike conversion for any issues
- Fine-tune and adjust the motor’s power settings and other components for optimal performance
Assess Your Bike’s Compatibility for Electric Conversion
First, you’ll need to assess if your bike’s frame and components are compatible for electric conversion. Evaluating compatibility is crucial to ensure a successful conversion process.
Start by examining your bike’s frame, considering factors such as its material, strength, and weight-bearing capacity. A sturdy frame made of aluminum or steel is ideal for electric conversion.
Next, evaluate the components of your bike, including the brakes, fork, and drivetrain. Check if they can handle the additional weight and power of an electric motor.
If your bike’s frame or components are not suitable for conversion, consider alternatives such as upgrading certain parts or purchasing a new bike.
Gather the Necessary Tools and Equipment
When it comes to converting a regular bike into an electric one, there are a few key steps to follow.
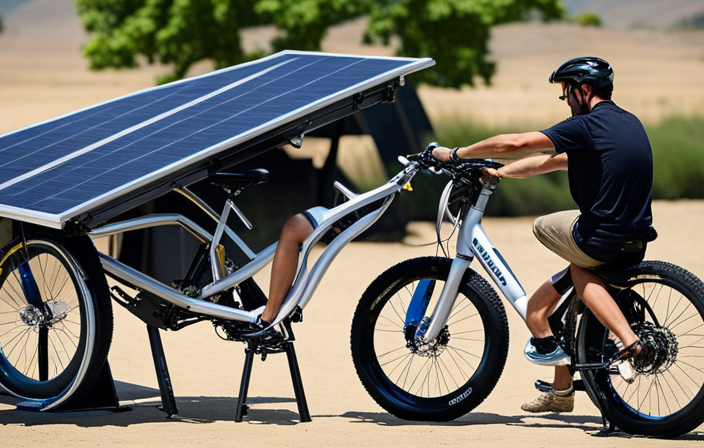
First, it’s important to research and purchase a suitable electric bike conversion kit that meets your specific needs and preferences. This kit will include all the necessary components to transform your bike into an electric-powered machine.
In addition to the conversion kit, you’ll also need to gather a variety of tools such as wrenches, screwdrivers, and wire cutters to successfully complete the installation process. These tools will be essential for properly connecting and securing the various electrical components of the conversion kit onto your bike.
Research and purchase a suitable electric bike conversion kit
Before starting the conversion process, it’s important to research and purchase a suitable electric bike conversion kit. This step is crucial because the kit will determine the overall performance and functionality of your electric mountain bike.
To begin, I recommend researching your options thoroughly. Look for reputable manufacturers that offer conversion kits specifically designed for mountain bikes. Compare prices from different retailers to ensure you get the best deal possible. Consider the features and specifications of each kit, such as motor power, battery capacity, and installation requirements.
By conducting thorough research and comparing prices, you can make an informed decision and choose a conversion kit that meets your needs and budget.
Once you have your kit, you can move on to the next step of gathering the necessary tools such as wrenches, screwdrivers, and wire cutters.
Gather tools such as wrenches, screwdrivers, and wire cutters
Once you’ve got your electric bike conversion kit, gather tools like wrenches, screwdrivers, and wire cutters.
Bike maintenance is crucial for ensuring optimal performance and longevity of your electric bike. By regularly maintaining your electric bike, you can reap the many benefits it offers.
Electric bikes provide a convenient and eco-friendly mode of transportation, allowing you to effortlessly navigate through traffic and reduce your carbon footprint.
With the right tools at your disposal, you can easily perform routine maintenance tasks such as tightening loose bolts, adjusting brakes, and replacing worn-out components.
Remove the Necessary Bike Components
Alright, so now that we have gathered all the necessary tools and equipment, it’s time to dive into the process of removing the necessary bike components.
First, we need to detach the wheels, pedals, and chain from the bike. This will allow us to have better access to the bottom bracket and crankset, which are the next components we need to remove.
Detach the wheels, pedals, and chain from your bike
Start by detaching the wheels, pedals, and chain from your bike. This is a crucial step in the process of converting your mountain bike into an electric one. By removing these components, you create the necessary space to install the electric motor and battery.
The advantages of electric bike conversion are numerous. Firstly, it allows you to transform your regular bike into a powerful and efficient electric vehicle, providing you with a new level of speed and convenience. Additionally, converting your own bike is often more cost-effective than buying a new electric bike.
To ensure the longevity and performance of your electric mountain bike, it is important to follow some maintenance tips. Regularly check the battery, keep the tires properly inflated, and clean the bike after each ride. These simple steps will help you enjoy a smooth and reliable ride.
Now, let’s move on to removing the bottom bracket and crankset, which is the next crucial step in the conversion process.
Remove the bottom bracket and crankset
To remove the bottom bracket and crankset, you’ll need a specialized tool called a crank puller. This tool allows you to safely detach these components from your bike’s frame. Before proceeding, it’s important to conduct a compatibility check to ensure that the electric conversion kit you’re planning to install is compatible with your bike’s bottom bracket and crankset. Once you have confirmed compatibility, gather the necessary components such as the crank puller, a wrench, and grease. Follow the steps below to remove the bottom bracket and crankset:
| Step | Description | Tools Needed |
|---|---|---|
| 1 | Remove the crank bolts using a wrench | Wrench |
| 2 | Insert the crank puller into the crank arm and tighten it | Crank puller |
| 3 | Use the crank puller to pull the crank arm off the bottom bracket spindle | Crank puller, wrench |
With the bottom bracket and crankset removed, you can now move on to installing the electric conversion kit, which will transform your mountain bike into an electric one.
Install the Electric Conversion Kit
First, you’ll need to gather all the tools and components necessary to install the electric conversion kit on your mountain bike. Choosing the right electric conversion kit is crucial to ensure a smooth and successful installation. Look for a kit that is compatible with your bike’s frame and has the power and battery capacity that suits your needs.
Troubleshooting common issues during the conversion process is also important. Ensure that all the components are properly connected and that the wiring is secure. If you encounter any problems, consult the instruction manual or reach out to the manufacturer for assistance.
Once you’ve gathered everything you need and addressed any potential issues, you can move on to connecting the wiring and handlebars, which will be covered in the next section.
Connect the Wiring and Handlebars
After successfully installing the electric conversion kit, it’s time to move on to the next step: connecting the wiring and positioning the handlebars. This crucial step ensures that all the components work together seamlessly and the electric system functions properly.
Here’s what you need to do:
-
Start by carefully examining the wiring connections. Make sure each wire is securely connected and properly insulated.
-
Next, position the handlebars in a comfortable and ergonomic position. Adjust the height and angle to suit your riding style and preferences.
-
Double-check all the connections to ensure they are secure and tight.
-
Test the handlebar controls to ensure they are functioning correctly, including the throttle and any additional buttons or switches.
With the wiring and handlebars connected, the next section will guide you on how to mount the battery, providing power to your electric mountain bike.
Mount the Battery
With the battery securely attached, it’s important to ensure all the wiring is properly connected and insulated. Battery mounting techniques play a crucial role in the overall performance and safety of an electric bike conversion.
When considering battery placement, it is important to take into account factors such as weight distribution, accessibility, and protection from external elements. Mounting the battery in a central and low position helps maintain the bike’s balance and stability. Additionally, using sturdy and reliable mounting brackets or straps ensures that the battery remains securely in place during rides.
Proper insulation of the wiring is equally important to prevent any short circuits or damage. By securing the battery and ensuring proper wiring connections and insulation, you can move on to the next step of testing the electric bike conversion, ensuring that everything is working as expected.
Test the Electric Bike Conversion
Once the battery has been successfully mounted onto the bike, it’s essential to turn on the system and carefully inspect for any errors or malfunctions. This step ensures that all the components are properly connected and functioning correctly.
After the initial check, I recommend taking a short test ride to further assess the performance of the electric bike conversion and ensure smooth operation.
Turn on the system and check for any errors or malfunctions
To start, you’ll want to turn on the system and make sure there aren’t any errors or malfunctions. This step is crucial to ensure a smooth and safe ride. Here are some troubleshooting tips and a maintenance guide to help you with this process:
- Check the battery connection to ensure it is securely attached.
- Verify that all wires are properly connected and free from any damage.
- Inspect the display screen for any error messages or abnormalities.
- Test the throttle and brakes to make sure they are responsive and functioning correctly.
- Listen for any unusual sounds or vibrations coming from the motor or drivetrain.
By following these steps, you can identify and address any potential issues before taking your electric mountain bike out for a test ride. This will ensure everything is functioning correctly and provide you with a worry-free riding experience.
Now, it’s time to take a short test ride to put your electric mountain bike to the ultimate test.
Take a short test ride to ensure everything is functioning correctly
After ensuring that the electric mountain bike’s system is functioning properly, it’s time to take it for a test ride. This step is crucial to ensure that everything is working as intended.
A test ride allows me to experience the benefits of an electric assist and confirm that there are no hidden issues. During the test ride, I pay close attention to the bike’s performance, including the responsiveness of the motor, the smoothness of gear shifting, and the effectiveness of the brakes. It’s also a good opportunity to troubleshoot any potential problems that may arise, such as unusual noises or vibrations.
By taking the time to thoroughly test ride the electric bike, I can identify any issues and address them before hitting the trails.
Now, let’s move on to fine-tuning and adjusting the electric bike’s components for optimal performance.
Fine-Tune and Adjust the Electric Bike
When it comes to fine-tuning and adjusting an electric bike, there are two key areas to focus on: the motor’s power settings and the brakes and gears.
As someone who enjoys customizing their ride, I have found that adjusting the motor’s power settings to my preference allows for a more personalized and efficient riding experience.
Additionally, fine-tuning the brakes and gears ensures optimal performance, making every ride smoother and safer.
Adjust the motor’s power settings to your preference
You can easily adjust the motor’s power settings to match your preferences. With the right adjustment techniques, you can optimize the power output of your electric bike for a smoother and more efficient ride.
Here are some innovative ways to fine-tune the motor’s power settings:
- Use the bike’s control panel to adjust the power level on the go.
- Experiment with different power settings to find the ideal balance between speed and battery life.
- Consider using a mobile app that allows you to customize and save your preferred power settings.
- Take advantage of power assist modes that offer different levels of assistance based on your riding style and terrain.
- Consult the bike’s user manual or contact the manufacturer for more advanced power optimization techniques.
Fine-tune the brakes and gears for optimal performance
After adjusting the motor’s power settings to my preference, I turned my attention to fine-tuning the brakes and gears of my mountain bike for optimal performance.
Ensuring that my brakes are properly adjusted is crucial for maintaining control and safety while riding. I made sure that the brake pads were aligned correctly and adjusted the tension to provide a responsive and reliable stopping power.
Additionally, I focused on gear optimization to enhance my riding experience. By adjusting the front and rear derailleurs, I was able to achieve smooth and efficient gear shifting, allowing me to tackle various terrains with ease.
It is essential to strike the perfect balance between the brake adjustment and gear optimization to maximize the overall performance of my electric mountain bike.
Transitioning into the subsequent section, it is important to learn and follow local regulations to ensure a responsible and legal use of an electric mountain bike.
Learn and Follow Local Regulations
It’s important to learn and follow local regulations when making your mountain bike electric. Understanding the laws and safety precautions in your area will ensure a smooth and legal transition to an electric bike. Here are some key points to consider:
-
Check the legal requirements: Each region has different rules regarding electric bikes. Make sure you understand the maximum speed, power limit, and any licensing or registration requirements.
-
Safety gear: Invest in a quality helmet and other protective gear, such as knee and elbow pads. Your safety should always be a top priority.
-
Respect trail restrictions: Some trails are designated for non-motorized vehicles only. Always respect these restrictions and choose appropriate paths for your electric bike.
-
Be considerate of others: Keep in mind that not everyone may be familiar with electric bikes. Ride responsibly and be considerate of pedestrians and other cyclists.
-
Stay informed: Regulations can change over time, so it’s essential to stay updated on any new laws or requirements in your area.
Enjoy Your Electric Mountain Bike!
When it comes to exploring new trails and conquering challenging terrains with ease, there’s nothing quite like the exhilaration of an electrifying adventure on my newly converted bike.
With the addition of an electric motor, I can effortlessly navigate steep inclines and power through rugged terrain, opening up a whole new world of possibilities for my mountain biking adventures.
The thrill of the ride is unmatched as I soar over obstacles and effortlessly conquer even the most daunting trails.
Explore new trails and conquer challenging terrains with ease
To effortlessly tackle challenging terrains, you’ll be able to explore new trails and conquer them with ease on your electric mountain bike.
The benefits of having an electric bike are numerous. First and foremost, it provides you with an extra boost of power, allowing you to ride longer distances and climb steeper hills without breaking a sweat. It also makes your rides more enjoyable and less physically demanding, as the electric assistance takes away the strain from pedaling.
Maintenance tips for your electric mountain bike are crucial to ensure its longevity. Regularly check the battery for any signs of damage or deterioration, and keep it charged to maintain optimal performance. Additionally, clean and lubricate the chain to prevent rust and ensure smooth shifting.
Embrace the thrill of an electrifying adventure on your newly converted bike!
Get ready to experience the excitement of an electrifying adventure on your newly converted e-bike!
Converting a regular bike into an electric one opens up a whole new world of possibilities. The converting process involves installing a motor, battery, and controller system onto your existing bike.
The benefits of electric bikes are numerous. Firstly, they provide assistance when riding uphill, making it easier to conquer challenging terrains. Secondly, they allow you to travel longer distances without getting exhausted. With an e-bike, you can explore new trails and go on longer rides without worrying about running out of energy.
Additionally, electric bikes are eco-friendly and reduce your carbon footprint. So, get ready to embark on thrilling adventures, explore new places, and enjoy the benefits of your newly converted e-bike!
Frequently Asked Questions
Will converting my mountain bike to electric affect its performance on rough terrains?
Converting a mountain bike to electric can enhance its performance on rough terrains. An electric mountain bike provides more power, allowing for easier climbs and improved control. It combines the benefits of a regular mountain bike with the added advantages of electric assistance.
How long does it typically take to complete the electric conversion process?
On average, the electric conversion process takes quite a long time, allowing you to fully appreciate the joy of anticipation. Common challenges include sourcing compatible parts and ensuring a seamless integration of the electrical components.
Are there any specific bike models or brands that are more compatible for electric conversion?
I’ve found that some bike models, like the Specialized Stumpjumper and Trek Powerfly, have better compatibility for electric conversion kits. Converting a mountain bike to electric offers advantages like increased speed and extended range.
Can I remove the electric conversion kit and revert my bike back to its original state if needed?
Yes, the electric conversion kit can be removed, allowing the bike to be reverted back to its original state. This reversibility is one of the benefits of electric conversion, providing flexibility and options for the rider.
Are there any maintenance requirements or additional costs associated with owning an electric mountain bike?
There are maintenance requirements and additional costs associated with owning an electric mountain bike. Regularly check and clean the drivetrain, battery, and electrical components. Lubricate the chain, inspect tires, and ensure proper charging. Regular maintenance reduces the cost of repairs and prolongs the bike’s lifespan.
Conclusion
Well, who would have thought that turning a regular mountain bike into an electric one could be so simple and innovative? With just a few tools and a little bit of know-how, I was able to transform my trusty steed into a powerful and efficient electric mountain bike.
It’s truly a marvel of modern engineering and a testament to the ingenuity of the human mind. So, if you’re looking to take your mountain biking adventures to the next level, why not give electric conversion a try? You won’t be disappointed.