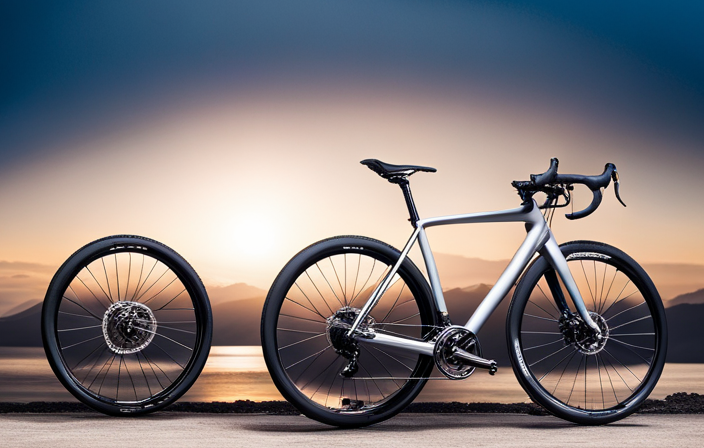

Are you interested in converting your road bike into a gravel grinder that can handle rough terrains? You’ve come to the right place!
In this article, I’ll guide you through the process of upgrading your trusty steed for optimal performance on gravel roads and trails.
From assessing compatibility to installing wider rims and disc brakes, we’ll delve into the technical details that will make your bike a true off-road beast.
So get ready to take on any gravel adventure with confidence and finesse!
Key Takeaways
- Check tire clearance and consider upgrading to tubeless-ready tires with aggressive tread patterns for improved stability and traction on gravel terrain.
- Adjust bike fit for comfort on rough terrain by optimizing saddle height, angle, and stem length.
- Upgrade brakes and tires for a better gravel riding experience, considering hydraulic disc brakes for better modulation and installing wider rims for stability.
- Consider adding accessories such as racks, fenders, lights, and bags for versatility and convenience during gravel riding adventures.

Schwinn Sporterra RX Gravel Bike, 700c Mens and Womens Bike, 14-Speed Drop Bar Gravel Bicycle, Mechanical Disc Brakes, Rigid Fork, Aerodynamic Riding Position, Quick Release Seat Post, Adult Bicycle
GRAVEL BICYCLE: Enjoy next level riding with the Sporterra RX by Schwinn. With 700c wheels, this mens and...
As an affiliate, we earn on qualifying purchases.
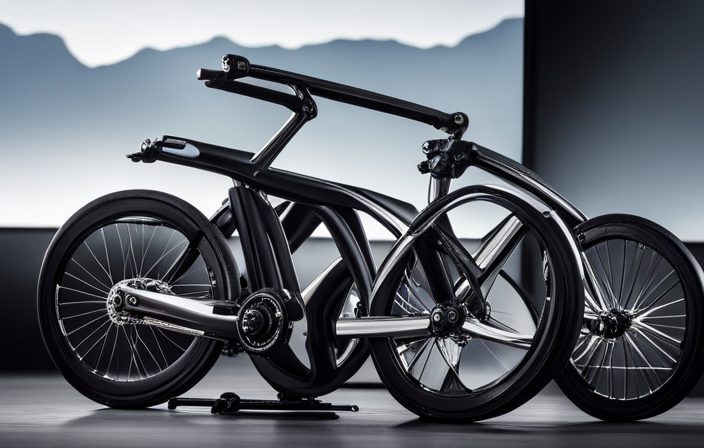
Assess Your Bike’s Compatibility for Gravel Riding
Assess if your bike is compatible for gravel riding by checking the tire clearance and frame design. When converting a road bike into a gravel rider, it’s important to ensure that your bike can handle the demands of off-road terrain.
Start by evaluating the tire clearance on your bike. Gravel roads often have loose surfaces and uneven terrain, so you’ll need wider tires to provide stability and traction. Look for a minimum tire clearance of 35mm or more to accommodate the larger tires needed for gravel riding.
Next, consider the frame design of your road bike. A gravel-specific frame usually has additional features like increased tire clearance, disc brakes, and mounting points for racks and fenders. These features enhance the bike’s performance and versatility on gravel roads.
As you assess your bike’s compatibility, also take into account adjusting its fit to ensure comfort during long rides on rough terrain. Consider changing the saddle height, handlebar position, and stem length to optimize your posture and control.
Choosing the right pedal type is another crucial aspect when converting your road bike into a gravel rider. Clipless pedals provide better power transfer and efficiency, while flat pedals offer more freedom of movement.
To upgrade your tires for better traction and durability, consider options such as tubeless-ready tires with aggressive tread patterns designed specifically for off-road use. These upgrades will enhance performance on gravel surfaces without compromising speed on pavement sections.
Now that we have evaluated our bike’s compatibility, let’s move onto upgrading our tires for better traction and durability.

Mongoose Men's Elroy Adventure Bike 700C Wheel Bicycle, Blue, 54cm frame size
Versatile adventure touring bike features capable adventure bike geometry, a sleek alloy frame and steel fork for the...
As an affiliate, we earn on qualifying purchases.
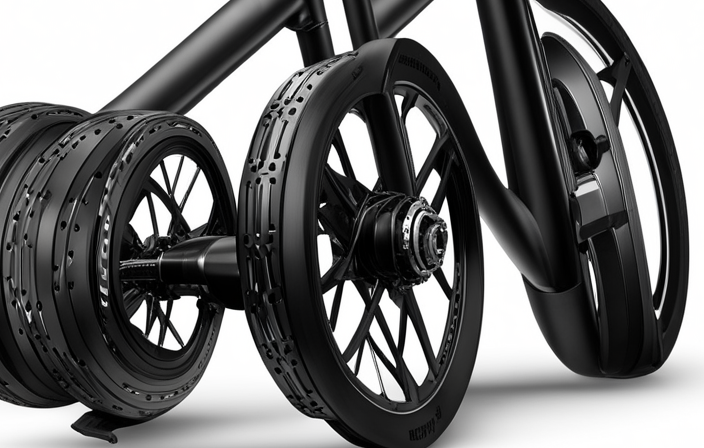
Upgrade Your Tires for Better Traction and Durability
Improve your traction and durability by upgrading your tires. When it comes to gravel riding, having the right tires can make a huge difference in how well your road bike performs off-road.
One key aspect to consider is tire pressure. Lowering the tire pressure can provide better grip on loose surfaces, allowing you to maintain control and stability. However, be cautious not to go too low as this can increase the risk of pinch flats or damaging the rims on rocks or roots.
Another important factor is choosing the right tread pattern for your tires. Gravel roads often consist of a mix of hard-packed dirt, loose gravel, and even mud. A tire with a more aggressive tread pattern will help you navigate these different terrains with ease, providing maximum traction and reducing the chances of skidding or sliding.
To further enhance your gravel riding experience, consider installing wider rims for improved stability. Wider rims allow for larger volume tires which not only provide better comfort but also increase stability when tackling rough terrain.
By upgrading your tires and considering factors such as tire pressure and tread pattern, you’ll be able to transform your road bike into a capable gravel rider.
Now let’s move on to the next step: installing wider rims for improved stability.

WEIZE Road Bike, 700C Wheel City Commuter Bicycle, 14 Speed Drop Bar, Racing Adult Bike with Caliper Brakes, High-Carbon Steel Hybrid Bikes, Urban Adult Bicycle for Men and Women,Black
Caliper brake system: The road bike adopts a dual caliper brake design, which is lighter in overall weight...
As an affiliate, we earn on qualifying purchases.
Install Wider Rims for Improved Stability
To enhance your off-road performance, consider installing wider rims on your road bike for increased stability. Wider rims provide a larger contact patch with the ground, allowing for better traction and control on gravel surfaces. They also enable you to run lower tire pressure without risking pinch flats or sidewall damage. By improving tire pressure distribution, wider rims help reduce rolling resistance and increase overall efficiency.
When upgrading to wider rims, it’s important to ensure compatibility with your bike’s frame and brake system. Most modern road bikes can accommodate wider rims up to a certain width, so be sure to check the manufacturer’s recommendations.
Additionally, upgrading handlebars to a more ergonomic design can further enhance your off-road riding experience. Consider options like flared drop bars that offer greater control and stability when navigating rough terrain.
By installing wider rims and upgrading handlebars, you’ll transform your road bike into a capable gravel rider that can tackle any adventure with confidence. Adjusting your bike’s geometry for a more comfortable ride is the next step in optimizing its performance on gravel roads.

AVASTA 700C Road Adult Step-Over Gravel Hybrid Bike Bicycle for Men Woman Male Female,Lightweight Aluminum Alloy Frame with 21-Speed Gearing for City Commuting,Dual Disc Brakes,19 inch Frame,White
🚴♂️【Durable Aluminum Alloy Frame】This lightweight yet strong frame is built to last, offering a perfect balance of durability...
As an affiliate, we earn on qualifying purchases.
Adjust Your Bike’s Geometry for a More Comfortable Ride
Adjusting your bike’s geometry can result in a more comfortable ride on rough terrain. When it comes to gravel riding, having the right bike fit is crucial for maximizing both comfort and control. One of the first things you should consider is your handlebar options. A wider handlebar can provide better stability and control, allowing you to navigate through challenging terrain with ease. It also gives you more leverage when tackling steep climbs or descents.
In addition to handlebars, adjusting your bike’s geometry can involve making changes to the saddle height and angle, as well as the stem length and angle. These adjustments can help optimize your riding position for improved power transfer and reduced fatigue on long rides.
When transitioning into the next section about installing disc brakes for increased stopping power, it’s important to note that a proper bike fit plays a crucial role in ensuring optimal brake performance. With a more comfortable riding position achieved through adjusting your bike’s geometry, you’ll have better control over your bike and be able to fully utilize the increased stopping power provided by disc brakes.
Next up: Install disc brakes for increased stopping power…
Install Disc Brakes for Increased Stopping Power
Installing disc brakes on your bike can significantly enhance your stopping power, ensuring a safer and more controlled riding experience. When it comes to gravel riding, the advantages of hydraulic disc brakes over mechanical disc brakes are clear. Hydraulic disc brakes provide better modulation, which means you have more control over how much braking force is applied. They also offer increased stopping power, allowing you to stop quickly and safely even in challenging terrain or adverse weather conditions.
To properly maintain and care for disc brakes on a gravel bike, there are a few key steps to follow. First, regularly inspect the brake pads for wear and replace them when necessary. It’s also important to keep the rotors clean from dirt and debris that could affect their performance. Regularly check the brake fluid level in hydraulic systems and bleed the brakes as needed to ensure optimal performance.
By installing disc brakes on your road bike turned gravel rider, you’ll be able to confidently tackle rougher terrains without compromising safety. The next step in transforming your road bike into a capable gravel machine is to add a suspension fork for smoother off-road riding.
Add a Suspension Fork for Smoother Off-Road Riding
Adding a suspension fork will provide a smoother off-road riding experience. Not only does it absorb the impact of bumps and uneven terrain, but it also enhances control and stability on gravel rides. When choosing the right suspension fork for gravel riding, there are several factors to consider such as travel distance, weight, and maintenance requirements.
To help you make an informed decision, here is a table showcasing three popular suspension forks for gravel riding:
| Suspension Fork | Travel Distance | Weight (grams) | Maintenance |
|---|---|---|---|
| Fork A | 60mm | 1500 | Moderate |
| Fork B | 80mm | 1700 | Low |
| Fork C | 100mm | 1800 | High |
Maintenance is an important aspect to consider when selecting a suspension fork. Regular cleaning and lubrication of the stanchions and seals will ensure optimal performance and longevity.
Once you have chosen the right suspension fork for your road bike, it’s essential to prioritize proper maintenance. Regularly inspecting the fork for any signs of wear or damage is crucial. Additionally, keeping the stanchions clean from dirt and debris will prevent premature wear.
Next, we’ll discuss how upgrading your gearing can improve your ability to tackle steep climbs and technical descents without compromising speed or efficiency.
Upgrade Your Gearing for Steep Climbs and Technical Descents
To tackle steep climbs and technical descents with ease, you should consider upgrading your gearing. Having the right gear ratios can make a world of difference when it comes to conquering challenging terrain on your gravel bike. Upgrading your drivetrain to include a wider range cassette and a smaller chainring will give you the low-end gearing needed for those steep ascents, while still allowing you to maintain speed on the flats.
When it comes to climbing, having lower gears means less strain on your legs and increased traction. This is especially important when riding off-road, where the terrain can be unpredictable and unforgiving. On the other hand, when descending technical sections, having higher gears will allow you to maintain control and keep up with the demands of the trail.
In addition to upgrading your gearing, there are a couple of other components that can greatly enhance your gravel riding experience. Upgrading your brakes to a set with more stopping power will give you added confidence when navigating steep descents or tricky corners. Choosing the right tires for off-road riding is also crucial. Look for tires that have good traction and puncture resistance, as these will help improve grip and reduce flats.
By upgrading your gearing, brakes, and tires, you’ll be well-equipped to handle any challenge that comes your way on the gravel trails. Now let’s move on to installing a dropper seatpost for better control on technical terrain…
Install a Dropper Seatpost for Better Control on Technical Terrain
Improve your control on technical terrain by installing a dropper seatpost. A dropper seatpost is a game-changer when it comes to navigating tricky descents and unpredictable trails. It allows you to quickly and easily adjust the height of your saddle, giving you more room to maneuver and lower your center of gravity for better stability.
One of the key benefits of a dropper seatpost is that it allows you to lower your saddle out of the way when tackling steep descents or technical sections. This gives you more freedom to shift your weight around and maintain better balance on challenging terrain. When you’re ready to climb again, simply press a lever or push a button, and the seatpost will raise back up into its original position.
Installing a dropper seatpost requires some basic mechanical skills, but it’s not overly complicated. Start by measuring the diameter of your current seat tube to ensure compatibility with the new post. Then, remove your old seatpost and insert the dropper post using lubrication if necessary. Follow the manufacturer’s instructions for attaching cables or hydraulic lines if applicable.
With a dropper post installed, you’ll have greater control over your road bike turned gravel rider on technical terrain. However, don’t forget about protecting your bike with frame and fork guards as well as other necessary upgrades for an optimal gravel riding experience without compromising durability or performance.
Protect Your Bike with Frame and Fork Guards
Ensure the durability and performance of your bike on technical terrain by protecting it with frame and fork guards. When riding gravel, your bike is exposed to various elements that can damage its frame and forks. By installing proper protection, you can prevent scratches, dings, and other forms of damage that may compromise the integrity of your bike.
One way to protect your bike’s frame is by using adhesive frame guards. These thin protective films are applied directly onto the frame to shield it from rocks, debris, and other potential hazards. Additionally, you can install a chainstay guard to protect the underside of the chainstays from chain slap and rock strikes.
When it comes to fork protection, consider installing fork guards or neoprene covers. Fork guards provide an extra layer of defense against rocks and branches that may come into contact with your front suspension forks during off-road rides. Neoprene covers are designed to keep dirt and mud away from the seals and stanchions of your suspension forks.
By investing in these protective measures for your bike’s frame and forks, you can ride with peace of mind knowing that your investment is safeguarded against potential damage caused by rough terrains.
To enhance your biking experience even further on longer adventures, consider adding bikepacking accessories such as saddlebags or handlebar bags for additional storage capacity without compromising performance or handling.
Consider Adding Bikepacking Accessories for Longer Adventures
After protecting your bike with frame and fork guards, the next step in transforming your road bike into a gravel rider is to consider adding bikepacking accessories for longer adventures. Bikepacking gear allows you to carry essential items such as food, water, clothing, and camping equipment while maintaining stability and control on rough terrains.
To enhance your long-distance cycling experience, here are three essential bikepacking accessories:
-
Frame Bags: These bags fit snugly within the main triangle of your bike’s frame and provide ample storage capacity without interfering with your pedaling motion. They are perfect for carrying heavier items like tools and spare parts.
-
Handlebar Bags: Designed to attach securely to your handlebars, these bags offer quick access to smaller items like snacks, maps, and electronics. They help distribute weight evenly across the front end of the bike for improved handling.
-
Seat Packs: These packs attach beneath your saddle and seatpost, providing additional storage space for lightweight but bulky gear like sleeping bags or tents.
By equipping yourself with the right bikepacking gear and following these long-distance cycling tips, you can embark on epic off-road adventures with confidence and ease.
Now let’s explore how you can optimize your bike’s weight distribution for off-road stability.
Optimize Your Bike’s Weight Distribution for Off-Road Stability
To enhance the stability of your bike off-road, it’s important to optimize the weight distribution. When riding on gravel or uneven terrain, having a well-balanced bike can make all the difference in maintaining control and preventing accidents.
One way to achieve this is by optimizing your bike’s aerodynamics. Choose handlebars that are designed for off-road riding, such as flared drop bars or wide flat bars. These handlebars provide more stability and control when navigating through rough terrain.
Additionally, consider adjusting the position of your saddle and handlebars. A slightly lower saddle height can help you maintain balance and control on unpredictable surfaces, while raising your handlebars slightly can give you better leverage for maneuvering in challenging conditions.
By optimizing your bike’s weight distribution and aerodynamics, you’ll be able to ride with greater confidence and stability on gravel roads.
The next step is to fine-tune your bike’s suspension for optimal performance off-road without compromising its road capabilities.
Fine-Tune Your Bike’s Suspension for Gravel Riding
After optimizing my road bike’s weight distribution for off-road stability, I knew that fine-tuning the suspension would be crucial to fully transform it into a capable gravel rider. Adjusting suspension settings is essential to ensure a smooth and controlled ride on rough terrain.
Firstly, it’s important to consider the fork. Increasing the air pressure in the fork will help prevent excessive bottoming out and provide better control over bumps and rocks. On the other hand, reducing the rebound damping will allow the fork to recover quickly after compressions, maintaining traction.
Next, I turned my attention to choosing the right gravel tires. These tires play a significant role in enhancing grip and handling on loose surfaces. Look for wider tires with aggressive tread patterns that offer increased traction and stability. Additionally, lower tire pressures can improve comfort and grip on gravel roads.
By adjusting my bike’s suspension settings and selecting appropriate gravel tires, I was able to significantly enhance its performance off-road. Now equipped with improved control and traction, I was ready to learn proper technique for handling gravel terrain…
Transition: With my bike now prepared for off-road adventures, let’s delve into learning proper technique for handling gravel terrain without compromising safety or speed.
Learn Proper Technique for Handling Gravel Terrain
Now that the bike is ready for off-road adventures, it’s time to learn the proper technique for navigating gravel terrain while maintaining safety and speed.
When riding on gravel, it is crucial to have impeccable control and balance over your bike to ensure a smooth and enjoyable ride. Here are five essential techniques to master:
-
Maintain a relaxed grip: By keeping a light grip on the handlebars, you allow the bike to move freely beneath you, absorbing bumps and vibrations without losing control.
-
Hover above the saddle: Instead of sitting down, hover slightly above the saddle with your weight distributed evenly between your hands and feet. This position helps absorb shocks and allows for quick adjustments in response to changing terrain.
-
Look ahead: Always focus your gaze further down the trail. This not only helps you anticipate obstacles but also aids in maintaining stability as you navigate through loose gravel.
-
Feather the brakes: While descending or cornering on gravel, lightly squeeze both brakes simultaneously rather than gripping them tightly. This technique prevents skidding and ensures better traction.
-
Use body English: Shift your weight towards the rear wheel when climbing steep grades or accelerating quickly on loose surfaces. Conversely, lean forward when descending or entering corners.
By mastering these techniques, you’ll be well-equipped to handle any challenging gravel terrain with confidence and finesse.
Now let’s explore gravel routes and trails to test your modifications!
Explore Gravel Routes and Trails to Test Your Modifications
Discovering new gravel routes and trails will allow me to put my bike modifications to the test and explore exciting off-road adventures. As I continue to transform my road bike into a versatile gravel rider, finding the best local gravel trails becomes essential. These trails offer a variety of terrains, from smooth dirt paths to rugged rocky sections, giving me the opportunity to push my modified bike’s capabilities.
To help you in your quest for the perfect gravel route, here is a table outlining three recommended local gravel trails:
| Trail Name | Difficulty Level | Length (miles) |
|---|---|---|
| Oak Ridge Loop | Moderate | 15 |
| River Run | Easy | 10 |
| Mountain Pass | Challenging | 20 |
Exploring these routes will not only test the modifications made to your road bike but also provide stunning scenery and thrilling challenges. The diverse landscapes encountered during these rides will ensure an exhilarating biking experience.
As you venture out on these new-found routes, it is crucial to maintain your gravel bike for longevity and optimal performance.
Maintain Your Gravel Bike for Longevity and Performance
To ensure your gravel bike lasts and performs at its best, it is important to regularly maintain it. Proper bike maintenance is essential for both longevity and optimal performance on the trails. Here are some key bike maintenance tips to keep in mind.
Firstly, make sure to clean your gravel bike thoroughly after each ride. Use a gentle detergent and water to remove any dirt, mud, or debris that might have accumulated during your ride. This will prevent any potential damage to the components and keep your bike running smoothly.
Additionally, check the tire pressure before every ride. Gravel tires require different pressure levels compared to road tires, so it’s crucial to choose the right gravel tires for your specific riding conditions. Lower tire pressures provide better traction on rough terrain while higher pressures are ideal for smoother surfaces.
Regularly inspect and lubricate all moving parts such as the chain, derailleurs, and brakes. Apply a suitable lubricant to prevent rusting and ensure smooth operation. It’s also important to regularly check the brake pads for wear and replace them if necessary.
Lastly, don’t forget about proper storage when not using your gravel bike. Keep it in a dry place away from extreme temperatures or humidity that could potentially damage its components.
By following these simple yet essential maintenance tips and choosing the right gravel tires, you can prolong the lifespan of your gravel bike while ensuring optimal performance on every ride.
Frequently Asked Questions
Can I use my road bike for gravel riding without making any modifications?
No, using a road bike for gravel riding without any modifications can be challenging due to its limitations. Road bikes are designed for smooth pavement and lack the necessary features for off-road terrain.
However, opting for a dedicated gravel bike offers numerous benefits. Gravel bikes come with wider tires, more durable frames, and increased clearance to handle rough surfaces and unpredictable conditions. These enhancements provide better stability, control, and comfort during gravel rides.
How much does it cost to convert a road bike into a gravel bike?
Converting a road bike into a gravel bike can cost anywhere from $200 to $1000, depending on the components and modifications you choose.
The benefits of this conversion are numerous. A gravel bike offers a more comfortable riding position, wider tires for increased stability on rough terrain, and improved braking power with disc brakes.
It also allows for the flexibility to explore different types of terrain while still maintaining the speed and efficiency of a road bike.
Are there any specific weight limits for a gravel bike?
Weight limits for gravel bikes can vary depending on the specific model and components. However, it’s generally recommended that riders weighing over 250 pounds consult with a professional to ensure their safety and the bike’s durability.
Modifications may be needed to increase weight capacity, such as choosing stronger wheels, tires, and frames. Additionally, reinforcing certain areas of the bike, like the fork or seat post, can help accommodate heavier riders without compromising performance.
Can I use my gravel bike for road riding as well?
Yes, you can definitely use your gravel bike for road riding as well. In fact, many riders enjoy the versatility of a gravel bike because it allows them to mix road and gravel riding seamlessly.
The benefits of using a gravel bike for road riding include its comfortable geometry, wider tires for better stability and traction, and the ability to handle rougher terrain if needed.
It’s a great option for those who want to explore different types of cycling without needing multiple bikes.
How often should I replace the tires on my gravel bike?
When it comes to tire maintenance and replacing tires on a gravel bike, I suggest paying close attention to the wear and tear. Regularly inspect the tread for any signs of excessive wear, such as bald spots or cracks.
Additionally, keep track of your mileage and consider replacing the tires every 1,000-2,000 miles, depending on your riding style and terrain conditions.
Proper tire maintenance will ensure optimal performance and safety during your gravel adventures.
Conclusion
After all the modifications, my road bike has transformed into a gravel beast ready to conquer any terrain.
With upgraded tires providing superior traction and durability, wider rims for stability, and disc brakes for increased stopping power, I am confident in taking on even the roughest gravel trails.
Fine-tuning the suspension and adjusting the bike’s geometry have made my rides more comfortable than ever before.
Now it’s time to hit the gravel routes and put my modified bike to the test.
With proper maintenance, this gravel rider will continue to perform at its best for many adventures to come.