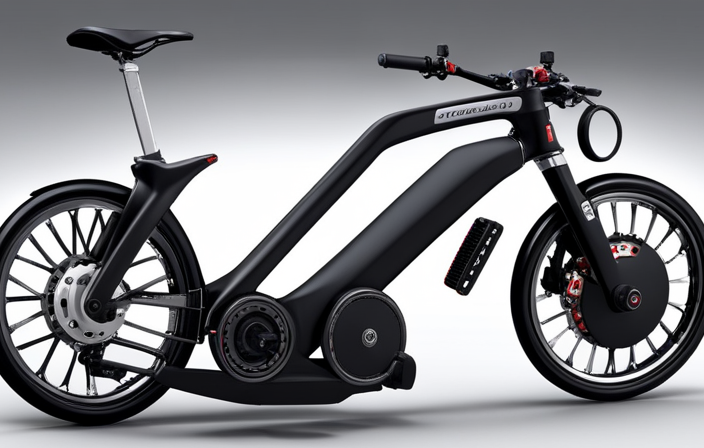
Imagine transforming your regular bike into a powerful electric ride, gliding effortlessly through the streets like a sleek machine.
In this article, I will guide you through the process of making your bike electric, step by step.
From assessing compatibility to choosing the right conversion kit, gathering tools, and testing the electric system, I’ll provide you with the technical know-how and precision to ensure a successful transformation.
Get ready to experience the benefits of an electric bike and enjoy the ride of a lifetime.
Key Takeaways
- Electric bikes provide extra power for easier and faster pedaling.
- There are different types of conversion kits available (front, rear, or mid-drive) to make a regular bike electric.
- It is important to choose the right battery capacity and motor power for the conversion kit.
- Safety should be prioritized by wearing proper gear, following traffic laws, and registering and insuring the electric bike.
Benefits of Electric Bikes
You’ll love the benefits of electric bikes. Electric bikes, also known as e-bikes, offer numerous advantages over regular bicycles.
One major advantage is the extra power provided by the electric motor, which allows for easier and faster pedaling. This is especially beneficial when facing uphill or when traveling long distances.
Another advantage is the option to switch between pedal-assist mode and full-electric mode, giving riders the flexibility to choose how much effort they want to exert.
Additionally, e-bikes are eco-friendly as they produce zero emissions, making them an environmentally conscious choice.
However, there are also a few disadvantages to consider. Electric bikes tend to be more expensive than regular bikes, and the added weight of the motor and battery can make them heavier and harder to maneuver.
Assessing your bike’s compatibility with electric conversion kits is the next step in turning your regular bike into an electric one.
Assess Your Bike’s Compatibility
To assess my bike’s compatibility for conversion, I need to first determine if it’s suitable for the process. This involves considering the bike’s frame and components.
The frame should have enough space and the necessary mounting points to accommodate the electric components.
The components themselves should be in good condition and compatible with the conversion kit.
Determine if Your Bike is Suitable for Conversion
First, check if your bike is suitable for conversion. Assessing the limitations of your bike is crucial to determine if it can handle the modifications necessary for an electric conversion. Consider if your bike has a sturdy frame that can support the additional weight of the electric components. Look for any signs of damage or weakness that could compromise the integrity of the frame.
Additionally, examine the components of your bike such as the brakes, gears, and wheels. Ensure that they are in good working condition and can handle the increased power and torque of an electric motor. Taking these factors into account will help you determine if your bike is compatible for conversion.
Moving forward, consider the bike’s frame and components to ensure a successful electric conversion.
Consider the Bike’s Frame and Components
Assessing the frame and components of your bike is essential in determining if it is suitable for conversion. When assessing compatibility, consider the type and size of your bike’s frame. Electric conversion kits are generally designed to fit specific frame types, such as road, mountain, or hybrid. Ensure that the kit you choose is compatible with your bike’s frame to ensure a proper fit and functionality.
Additionally, assess the condition of your bike’s components, such as the drivetrain, brakes, and wheels. These components should be in good working order to support the added weight and power of an electric conversion.
Once you have assessed the frame and components, you can proceed to choose the right conversion kit that matches your bike’s specifications and your desired level of power and performance.
Choose the Right Conversion Kit
When choosing the right conversion kit for your bike, there are several key points to consider.
First, you need to select the type of electric conversion kit that suits your needs, whether it’s a front wheel, rear wheel, or mid-drive kit.
Next, it’s important to consider the battery capacity and motor power, as these factors will determine the range and performance of your electric bike.
Lastly, look for a conversion kit that offers user-friendly installation, ensuring a hassle-free process for transforming your regular bike into an electric one.
Select the Type of Electric Conversion Kit
To make your regular bike electric, you’ll need to choose the type of electric conversion kit that suits your needs. There are various types of electric conversion kits available, each with its own advantages and disadvantages. The two most common types are front wheel conversion kits and rear wheel conversion kits. Front wheel conversion kits are generally easier to install and provide a balanced weight distribution, while rear wheel conversion kits offer better traction and handling.
When evaluating cost, compare the performance of different conversion kits to ensure you’re getting the best value for your money. Consider battery capacity and motor power when selecting a conversion kit, as these factors will determine the range and speed of your electric bike.
With the right conversion kit, you can transform your regular bike into a powerful and efficient electric ride.
Consider Battery Capacity and Motor Power
Consider the battery capacity and motor power when selecting an electric conversion kit for your bicycle. The battery capacity determines how far you can ride on a single charge, so it is crucial to choose one that suits your needs. Look for a kit with a battery that has a long battery life and can provide enough power for your desired distance.
Additionally, the motor power determines the speed and efficiency of your electric bike. A more powerful motor allows for faster acceleration and better hill climbing ability. It is important to find a balance between battery capacity and motor power to ensure optimal performance.
When considering battery life and motor efficiency, you can make an informed decision about which electric conversion kit to choose.
Moving on to the next section, let’s explore how to look for user-friendly installation.
Look for User-Friendly Installation
Searching for a conversion kit with easy installation is essential for a smooth and hassle-free experience. User-friendly installation ensures that even beginners can successfully transform their regular bike into an electric one. A step-by-step guide provided by the manufacturer simplifies the process, making it easier to understand and follow. To further enhance the installation process, it is helpful to look for a conversion kit that includes a comprehensive set of tools. This eliminates the need to gather the necessary tools separately, saving time and effort. In order to achieve a successful conversion, it is crucial to have the right tools readily available. By considering user-friendly installation and having the necessary tools at hand, the process of turning a regular bike into an electric one becomes more straightforward and efficient.
Gather the Necessary Tools
First, you’ll need to gather all the necessary tools for converting your regular bike into an electric one. To successfully complete this process, you’ll require a few key tools.
Firstly, you’ll need a set of wrenches and screwdrivers to disassemble certain parts of your bike. Additionally, a wire cutter and stripper will be necessary to handle the electrical components. It’s also important to have a soldering iron and soldering wire to connect the wires properly. Furthermore, a multimeter will enable you to test the electrical connections and ensure everything is functioning correctly. Lastly, you’ll need a set of Allen wrenches to tighten any bolts or screws.
With these tools in hand, you can now move on to the next step of preparing your bike for conversion, ensuring a smooth and efficient process.
Prepare Your Bike for Conversion
Before beginning the conversion process, it’s crucial to prepare your bike by following these key points.
Firstly, clean and inspect your bike thoroughly to ensure that all parts are in good condition and free from dirt or debris.
Secondly, remove any unnecessary accessories such as baskets or fenders that may interfere with the conversion process.
Lastly, securely fasten any loose parts to prevent them from getting damaged during the conversion or while riding the electric bike.
Clean and Inspect Your Bike
To start, I’ll want to clean and inspect my bike before converting it to electric. Proper cleaning techniques are essential to ensure that the conversion process goes smoothly.
I’ll begin by removing any dirt, grime, and grease from the frame using a gentle detergent and a soft brush. It’s important to pay attention to all the nooks and crannies to ensure a thorough clean.
Once the bike is clean, I’ll inspect the frame for any signs of damage or wear. I’ll check the tires for any punctures or tread wear, and make sure the brakes and gears are in good working condition. By conducting a detailed inspection, I’ll be able to identify any maintenance issues that need to be addressed before proceeding with the conversion.
With the bike cleaned and inspected, I can now move on to removing any unnecessary accessories, such as fenders or racks, to streamline the conversion process.
Remove Any Unnecessary Accessories
Now that the bike is clean and inspected, it’s time to remove any unnecessary accessories to streamline the conversion process.
To begin, assess compatibility between your bike and the electric conversion kit you have chosen. Ensure that the kit fits the frame size, wheel diameter, and brake type of your bike. This will prevent any complications during installation.
Next, choose a suitable kit that matches your needs and preferences. Consider factors such as battery capacity, motor power, and control options. Research customer reviews and expert opinions to make an informed decision.
Once you have assessed compatibility and chosen a suitable kit, it’s time to remove any unnecessary accessories that may interfere with the installation process. Here are five items to consider removing:
- Front and rear fenders
- Bike rack or pannier rack
- Water bottle holder
- Bell or horn
- Kickstand
By removing these accessories, you will have a clear workspace to install the electric conversion kit.
Now, let’s move on to the next section about securely fastening loose parts.
Securely Fasten Loose Parts
Once you’ve chosen the suitable electric conversion kit and removed any unnecessary accessories, it’s important to securely fasten any loose parts to ensure a safe and reliable ride.
Start by inspecting the bike for any loose bolts or components. Use a wrench or socket set to securely tighten all the bolts, paying close attention to the handlebars, seat post, and pedals. This will prevent part movement during your ride and reduce the risk of accidents or damage to the electric conversion kit.
Additionally, make sure that the cables are properly secured and tucked away to avoid interference with the moving parts.
Once all the necessary adjustments have been made, you can proceed to install the electric conversion kit, transitioning seamlessly into the subsequent section about how to do it.
Install the Electric Conversion Kit
First, you’ll need to install the electric conversion kit on your regular bike. Begin by unpacking the kit and familiarizing yourself with its components. Follow the instructions provided, ensuring that you securely attach the motor to the bike frame.
Next, connect the battery pack to the motor using the provided wiring harness. Make sure to customize accessories such as the throttle and display according to your preference.
Once everything is connected, refer to the troubleshooting guide in case you encounter any issues. Double-check all connections and ensure that they are tight and secure.
Finally, test and adjust the electric system to ensure it is functioning properly. This will involve testing the throttle response, checking the battery level, and adjusting settings if necessary.
Transitioning into the subsequent section, it is important to thoroughly test the electric system before taking your newly converted bike for a ride.
Test and Adjust the Electric System
When testing and adjusting the electric system of my bike conversion, I first check for proper functioning of all components. This includes testing the motor power and speed to ensure they’re working within the desired parameters. If adjustments need to be made, I carefully adjust the settings to optimize performance.
Additionally, I test the battery life and charging capabilities to ensure I have enough power for my rides and that the battery is charging properly.
Check for Proper Functioning
To ensure everything is working correctly, I regularly assess battery life and ensure proper wiring when converting a regular bike into an electric one.
First, I check the battery’s charge level using a voltmeter and compare it to the manufacturer’s specifications. If the battery is not holding a charge, I replace it with a new one.
Next, I inspect the wiring connections to ensure they are secure and free from any damage or corrosion. I also test the throttle and brakes to make sure they are responsive and functioning properly.
Additionally, I check the motor for any unusual noises or vibrations. If everything is in order, I proceed to make adjustments to motor power and speed.
This ensures that the electric bike is not only functional but also safe and efficient.
Make Adjustments to Motor Power and Speed
In order to optimize performance, adjustments are made to the power and speed of the motor.
By adjusting the motor torque, you can fine-tune the amount of power delivered to the wheels. This can be done by modifying the current supplied to the motor or changing the gear ratio.
Increasing the top speed of the electric bike can be achieved by adjusting the controller settings to allow for a higher voltage output. However, it’s important to note that increasing the top speed may have an impact on the battery life and overall range.
Therefore, it is essential to find the right balance between speed and battery efficiency. Once the adjustments are made, it is crucial to test the battery life and charging capabilities to ensure that the modifications have not negatively affected these aspects.
Test the Battery Life and Charging
You should test the battery life and charging capabilities to ensure that the modifications haven’t negatively affected them. Here are some steps to follow for battery life testing and charging methods:
-
Measure the voltage: Use a multimeter to check the voltage of the battery before and after each ride. This will give you an idea of how much power is being consumed.
-
Monitor the range: Keep track of the distance you can travel on a single charge. This will help you understand the battery’s capacity and estimate how far you can go before needing to recharge.
-
Experiment with charging methods: Try different charging techniques, such as fast charging or slow charging, to see which one works best for your modified electric bike. Keep an eye on how long it takes to fully charge the battery.
-
Consider battery maintenance: Regularly inspect the battery for any signs of damage or wear. Clean the terminals and ensure proper ventilation to maximize battery life.
Testing the battery life and exploring various charging methods will help you optimize your electric bike’s performance. It’s essential to ensure safety and legal compliance while enjoying your modified ride.
Ensure Safety and Legal Compliance
When converting a regular bike into an electric bike, it is crucial to prioritize safety and legal compliance.
This involves wearing proper safety gear, such as a helmet and reflective clothing, to protect yourself on the road.
Additionally, it is important to follow all traffic laws and regulations to ensure a safe and smooth ride.
Lastly, registering and insuring your electric bike is necessary to comply with legal requirements and protect your investment.
By adhering to these key points, you can enjoy the benefits of an electric bike while minimizing risks and staying within the bounds of the law.
Wear Proper Safety Gear
Wearing proper safety gear is essential when making a regular bike electric. It is important to prioritize safety to minimize the risk of accidents and injuries.
One of the most crucial safety gears is a helmet. Helmets provide protection for the head, reducing the severity of head injuries in case of a fall or collision. It is recommended to choose a helmet that fits properly and meets safety standards.
Additionally, wearing other protective gear such as knee pads, elbow pads, and gloves can provide an extra layer of protection. These gears help to safeguard vulnerable body parts and prevent injuries.
Moving forward, it is equally important to follow traffic laws and regulations to ensure safe and legal operation of the electric bike. Adhering to these rules will promote a secure and smooth riding experience for both the rider and others on the road.
Follow Traffic Laws and Regulations
Following traffic laws and regulations is crucial to ensure a safe and legal operation of an electric bike. Traffic safety is of utmost importance when riding on the road, as it not only protects the rider but also other road users. Obeying traffic laws such as stopping at red lights, using hand signals for turning, and yielding to pedestrians greatly reduces the risk of accidents and promotes a harmonious traffic flow. By following these regulations, we can effectively prevent collisions and maintain order on the roads. To emphasize the significance of traffic safety, let’s take a look at the following table:
| Traffic Safety | Importance of Obeying Traffic Laws | Emotional Impact |
|---|---|---|
| Reduces accidents | Ensures the safety of all road users | Peace of mind |
| Prevents collisions | Promotes a harmonious traffic flow | Sense of security |
| Maintains order on the roads | Protects the rider and pedestrians | Confidence in the system |
By understanding and respecting traffic laws, we can create a safer environment for everyone on the road. Moving forward, let’s explore the next topic of how to register and insure your electric bike.
Register and Insure Your Electric Bike
To legally operate an electric bike, it is important to register and insure it.
Insurance requirements for electric bikes vary depending on your location, so it is crucial to research and understand the specific regulations in your area. Some places may require liability insurance, while others may not have any insurance requirements at all.
Additionally, legal restrictions may exist regarding the use of electric bikes on certain roads or bike paths. It is essential to familiarize yourself with these restrictions to avoid any potential legal issues.
By registering and insuring your electric bike, you not only ensure compliance with the law but also protect yourself and others in case of an accident or theft.
Moving forward, let’s discuss how to maintain and care for your electric bike.
Maintain and Care for Your Electric Bike
Caring for your electric bike is essential in order to keep it in good working condition. Regular electric bike maintenance is crucial to ensure a smooth and safe riding experience. To maintain your electric bike, follow these steps:
- Keep your battery charged between rides to prolong its lifespan.
- Clean your electric bike regularly, especially after riding in wet or muddy conditions.
- Inspect and tighten all bolts and screws to prevent any loose parts.
- Check the tire pressure regularly and inflate them as needed for optimal performance.
Troubleshooting common issues is also part of maintaining your electric bike. If you encounter problems such as a sudden loss of power or strange noises, consult the user manual or contact a professional for assistance. By properly maintaining and troubleshooting your electric bike, you can enjoy a worry-free riding experience.
Now, let’s move on to the next section and explore how to fully enjoy your electric bike.
Enjoy Your Electric Bike
Now that you’ve properly maintained and cared for your e-bike, it’s time to fully enjoy the ride! To enhance your electric bike experience, you can consider customization options.
Upgrading components like the saddle, pedals, or handlebar grips can provide added comfort and personalization. Additionally, installing accessories such as a front basket or rear rack can improve the practicality of your bike.
When it comes to having a smooth ride, there are a few tips to keep in mind. Firstly, make sure your tires are properly inflated to the recommended pressure for optimal performance. Secondly, maintain a steady and consistent pedaling cadence to maximize the efficiency of the electric motor. Lastly, practice using the different assistance levels and find the one that suits your riding style and terrain.
With these tips, your electric bike rides will be even more enjoyable.
Frequently Asked Questions
How much does it cost to convert a regular bike into an electric bike?
Converting a regular bike into an electric bike can cost anywhere from $300 to $1500, depending on the quality of components. However, the benefits of an electric bike, such as increased speed and reduced effort, outweigh the cost.
Can I convert any type of bike into an electric bike?
Converting any bike into electric has pros and cons. Factors to consider are battery capacity, motor power, and compatibility with the bike. Pros include eco-friendliness and increased speed, while cons include added weight and cost.
What is the range of an electric bike after conversion?
The range of an electric bike after conversion depends on various factors, including electric bike battery life and external conditions. Battery capacity, terrain, rider weight, and speed all play a role in determining the distance an electric bike can travel on a single charge.
How long does it take to fully charge the electric bike’s battery?
The charging time of the electric bike’s battery depends on its capacity. Typically, it takes around 4-6 hours to fully charge a standard electric bike battery with a capacity of 500-700 watt-hours.
Are there any maintenance requirements specific to electric bikes after conversion?
After converting a regular bike to electric, there are specific maintenance requirements to ensure battery lifespan and safety. Regularly inspect and clean the battery, check wiring connections, monitor tire pressure, and follow manufacturer guidelines for charging and storage.
Conclusion
After going through the process of converting my regular bike into an electric one, I can confidently say that it is a worthwhile endeavor.
The benefits of having an electric bike are numerous, from increased speed and convenience to reduced effort and environmental impact.
By carefully assessing my bike’s compatibility, choosing the right conversion kit, and following the necessary steps, I was able to successfully transform my bike into an electric marvel.
With proper maintenance and care, I can now enjoy the smooth ride of my electric bike while contributing to a greener future.