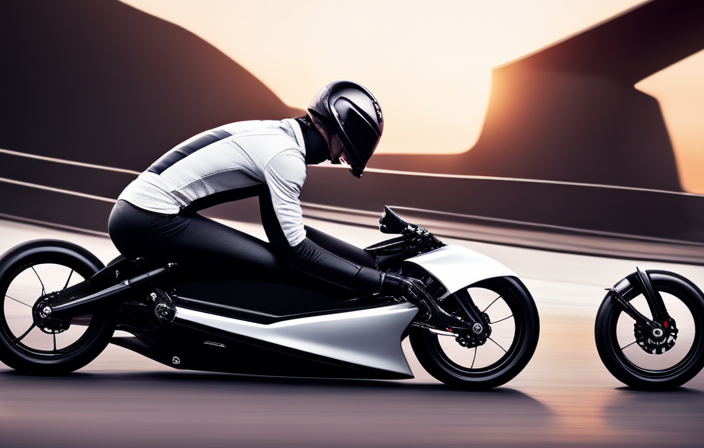
Hey there, fellow cyclists! Ever wondered how to transform your regular old bike into a powerful electric ride? Look no further, because I’ve got all the details you need.
In this article, I’ll guide you through the step-by-step process of converting your bike into an electric bike. We’ll assess your bike’s suitability, choose the perfect conversion kit, gather the necessary tools, and get our hands dirty with installation.
So, let’s dive in and electrify our wheels!
Key Takeaways
- Assess the suitability of your bike frame and determine your budget for the conversion.
- Research and choose a conversion kit that meets your requirements and preferences.
- Gather the necessary tools for installation and follow proper safety precautions.
- Connect the motor, battery, and wiring according to the manufacturer’s instructions and test for functionality.

Schwinn Network 1 Hybrid Bike, 700c Mens and Womens Bike, 21-Speed Hybrid Bicycle, Aluminum Frame, Suspension Fork, Alloy Linear Pull Brakes, Adult Bicycle
HYBRID BICYCLE: Ride confidently on or off the pavement in the Network 1 by Schwinn. With 700c wheels,...
As an affiliate, we earn on qualifying purchases.
Assess Your Bike’s Suitability for Conversion
Before you begin, make sure your bike’s frame is sturdy enough for conversion. Assessing your bike frame is crucial to ensure that it can handle the additional weight and power of an electric motor. Start by examining the frame for any cracks or signs of weakness. Look for any areas that may need reinforcement or repairs. Pay close attention to the joints and welds, as these are common areas of weakness. If your bike frame is made of steel or aluminum, it should generally be strong enough for conversion. However, if you have a carbon fiber frame, it may not be suitable for electric conversion due to its lightweight and delicate nature.
In addition to assessing your bike frame, you also need to assess your budget. Electric bike conversion kits can vary greatly in price, so it’s important to determine how much you’re willing to spend. Consider the features and specifications you desire in a conversion kit and research the average price range for those options. Keep in mind that cheaper kits may have lower quality components and may not provide the performance and reliability you desire. By assessing your budget beforehand, you can narrow down your options and choose a conversion kit that best fits your needs and financial capabilities.
Now that you have assessed your bike frame and budget, it’s time to move on to the next step: research and choose the right conversion kit.

WEIZE Road Bike, 700C Wheel City Commuter Bicycle, 14 Speed Drop Bar, Racing Adult Bike with Caliper Brakes, High-Carbon Steel Hybrid Bikes, Urban Adult Bicycle for Men and Women,White
Caliper brake system: The road bike adopts a dual caliper brake design, which is lighter in overall weight...
As an affiliate, we earn on qualifying purchases.
Research and Choose the Right Conversion Kit
First, research and choose the right conversion kit for your bicycle. Conversion kit selection is crucial to ensure the compatibility and performance of your electric bike. There are various types of conversion kits available in the market, each with its own specifications and features. It is essential to consider factors such as motor power, battery capacity, and wheel size when making your selection.
When choosing a conversion kit, pay close attention to battery placement. The battery is a critical component of your electric bike, as it provides the power needed for the motor to run. Depending on your preference and bike design, you can choose between rear rack-mounted batteries, frame-mounted batteries, or downtube-mounted batteries. Each placement option has its advantages and disadvantages, so carefully consider your needs and the impact on your bike’s balance and handling.
By selecting the right conversion kit and considering battery placement, you can ensure that your electric bike meets your specific requirements and performs optimally.
Now that you have made your conversion kit selection, the next step is to gather the necessary tools for the installation process.

SAVADECK Carbon Gravel Bike - T800 Carbon Frame & Fork | Shimano U6000 11-Speed Groupset | Hydraulic Disc Brakes | 700CX40mm All-Terrain Tires | Men & Women Road/Off-Road Bicycle (Gray, 53cm)
【Ultralight T800 Carbon Performance】: Featuring a premium T800 R21 carbon fiber frame and fork weighing just 10.4kg (22.92...
As an affiliate, we earn on qualifying purchases.
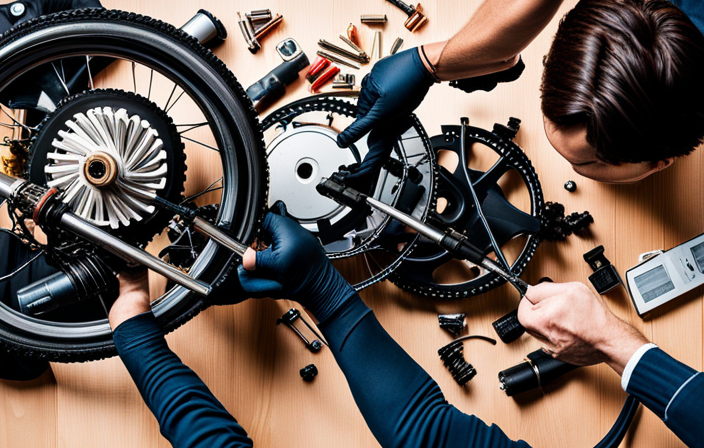
Gather the Necessary Tools
Now that you’ve chosen the right conversion kit, it’s time to gather the necessary tools for the installation process. Ensuring that you have the proper tools is crucial for a successful conversion. Here are the essential tools you will need:
- Adjustable wrench: This versatile tool will be used to tighten and loosen nuts and bolts throughout the installation process.
- Allen wrench set: Different sizes of Allen wrenches will be needed to remove and tighten various components of the bike.
- Screwdriver set: A set of Phillips and flathead screwdrivers will come in handy for removing screws and securing parts.
- Wire cutters/strippers: These tools are essential for cutting and stripping wires, allowing for proper connectivity between the components.
Having these tools readily available will make the installation process smoother and more efficient. It’s important to remember that proper battery maintenance is also crucial for the longevity and performance of your electric bike. Regularly checking the battery’s charge level and charging it as needed will ensure optimal performance.
With the necessary tools gathered and an understanding of proper battery maintenance, it’s time to move on to the next step: removing the existing front wheel.

Schwinn Wayfarer Hybrid Bike, 700c Mens and Womens Bike, 7-Speed Hybrid Bicycle, Retro Steel Frame, Front and Rear Linear Pull Brakes, Fenders, Cargo Space, Adult Bicycle
HYBRID BICYCLE: Ride in comfort and vintage style with the Wayfarer by Schwinn. With 700c wheels, this mens...
As an affiliate, we earn on qualifying purchases.
Remove the Existing Front Wheel
To remove the existing front wheel, you’ll need to loosen the nuts or quick release lever that secures it in place. Before beginning this process, it is essential to take safety precautions. Make sure you are in a well-lit area and wearing appropriate protective gear, such as gloves and safety glasses. Additionally, ensure that the bike is stable and won’t tip over during the removal process.
To find suitable conversion kits, do some research to determine which kit is compatible with your bike. Consider factors such as wheel size, motor power, and battery capacity. Look for reputable brands and read customer reviews to ensure you are getting a high-quality kit.
Now, back to removing the front wheel. Start by locating the nuts or quick release lever on the axle of the wheel. Use a wrench or your hands to loosen them. Once they are loose, you can proceed to lift the wheel off the fork dropouts. Be careful not to damage any brake cables or other components.
With the existing front wheel removed, we are now ready to move on to the next step: installing the electric wheel.
Install the Electric Wheel
Once the existing front wheel is removed, you’re ready to install the electric wheel. Electric wheel installation offers numerous advantages, such as increased speed, reduced effort, and extended range.
To begin, align the electric wheel with the front fork dropouts, ensuring that the axle fits snugly into the fork. Next, secure the wheel by tightening the axle nuts or quick-release skewer. Make sure the wheel is centered between the fork blades and that it spins freely.
Now, attach the brake rotor to the wheel hub, aligning the holes and tightening the bolts. This will ensure proper braking functionality. Additionally, connect the electrical cables from the motor to the bike’s existing wiring system, following the manufacturer’s instructions.
Connect the Motor and Battery
After aligning the brake rotor and tightening the bolts, you can connect the electrical cables from the motor to the bike’s existing wiring system. This step is crucial for ensuring a proper connection between the motor and the bike’s electrical system. Here’s how you can do it:
-
Locate the motor’s electrical cables: The motor should have two cables, usually color-coded as red and black. These cables are responsible for transmitting power from the battery to the motor.
-
Connect the motor cables to the bike’s wiring system: Identify the corresponding wires in your bike’s existing wiring system. You may need to consult the bike’s instruction manual or seek professional help if you are unsure. Once you have located the correct wires, use connectors or soldering to securely attach the motor cables to the bike’s wiring system.
-
Test the connection: Before proceeding to the next step, it is essential to ensure that the motor is properly connected to the bike’s electrical system. Test the motor by turning on the bike’s power and checking if the motor is receiving power and functioning correctly.
Now that the motor connection is complete, we can move on to the next step: mounting the battery.
Mount the Battery
After successfully connecting the motor and battery, the next step in converting my bike into an electric bike is to mount the battery. This is a crucial step as it determines the stability and efficiency of the entire system. There are several battery mounting techniques that can be employed, each with its own advantages and considerations.
To begin, I need to choose the appropriate location for the battery placement. This decision should be based on factors such as weight distribution, accessibility, and protection from the elements. It is important to ensure that the battery is securely mounted to prevent any movement or damage during rides.
To provide a clear understanding of the various battery mounting techniques and considerations, I have created a table below:
| Mounting Technique | Description |
|---|---|
| Frame-mounted | Attaching the battery to the bike’s frame using straps or brackets. This technique is popular for its simplicity and accessibility. However, it may affect the bike’s balance and require additional measures to protect the battery from vibrations. |
| Rear Rack-mounted | Mounting the battery on a rear rack specifically designed to hold the battery. This technique is ideal for distributing the weight evenly and providing easy access for maintenance. However, it may require additional modifications to the bike’s rear end. |
| Triangle-mounted | Placing the battery inside the bike’s triangle frame. This technique offers a low center of gravity and keeps the battery protected. However, it may require customization or a specially designed frame. |
| Seat-post mounted | Mounting the battery on the seat post using a dedicated battery holder. This technique is convenient and does not require any modifications to the bike’s frame. However, it may affect the bike’s aesthetics and may not be suitable for heavier batteries. |
Install the Controller and Throttle
Now that the battery is securely mounted, it’s time to install the controller and throttle for the electric bike conversion. This step is crucial in ensuring the proper functioning of the electric system. Here’s how to do it:
-
Locate the controller: The controller is the brain of the electric bike conversion. It regulates the power flow and controls the motor. Find a suitable spot on the bike frame to mount it securely.
-
Connect the wires: The controller comes with a set of wires that need to be connected to the battery and the motor. Follow the manufacturer’s instructions and make sure all connections are secure.
-
Understanding the throttle mechanism: The throttle is what allows you to control the speed of your electric bike. It is usually a handlebar-mounted device that sends signals to the controller to adjust the power output. Familiarize yourself with how the throttle works and ensure it is properly installed.
-
Mount the throttle: Install the throttle on the handlebars within easy reach of your hand. Make sure it is securely attached and aligned for comfortable operation.
-
Test the system: Before moving on to the next step, test the controller and throttle to ensure they are working correctly. Turn on the system and check if the throttle responds smoothly.
With the controller and throttle properly installed, it’s time to connect the wiring for the electric bike conversion.
Connect the Wiring
To connect the wiring, start by identifying the appropriate wires from the controller and ensure they are securely attached to the battery and motor. Electrical connections are crucial for the proper functioning of your electric bike, so it’s important to follow the right steps to ensure a safe and efficient setup.
Here are some safety precautions to keep in mind while connecting the wiring:
-
Double-check all connections: Before proceeding, make sure all the connections are in good condition and properly insulated to prevent any short circuits or electrical hazards.
-
Use the right tools: Use appropriate tools, such as wire strippers and crimping tools, to ensure clean and secure connections. Avoid using tape or unreliable connectors that can cause loose connections or potential failures.
-
Follow the wiring diagram: Consult the wiring diagram provided by the manufacturer to correctly identify the wires and their corresponding connections. This will help you avoid confusion and prevent any accidental damage to the electrical system.
-
Securely fasten the wires: Use zip ties or cable clamps to secure the wires in place and prevent them from rubbing against any sharp edges or moving parts. This will minimize the risk of wires getting damaged during operation.
Now that the wiring is securely connected, it’s time to test the electric system and ensure everything is functioning as expected.
Test the Electric System
Once you have securely connected the wiring, it’s important to test the electric system to ensure everything is functioning properly. Testing the electric system is crucial to identify any issues or potential problems that may arise during the operation of your electric bike.
There are several testing methods that can be employed to ensure the system’s functionality. Firstly, you can use a multimeter to check the voltage and current flow in different parts of the system. This will help you identify any potential wiring or connection issues.
Additionally, you can perform a load test by connecting a light bulb or other electrical load to the system and observing its performance. This will give you an indication of the system’s ability to handle the load.
Troubleshooting tips include checking for loose connections, inspecting for any signs of overheating, and ensuring that all components are properly grounded.
By conducting these tests and troubleshooting steps, you can ensure that your electric system is working efficiently and safely.
Once the electric system has been tested and any issues have been resolved, you can move on to the next section, which involves adjusting and fine-tuning the electric components.
Adjust and Fine-Tune the Electric Components
After securely connecting the wiring, it’s important to adjust and fine-tune the electric components to ensure optimal performance. One crucial aspect of this process is to fine-tune the battery. Begin by checking the voltage output and adjusting it according to the manufacturer’s specifications. This step is essential as it directly affects the overall performance and range of your electric bike.
Next, focus on optimizing the performance of the motor. Start by adjusting the controller settings to match the motor’s specifications. This includes setting the maximum speed, acceleration, and throttle response. Additionally, make sure to properly align the motor with the bike’s drivetrain to maximize power transfer.
Another important component to fine-tune is the braking system. Since the electric motor adds extra weight to the bike, it’s crucial to ensure that the brakes are properly adjusted and responsive. Test the brakes at different speeds to ensure they engage smoothly and provide adequate stopping power.
Lastly, evaluate the overall balance and stability of the bike. Adjust the suspension and tire pressure to optimize comfort and handling. Additionally, check the alignment and tension of the chain to prevent any issues while riding.
Now that the electric components have been fine-tuned to perfection, it’s time to install additional accessories (optional). These accessories can enhance the functionality and convenience of your electric bike, such as adding lights, a horn, or a phone mount. By customizing your bike with these optional accessories, you can further enhance your riding experience.
Install Additional Accessories (optional)
After adjusting and fine-tuning the electric components of my bike, I decided to explore the option of installing additional accessories to further enhance my electric bike experience. This step is optional and highly dependent on personal preference and needs. However, it is important to consider the pros and cons as well as the cost considerations before making any decisions.
To help you evaluate the possible accessories for your electric bike, I have created the following table:
| Accessory | Pros | Cons |
|---|---|---|
| Front Basket | Convenient storage space | May affect bike balance |
| Rear Rack | Increased carrying capacity | Adds weight to the bike |
| Fenders | Protects from mud and water | May require frequent cleaning |
| Lights | Enhances visibility | Requires battery or dynamo |
| Bell | Alerts pedestrians and cyclists | Can be loud and annoying |
| Phone Holder | Easy access to navigation | May obstruct view or controls |
Considering the cost, it’s important to note that additional accessories can add up and impact the overall budget. However, these accessories can greatly improve the functionality and convenience of your electric bike.
With the installation of additional accessories complete, it’s time to learn to ride and control your electric bike effortlessly.
Learn to Ride and Control Your Electric Bike
Now that you have installed the additional accessories, it’s time to familiarize yourself with riding and controlling your e-bike. Here are some important riding techniques and safety precautions to keep in mind:
-
Balance: When starting, make sure to keep your weight centered and balanced on the bike.
-
Pedal Assist Levels: Familiarize yourself with the different pedal assist levels available on your e-bike. Start with a lower level and gradually increase as you become more comfortable.
-
Braking: Get used to the e-bike’s braking system and practice using both the front and rear brakes together for effective stopping power.
-
Turning: When making turns, lean your body slightly into the turn and use your handlebars to steer smoothly.
Safety precautions:
-
Wear a helmet: Always wear a properly fitted helmet to protect your head in case of accidents.
-
Observe traffic rules: Follow all traffic laws, signals, and signs, just like you would on a regular bicycle.
-
Be aware of your surroundings: Keep an eye out for pedestrians, vehicles, and other potential hazards.
-
Practice in a safe area: Start in a controlled environment, such as an empty parking lot, to get comfortable with your e-bike before venturing out on busy roads.
By mastering these riding techniques and adhering to safety precautions, you will be ready to explore the roads with confidence.
In the next section, we will discuss how to maintain and care for your electric bike, ensuring its longevity and optimal performance.
Maintain and Care for Your Electric Bike
To keep your e-bike in optimal condition, it’s important to regularly clean and lubricate the moving parts. Proper maintenance is key to ensuring the longevity and performance of your electric bike.
Here are some maintenance tips and a troubleshooting guide to help you keep your e-bike running smoothly.
Firstly, it’s essential to clean your e-bike regularly. Use a mild detergent and water to wash the frame, wheels, and other components. Avoid using a high-pressure hose as it may damage the electronic parts. After cleaning, dry the bike thoroughly to prevent rust and corrosion.
Next, focus on lubrication. Apply lubricant to the chain, derailleur, and other moving parts to reduce friction and ensure smooth operation. Be sure to use a lubricant specifically designed for bicycles, as other products may cause damage.
Additionally, regularly inspect your e-bike for any signs of wear or damage. Check the tires for proper inflation and look for any loose bolts or screws. If you encounter any issues, consult the troubleshooting guide provided by the manufacturer or seek professional assistance.
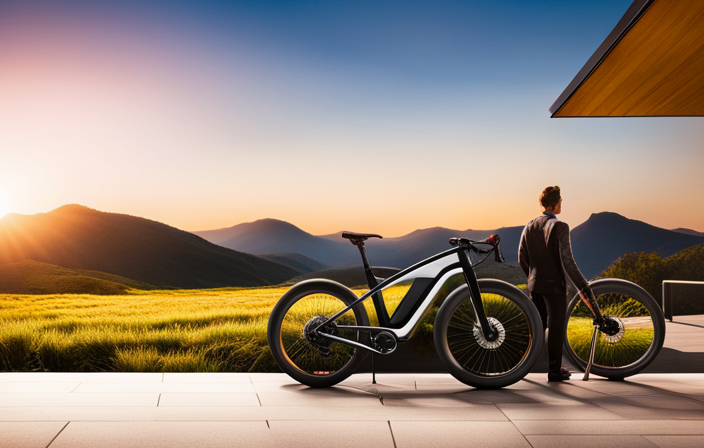
Enjoy the Benefits of Your New Electric Bike
You’ll love the convenience and eco-friendly nature of riding an electric bike. Electric bike commuting offers numerous benefits that make it an ideal choice for daily transportation. Not only does it reduce your carbon footprint, but it also saves you money on fuel costs. Plus, the electric assistance makes it easier to tackle hills and longer distances, making your commute more enjoyable.
To ensure that your electric bike is always ready for your daily ride, here are some tips for extending its battery life. First, avoid fully draining the battery. It’s best to recharge it when it reaches around 20-30% capacity. This helps prolong its lifespan and maintain its overall performance. Additionally, store the battery in a cool and dry place when not in use. Extreme temperatures can negatively affect its efficiency.
Another tip is to use the pedal-assist mode wisely. Instead of relying solely on the motor, engage in some active pedaling to share the workload. This not only conserves battery power but also provides a good workout. Lastly, avoid excessive acceleration and maintain a steady speed. Smooth, gradual movements are more energy-efficient and help maximize your battery’s range.
Frequently Asked Questions
How much does it cost to convert a regular bike into an electric bike?
Converting a regular bike into an electric bike can cost anywhere from $500 to $2,000, depending on the quality of components and labor involved. The benefits include increased speed, ease of climbing hills, and extended range for longer rides.
What is the average range of an electric bike after conversion?
The average range of an electric bike after conversion depends on various factors, including the type and capacity of the electric bike batteries, terrain, rider weight, and speed.
Can I still pedal my electric bike if the battery runs out?
Yes, you can still pedal your electric bike if the battery runs out. The pedaling options allow you to manually propel the bike forward, ensuring you’re never left stranded. However, the battery life greatly affects the overall performance and ease of pedaling.
Are there any legal requirements for riding an electric bike?
Yes, there are legal restrictions and safety guidelines for riding an electric bike. It is important to familiarize yourself with local laws regarding speed limits, age restrictions, and helmet requirements to ensure a safe and legal ride.
How often should I maintain and service my electric bike?
I should maintain and service my electric bike regularly to ensure optimal performance and longevity. This includes checking and lubricating the chain, inspecting the brakes, tires, and battery, and cleaning the bike after every ride.
Conclusion
Well, that’s it folks. After countless hours of research, gathering tools, and putting in the hard work, I have successfully transformed my bike into an electric wonder.
Who needs to buy an expensive electric bike when you can convert your own? The sense of accomplishment and satisfaction is truly overwhelming.
Now I can effortlessly zoom past all those traditional bikers, their sweat-soaked brows and tired legs a constant reminder of their outdated ways.
Life is good, my friends, life is electrifying.