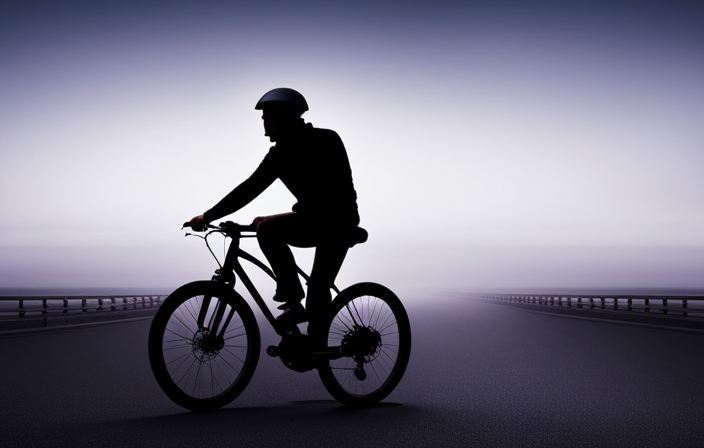
In today’s fast-paced world, transportation options are evolving rapidly. If you’re seeking a greener and cost-effective way to commute, why not consider building your own electric bike?
With the right materials and tools, converting your regular bicycle into an electric one is within reach. In this article, I will guide you through the step-by-step process of creating your very own electric bike, allowing you to enjoy the benefits of eco-friendly transportation while saving money along the way.
Let’s get started!
Key Takeaways
- Choose a compatible motor and battery for your bike, considering factors like weight, efficiency, and noise level.
- Look for a sturdy bike frame made of steel or aluminum that has enough space for the battery and motor.
- Remove the bike’s pedals and crankset using the necessary tools and upgrade the drivetrain for smooth power transfer.
- Install the electric bike conversion kit by securely mounting the motor and attaching the battery pack, ensuring proper connections and insulation.
Gather the Necessary Materials and Tools
Now that you’ve decided to embark on the exciting journey of building your own electric bike, let’s dive into gathering all the essential materials and tools you’ll need.
Choosing the right motor and battery is crucial for a successful electric bike conversion. Ensure that the motor is compatible with your bicycle’s frame and has the desired power output. Consider factors such as weight, efficiency, and noise level when selecting the battery.
It’s also important to have the necessary tools on hand, including a wrench set, screwdrivers, wire cutters, and a multimeter for electrical testing.
Additionally, it’s helpful to gather resources such as online forums or instructional videos to troubleshoot common issues that may arise during the conversion process.
With these materials and tools at your disposal, you’ll be well prepared to move on to the next section about choosing the right bicycle for conversion.
Choose the Right Bicycle for Conversion
First, you’ll need to pick out a bicycle that’s practically begging to be transformed into a speedy, electrified marvel. Choosing the right bicycle for conversion is crucial to ensure a successful DIY electric bike project.
When selecting the perfect bike, there are several factors to consider. Firstly, look for a sturdy frame made of materials like steel or aluminum, as it needs to support the extra weight of the electric components. Additionally, consider the bike’s wheel size, as larger wheels provide better stability and a smoother ride. Another important factor is the availability of space for the battery and motor. Make sure the bike has enough room to accommodate these components without compromising functionality. Lastly, pay attention to the bike’s weight and overall condition. Opt for a lightweight and well-maintained bike that will make the conversion process easier.
With these tips in mind, you can find the ideal bicycle for your electric conversion project.
Now, it’s time to move on to the next step and remove the bike’s pedals and crankset.
Remove the Bike’s Pedals and Crankset
To start the transformation, you’ll want to get rid of the bike’s pedals and crankset – it’s time to give your ride a whole new power!
Removing the bike’s pedals and crankset is an essential step in converting your bicycle into an electric bike. This process involves using a pedal wrench to unscrew the pedals from the crank arms. It may require some force, as the pedals are usually tightly secured.
Once the pedals are removed, you can proceed to take off the crankset. This can be done by loosening the bolts that hold it in place.
Upgrading the bike’s drivetrain is crucial for a successful electric conversion, as it will ensure smooth and efficient power transfer. Consider upgrading to a stronger and more durable drivetrain to handle the increased torque and power of the electric motor.
With the pedals and crankset removed, it’s time to move on to the next step: installing the electric bike conversion kit.
Install the Electric Bike Conversion Kit
When you’re ready, go ahead and start installing the electric bike conversion kit. Here are five important steps to follow:
- Mount the motor securely onto the frame using the provided brackets and screws.
- Attach the battery pack to a convenient location on the frame, ensuring it is stable and won’t interfere with your pedaling.
- Connect the controller to the motor and battery following the manufacturer’s instructions, making sure all the wires are properly connected and insulated.
- Double-check the connections and make sure there are no loose or exposed wires that could lead to electrical issues.
- Test the conversion kit by turning on the power and checking if the motor engages smoothly.
Installing the motor, battery, and controller is crucial for the successful conversion of your bike. However, if you encounter any common conversion kit issues, such as motor noise or battery not holding a charge, troubleshooting guides are available from the manufacturer.
Now, let’s move on to the next section where we connect the motor and battery.
Connect the Motor and Battery
Now that you have successfully mounted the motor and attached the battery pack, it’s time to connect the two and bring your electric bike to life, giving it the power it needs to ride like a dream.
First, ensure that the motor is properly aligned with the bike’s drivetrain. This will ensure optimal performance and efficiency. Once aligned, securely connect the motor wires to the corresponding terminals on the battery pack. It is crucial to double-check the polarity to avoid any damage.
Additionally, consider the battery capacity and range. Choose a battery pack that suits your desired riding distance and power requirements. A higher capacity battery will provide a longer ride, but keep in mind that it may also add weight to your bike.
Now, let’s move on to the next step and install the throttle and controller for complete control over your electric bike’s speed and performance.
Install the Throttle and Controller
Start by attaching the throttle and controller, giving you complete control over the speed and performance of your electrifying ride. To install the throttle cable, begin by finding a suitable location on the handlebars and secure the throttle in place using the provided screws.
Next, connect the throttle cable to the designated port on the controller. This cable will transmit your input from the throttle to the controller, controlling the motor’s power output accordingly.
Troubleshooting common controller issues can be done by checking the connections between the controller and the throttle. Ensure that all connections are secure and properly plugged in. If the controller is not responding, double-check the wiring and make sure it is correctly connected to the battery and motor. If issues persist, consult the controller’s manual or contact the manufacturer for further assistance.
Now that the throttle and controller are installed, it’s time to move on to the next step: mounting the battery on the bike frame.
Mount the Battery on the Bike Frame
With the battery securely fastened to the bike frame, unleash the power and embark on an electrifying journey.
When it comes to mounting options and battery placement, there are a few key factors to consider. First, determine the size and weight of your battery to ensure it will fit properly on your bike frame. Look for mounting brackets or cages that are specifically designed for electric bike batteries, as they will provide a secure and stable attachment.
It’s important to position the battery in a way that maintains the bike’s balance and stability, so experiment with different locations until you find the optimal placement.
Once the battery is securely mounted, you can proceed to the next step of connecting the wiring and testing the system, ensuring a smooth and reliable ride.
Connect the Wiring and Test the System
Once the battery is securely mounted on the bike frame, you can connect the wiring and test the system, taking your electrifying journey one step closer to reality.
Begin by carefully connecting the wires from the battery to the corresponding connectors on the motor, throttle, and controller. Double-check that all connections are secure and properly insulated to prevent any potential electrical issues.
Once the wiring is complete, it’s time to test the system. Turn on the bike and check if the motor engages smoothly when you twist the throttle. Ensure that the brakes are functioning properly and that the lights and indicators are working as expected.
If any issues arise, troubleshooting common wiring issues such as loose connections or faulty components can help identify and resolve the problem.
With the electrical system successfully tested, you can now move on to adjusting the bike’s gearing and brakes, optimizing the overall performance.
Adjust the Bike’s Gearing and Brakes
Get ready to fine-tune your ride by adjusting the bike’s gearing and brakes for optimal performance.
Adjusting gear ratios is essential to ensure that your electric bike operates efficiently. By finding the right balance between the front and rear gears, you can optimize power delivery and improve overall speed and acceleration.
Upgrading brake systems is also crucial for safety and control. Consider installing hydraulic disc brakes, which provide better stopping power and modulation compared to traditional rim brakes. Additionally, adjusting brake pads and calipers to the correct position will ensure that your bike stops smoothly and effectively.
Once you’ve fine-tuned the gearing and brakes, you can move on to customizing your electric bike with accessories that suit your style and needs.
Customize Your Electric Bike with Accessories
After adjusting the gearing and brakes on your electric bike, it’s time to take your customization to the next level by adding accessories.
There are a plethora of electric bike accessory recommendations available to personalize your ride and enhance your overall biking experience. Firstly, consider installing a comfortable saddle or seat cover, as it can make a significant difference in long rides.
Additionally, a handlebar bag or pannier rack can provide convenient storage space for your belongings. For safety purposes, consider adding front and rear lights, as well as reflective stickers or tape to increase visibility.
Lastly, don’t forget to invest in a sturdy lock to protect your electric bike from theft. These tips for personalizing your electric bike will help you create a ride that suits your style and needs.
Now, let’s transition into the subsequent section and learn how to ride and maintain your electric bike effectively.
Learn How to Ride and Maintain Your Electric Bike
To effectively ride and maintain an electric bike, it is essential to familiarize myself with proper riding techniques and regular maintenance practices.
When it comes to electric bike maintenance tips, there are a few key things to keep in mind.
First, always check the tire pressure before each ride to ensure optimal performance and prevent punctures.
Additionally, regularly clean and lubricate the chain to avoid excessive wear and tear.
Troubleshooting common electric bike issues involves checking the battery connection, inspecting the wiring for any damages, and resetting the system if necessary.
Lastly, it is important to follow safety guidelines and local regulations to ensure a safe and enjoyable riding experience. This includes wearing a helmet, obeying traffic laws, and being aware of pedestrians and other vehicles on the road.
Follow Safety Guidelines and Local Regulations
Following safety guidelines and local regulations is crucial for ensuring a safe and enjoyable riding experience on an electric bike. It is important to explore local bike paths and trails that are suitable for electric bikes. These designated routes provide a safe environment and minimize potential risks.
Additionally, understanding the basics of electric bike maintenance is essential. Regularly check the brakes, tires, and battery to ensure they are in optimal condition. Familiarize yourself with the proper charging procedures and storage recommendations to prolong the lifespan of your electric bike.
By adhering to safety guidelines and local regulations, you can confidently ride your DIY electric bike and enjoy the benefits it brings. Transitioning into the subsequent section about ‘enjoying the benefits of your DIY electric bike,’ it is important to follow these steps to maximize your riding experience.
Enjoy the Benefits of Your DIY Electric Bike
Experience the thrill and freedom of riding your very own custom-built electric bike and unlock a world of endless possibilities. Building your own electric bike not only allows you to tailor it to your specific needs but also offers numerous benefits. First and foremost, owning an electric bike is environmentally friendly, as it produces zero emissions and reduces your carbon footprint. Additionally, it provides a cost-effective mode of transportation, saving you money on fuel and parking expenses. Moreover, with an electric bike, you can easily navigate through traffic and reach your destination faster, while avoiding the stress and hassle of congested roads. Furthermore, regular cycling offers health benefits such as improved cardiovascular fitness and increased muscle strength. So, why wait? Start building your own electric bike today and enjoy the advantages it brings. Transitioning to the next section, let’s look at how you can save money on transportation costs.
Save Money on Transportation Costs
Save a significant amount of money on your daily commute by switching to a more cost-effective mode of transportation. With a DIY electric bike, you can reduce fuel consumption and save on the rising costs of gasoline.
Not only will you be able to save money on transportation costs, but you will also promote a healthier lifestyle by incorporating exercise into your daily routine. As you ride your electric bike to work or run errands, you’ll be burning calories and improving your cardiovascular health.
Additionally, the maintenance and upkeep costs of an electric bike are much lower compared to a car or motorcycle. By making the switch, you can save money while reducing your carbon footprint and going green. It’s a win-win situation for your wallet and the environment.
Transitioning into the next section, let’s explore how to further reduce your carbon footprint and go green.
Reduce Your Carbon Footprint and Go Green
By opting for alternative modes of transportation, such as walking or using public transit, you can contribute to reducing your carbon footprint and going green. Clearly, the planet doesn’t need any more exhaust fumes.
One of the most effective ways to reduce emissions and promote sustainable transportation is by using an electric bike. Electric bikes, also known as e-bikes, are powered by an electric motor and can be charged using renewable energy sources. They produce zero emissions during operation, making them an environmentally friendly option for commuting.
Additionally, e-bikes are more energy-efficient compared to traditional gas-powered vehicles, as they require less energy to travel the same distance. By choosing to ride an electric bike instead of driving a car, you can significantly reduce your carbon footprint and contribute to a cleaner, greener planet.
Frequently Asked Questions
How long will it take to convert a regular bicycle into an electric bike?
Converting a regular bicycle into an electric bike can take anywhere from a few hours to a couple of days, depending on your experience and the complexity of the conversion. Essential tools include a motor, battery, controller, and wiring.
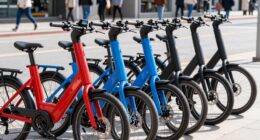
Can any type of bicycle be converted into an electric bike?
Yes, almost any type of bicycle can be converted into an electric bike. The benefits of electric bike conversion include increased speed and range, easier uphill climbs, and the ability to pedal or use electric power.
What is the average cost of an electric bike conversion kit?
The average cost of an electric bike conversion kit is around $500. DIY options allow you to transform any regular bicycle into an electric one. These kits include a motor, battery, controller, and all necessary hardware for installation.
Is it difficult to maintain an electric bike?
Maintaining an electric bike can be somewhat challenging. Pros of using one for daily commute include cost savings and eco-friendliness. However, common issues like battery problems and motor malfunctions can arise. Troubleshooting tips include checking connections, monitoring battery health, and seeking professional assistance.
Are there any legal restrictions or regulations for riding an electric bike on public roads?
Electric bike safety regulations vary by country and region. It’s crucial to familiarize yourself with local laws before riding. Electric bikes offer numerous benefits on public roads, including reduced emissions and increased mobility.
Conclusion
In conclusion, creating your own electric bike is a rewarding and eco-friendly project. By following the steps outlined in this article, you can transform an ordinary bicycle into a powerful mode of transportation.
Not only will you save money on transportation costs, but you will also reduce your carbon footprint. In fact, did you know that electric bikes emit approximately 22% less carbon dioxide per mile compared to cars? So not only will you be saving money, but you’ll be helping the environment as well.
Get started on your DIY electric bike project today and enjoy the benefits it brings.