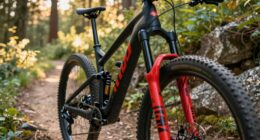

Riding a bike is my preferred mode of transportation in the city. There’s an unparalleled sensation of the breeze flowing through my hair and the sunlight touching my face while I’m cycling along the street. However, as much as I cherish my bicycle, I’m aware that it requires consistent upkeep to ensure it operates without any issues.
One of the most important parts of my bike to maintain is the chain. But how do I know when it’s time to replace it? In this article, I’ll walk you through the process of measuring your bike chain to determine if it’s time for a replacement.
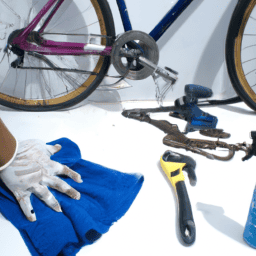
Before we get started, let’s gather our tools. You’ll need a chain checker, a ruler or tape measure, and a clean rag. A chain checker is a specialized tool that measures the stretch of your bike chain. It’s a small, handheld device that can be purchased at any bike shop or online. The ruler or tape measure will be used to measure the length of the chain. And the clean rag is for wiping down the chain and removing any dirt or debris that may be on it.
Now that we have our tools, let’s get started on measuring that chain!
Key Takeaways
- Regular maintenance of the chain is essential to keep the bike running smoothly.
- Proper handling and measurement of the chain are important to determine its wear and tear.
- Keeping the chain lubricated is crucial to prevent quick wear and tear and breakage.
- Measuring the chain length accurately by counting links is necessary, and precision measurement of the distance between the chain and front chainring is important for the bike’s performance and efficiency.
Gather Your Tools
Gather your tools.
You’ll need to grab some tools to get started, but don’t worry, it won’t take long! Tool recommendations include a chain checker, a ruler or tape measure, and a pair of pliers.
A chain checker is a specialized tool that measures the wear on your chain. It’s more accurate than a ruler or tape measure, but if you don’t have one, a ruler or tape measure will do. Pliers are useful for removing the chain from the bike, if necessary.
Proper handling of the chain is important when measuring it. Make sure the chain is clean and free from debris before measuring.
If you’re using a chain checker, place it on the chain and apply pressure until the pins on the tool drop into the chain links. If you’re using a ruler or tape measure, measure from the center of one pin to the center of another pin that is exactly 12 inches away.
Once you’ve determined the size of your bike chain, you can move on to the next step of the process.
Determine the Size of Your Bike Chain
To determine the size of my bike chain, I count the links and measure the distance between them.
First, I count the number of links in the existing chain or the length of the chain to be replaced.
Then, I measure the distance between the pins in the links or use a chain checker tool to determine the chain’s pitch.
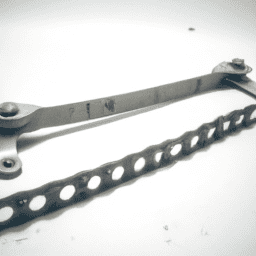
Count the Links
Counting the links on your bicycle chain is a quick and straightforward method to measure its length. Before starting, keep in mind that the chain should be on the bike and in its fully extended position. If you’ve recently removed links from the chain, be sure to add them back before counting. In case you need to remove links, use a chain removal tool to do so.
Once you’ve removed the necessary links, lubricate the chain with a good quality chain lubricant to ensure its smooth operation. To count the links, find the master link or the connecting link on your chain. This link is usually different in appearance from the other links and is designed to be removed without tools.
Count from this link to the corresponding link on the other side of the chain. Make sure to count all the links, including the half-links if your chain has them. The number of links you counted is the length of your chain.
Next, we’ll discuss how to measure the distance between the chain and the front chainring.
Measure the Distance
Did you know that the distance between your chain and front chainring can affect your bike’s performance and efficiency? That’s why precision measuring of your bicycle chain is important. Here are three key things to keep in mind when measuring the distance between your chain and front chainring:
-
Use a ruler or tape measure that can measure in millimeters for accuracy.
-
Make sure that your bike is in the correct gear, which is the smallest chainring and the smallest rear cog.
-
Avoid common mistakes such as measuring from the center of the chainring instead of the teeth or measuring from the wrong area of the chain.
Precision measuring is crucial in ensuring that your chain is at the right distance from the front chainring. However, it’s not the only thing you need to do to maintain your bike’s efficiency. After measuring, be sure to check for wear and tear on your chain and replace it if necessary.
Check for Wear and Tear
One way you can quickly check if your bicycle chain is worn out is by feeling for looseness or slackness in the chain. To do this, stand next to your bike and grab the chain with your hands. Then, try to move the chain back and forth. If you feel any looseness or slackness, it means that your chain is probably worn out. This can be a sign that it’s time to replace your bike chain.
Replacing options for your bike chain can vary depending on the type of bike you have. Some bike chains can be easily replaced by simply removing the old chain and installing a new one. Other bikes may require a more complex replacement process, which may involve removing other parts of the bike. Regardless of the replacement process, it’s important to replace your bike chain in a timely manner to avoid any potential problems.
With that being said, maintaining your bike chain is just as important as replacing it when necessary.
Maintain Your Bike Chain
To keep your bike running smoothly, it’s crucial to regularly care for and nurture your trusty steed’s lifeline: the chain. Just like how we need to fuel ourselves with proper nutrition and self-care to function at our best, our bikes need consistent attention and maintenance to perform at their peak.
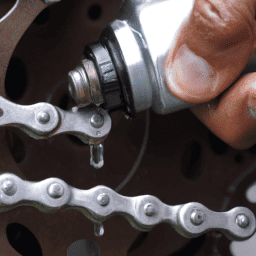
One of the most important things you can do to maintain your bike chain is to keep it lubricated. Chains that aren’t properly lubricated can wear down quickly and may even break, causing damage to your bike and potentially even causing accidents. The frequency of chain lubrication depends on a variety of factors, including how often you ride, the conditions in which you ride, and the type of lubricant you use.
As a general rule, it’s a good idea to clean and lubricate your chain every 100-200 miles. However, if you ride in wet or muddy conditions, you may need to lubricate your chain more frequently to prevent rust and corrosion. Additionally, you should regularly inspect your chain for any signs of wear and tear, such as elongation or rust.
By taking the time to properly care for and maintain your bike chain, you can ensure that your bike runs smoothly and safely for many miles to come.
Frequently Asked Questions
How often should I replace my bike chain?
I replace my bike chain when it reaches 0.5% or more of wear, which is indicated by signs like elongation, skipping, or noise. Best practices for chain maintenance include regularly cleaning, lubricating, and checking for wear.
Can I use any type of chain on my bike?
I can’t just use any type of chain on my bike. Chain compatibility matters, and I need to make sure I select the right one. I also need to adjust the chain length properly.
How do I know if my chain is too loose or too tight?
To check chain tension, lift the chain at the midpoint of the rear cassette. A properly tensioned chain will rise about half an inch. Chain maintenance is crucial for longevity and proper shifting. Regular chain tensioning is recommended.
What type of lubricant should I use on my bike chain?
When it comes to lubricating my bike chain, I prefer using wax lubricant for its many benefits, including a cleaner chain and longer lasting lubrication. Proper application techniques involve cleaning the chain first and ensuring even coverage.
Can I add or remove links from my bike chain to make it fit better?
Yes, you can add or remove links from your bike chain to adjust its size. However, be sure to use a chain tool and pay attention to chain compatibility to ensure proper function and avoid damage to your bike.
Conclusion
Well folks, we’ve reached the end of our journey on how to measure a bicycle chain. I hope you were able to gather all the necessary tools, determine the size of your bike chain, check for wear and tear, and maintain your chain accordingly.
But let’s be real, who has time for that? Why bother measuring your chain when you can just wait for it to break and then buy a new one? It’s like playing Russian roulette with your bike, but much more expensive. And let’s not forget the added bonus of having to walk your bike home when the chain inevitably snaps mid-ride.
But hey, if you’re feeling daring and want to live life on the edge (or just want to save some money), go ahead and measure that chain. Just don’t come crying to me when you’re stuck on the side of the road with a broken chain and a bruised ego.
Happy riding, folks!