
Were you aware that improperly fitted bicycles are responsible for 80% of injuries incurred while cycling? It’s crucial to recognize that selecting a bicycle of the correct size is not merely a matter of comfort but is equally important for ensuring safety.
As an AI language model, I may not be able to ride a bike, but I can certainly provide you with a step-by-step guide on how to measure your bicycle size accurately.
Before we dive into the details, let’s discuss why proper bike sizing is crucial. Riding a bike that’s too small or too big can put unnecessary strain on your body, leading to discomfort and even injury. Additionally, a bike that’s not properly adjusted to your body can cause you to lose control and increase the risk of accidents.
By following the steps we’ll outline in this article, you’ll be able to find the right size bike that suits your body type and riding style, ensuring a comfortable and safe ride every time.
Key Takeaways
- Proper bike sizing is crucial for both comfort and safety while cycling.
- Measuring tape, calculator, and pen/paper are necessary tools for determining the correct bike size.
- Inseam, torso length, and arm length should be considered along with height to find the perfect fit.
- Test riding different bikes is important to determine comfort and handling on various terrains.

Schwinn Sporterra RX Gravel Bike, 700c Mens and Womens Bike, 14-Speed Drop Bar Gravel Bicycle, Mechanical Disc Brakes, Rigid Fork, Aerodynamic Riding Position, Quick Release Seat Post, Adult Bicycle
GRAVEL BICYCLE: Enjoy next level riding with the Sporterra RX by Schwinn. With 700c wheels, this mens and...
As an affiliate, we earn on qualifying purchases.
Understand the Importance of Proper Bike Sizing
You’ll wanna make sure you get the right size bike, because the importance of bike fitting cannot be overstated. A properly sized bike ensures that you are comfortable and safe while riding.
Many riders make the mistake of thinking that a bike that is too big or too small won’t make too much of a difference, but in reality, it can greatly affect your performance and even lead to injuries.
Common bike sizing mistakes include choosing a bike simply based on the rider’s height or assuming that all bikes are created equal. However, there are many factors that come into play when determining the right size bike for you, such as your inseam length, your riding position, and even your flexibility.
That is why it is crucial to take the time to properly measure your bike. So, before you start measuring, make sure you gather the necessary tools!

Mongoose Men's Elroy Adventure Bike 700C Wheel Bicycle, Blue, 54cm frame size
Versatile adventure touring bike features capable adventure bike geometry, a sleek alloy frame and steel fork for the...
As an affiliate, we earn on qualifying purchases.
Gather the Necessary Tools
To gather the necessary tools for measuring a bicycle size, I always make sure to have a measuring tape, calculator, and pen and paper on hand.
The measuring tape is crucial for accurately measuring the various components of the bike, including the frame, wheels, and handlebars.
The calculator comes in handy for performing calculations to ensure that the bike fits the rider properly.
With these tools, I can confidently measure a bike and make any necessary adjustments for a comfortable and safe ride.
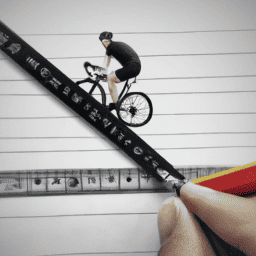
Measuring Tape
Grab that measuring tape and wrap it around the bike frame, making sure to keep it taut for an accurate measurement. Measuring the size of the bike frame is crucial for finding the right bike size that fits your body. Using a measuring tape is the most common and precise way to do it.
Although there are measuring tape alternatives such as yardsticks or rulers, they may not be long enough or flexible enough to wrap around the frame. To measure the bike size, start at the center of the bike’s bottom bracket and measure up to the top of the seat tube. This will give you the length of the seat tube.
Then, measure the length of the top tube, which is the tube that runs parallel to the ground, from the center of the seat tube to the center of the head tube. You can also use online resources to find the right bike size for your height and inseam measurement. However, it’s always best to measure the bike frame yourself to ensure the perfect fit.
Now, onto the next section about using a calculator to determine the right bike size.
Calculator
Calculators can help determine the proper fit for your body on a bike. By calculating proportions and taking into account your body measurements, you can find the perfect size for your custom bike fitting.
Here are four steps to follow when using a calculator to measure your bicycle size:
- Measure your inseam – this is the distance from the floor to your crotch.
- Input your inseam measurement into a bike fit calculator.
- Adjust the saddle height accordingly to match the recommended range.
- Choose a frame size that corresponds to your inseam measurement and riding style.
Using a calculator can provide a more precise and accurate measurement for your bike fit. However, if you don’t have access to one, don’t worry! There are other methods, such as using pen and paper, that can also help you find the perfect fit.
Pen and Paper
By simply jotting down your body measurements and taking note of your riding style, you can easily find the perfect fit for your custom bike using just pen and paper. This method is handy when you don’t have access to a calculator or digital tools. You can use sketching techniques to visualize the measurements and make adjustments before you start building your bike.
To begin, gather a measuring tape, a pen, and a piece of paper. Start by measuring your inseam, which is the distance from the floor to your crotch. Record this measurement in the first column of the table below. Next, measure your torso length, which is the distance from your crotch to your shoulder. Record this measurement in the second column. Lastly, measure your arm length, which is the distance from your shoulder to your wrist. Record this measurement in the third column. Once you have recorded all your measurements, you can use the table to determine the ideal frame size for your bike.
In the next section, we will move on to measuring your body to ensure you have accurate measurements for your custom bike.

AVASTA 700C Road Adult Step-Over Gravel Hybrid Bike Bicycle for Men Woman Male Female,Lightweight Aluminum Alloy Frame with 21-Speed Gearing for City Commuting,Dual Disc Brakes,19 inch Frame,White
🚴♂️【Durable Aluminum Alloy Frame】This lightweight yet strong frame is built to last, offering a perfect balance of durability...
As an affiliate, we earn on qualifying purchases.
Measure Your Body
Before you start, it’s important to know that measuring your body for a bicycle size can be a fun and empowering experience. Body proportions play a crucial role in determining the right size of a bicycle.
It’s important to measure your inseam, torso length, and arm length. To measure your inseam, stand with your back against a wall and place a book between your legs. Measure the distance from the floor to the top of the book.
To measure your torso length, measure from your crotch to the top of your shoulders. Lastly, to measure your arm length, measure from your shoulder to the tip of your fingers.
It’s also important to consider your clothing choices when taking measurements. Wear clothes that are form-fitting but not too tight. Avoid thick clothing like jeans and bulky jackets, as they can add extra inches to your measurements.
Once you have your body measurements, compare them to bike size charts. This will help you determine the right bike size for your body type.

WEIZE 700C Hybrid Bike for Adults, 14 Speed Road Bike, City Commuter Bicycle with Caliper Brakes, High-Carbon Steel Racing Adult Bike, Urban Adult Bicycle for Men and Women, White
Caliper brake system: The hybrid bike adopts a dual caliper brake design, making daily maintenance more convenient and...
As an affiliate, we earn on qualifying purchases.
Compare Your Measurements to Bike Size Charts
Once you’ve got your body measurements down pat, it’s time to see how you stack up against the bike size charts and find the perfect fit for your riding needs! Here are some common mistakes to avoid and expert advice to help you find the perfect fit:
-
Don’t rely solely on your height: While height is a good starting point, it’s not the only factor to consider when choosing a bike size. Your inseam length, arm length, and torso length are also important measurements to take into account.
-
Use multiple size charts: Different bike manufacturers may have slightly different size charts, so it’s a good idea to consult a few different ones to get a better idea of what size bike you need.
-
Consider your riding style: The type of riding you plan on doing will also affect the size of bike you need. For example, if you plan on doing more aggressive mountain biking, you may want a smaller frame size for better maneuverability.
By following these tips, you can avoid sizing pitfalls and find the perfect fit for your riding needs. But before you make your final decision, it’s important to test ride the bike to ensure it feels comfortable and handles well.
Test Ride Before You Buy
Make sure you hop on and take a spin before you make a decision on which bike to purchase. Testing the bike before buying it is the only way to determine if it’s the right fit for you. When you test ride a bike, you’ll get a sense of how comfortable it is and how it handles different terrains. These are two critical factors in choosing the right bike.
To help you make an informed decision, here’s a table that outlines the comfort level and terrain suitability of different bike types:
| Bike Type | Comfort Level | Terrain Suitability |
|---|---|---|
| Road | Low | Paved roads and bike paths |
| Mountain | Average | Off-road trails and rough terrain |
| Hybrid | High | City streets and light off-road |
| Cruiser | Very High | Flat, easy terrain and leisurely rides |
Remember, everyone’s body is different, and what may be comfortable for one person may not be for another. Additionally, the terrain you’ll be riding on will also play a significant role in determining the right bike for you. So, don’t skip the test ride and take note of how comfortable the bike feels and how it handles on the terrain you’ll be riding on.
Frequently Asked Questions
How often should I measure my bike size?
It is important to frequently get a professional bike fitting to ensure optimal performance and comfort. The frequency of bike fitting depends on how often you ride and any changes in your body or riding style.
Can a bike size chart be used for all types of bicycles?
Bike size charts vary across different types of bicycles due to differences in geometry and intended use. It’s important to consider factors such as riding style and preferences when choosing the right size.
What if my body measurements fall between two bike sizes on the chart?
When my measurements fall between two bike sizes on a chart, I choose a size compromise and make adjustments for a perfect fit. Dealing with discomfort, I find solutions for in between sizes such as adjusting the saddle height or stem length.
Are there any tips for measuring myself accurately?
To measure myself accurately for a bike, I use measuring techniques like standing straight, measuring my inseam, and paying attention to common mistakes like slouching or wearing thick clothes. It’s important to be precise for a comfortable ride.
How can I adjust the bike’s size after purchasing it?
To adjust the bike’s size, I first adjust the saddle height to ensure proper leg extension. Then, I choose appropriate handlebar width to match my shoulder width. This will improve comfort and control while riding.
Conclusion
In conclusion, proper bike sizing is crucial for a comfortable and safe ride. By measuring your body and comparing the measurements to bike size charts, you can ensure that you’re selecting the right size bike for your needs.
It’s also important to test ride the bike before purchasing to make sure it feels comfortable and fits well. Did you know that a study conducted by the American Academy of Pediatrics found that improper bike sizing was a leading cause of biking-related injuries in children?
This statistic highlights the importance of taking the time to properly measure and select the right size bike for yourself or your child. Don’t underestimate the importance of proper bike sizing – it can make all the difference in a safe and enjoyable ride. Remember to always wear a helmet and follow proper biking safety guidelines.