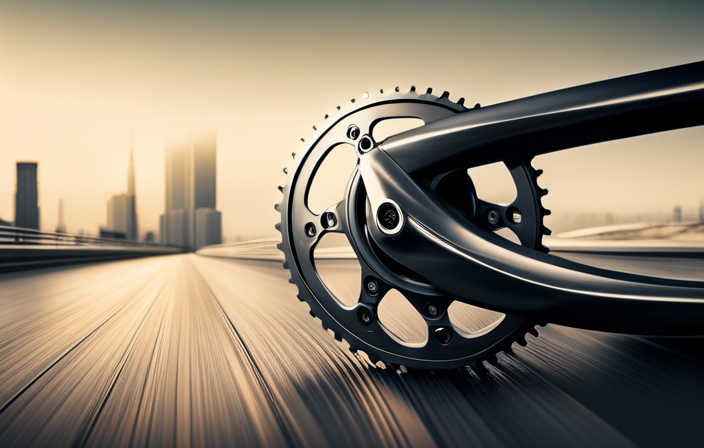
Similar to a smoothly operating machine, a bicycle depends on all its parts working together seamlessly. One essential component that is sometimes overlooked is the chain. It acts as the engine, transferring power from your legs to the wheels.
But just like any other part, it can wear out over time. That’s why it’s essential to know how to measure your bicycle chain accurately. In this guide, I’ll walk you through the process step by step, ensuring your bike stays in top shape for miles to come.
Key Takeaways
- Regularly measuring and adjusting the length of the chain is crucial for optimal performance and longevity.
- Choosing the right chain that is compatible with the bike’s drivetrain is essential for smooth operation.
- Proper maintenance, including regular cleaning and inspection for signs of wear, is necessary to prevent poor shifting and drivetrain damage.
- Signs of a worn or stretched chain include gears skipping, chain lengthening, chain elongation exceeding 0.5%, and clicking or grinding noise while pedaling.

WEIZE Road Bike, 700C Wheel City Commuter Bicycle, 14 Speed Drop Bar, Racing Adult Bike with Caliper Brakes, High-Carbon Steel Hybrid Bikes, Urban Adult Bicycle for Men and Women,Black
Caliper brake system: The road bike adopts a dual caliper brake design, which is lighter in overall weight...
As an affiliate, we earn on qualifying purchases.
Importance of Proper Chain Measurement
You need to understand the importance of properly measuring your bicycle chain. Accurate chain measurement is crucial for optimal performance and longevity of your bike.
To measure your chain accurately, you will need a few essential tools. Firstly, a chain checker tool is necessary to determine if your chain has worn beyond its usable limit. This tool measures the elongation of the chain, indicating if it needs to be replaced.
Secondly, a ruler or tape measure is needed to measure the chain’s length. By aligning the measuring tool with the chain’s rivets, you can determine its exact length.
To ensure accurate measurements, it is essential to follow the proper steps. Once you grasp the importance of chain measurement, it is time to move on to the tools needed for measuring your bicycle chain, ensuring optimal performance and safety.

AVASTA 700C Road Adult Step-Over Hybrid Bike Bicycle for Men Woman Male Female,Lightweight Aluminum Alloy Frame with 21-Speed Gearing for City Commuting,Dual Disc Brakes,19 inch Frame,Chameleon Grey
🚴♂️【Durable Aluminum Alloy Frame】This lightweight yet strong frame is built to last, offering a perfect balance of durability...
As an affiliate, we earn on qualifying purchases.
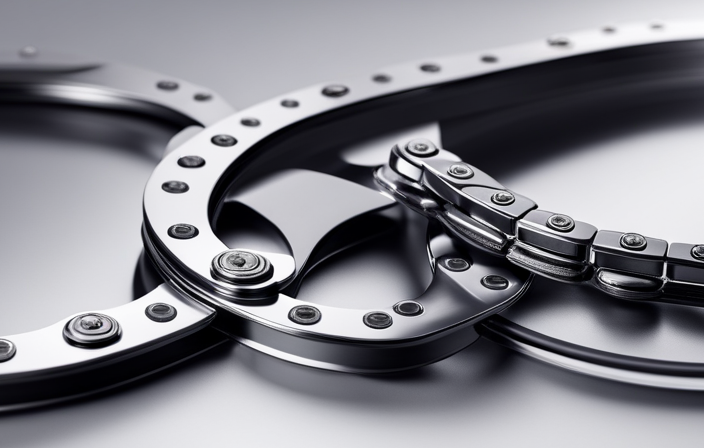
Tools Needed for Measuring your Bicycle Chain
To accurately gauge the length of your bike’s chain, you’ll need a few essential tools. Chain measurement accuracy is crucial for maintaining optimal performance and preventing unnecessary wear on your drivetrain.
The first tool you’ll need is a chain checker, which measures the wear on your chain and indicates whether it needs to be replaced. Additionally, a ruler or tape measure is essential for measuring the length of your chain to ensure it is the correct size for your bike.
It’s important to note that regular chain maintenance is vital for the longevity of your bike’s drivetrain and overall performance. By regularly measuring and replacing your chain when necessary, you can prolong the life of your drivetrain components and ensure smooth and efficient gear shifting.
Now, let’s move on to the first step: positioning your bike.

VIRIBUS Hybrid Bikes, 28 inch Mens Bike with Lightweight Aluminum Frame and Disc Brakes, 700C Bikes for Tall Men, 7 Speed Vintage Retro Hybrid Bicycles for City Commuters, Adult Road Bike, Blue
700C Wheel Hybrid Bike: Experience the ultimate comfort and style with Viribus's road bike, featuring a cushioned seat...
As an affiliate, we earn on qualifying purchases.
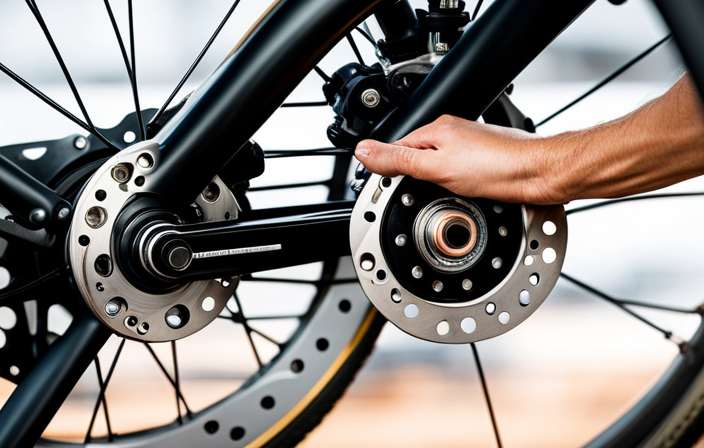
Step 1: Positioning Your Bike
First, make sure your bike is securely placed in an upright position. Proper bike positioning is crucial for accurate chain measurement. Common mistakes while positioning include not fully supporting the bike, which can lead to an unstable reading. To avoid this, place the bike on a sturdy surface and ensure it is balanced on both wheels. Use a bike stand or lean it against a wall for added stability.
Additionally, make sure the bike is in the correct gear for chain measurement, usually the smallest chainring and smallest rear cog. Once your bike is properly positioned, you can move on to step 2: locating the master link or pin.

HH HILAND 700C Road Hybrid Bike, 7 speeds Bikes Urban City Commuter Bicycle with Disc Brake for Men Women Adult Comfortable Bicycle
Beginner Friendly Design: Our flat handlebar hybrid bike is a beginner's delight, offering a stable grip for assured...
As an affiliate, we earn on qualifying purchases.
Step 2: Locating the Master Link or Pin
Next, find the master link or pin on your bike’s chain. This is an essential step in measuring chain tension accurately.
The master link is a removable link, usually different in appearance from the other links, that allows for easy chain removal and installation. If your bike doesn’t have a master link, you’ll need to locate a standard pin instead.
It’s important to identify this point because it will serve as a reference when measuring the chain length. Take note of the position of the master link or pin, as it will help you ensure that the chain is properly tensioned when you reassemble it.
Once you’ve located the master link or pin, you can move on to the next step of measuring the chain length.
Step 3: Measuring the Chain Length
After locating the master link or pin, I proceed to measure the length of the chain. Chain length measurement techniques vary, but the most common method involves placing the chain on the largest chainring and the largest rear cog. Then, I pull the chain taut and measure the distance between the two points where the chain meets.
Another method is to use a chain measuring tool, such as a chain wear indicator or a chain checker. These tools provide a more accurate measurement by determining the wear and elongation of the chain. By using these different chain measuring tools, I can ensure that the chain length is within the manufacturer’s recommended specifications.
Now, let’s move on to the next step: checking for chain wear to ensure optimal performance.
Step 4: Checking for Chain Wear
To ensure optimal performance, you should regularly check for wear on your chain. Checking chain wear is crucial because a worn chain can negatively affect your bike’s shifting and overall performance.
Signs of chain wear include elongation, which can be measured using a chain wear indicator tool or a ruler. A new chain typically measures exactly 12 inches from pin to pin, but if it has stretched beyond 12 1/16 inches, it is time for a replacement. You might also notice excessive flexing, rust, or stiff links.
By checking your chain regularly, you can catch these signs of wear early on and prevent further damage to your drivetrain. This will help prolong the life of your components and ensure a smooth ride.
Moving on to the next step, replacing a worn or damaged chain is essential for maintaining optimal performance.
Step 5: Replacing a Worn or Damaged Chain
Replacing a worn or damaged chain is necessary to ensure your bike continues to perform at its best. When a chain becomes worn or damaged, it can negatively impact the overall performance of your bike and even cause further damage to other components.
To replace a chain, start by shifting the rear derailleur to the smallest chainring and smallest rear cog. Then, use a chain tool to break the chain at any link. Next, remove the old chain and thread the new chain through the derailleur and over the cassette. Reconnect the chain using a quick link or a chain pin, ensuring it is properly tensioned.
Once the new chain is in place, it’s essential to perform regular chain maintenance and chain lubrication to prolong its lifespan and optimize performance. This will be discussed in the next section about tips for maintaining your bicycle chain.
Tips for Maintaining your Bicycle Chain
For optimal performance, make sure you regularly clean and lubricate your bike chain. Chain maintenance is an essential part of keeping your bicycle running smoothly and extending the life of your chain.
Here are three important tips for maintaining your bicycle chain:
-
Clean your chain regularly: Use a degreaser and a brush to remove dirt, grime, and old lubricant from your chain. Ensure you clean all the links thoroughly.
-
Lubricate your chain properly: Apply a high-quality bicycle chain lubricant to each link, ensuring that you cover the entire chain. Wipe off any excess lubricant to prevent attracting dirt and debris.
-
Avoid over-lubricating: Applying too much lubricant can attract dirt and create a messy buildup. It’s important to find the right balance so that your chain stays properly lubricated without collecting excess debris.
Proper chain maintenance and lubrication will not only improve the performance of your bike but also extend the life of your chain.
Now let’s move on to the benefits of proper chain measurement.
Benefits of Proper Chain Measurement
Make sure you have the proper chain length to ensure smooth and efficient pedaling. Proper chain measurement is crucial for the performance and longevity of your bicycle. By measuring the chain correctly, you can experience a range of benefits and avoid unnecessary wear and tear.
One of the main benefits of proper chain measurement is improved shifting performance. A correctly sized chain allows for precise gear changes, ensuring smooth transitions between gears. Additionally, a properly measured chain reduces the risk of chain slippage, which can lead to accidents or damage to the bike.
Proper chain measurement also helps prevent premature wear on your drivetrain components. When the chain is too long or too short, it puts unnecessary stress on the cassette, chainrings, and jockey wheels. Over time, this can lead to expensive repairs or replacement parts.
In order to avoid these common mistakes and keep your bike running smoothly, it is important to measure your chain regularly and make adjustments as needed.
Common Mistakes to Avoid
One common mistake to avoid is neglecting to regularly check and adjust the length of your bike’s chain. Proper techniques for measuring your bicycle chain are crucial to ensure optimal performance and prevent unnecessary wear and tear.
Here are three common mistakes to avoid when measuring your bike chain:
-
Incorrect chain length: Using a chain that is too long or too short can cause poor shifting and potential damage to your drivetrain.
-
Neglecting chain wear: Failing to regularly inspect your chain for signs of wear, such as elongation or rust, can lead to decreased efficiency and potential breakage.
-
Improper chain tension: Maintaining the correct tension is essential for smooth gear shifting and preventing chain skipping.
By avoiding these common mistakes and properly measuring your bike chain, you can extend its lifespan and enjoy a smoother ride.
Now let’s move on to understanding chain compatibility.
Understanding Chain Compatibility
To understand chain compatibility, you should consider the specific requirements of your bike’s drivetrain. Chain compatibility issues can arise when the chain is not properly matched to the components of the drivetrain, leading to poor shifting performance and potential damage to the drivetrain. Choosing the right chain for your bike is crucial to ensure smooth and efficient operation. To help you make an informed decision, consider the following table:
| Component | Chain Compatibility |
|---|---|
| Cassette | Number of speeds |
| Chainrings | Number of teeth |
| Derailleur | Cage length |
| Shifters | Speed compatibility |
| Chain | Speed compatibility |
By matching these factors, you can ensure that the chain is compatible with your bike’s drivetrain. Understanding chain compatibility is essential for maintaining optimal performance and preventing unnecessary wear. Now, let’s move on to the next section and discuss how often you should measure your bicycle chain.
How Often Should You Measure your Bicycle Chain?
Determining the frequency for checking your bike’s chain is important for maintaining its longevity and performance. Regularly measuring your bicycle chain is crucial to ensure its optimal function and to prevent premature wear.
Contrary to common misconceptions, it is not necessary to measure your chain after every ride. Instead, a good rule of thumb is to measure it every 1,000 to 2,000 miles, or every three to six months, depending on your riding habits. However, there are a few factors that may require more frequent measurement, such as riding in wet or muddy conditions, or if you notice any unusual noises or shifting issues while riding.
In addition to measuring your chain, it is also important to properly clean it to remove dirt and debris that can cause premature wear. By regularly measuring and maintaining your bicycle chain, you can ensure optimal performance and extend its lifespan.
Moving on to the next section, let’s discuss the signs of a worn or stretched chain.
Signs of a Worn or Stretched Chain
If you notice your bike’s gears skipping, it’s a sign that your chain may be worn or stretched. To accurately measure chain wear, you’ll need a chain wear indicator tool. Here are four signs that indicate a stretched chain:
-
Chain length: A new chain typically measures 12 inches over 24 links. As it wears, it can lengthen up to 1/16 of an inch per foot. Measure the chain’s length and compare it to the original length.
-
Chain elongation: A stretched chain will show signs of elongation when measured against a ruler or chain wear indicator. If it exceeds 0.5% elongation, it’s time to replace it.
-
Chain skipping: A worn chain may skip or slip on the bike’s gears, especially when applying pressure or climbing uphill.
-
Chain noise: A stretched chain can produce a clicking or grinding noise while pedaling.
Measuring chain wear is crucial to maintain optimal bike performance. A worn chain can cause premature wear on the cassette and chainrings, affecting shifting and overall performance.
The Impact of a Worn Chain on Bike Performance
A worn chain negatively affects a bike’s performance by causing shifting issues and reducing overall efficiency. When a chain becomes worn, it no longer fits perfectly with the teeth of the cassette and chainrings, leading to difficulty in shifting gears smoothly.
Additionally, a worn chain can cause the chain to slip, resulting in power loss and a decrease in overall pedaling efficiency. The impact of chain wear can be felt especially when climbing hills or trying to accelerate quickly.
To maintain chain performance, it is important to regularly check for signs of wear and replace the chain when necessary. By doing so, you can ensure optimal performance and prevent further damage to other drivetrain components.
As we conclude, understanding the impact of a worn chain allows us to prioritize proper chain maintenance and ultimately enhance our biking experience.
Final Thoughts and Conclusion
In conclusion, it is crucial to regularly check for signs of wear and replace the chain when necessary to ensure optimal performance and prevent further damage to other drivetrain components.
Proper bike maintenance includes checking the chain for wear and maintaining proper chain tension. A worn chain can lead to decreased efficiency and performance, as well as potential damage to the cassette, chainrings, and derailleur.
To measure a bicycle chain for wear, there are various methods available, including using a chain checker tool or measuring the chain’s length. Additionally, maintaining proper chain tension is essential for smooth shifting and overall bike performance.
It is recommended to consult the bike manufacturer’s guidelines or seek professional assistance when it comes to measuring chain wear and ensuring proper chain tension. By regularly inspecting and replacing the chain, cyclists can enjoy a smoother, more efficient ride and avoid costly drivetrain repairs.
Frequently Asked Questions
How do I know if my chain is too tight or too loose?
To determine if my chain is too tight or too loose, I can perform a chain tension adjustment. By checking the slack in the chain and ensuring it’s within the recommended range, I can maintain optimal chain tension for proper bicycle performance.
Can I use a ruler or tape measure to measure my bicycle chain?
No, a ruler or tape measure is not suitable for measuring chain wear on a bicycle. Specialized tools such as a chain wear gauge are more accurate and precise, allowing for an accurate assessment of the chain’s condition.
Is it necessary to measure my bicycle chain regularly?
Regularly measuring my bicycle chain is crucial for maintaining optimal performance. Using a chain wear indicator tool allows me to accurately measure chain wear, preventing premature wear on other components and ensuring a smooth and efficient ride.
What are the signs of a worn or stretched chain?
Symptoms of a worn or stretched bicycle chain include skipping gears, chain slipping off, and difficulty shifting. Causes can include regular wear and tear, lack of maintenance, or using a chain that is not properly sized for the bike.
How does a worn chain affect the performance of my bike?
A worn chain negatively impacts bike performance by causing inefficient power transfer, increased wear on other drivetrain components, and potential for chain breakage. Regular chain maintenance and preventive measures can prolong its lifespan and ensure optimal bike performance.
Conclusion
In conclusion, measuring your bicycle chain is an essential task that should not be overlooked. By ensuring that your chain is the correct length, you can prevent potential issues such as poor shifting and premature wear on your drivetrain.
Using the proper tools and following the steps outlined in this article, you can easily measure your chain and maintain optimal performance on your bike.
Remember, a well-maintained chain is the key to a smooth and enjoyable ride. So, grab your wrench and get ready to measure your chain – it’s time to keep your bike running like a well-oiled machine!