
Were you aware that the tallness of your bicycle significantly influences your cycling experience? Indeed, research has shown that setting your bike to the appropriate height could improve your pedaling efficiency by as much as 20%.
That means you can ride faster and farther with less effort simply by ensuring that your bike is the correct height for your body.
But how do you measure the height of your bike? It may seem like a daunting task, but with the right tools and knowledge, it’s actually quite simple.
In this article, I’ll guide you through the steps to measure the height of your bike and adjust it for maximum comfort and efficiency.
So, let’s get started!
Key Takeaways
- Accurately measuring bike height is important for comfort and efficiency.
- The distance between the ground and the highest point of the frame determines the height of the bike.
- Measuring from the ground to the top of the saddle is a common mistake to avoid.
- Use a measuring tape or alternative methods on a flat, stable surface to measure bike height.
Understand the Components of Your Bike
You’ll want to take a look at your bike’s components, like the frame and handlebars, to get a better understanding of how to measure its height. Identifying bike parts is crucial in determining the correct measurement of your bicycle.
The height of the bike refers to the distance between the ground and the highest point of the frame. One common mistake in measuring height is measuring from the ground to the top of the saddle. While the saddle height is an important measurement, it doesn’t give an accurate representation of the overall height of the bike.
To get an accurate measurement, you need to measure from the ground to the top of the frame. Having a good understanding of the bike’s components will help you identify the highest point of the frame and determine the correct measurement.
Determine the Correct Measurement
First, it’s important to find a flat surface to place your bike on. Once you have your bike in position, it’s time to determine the correct measurement for its height.
Here are four key tips to keep in mind when measuring your bike:
-
Measure the frame size: The frame size is the most important measurement when it comes to determining the height of your bike. To measure the frame size, use a tape measure to determine the distance from the center of the bottom bracket to the top of the seat tube.
-
Check the saddle height: The saddle height is another key measurement that can affect the overall height of your bike. To measure the saddle height, place a spirit level on top of the saddle and adjust the height until the level is perfectly horizontal.
-
Avoid common mistakes: One common mistake when measuring the height of a bike is to measure from the ground up to the top of the saddle. This can lead to an inaccurate measurement. Additionally, it’s important to make sure that the bike is level when measuring its height.
-
Consider alternative methods: If you don’t have a tape measure or spirit level, there are alternative methods to determine the height of your bike. For example, you can use a piece of string to measure the distance from the center of the bottom bracket to the top of the seat tube.
With these tips in mind, it’s time to gather the necessary tools to measure the height of your bike accurately.
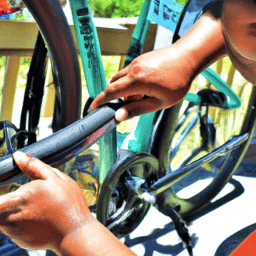
Gather the Necessary Tools
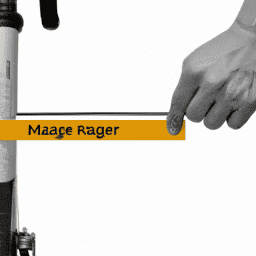
Now that you know what to look for, it’s time to grab the tools you’ll need to get the job done. To ensure measuring accuracy, you’ll need a measuring tape that can measure up to at least 6 feet (2 meters) in length. A digital caliper or ruler can be used as an alternative, but may not provide the same level of precision as a measuring tape.
In addition to a measuring tool, you’ll also need a flat, stable surface to rest the bicycle on. A level surface will ensure that the height of the bicycle is measured accurately. If you don’t have access to a level surface, placing a small platform underneath the bicycle can help to ensure that the bike remains stable and level.
With the proper tools and preparation, you’ll be ready to measure the height of your bicycle in no time. Now that you’ve gathered the necessary tools and prepared a stable surface, it’s time to measure the height of your bicycle.
Measure the Height
Get ready to discover the soaring altitude of your trusty two-wheeled steed by determining its vertical distance from the ground.
To measure the height of your bicycle, start by standing the bike upright on a level surface. Place one end of a tape measure on the ground directly beneath the center of the bike’s frame. Extend the tape measure vertically until the other end reaches the highest point on the frame, typically the top of the seat or handlebars. Keep the tape measure straight and taut to ensure accurate measurement.
Common mistakes when measuring the height of a bicycle include not standing the bike upright on a level surface, failing to measure from the center of the frame, or not extending the tape measure vertically to the highest point on the bike.
An alternative method is to use a spirit level to ensure the bike is completely vertical before measuring. Once you’ve determined the height of your bike, you can adjust it for maximum comfort and efficiency.
Adjust Your Bike for Maximum Comfort and Efficiency
When it comes to cycling, it’s crucial to adjust your bike for maximum comfort and efficiency. One of the most important adjustments is the saddle height, as it can greatly impact your pedal stroke and overall comfort.
Another key adjustment is the handlebar position, which can affect your posture and grip on the bike. By making these two adjustments, you can optimize your bike for your body and enjoy your rides even more.
Adjusting Saddle Height
Adjusting the saddle height can greatly improve your comfort while riding a bicycle. Proper posture is essential to enjoying a long ride without experiencing any discomfort or injuries. Setting your saddle at the correct height is an important aspect of achieving proper posture.
When your saddle is too low, it can cause you to slouch, which can lead to back pain and other issues. Conversely, when your saddle is too high, it can cause your hips to rock from side to side, resulting in knee pain.
It’s also important to consider the angle of your saddle when adjusting the height. The angle of your saddle can affect your comfort, power output, and even your ability to control the bike. Tilting your saddle forward or backward can help you find the most comfortable position for your body. However, it’s important to remember that even small adjustments can make a big difference.
Once you find the right height and angle for your saddle, you’ll be able to ride with proper posture and avoid injuries.
Now, let’s move on to the next step of adjusting your bike: adjusting the handlebar position.
Adjusting Handlebar Position
Now let’s take a look at how you can tweak the position of your handlebar to improve your riding experience. One of the first things to consider is your handlebar grip. A comfortable grip can make all the difference in preventing hand fatigue during a long ride.
Here are a few tips to get started:
- Experiment with different handlebar tape to find a grip that feels good to you.
- Adjust the grip position by moving the handlebar up or down to find the sweet spot for your hands.
- Try different grip shapes, such as ergonomic or flat bars, to see which one works best for your riding style.
- Consider adding bar ends to give your hands more options for gripping during a ride.
- Make sure your handlebar is tightened securely to prevent any slipping or movement.
By making small adjustments to your handlebar position and grip, you can improve your comfort and control while riding. Don’t be afraid to experiment and find what works best for you.
Frequently Asked Questions
How do I know if my bike is the right size for me?
Finding the right bike size for me involves various fitting techniques such as adjusting the saddle height and handlebar position. It’s important to get it right for optimal performance and comfort while riding.
Can I use any measurement tool to measure the height of my bike?
To accurately measure the height of a bike, it’s important to use a measuring tool such as a tape measure or ruler. Common mistakes include measuring from the ground instead of the center of the bike’s frame. Tips: ensure the bike is on level ground and measure from the top of the seat tube to the center of the bottom bracket.
How often should I measure the height of my bike?
To ensure optimal performance and safety, I measure my bike’s height regularly using a reliable measuring tool. The frequency depends on usage and terrain, but generally every few months. A ruler or tape measure are best tools for accurate measurements. Bike height: How often? Measuring bike height: Best tools.
Is the height of my bike important for performance?
The height of my bike impacts my performance as it affects my aerodynamics. There is a correlation between height and speed, with a lower height resulting in less wind resistance and faster speeds.
Can adjusting the height of my bike improve my overall riding experience?
Adjusting the saddle height can improve overall riding experience by increasing comfort level and efficiency. Experiment with different heights to find the optimal position, taking into account leg extension and pedal stroke.
Conclusion
Well, there you have it folks – a complete guide on how to measure the height of your bicycle!
With these simple steps, you can ensure that your bike is adjusted to fit your body perfectly, allowing for maximum comfort and efficiency on your rides.
From understanding the components of your bike to gathering the necessary tools, measuring the height of your bicycle may seem daunting at first, but it’s a quick and easy process that can make all the difference in your cycling experience.
Just imagine gliding down the road, the wind in your hair, the sun on your face, and your bike adjusted perfectly to fit your body.
No more discomfort or strain, just pure enjoyment as you take in the scenery around you.
So why wait? Grab your bike, gather your tools, and start measuring!
With a little bit of effort and attention to detail, you’ll be on your way to the ultimate cycling experience in no time.
Happy riding!