
Were you aware that the typical American dedicates more than six hours weekly to bike riding for exercise or pleasure? Regardless of whether you’re an avid biker or an occasional cyclist, it’s essential to have a bike that fits you correctly to ensure comfort, maximize efficiency, and prevent injuries.
One of the most important measurements to ensure a proper fit is the height of your bike. In this article, I will guide you through the steps to accurately measure the height of your bicycle, so you can ride with confidence and ease.
Before we dive into the nitty-gritty of measuring your bike’s height, let’s talk about why it matters. Riding a bike that doesn’t fit properly can result in discomfort and even pain in the neck, back, and knees. Furthermore, an ill-fitting bike can cause inefficiencies in your pedaling technique, resulting in a less enjoyable and less effective ride.
By taking the time to properly measure your bike’s height, you can avoid these issues and enjoy the full benefits of cycling. So, let’s get started!
Key Takeaways
- Properly fitting a bike is crucial for comfort, efficiency, and injury prevention.
- Measuring the height of the bike is important for proper fit.
- Ground clearance of the bike needs to be determined first and the bike should be positioned on a flat surface with the seat and handlebars leveled to the ground.
- Inseam length is important for selecting the proper bike size.
Gather the necessary tools
Now that we know how to measure the height of a bicycle, let’s gather the necessary tools. We’ll need a measuring tape and a level, which are essential to ensure measuring accuracy.
A measuring tape is used to measure the distance between two points, while a level helps to ensure that the bike is standing straight and not leaning to one side. If a measuring tape or a level isn’t available, there are tool alternatives that can be used.
A ruler and a plumb line can be used instead of a measuring tape and a level, respectively. However, keep in mind that these alternatives may not be as accurate as the original tools and may affect the final measurement.
With the necessary tools at hand, we can now proceed to determine the ground clearance of the bicycle.
Determine the ground clearance
To determine the ground clearance of my bicycle, I first positioned it on a level surface. Then, I measured the distance from the ground to the lowest point of the frame using a measuring tape. It’s important to ensure that the bike is stable and not leaning to one side to get an accurate measurement.
Adjust the paragraph structure in the input to logically group complete sentences on their own lines, with a double new line after. Use contractions.
Position the bike
Placing the bike on a flat surface is crucial before attempting to measure its height. Proper bike positioning is important in ensuring accurate measurements. It’s best to position the bike with the seat and handlebars leveled to the ground. This can be done by either using a bike stand or leaning the bike against a wall or a sturdy object.
Make sure that the bike is stable and won’t move during the measuring process. Common mistakes to avoid when positioning the bike include placing it on an uneven surface, leaning it at an angle, or not aligning the seat and handlebars properly. These mistakes can affect the accuracy of the measurements and may result in incorrect adjustments to the bike’s fit.
Once the bike is positioned properly, it’s now ready to measure the distance between the ground and the highest point of the bike frame.
Transition: With the bike properly positioned, the next step is to measure the distance between the ground and the highest point of the bike frame.
Measure the distance
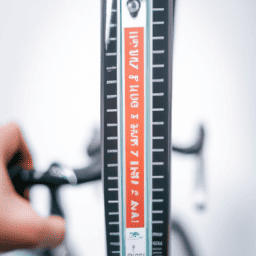
Properly positioning the bike on a flat surface allows for accurate assessment of the distance between the highest point of the frame and the ground. To measure the height of a bicycle, it’s essential to use the right measuring techniques.
One method is to use a tape measure to measure the distance between the ground and the highest point of the frame. It’s important to ensure that the tape measure is held straight and parallel to the ground to achieve distance accuracy.
Another method is to use a ruler or a carpenter’s square to measure the distance between the ground and the highest point of the frame. This technique is particularly useful when the ground is uneven.
If the bike is not positioned correctly, it may lead to inaccurate measurements. Once the distance has been measured, it can be recorded for future reference.
With the distance measurement recorded, the next step is to measure the inseam length.
Measure the inseam length
First, you’ll need to stand up straight next to the bicycle with your feet shoulder-width apart, like a tree firmly rooted in the ground.
To measure the inseam length, you’ll need a tape measure and a friend to help you. The inseam length is the distance from the floor to your crotch. To measure it, you’ll need to stand with your back against a wall and hold a book or a ruler between your legs, as if you were sitting on a saddle. Your friend should measure the distance from the floor to the top of the book or ruler.
Finding fitting and selecting frames that are the right size for you is crucial for a comfortable and safe ride. That’s why it’s important to take accurate measurements, such as the inseam length, before buying a bicycle.
Once you have the inseam length, you can use it to calculate the bike size that’s best suited for you.
Calculate the bike size
Now that you’ve got your inseam length, it’s time to crunch some numbers and figure out what bike size will suit you best. Finding the right fit is crucial for maximizing comfort and performance while riding.
There are a few bike sizing tips to consider when measuring bike frame. The first thing to keep in mind is the importance of bike fit. A bike that is too big or too small can cause discomfort, pain, and even injury.
To measure the bike frame, stand with your feet shoulder-width apart and measure the distance from the ground to your crotch. This measurement will give you the standover height, which should be about 1-2 inches shorter than the height of the bike’s top tube.
Once you have this measurement, consult a bike sizing chart to determine the appropriate size for your height. Remember that this is just a starting point and you may need to make necessary adjustments for your personal comfort.
Make necessary adjustments
Once you’ve determined the appropriate bike size, it’s important to make any necessary adjustments to ensure a comfortable and efficient ride. One of the most important adjustments you can make is to the saddle height. A saddle that is too high or too low can cause discomfort, pain, and even injury. To find the proper height, you’ll need to measure your inseam and adjust the saddle accordingly.
To adjust the saddle height, use the following table as a guide:
| Rider Height | Inseam | Saddle Height |
|---|---|---|
| 4’10"- 5’1" | 24"- 27" | 14"- 15" |
| 5’2"- 5’5" | 27"- 29" | 15"- 16" |
| 5’6"- 5’9" | 29"- 31" | 16"- 17" |
| 5’10"- 6’1" | 31"- 33" | 17"- 18" |
Finding the proper bike fit is essential for both performance and comfort. Making adjustments such as saddle height can greatly improve your riding experience. Remember to always test ride your bike after making any adjustments to ensure a proper fit.
Frequently Asked Questions
How do you know if the bike is the right size for you?
To determine if a bike is the right size for me, I first adjust the saddle positioning to ensure my legs are fully extended when pedaling. I also consider frame size, ensuring that the top tube is comfortable and the handlebars are within reach.
Can you measure the height of a bicycle without any tools?
Measuring a bike’s height without tools is like trying to bake a cake without a recipe; it’s possible but not ideal. Alternative methods, such as using your own body as a reference, may suffice, but accuracy concerns remain.
What is the average height of a bike?
Based on factors affecting bike height, the average height of a bike can vary. To choose the right bike size based on height, use measurements of inseam, torso, and arm length to determine the appropriate frame size.
Is there a specific formula to calculate the height of a bicycle?
How do I calculate the height of a bicycle? Bicycle height measurement tools can be used to determine frame size based on rider height. This formula is crucial for achieving proper fit and preventing injury while riding.
How do you adjust the height of the bike seat?
To adjust the seat height, loosen the seat clamp and raise or lower the seat post until your leg is almost fully extended when pedaling. If still uncomfortable, consider bike fit troubleshooting for proper positioning.
Conclusion
In conclusion, measuring the height of a bicycle is an essential step in ensuring a comfortable and safe ride. It’s a straightforward process that can be accomplished by anyone with the right tools and techniques. By determining the ground clearance and inseam length, as well as calculating the bike size, you can make necessary adjustments to fit the bike to your body and riding style.
Interestingly, according to a study by the National Institute for Occupational Safety and Health, over 1,000 bicyclists die each year in the United States alone. Head injuries are the leading cause of death. Properly fitting a bike to your body can help prevent accidents and injuries by ensuring proper control and balance.
By taking the time to measure the height of your bicycle, you can make sure you are riding safely and comfortably. Follow these simple steps and enjoy your ride with confidence.