
For cyclists, the size of the bike frame is crucial. The right frame size significantly affects your comfort, performance, and how much you enjoy cycling. Nonetheless, figuring out the correct size for a bicycle frame can seem overwhelming, particularly for newcomers to the sport.
In this article, I will guide you through the process of measuring the size of a bicycle frame, step by step.
Before we begin, it is important to understand why frame size is so crucial. A frame that is too small or too large can cause discomfort, pain, and even injury. A frame that is too small can lead to cramped riding positions, while a frame that is too large can cause you to overreach and strain your back and neck.
By measuring the size of your bicycle frame, you can ensure that you are riding in a comfortable and safe position, allowing you to fully enjoy your cycling experience.
Key Takeaways
- Measuring the frame size is crucial for comfort, performance, and safety while cycling.
- Necessary tools for measuring frame size include a tape measure, spirit level, and plumb bob.
- Different frame geometries require different methods of measurement, and seat tube length is a key factor in determining frame size.
- Consulting with a professional bike fitter can improve comfort, performance, and prevent injury, and adjusting handlebars and saddle position can greatly improve riding experience.

Under Armour Squeeze Water Bottles, 32 oz Water Bottles, Sideline Sports Water Bottle with Quick-Shot Lid, Quick & Easy Hydration, Gym Water Bottles, Squeeze Bottle, 1 32oz Bottle
- Easy Hydration: Quick-shot lid and one-way valve
- On-the-Go Use: One-hand operation for active hydration
- Measurement Markings: Ounces and milliliters for tracking
As an affiliate, we earn on qualifying purchases.
Understand the Importance of Frame Size
You’ll want to make sure you understand the importance of frame size when choosing a bicycle. Proper fit is crucial for comfort, efficiency, and overall enjoyment of the ride. A bike that’s too big or too small can cause discomfort, pain, or even injury.
Bike geometry plays a significant role in frame size, as it affects the distance between the handlebars, the seat, and the pedals. Different types of bikes have different geometries, depending on their intended use. For instance, a road bike has a more aggressive posture than a cruiser bike, which is designed for casual riding.
Understanding the importance of fit and bike geometry will help you choose the right frame size and ensure a comfortable and safe ride.
Now, let’s gather the necessary tools to measure your bike frame.
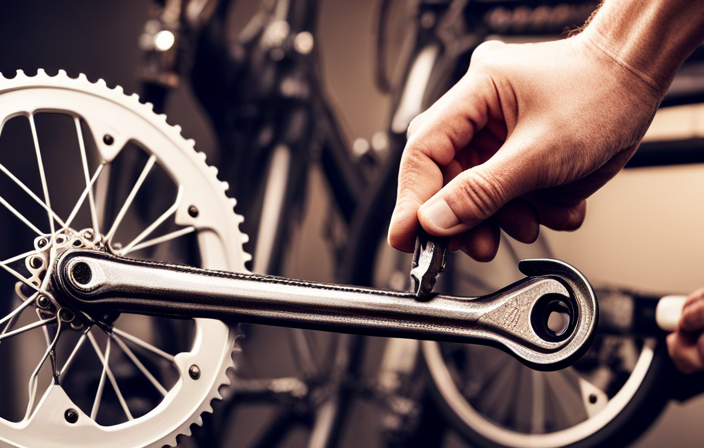
Gather the Necessary Tools
To get started, grab the essential tools needed for determining the dimensions of your two-wheeled ride. Measuring accuracy is crucial, and having the appropriate equipment will ensure precision.
Firstly, you’ll need a tape measure, preferably one that’s at least six feet long, to obtain accurate measurements. Secondly, a spirit level will help determine if your bike is level while measuring. Finally, a plumb bob is useful for measuring angles accurately, especially for determining the seat angle.
It’s important to note that common errors can occur when measuring the frame size. One such mistake is measuring from the center of the bottom bracket when determining the seat tube length, which can lead to incorrect measurements.
Additionally, different types of frame geometries, such as compact and sloping, require different methods of measurement. By having the necessary tools and understanding these errors and frame designs, you’ll be well-equipped to accurately measure your bike’s frame size.
With that said, let’s move on to the next section about how to measure the seat tube.
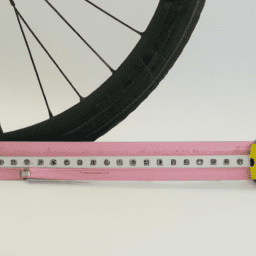
Measure the Seat Tube
Get your tape measure and place it against the seat post of your bike, making sure it is parallel to the ground, and measure the distance from the center of the bottom bracket to the top of the seat. This measurement is known as the seat tube length and is one of the key factors in determining the correct frame size for your bike. However, it is important to note that the seat tube angle and frame material also play a role in determining the overall size and fit of the bike.
The seat tube angle refers to the angle between the seat tube and the ground. A steeper angle will result in a more forward riding position, while a shallower angle will result in a more upright riding position. The frame material can also affect the fit of the bike, as different materials have different levels of stiffness and flexibility. When measuring the seat tube length, it is important to take into account these additional factors to ensure that the frame size is appropriate for your body and riding style.
Determining the right size for your bike is crucial for a comfortable and safe riding experience. To do so, it is important to consider not only the seat tube length, but also the seat tube angle and frame material. With these factors in mind, you can find the perfect fit for your needs and enjoy the ride with confidence.
Determine the Right Size
To determine the right size for my bicycle frame, I’ll refer to a sizing chart and consult with a professional.
The sizing chart will provide me with a general idea of the appropriate size based on my height and inseam length.
However, consulting with a professional will allow me to take into account other factors such as my riding style and body proportions for a more accurate fit.
Using a Sizing Chart
You’ll find it easy and straightforward to determine the size of your bicycle frame by referring to a sizing chart. These charts are typically available online and are specific to the brand of bicycle you own.
When using a sizing chart, you’ll need to take into account factors such as your height, inseam length, and arm length. Comparing brands can be challenging as each brand has its own sizing chart. However, most charts take into account the standard measurements and will provide a general idea of the frame size that would be appropriate for you.
Additionally, it’s important to adjust for personal preference, such as the type of riding you’ll be doing. For example, if you’re going to use your bike for more leisurely rides, you may want a larger frame for added comfort.
Using a sizing chart is a great way to get started, but it’s important to consult with a professional bike fitter to ensure that you’re getting the best fit possible for your body type and riding style. A professional bike fitter can make additional adjustments to your bike, such as changing the length of the stem or handlebars, to ensure that you have the most comfortable ride possible.
Consulting with a Professional
Consulting with a professional for a personalized bike fitting can greatly enhance your riding experience and prevent discomfort or injury. Here are some benefits of customizing your bike fit with a professional:
-
Improved Comfort: A professional bike fitter can help you find the right saddle, handlebar, and stem that fit your body type and riding style. This can greatly reduce discomfort and pain during long rides.
-
Increased Performance: A proper bike fit can also improve your power output and efficiency. A professional can help you find the optimal position for your body, which can lead to better performance and faster times.
-
Injury Prevention: A bike that is not properly fitted can cause injuries such as knee pain, back pain, and numbness in the hands. A professional bike fitter can help you avoid these issues by ensuring that your bike is adjusted to fit your body correctly.
Finding a reputable consultant is important when seeking a personalized bike fitting. Look for someone who’s certified by a reputable organization such as the International Bike Fitting Institute or the Bike Fit Education. Additionally, ask for referrals from other cyclists or bike shops in your area.
Transitioning into the subsequent section, it’s important to note that even after consulting with a professional and customizing your bike fit, it’s still important to test ride and make adjustments as needed.
Test Ride and Make Adjustments
Now that you’ve found the right frame size, it’s time to take the bike for a spin and see if any adjustments need to be made.
When test riding the bike, pay attention to how it feels under you. Are the handlebars in a comfortable position? If not, try adjusting them to find a position that feels right. Adjusting handlebars is a simple task that can greatly improve your riding experience.
Another important factor to consider is the saddle. Choosing the right saddle can make a big difference in your comfort level while riding. If your current saddle feels uncomfortable, try making adjustments to the angle and height.
If adjustments don’t help, it may be time to invest in a new saddle that better fits your body.
By test riding and making necessary adjustments, you can ensure that your bike fits you perfectly and that your riding experience is enjoyable and comfortable.
Frequently Asked Questions
How do I know if a certain frame size is right for me?
To determine if a certain bike frame size is right for me, I recommend using a Fit Calculator or getting a Professional Fitting. These methods take into account factors such as height, inseam, and riding style for a precise fit.
Can I measure the frame size without having the bike with me?
I was curious about measuring accuracy without the bike present. Unfortunately, I couldn’t find any alternative measurement methods that don’t require the bike itself. It seems that having the bike is necessary for accurate measurements.
What are the common mistakes people make when measuring a bike frame?
Common mistakes when measuring a bike frame include not using accurate methods, such as measuring from the center of the bottom bracket to the top of the seat tube. Factors affecting measurements include different types of frames, tube angles, and seat post heights.
Should I consider my height or inseam length when choosing a frame size?
When choosing a bike frame size, consider both your height and inseam length. Height determines frame size, while inseam length helps adjust saddle height for a better fit. Adjusting your frame ensures comfort and proper riding posture.
Can I make adjustments to the frame size after purchasing the bike?
While purchasing a bike, it’s crucial to consider adjusting bike fit. Professional fitting services can help make necessary adjustments to the frame size for an optimal riding experience.
Conclusion
To conclude, measuring the size of a bicycle frame is crucial in ensuring a comfortable and safe ride. By understanding the importance of frame size and gathering the necessary tools, you can accurately measure the seat tube and determine the right size for your body.
It’s important to note that different manufacturers may have varying measurements for their frames, so it’s always best to consult the manufacturer’s guidelines. For example, I once had a friend who purchased a bike without measuring the frame size first. While the bike looked great, it was too small for him and caused discomfort during long rides.
After measuring the frame size and determining the correct size, he was able to trade in his bike for a better fitting one and now enjoys cycling without any discomfort. Remember to always test ride and make adjustments to ensure the best fit.
By following these steps, you’ll be able to find the perfect frame size and enjoy a comfortable and safe ride.