
Did you know that electric bikes are becoming increasingly popular, with global sales expected to reach 40 million units by 2025?
With this surge in popularity, it’s important to know how to handle common maintenance issues, such as punctures.
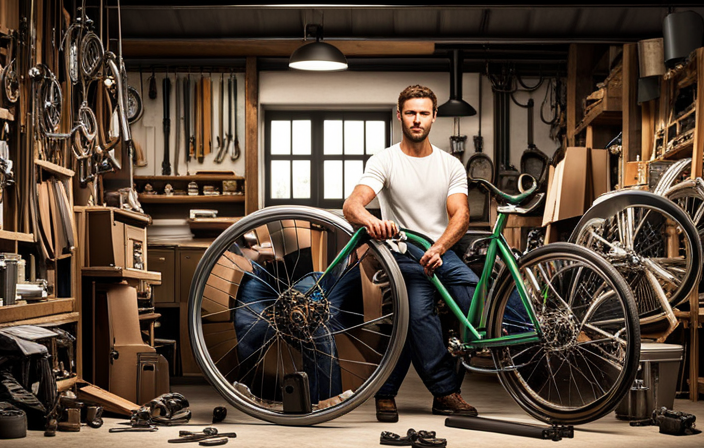
In this article, I will guide you through the step-by-step process of mending a puncture on an electric bike.
By following these simple instructions, you’ll be back on the road in no time, saving money on costly repairs and keeping your electric bike in top condition.
Key Takeaways
- Electric bikes are becoming increasingly popular due to their cost-effectiveness and environmentally friendly nature.
- Having the necessary tools and materials, such as a repair kit and spare inner tube, is essential for repairing punctures on electric bikes.
- Locating and removing the wheel is the first step in repairing a puncture on an electric bike.
- Inspecting and patching/replacing the inner tube is crucial for fixing the puncture, and using puncture-resistant tires or tire liners can help prevent future punctures.

CXWXC Bike Repair Stand -Shop Home Bicycle Mechanic Maintenance Rack- Bike Workstands for Mountain Bike and Road Bike (rs100) (Black)
360 DEGREE ROTATABLE CLAMP & HEIGHT ADJUSTABLE BODY- Clamp with lever can hold your bike super steady, adjustable...
As an affiliate, we earn on qualifying purchases.
Gather the necessary tools and materials
You’ll need to gather the necessary tools and materials to mend a puncture on your electric bike. Choosing the right repair kit is crucial for a successful repair.
Look for a kit that includes tire levers, a puncture repair patch, a small pump or CO2 inflator, and a wrench or Allen key to remove the wheel. Additionally, it’s important to have a spare inner tube on hand in case the puncture is too severe to be repaired.
Tips for quick and efficient puncture repair include inflating the tube slightly before locating the puncture, using soapy water to identify the leak, and roughening the tube surface with sandpaper before applying the patch.
Once you have gathered your tools and materials, you can move on to locating the puncture and removing the wheel.

VEVOR Bike Repair Stand, 4-Leg Steel Bicycle Repair Stand, 42.5"-74.8" Adjustable Height Bike Maintenance Work Stand with Magnetic Tool Tray, Foldable Bike Service Stand for Home, Shop (Max 80 Pounds)
80 lbs High Load Capacity: Crafted from heavy-duty non-rust steel with a thick column diameter, the bike repair...
As an affiliate, we earn on qualifying purchases.
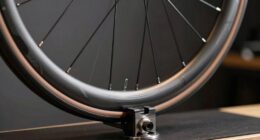
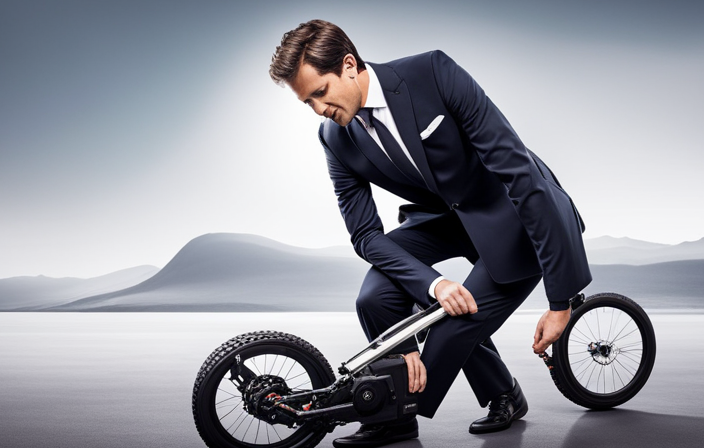
Locate the puncture and remove the wheel
First, find the spot where the tire is damaged and take off the wheel. It’s important to locate the puncture accurately to ensure a successful repair.
Start by flipping your electric bike upside down and examining the tire surface. Look for any visible signs of damage, such as thorns, nails, or glass. If you can’t identify the puncture visually, you can also listen for a hissing sound or feel for air escaping.
Once you’ve located the puncture, use a wrench or Allen key to loosen the nuts or bolts securing the wheel in place. Carefully lift the wheel off the bike frame, making sure not to damage any other components.
With the wheel removed, we can now move on to the next step of deflating the tire and removing it from the rim, which will be covered in the subsequent section.

CXWXC Bike Repair Stand - Maintenance Workstand for Mountain and Road Bikes
Easy bicycle maintenance: a bicycle repair stand is an essential item when you are working on your bike...
As an affiliate, we earn on qualifying purchases.
Deflate the tire and remove it from the rim
To remove the tire from the rim, start by deflating it completely. This can be done by unscrewing the valve cap and pressing down on the valve stem until all the air has escaped.
Once the tire is deflated, use a tire lever to carefully pry the edge of the tire off the rim. Start at one side and work your way around, gently lifting the tire away from the rim. Be cautious not to damage the inner tube in the process.
Repair techniques for electric bike tires can vary depending on the type of puncture. Common causes of punctures include sharp objects on the road or pinch flats from hitting curbs or potholes.
Inspect the inner tube for the puncture to determine the best method for repair or replacement.

CXWXC Bike Repair Stand 88lbs- E Bike Stand for Maintenance Workstand - Ebike Repair Stand Shop Home Mechanics for Mountain Bike and Road Bike (Max. 88lbs)
【Easy-Breezy Bicycle Maintenance】: A bike repair stand is an essential item when you’re working on your bike or...
As an affiliate, we earn on qualifying purchases.
Inspect the inner tube for the puncture
Take a close look at the inner tube to identify any signs of a puncture. Inspecting the inner tube is crucial in determining the location and size of the puncture. Start by inflating the tube slightly to make it easier to find the hole. Look for any visible damage, such as cuts, tears, or even small holes. It’s essential to examine the entire surface of the tube, including the valve area.
To prevent punctures on an electric bike, consider using puncture-resistant tires or tire liners. Additionally, maintaining the inner tube properly is crucial. Ensure the tube is properly inflated within the recommended pressure range and avoid overinflating. Regularly inspect the tube for signs of wear and replace it if necessary.
Moving on to the next step, let’s discuss how to patch or replace the inner tube.
Patch or replace the inner tube
Once you’ve identified the puncture on the inner tube, you have two options: patch it or replace it with a new one.
To patch the inner tube, follow these steps:
- Deflate the tube completely and remove it from the tire.
- Clean the area around the puncture with rubbing alcohol.
- Apply the patch adhesive to the puncture area and let it dry for a few minutes.
- Peel off the backing from the patch and firmly press it onto the puncture, ensuring good adhesion.
- Inflate the tube slightly to check for any leaks. If none are found, fully inflate the tube and reinstall it onto the tire.
Alternatively, if the puncture is too large or the tube is damaged in multiple places, replacing it with a new one is the best option. To prevent future punctures, consider using puncture-resistant inner tubes or adding tire liners.
Now, let’s move on to reinstalling the tire onto the rim.
Reinstall the tire onto the rim
Now, you can easily put the tire back onto the rim. Reinstalling the tire is an important step in the puncture repair process, and it requires proper technique and tire maintenance. To help you understand the process better, let’s take a look at the following table that outlines the steps involved:
| Reinstalling Technique | Tire Maintenance |
|---|---|
| 1. Start by lining up one side of the tire bead with the rim’s edge. | 1. Check the tire for any signs of wear or damage. |
| 2. Use your thumbs to push the tire bead over the rim, working your way around. | 2. Clean the rim and tire bead to ensure a secure fit. |
| 3. Be cautious not to pinch the inner tube while reinstalling the tire. | 3. Inspect the valve stem for any damage or debris. |
| 4. Ensure that the tire bead is evenly seated on both sides of the rim. | 4. Lubricate the tire bead with soapy water for easier installation. |
| 5. Double-check that the tire is properly aligned and centered on the rim. | 5. Maintain proper tire pressure for a smoother ride. |
By following these steps, you can successfully reinstall the tire onto the rim. Once done, you can move on to the next step, which is inflating the tire and checking for leaks.
Inflate the tire and check for leaks
After successfully reinstalling the tire onto the rim, it’s time to inflate the tire and check for leaks. This step is crucial to ensure a smooth and safe ride on your electric bike.
First, grab your tire pump and attach it securely to the valve stem. Use a pressure gauge to check the tire pressure and inflate it to the recommended level, which can usually be found on the sidewall of the tire.
Once the tire is adequately inflated, it’s time to check for leaks. Mix some soapy water in a spray bottle and spray it onto the tire, focusing on the valve stem and any areas that might be prone to leaks. If you see bubbles forming, it indicates a leak that needs to be addressed.
Once you’ve completed this step, you can move on to reinstalling the wheel onto the electric bike, ensuring a smooth and hassle-free ride.
Reinstall the wheel onto the electric bike
To reinstall the wheel onto the e-bike, make sure to align the axle with the dropouts and tighten the quick release lever securely. This ensures a proper fit and prevents any wobbling or misalignment during your ride. To help you visualize the process, refer to the table below:
| Wheel Alignment | Quick Release Lever |
|---|---|
| Axle centered between dropouts | Lever in closed position |
| Axle not touching dropouts | Lever in open position |
| No wobbling or misalignment | Lever tightened securely |
By following these steps, you can reinstall the wheel correctly and troubleshoot any issues with your electric bike. Once the wheel is securely attached, you can move on to the next step of testing the bike to ensure the repair was successful. This will help you verify that the puncture has been addressed and the bike is in proper working condition.
Test the bike to ensure the repair was successful
Once the wheel is securely attached, you can check the bike to make sure the repair was successful. Here are some testing techniques and troubleshooting tips to ensure everything is in order:
-
First, take the bike for a short test ride on a smooth, flat surface. Pay close attention to any unusual vibrations or sounds that may indicate a problem.
-
Next, test the brakes to ensure they’re functioning properly. Squeeze the brake levers firmly and make sure the bike comes to a smooth stop without any squeaking or grinding noises.
-
Test the gears by shifting through each one, both up and down. Ensure that the chain moves smoothly and the gears engage without any hesitation.
-
Finally, inspect the repaired area for any signs of air leakage. Apply a soapy water solution to the punctured area and look for bubbles, which indicate air escaping.
With the testing complete, we can now move on to taking preventive measures to avoid future punctures.
Take preventive measures to avoid future punctures
After successfully testing the repaired electric bike, it is crucial to take preventive measures to avoid future punctures.
Regular maintenance plays a vital role in ensuring the longevity and performance of electric bike tires. By following a few simple steps, you can significantly reduce the risk of punctures.
Firstly, regularly inspect the tires for any signs of wear or damage, such as cuts or embedded debris.
Secondly, maintaining proper tire pressure is essential as underinflated tires are more susceptible to punctures.
Lastly, consider investing in puncture-resistant tires specifically designed for electric bikes. These tires are built with reinforced materials and provide enhanced protection against punctures. When choosing puncture-resistant tires, look for features like Kevlar belts or thicker tread patterns.
Taking these preventive measures will help you enjoy a smoother and hassle-free ride, without the worry of frequent punctures.
Frequently Asked Questions
What are the necessary tools and materials needed to mend a puncture on an electric bike?
To mend a puncture on an electric bike, I will need a repair kit which includes tire levers, a puncture repair patch, a pump, and a wrench to remove the wheel if necessary.
How do I locate the puncture and remove the wheel?
To locate the puncture, I first inspect the tire and listen for any hissing sounds. Then, I remove the wheel by loosening the quick release lever or unscrewing the nuts, depending on the bike’s design.
How do I patch or replace the inner tube?
To patch the inner tube, locate the puncture and clean the area. Apply a patch, pressing firmly to ensure a secure seal. For replacing the inner tube, remove the wheel, release the air, and swap the old tube with a new one.
How do I reinstall the tire onto the rim?
To reinstall the tire onto the rim, start by deflating the tube completely. Next, align one side of the tire bead with the rim edge and use your thumbs to push the rest of the tire onto the rim. Finally, inflate the tube and check for any troubleshooting puncture issues.
What preventive measures can I take to avoid future punctures on my electric bike?
To keep my electric bike rolling smoothly, I take preventive measures like using puncture-resistant tires, regularly checking tire pressure, and avoiding rough terrain. Maintenance tips include cleaning the bike regularly and inspecting the tires for any signs of wear or damage.
Conclusion
As I carefully reattach the wheel onto my electric bike, I can’t help but feel a sense of accomplishment. The puncture may have temporarily halted my ride, but with determination and a few simple tools, I was able to mend it.
Symbolically, this repair reminds me of life’s obstacles and how we have the power to overcome them. Just like fixing a puncture, we can face challenges head-on, patching up the holes and continuing our journey towards success.
With a little perseverance, anything is possible.