So, you’re having some trouble with your electric bike’s front brushless hub motor? Well, fear not, because I’ve got just the solution for you.
In this article, I’ll show you how to open that motor and get it back in tip-top shape. With the right tools and a little know-how, you’ll be back on the road in no time.
Just follow my step-by-step instructions, and you’ll be amazed at how easy it is to tackle this repair yourself.
Let’s get started, shall we?
Key Takeaways
- Gathering the necessary tools and equipment is essential for opening an electric bike front brushless hub motor.
- Opening the motor cover requires locating and removing nuts, bolts, and screws while being careful not to damage wires and connectors.
- Before opening the motor, it is important to turn off the electric bike and disconnect the battery to prevent any potential issues.
- Inspecting the motor for visible damage, loose connections, and ensuring a thorough inspection is crucial for optimal motor performance.
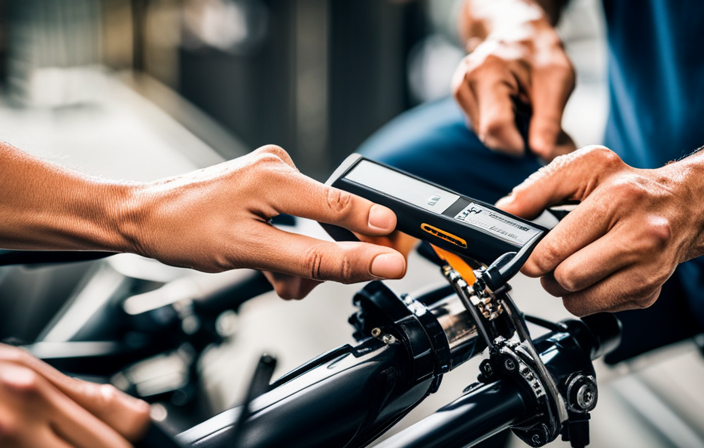
Gather the necessary tools and equipment
You’ll need a set of wrenches and a screwdriver to open the electric bike front brushless hub motor. These tools are essential in disassembling the motor and gaining access to its internal components. The wrenches will be used to loosen and remove the nuts and bolts that secure the motor in place, while the screwdriver is required to unscrew any screws that hold the motor cover in position.
Once you have gathered these tools, you can proceed with the steps to open the electric bike front brushless hub motor.
To begin, locate the nuts and bolts that hold the motor in place. Using the appropriate wrench, carefully loosen and remove these fasteners. Make sure to keep track of them as they will be needed when reassembling the motor.
Next, identify any screws that secure the motor cover. Use the screwdriver to unscrew these screws and carefully set them aside.
With the nuts, bolts, and screws removed, you can now gently lift the motor cover, exposing the internal components of the brushless hub motor. Take care not to damage any wires or connectors as you lift the cover.
Transition: Now that the electric bike front brushless hub motor is open, the next step is to turn off the electric bike and disconnect the battery.
Turn off the electric bike and disconnect the battery
First, make sure to switch off your e-bike and disconnect the battery. This is a crucial step in safely opening the front brushless hub motor of your electric bike.
Before proceeding, it is important to inspect the battery connections to ensure they are secure and free from any damage or corrosion. Inspecting the battery connections will help prevent any potential issues during the opening process.
Once the battery is disconnected and the connections have been inspected, it is recommended to clean the battery terminals. Over time, dirt and grime can accumulate on the terminals, affecting the overall performance of the electric bike. Using a clean cloth or a soft brush, gently wipe away any debris from the terminals. This will ensure a proper connection when reassembling the motor.
Now that the battery is disconnected and the terminals are clean, it is time to move on to the next step. Locate the screws or bolts holding the motor cover in place. By removing these screws or bolts, you will gain access to the internal components of the motor, allowing you to perform maintenance or repairs as needed.
Locate the screws or bolts holding the motor cover in place
After disconnecting the battery and inspecting the connections, it’s time to locate and remove the screws or bolts securing the motor cover. This step is crucial in accessing the inner workings of the electric bike’s front brushless hub motor.
To successfully complete this task, the following tools are needed:
- Screwdriver or Allen wrench (depending on the type of screws or bolts used)
- Pliers (to hold the screws in place while loosening them)
To locate and remove the motor cover screws or bolts, follow these steps:
-
Examine the motor cover carefully, identifying the screws or bolts holding it in place.
- Look for any visible signs of damage or corrosion.
- Check for any loose or missing screws or bolts.
-
Once you have located the screws or bolts, use the appropriate tool to remove them.
- For screws, use a screwdriver that fits snugly into the screw head.
- For bolts, use an Allen wrench that matches the size of the bolt.
By taking these steps, you can ensure a smooth and successful removal of the motor cover, allowing you to address any common motor cover issues that may arise, such as loose connections or debris accumulation.
With the motor cover removed, you can now proceed to the next step of the process: accessing the internal components of the brushless hub motor.
Use the appropriate tool to remove the screws or bolts
To remove the screws or bolts, use the correct tool for the job. Using alternative methods for removing screws or bolts can often lead to damage or stripped threads, so it’s important to use the appropriate tool.
The most common mistake when removing the motor cover is using the wrong size or type of screwdriver or wrench. This can result in stripped screws or bolts, making it difficult or impossible to remove them.
Another mistake to avoid is applying too much force when trying to loosen the screws or bolts. This can cause the tool to slip, potentially causing injury or damaging the motor cover. It’s important to apply steady pressure and use controlled movements to avoid any mishaps.
Once the screws or bolts have been successfully removed, carefully lift off the motor cover, taking care not to damage any of the internal components. Transitioning into the next section, this step will allow access to the inner workings of the motor.
Carefully lift off the motor cover
Gently lift the cover off, making sure to avoid any sudden movements or jerks. Opening the motor cover is a crucial step in motor maintenance techniques. Here are three important things to keep in mind when removing the motor cover:
-
Safety first: Before starting the process, ensure that the electric bike is turned off and disconnected from any power source. This will prevent any accidental electrocution or damage to the motor.
-
Right tools: Use the appropriate tools to remove any screws or bolts securing the motor cover. This may include a screwdriver or a wrench, depending on the type of fasteners used.
-
Delicate handling: Motor covers are often fragile and can be easily damaged if mishandled. Take care to lift the cover gently and evenly, applying equal pressure on all sides to avoid any cracks or breakage.
By following these steps, you can successfully remove the motor cover without causing any harm.
Now, it’s time to inspect the motor for any visible damage or loose connections.
Inspect the motor for any visible damage or loose connections
Now, take a close look at the motor to check for any visible damage or loose connections. Inspecting the motor is crucial to ensure its optimal performance.
Start by visually examining the motor casing for any signs of physical damage such as cracks, dents, or scratches. These can indicate a potential issue that needs to be addressed.
Additionally, pay attention to any loose connections within the motor. Gently wiggle the wires and connectors to see if they are securely attached. Loose connections can lead to poor electrical contact and result in motor malfunction. If you notice any loose connections, tighten them carefully using the appropriate tools.
It’s essential to be meticulous during this inspection process, as even the smallest damage or loose connection can significantly affect the motor’s performance and longevity.
Once you have thoroughly inspected the motor for any visible damage or loose connections, it’s time to move on to the next step: checking the wiring and connectors for any signs of wear or corrosion.
Check the wiring and connectors for any signs of wear or corrosion
Make sure to examine the wiring and connectors for any indications of wear or corrosion. Checking the wiring and connectors is a crucial step in troubleshooting an electric bike’s front brushless hub motor. Loose connections or corrosion can lead to poor performance or even motor failure, so it is important to address any issues before they worsen.
To begin, visually inspect the wiring harness and connectors for any signs of wear or damage. Look for frayed or exposed wires, as well as any bent or broken connectors. If you notice any loose connections, gently tighten them using a suitable tool, such as pliers or a screwdriver.
Next, clean the connectors to ensure a secure and reliable connection. Disconnect the wiring harness and use a contact cleaner spray or a small brush to remove any dirt, grime, or corrosion from the connectors. Be careful not to damage the connectors during this process.
Use a multimeter to test the motor’s functionality
To test the functionality of your motor, you should use a multimeter. This testing procedure will help you identify any issues with the motor and determine if it needs any repairs or replacements.
First, make sure the motor is disconnected from any power source. Then, set your multimeter to the appropriate voltage range and connect the positive and negative probes to the corresponding terminals of the motor.
Apply power to the motor and observe the readings on the multimeter. A healthy motor should show a consistent and stable voltage reading. If the readings are erratic or nonexistent, it indicates a problem with the motor.
Troubleshooting techniques such as checking the wiring and connectors for any signs of wear or corrosion should be performed before concluding that the motor is faulty. If necessary, remove any debris or obstructions from the motor that may be affecting its performance.
If necessary, remove any debris or obstructions from the motor
If needed, you can remove any debris or obstructions from the motor. This is an important step to ensure the optimal performance of your electric bike’s front brushless hub motor. Debris such as dirt, dust, or small rocks can accumulate over time and hinder the motor’s efficiency.
To remove such debris, follow these steps:
- Disconnect the motor from the power source and ensure it is completely powered off.
- Inspect the motor carefully for any visible debris or obstructions.
- Use a soft brush or compressed air to gently remove the debris. Avoid using excessive force to prevent damaging the motor’s delicate components.
Remember to also check the connections of the motor during this process. Loose or faulty connections can lead to poor performance or even motor failure. Ensure that all wires are securely connected and there are no signs of damage or corrosion.
By removing any debris and checking the connections, you can maintain the longevity and efficiency of your electric bike’s front brushless hub motor.
Once this step is complete, you can proceed to the next section on how to apply lubricant to the moving parts of the motor, ensuring smooth operation.
Apply lubricant to the moving parts of the motor
Applying lubricant to the moving parts helps maintain the motor’s performance and ensures smooth operation. Proper lubrication is essential for electric bike motors as it reduces friction, heat, and wear, prolonging the motor’s lifespan.
To effectively lubricate the motor, follow these lubricant application techniques.
First, locate the lubrication points on the motor. These are usually indicated by small holes or gaps in the housing. Use a small applicator, such as a syringe or a precision oiler, to apply the lubricant directly into these points. Be sure to use the appropriate lubricant recommended by the manufacturer for your specific motor.
When applying the lubricant, use a small amount and avoid over-lubricating. Excess lubricant can attract dirt and debris, leading to clogs and reduced performance. Additionally, wipe off any excess lubricant that may have spilled onto the motor housing to prevent accumulation and potential damage.
Once the moving parts are properly lubricated, reassemble the motor cover and secure it with the screws or bolts. This will protect the motor and prevent any contaminants from entering the system.
Reassemble the motor cover and secure it with the screws or bolts
Once the motor cover is reassembled and secured with the screws or bolts, the motor will be fully protected and ready for use. To ensure a proper reassembly, it is important to follow the correct techniques.
First, align the motor cover with the corresponding holes on the motor housing. Take care to position it correctly to avoid any interference with the internal components. Once aligned, insert the screws or bolts into the holes and tighten them securely using a suitable tool. Be cautious not to overtighten, as this may damage the threads or crack the cover.
During the reassembling process, it is essential to troubleshoot any issues that may arise. Check for any loose connections or damaged wires that could affect the motor’s performance. Ensure that all the wires are properly connected and securely fastened. Inspect the motor cover for any signs of damage or wear, and replace it if necessary. Additionally, double-check the alignment of the cover to ensure a snug fit.
By following these reassembling techniques and troubleshooting tips, you can ensure the motor cover is securely in place, providing optimal protection for the motor.
Now, it’s time to reconnect the battery and turn on the electric bike, allowing you to enjoy a smooth and efficient ride.
Reconnect the battery and turn on the electric bike
To power up your e-bike, simply reconnect the battery and flip the switch to turn it on.
Begin by locating the battery compartment, usually located near the rear wheel or on the frame of the bike. Once you have found it, carefully reconnect the battery to its designated connector, ensuring a secure connection. Take note of the polarity markings to ensure correct alignment.
Once the battery is properly connected, locate the power switch, typically located near the handlebars or on the battery itself. Flip the switch to the ‘on’ position. You should hear a faint click or see an indicator light, indicating that the bike is now powered on.
At this point, it is crucial to test the functionality of the e-bike. This can be done by engaging the pedal assist or throttle, depending on the model of your bike. Listen for any unusual sounds or vibrations and observe the response of the motor.
If everything appears to be functioning properly, you can proceed to the next step of testing the motor to ensure it is functioning properly.
Test the motor to ensure it is functioning properly
Make sure you give the motor a quick test by engaging the pedal assist or throttle and observing its response. Before proceeding with the test, it is crucial to inspect the motor connections to ensure they are securely fastened. Start by visually examining the wiring harness and connectors for any signs of damage or loose connections. If any issues are found, carefully reattach or repair the connections as necessary.
To test the motor performance, start by engaging the pedal assist or throttle. Observe how quickly the motor responds to your input. It should kick in smoothly and provide adequate power. Pay attention to any unusual noises or vibrations that may indicate a problem. Additionally, check if the motor is running quietly and without any excessive heat buildup.
If the motor fails to respond or exhibits abnormal behavior during the test, there may be an underlying issue that requires further attention. In such cases, it is recommended to consult a professional for further assistance. They will have the expertise and tools to diagnose and resolve any motor-related problems effectively.
If the issue persists, consult a professional for further assistance
If the issue continues, it’s best for you to seek professional assistance to resolve it. Consulting professionals can provide expert advice and troubleshooting techniques to identify the root cause of the problem and offer appropriate solutions.
Here are some reasons why consulting professionals is crucial:
-
Extensive Knowledge: Professionals have in-depth knowledge and experience with electric bike motors. They can quickly diagnose issues and provide accurate solutions.
-
Specialized Tools: Professionals have access to specialized tools and equipment required for motor troubleshooting. This ensures that the problem is addressed efficiently and effectively.
-
Warranty Considerations: Seeking professional assistance can help preserve any warranties on your electric bike. Attempting to fix the issue yourself may void the warranty, resulting in additional costs.
-
Safety Concerns: Electric bike motors involve electrical components that can be dangerous if mishandled. Professionals are trained to handle these components safely, minimizing the risk of injury.
Regularly maintain and inspect the motor to prevent future issues
Regularly maintaining and inspecting the motor ensures optimal performance and prevents future issues. Motor maintenance is essential for the longevity and efficiency of your electric bike. Here are some troubleshooting tips to keep your motor running smoothly.
First, start by inspecting the motor housing for any signs of damage or loose connections. Check the wires and connectors for any fraying or corrosion. Ensure that all the bolts and screws are properly tightened.
Next, clean the motor regularly to remove any dirt or debris that may affect its performance. Use a soft brush or cloth to gently wipe away any build-up on the motor and surrounding areas. Avoid using water or harsh cleaning chemicals that could damage the motor.
Additionally, check the motor’s bearings for any signs of wear or damage. Spin the wheel and listen for any unusual noises or vibrations. If you notice anything out of the ordinary, it may indicate a problem with the bearings that should be addressed promptly.
Finally, lubricate the motor’s moving parts, such as the gears and chain, to reduce friction and ensure smooth operation. Use a lubricant specifically designed for electric bike motors and follow the manufacturer’s recommendations.
Frequently Asked Questions
How do I know if my electric bike’s front brushless hub motor is damaged?
To determine if your electric bike’s front brushless hub motor is damaged, troubleshoot common issues such as unusual noises, loss of power, or overheating. Regular maintenance, including cleaning, lubricating, and inspecting for any visible damage, can help prolong its lifespan.
Can I use any type of lubricant on the moving parts of the motor?
I wouldn’t recommend using just any type of lubricant on the moving parts of the motor. Proper lubrication techniques are crucial for electric bike motors. Avoid common maintenance mistakes to ensure optimal performance and longevity.
Is it necessary to disconnect the battery before opening the motor cover?
Yes, it is absolutely necessary to disconnect the battery before attempting to remove the motor cover. This ensures battery safety and prevents any accidental electrical discharge that could potentially cause harm or damage to the motor.
What type of multimeter should I use to test the motor’s functionality?
To test the motor’s functionality, I recommend using a digital multimeter with a high voltage range. It’s crucial to regularly maintain electric bike motors to ensure optimal performance. Different types of motor controllers are available for electric bikes, each with their own advantages and features.
What should I do if I encounter any difficulties during the reassembly process?
If I encounter any difficulties during the reassembly process, I should follow these troubleshooting tips: double-check all connections, ensure proper alignment of components, refer to the user manual for guidance, and seek professional assistance if needed.
Conclusion
In conclusion, opening the front brushless hub motor of an electric bike requires the right tools, caution, and proper maintenance. By following the steps outlined above, you can easily access and inspect the motor for any issues.
Remember to always disconnect the battery and consult a professional if needed. Maintaining and regularly inspecting the motor will ensure its optimal performance and prevent future problems.
So, gear up and dive into the world of electric bike maintenance, for a smooth and efficient ride awaits!