You might be thinking, “Getting a bike ready for air travel? That seems like a huge challenge.”
And you’d be correct – it might seem intimidating initially. However, as a person who often flies with their bike, I can guarantee that it becomes quite straightforward with the appropriate gear and procedures.
Whether you’re a seasoned cyclist or just starting out, traveling with your bike can be a great way to explore new places and participate in events. But before you can hit the road (or trail), you’ll need to properly pack your bike for the flight.
In this article, I’ll guide you through the process step-by-step, from gathering the necessary equipment to checking in your bike at the airport. So let’s get started and get your bike ready for takeoff.
Key Takeaways
- A sturdy bike box or case and appropriate packaging materials are necessary to protect the bike from damage during transit.
- Fragile components should be wrapped in bubble wrap or foam padding, and the handlebars can be removed or turned sideways to reduce the overall size of the package.
- Proper labeling and communication with the airline, as well as understanding their policies regarding bike transportation, are important for a smoother travel experience.
- Inspecting and documenting any damage, as well as performing necessary maintenance, before and after packing the bike will ensure it arrives at the destination in top working condition.
Gather the Necessary Equipment
You’ll need to grab some gear to make sure your bike stays safe and sound during your flight, so don’t forget to double check your list!
The first step is choosing equipment that will protect your bike from damage. A sturdy bike box or case is essential, and make sure it’s the right size for your bike. You don’t want your bike rattling around inside the box during the flight.
Some bike boxes come with additional padding, but if yours doesn’t, you’ll need to purchase packing materials such as foam tubing, bubble wrap, and zip ties. These materials will help cushion your bike and keep the parts secure.
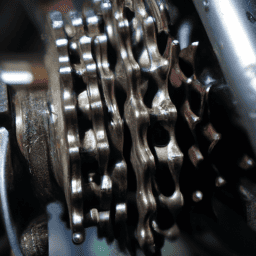
Once you have your packing materials, it’s time to prepare your bike for packing. Start by removing the pedals and the handlebars. If you have a carbon bike, it’s important to use a torque wrench to avoid damaging the frame. Loosen the stem bolts and rotate the handlebars 90 degrees, then tighten the bolts again.
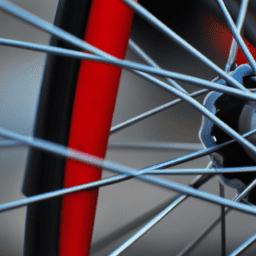
Next, remove the wheels. Deflate the tires slightly and pack them separately in padded wheel bags. Finally, protect the frame with foam tubing and bubble wrap, securing everything with zip ties.
With the right equipment and preparation, your bike will arrive at its destination in perfect condition.
Prepare Your Bike for Packing
Before taking to the skies, make sure your trusty two-wheeler is in tip-top shape with a few easy steps. Firstly, give your bike a thorough cleaning to remove any dirt or grime that might have accumulated during your last ride. This will not only make your bike look shiny and new but also prevent any potential damage to your bike during transit.
To do this, use a gentle soap and water to clean the frame, wheels, and other parts of your bike. Avoid using high-pressure water or harsh chemicals as they can damage the bike’s paint and components. Secondly, perform a quick maintenance check to ensure everything is working correctly. Check the brakes, gears, chain, and tires for any signs of wear and tear.
Replace any damaged parts or worn-out tires before packing your bike for a flight. It’s also a good idea to lubricate the chain and other moving parts to prevent rust and ensure everything runs smoothly during transit. Finally, remove any accessories such as water bottles, lights, and pedals, and pack them separately.
This will not only make your bike easier to pack but also prevent any damage to the bike or accessories. With your bike clean and in top condition, it’s time to pack it for your flight.
Pack Your Bike
Now that your bike is clean and in great condition, it’s time to start fitting it into a proper travel case. Choosing appropriate packaging is key to ensuring that your bike arrives at your destination intact.
There are several options available, including hard-shell cases, soft-shell cases, and cardboard bike boxes. Hard-shell cases offer the most protection but can be heavy and bulky, while soft-shell cases are lighter and easier to manage but may not offer as much protection. Cardboard bike boxes are a budget-friendly option but may not withstand rough handling during transit.
Once you have chosen your packaging, it’s important to secure fragile components such as the derailleur, handlebars, pedals, and wheels. These can be wrapped in bubble wrap or foam padding to prevent damage. Remove the pedals and wheels and securely fasten them to the frame using zip ties or straps.
Consider removing the handlebars or turning them sideways to reduce the overall size of the package. Finally, fill any empty spaces with padding or clothing to prevent the bike from shifting during transit. With these steps, your bike should be ready for travel.
Now it’s time to label and check-in your bike before your flight.
Label and Check-In Your Bike
When it comes to traveling with my bike, labeling and checking in my bike box or bag is crucial. I always make sure to attach a label with my name, address, and flight information to the outside of the box.
At the airport, I go to the oversized baggage check-in area to drop off my bike and notify the airline that I’m checking in a bike. This ensures that my bike is handled properly and arrives at my destination safely.
Label Your Bike Box or Bag
Don’t be that person who shows up to the airport with an unmarked bike box and expects it to magically make it to your destination without any issues. Label your damn box or bag, or prepare to spend your vacation rental budget on a new bike.
When it comes to labeling your bike box or bag for a flight, there are a few tips to keep in mind. First and foremost, make sure to include your contact information on the box or bag. This should include your name, phone number, and email address.
Additionally, it’s important to include handling instructions on the box or bag. This can include phrases like ‘Fragile – Handle with Care’ or ‘This Side Up’. Proper labeling can prevent mishandling and damage during transit, so take the time to make sure your box or bag is clearly labeled before heading to the airport.
With your bike properly labeled, you can now move on to the next step: checking it in at the airport.
Check-In Your Bike at the Airport
Ready to jet off on your next adventure with your trusty two-wheeler? Let’s talk about how to check in your bike at the airport.
Before heading to the airport, make sure you know the specific airport logistics for checking in a bike. Some airports require you to go to a specific counter or area to check in oversized baggage, while others may require you to drop off your bike at a separate location. Additionally, be aware of any baggage fees that may apply to checking in your bike. Some airlines may charge an extra fee for oversized or overweight items, so it’s important to know the airline’s policy beforehand.
Once you arrive at the airport, make sure your bike is securely packed in a bike box or bag. Take your bike to the appropriate check-in location and inform the airline representative that you will be checking in a bike. They will then weigh your bike and calculate any additional fees that may apply.
After paying any necessary fees, the airline will provide you with a baggage tag that you will need to attach to your bike box or bag. From there, you can proceed to your gate and prepare for your flight. Don’t forget to notify the airline of your bike in advance to ensure a smooth check-in process.
Notify the Airline of Your Bike
First things first, make sure to inform the airline about your trusty steed to avoid any hiccups on your journey. Most airlines require prior notification if you plan to travel with your bike. This is important to ensure that the airline has ample space for your bike on the flight, and to avoid any surprises or additional fees at the airport.
When notifying the airline, it’s important to provide accurate and detailed information about your bike, such as its size, weight, and any additional accessories that may be included. Communication strategy is key when it comes to packing and traveling with your bike.
Make sure to read and understand the airline’s policies regarding bike transportation, and communicate any concerns or questions you may have. Remember to ask about any fees, restrictions, or special requirements, and make sure you have the necessary documentation and packaging materials.
By notifying the airline and communicating effectively, you can ensure a smoother travel experience for both you and your bike. With that said, let’s move on to the next step: unpacking your bike.
Unpacking Your Bike
Now that I’ve arrived at my destination after packing my bike for the flight, it’s time to unpack it and get ready for my cycling adventure!
The first thing I need to do is inspect my bike for any damage that may have occurred during the flight. Once I’m sure everything is okay, I’ll reassemble my bike and then I can finally hit the road and enjoy my cycling adventure!
Inspect Your Bike for Damage
Before you start packing, take a moment to inspect your bike for any damage. Check for scratches, dents, or any other signs of wear and tear. If you notice any damage, take note of it and document it with photos. This will be helpful if you need to file a claim with the airline later on.
It’s important to thoroughly inspect your bike before packing it for a flight because damage can easily occur during transport. Even small scratches or dents can compromise the structural integrity of your bike, so it’s better to be safe than sorry.
Once you’ve inspected your bike and documented any damage, you can move on to the next step of reassembling your bike for packing.
Reassemble Your Bike
You’ll want to put your trusty two-wheeled companion back together before securing it for travel. Once you’ve inspected for any damage, it’s time for reassembly. Start by properly lubricating all moving parts such as the chain, derailleur, and brakes. This will ensure that your bike is in top working condition when you arrive at your destination.
Next, inflate your tires to the recommended pressure level. This will not only ensure a smooth and efficient ride, but also prevent any damage to the rims during travel. Finally, clean and perform any necessary maintenance before storing your bike for the long term. This will keep your bike in great condition for future cycling adventures. With your bike reassembled and maintained, you’ll be ready to enjoy your cycling adventure!
Enjoy Your Cycling Adventure!
Hop on your trusty bike, feel the wind in your hair, and explore the scenic routes ahead on your cycling adventure!
But before you set off, make sure to pack your bike properly for the flight. Choosing the right bike bag is essential to keeping your bike safe and secure during transport. Look for a bag that’s durable, has a hard case, and offers ample padding to protect your bike from any bumps or scratches. There are many great options available, so take the time to research and find the one that best suits your needs.
Traveling with your bike has many benefits, including being able to ride on familiar equipment and exploring new terrain. But it can also be a bit nerve-wracking, especially when it comes to packing and transporting your bike. That’s why it’s important to follow the proper guidelines and take the necessary precautions.
With the right bike bag and packing techniques, you can rest easy knowing your bike will arrive at your destination unscathed and ready for your next cycling adventure. So, grab your bike bag, hit the road, and enjoy the ride!
Frequently Asked Questions
Are there any specific airlines that allow bicycles to be checked in as regular baggage?
I’ve found that several airlines allow bicycles to be checked in as regular baggage, including Delta, American Airlines, and United. Additionally, some airlines offer bike packing services for an additional fee, such as BikeFlights and ShipBikes.
How should I pack accessories such as pedals, bottle cages, and handlebar tape?
Securing pedals & cages, protecting handlebar tape: Tips for packing bike accessories. To avoid damaging these parts, remove and pack them separately. Alternatives to packing accessories include renting or shipping them separately. As an experienced cyclist, I’ve learned how to protect my gear during travel.
Should I deflate my tires before packing my bike?
Deflating tires is recommended to prevent pressure changes during air travel and minimize the risk of damage to the wheels. However, it may impact bike components. Alternatives include reducing tire pressure to recommended levels. Secure the bike inside the box with padding and minimize movement. Use zip ties or straps.
Is it necessary to purchase a special bike box or can I use a regular cardboard box?
Honestly, a cardboard box won’t cut it. I’ve learned the hard way. The benefits of using a bike box include added protection, secure fit, and peace of mind. Properly secure the frame with padding and disassemble components.
Will I need any tools on hand when unpacking my bike at my destination?
Tools needed for unpacking my bike at my destination include a set of Allen keys, pedal wrench, and tire levers. The unpacking process involves removing the pedals, handlebars, wheels, and seat post before reassembling the bike.
Conclusion
In conclusion, packing a bicycle for a flight may seem daunting at first, but with the right equipment and preparation, it can be done efficiently and safely. As an experienced cyclist who’s traveled with my bike multiple times, I can attest to the importance of properly packing it to ensure it arrives at your destination in one piece.
According to a recent survey, the number of people traveling with their bikes has increased by 20% in the past year. This means that more and more people are discovering the joys of exploring new places on two wheels and are willing to go the extra mile to take their bikes with them.
So, if you’re one of those people who can’t imagine going on a trip without your trusty bicycle, don’t let the fear of packing it for a flight hold you back. With the right mindset and tools, you’ll be able to enjoy the ride wherever you go.