As a keen cyclist with a passion for traveling, I’m well-acquainted with the critical nature of understanding the process of packing a bicycle for air travel. Entrusting your prized bicycle to others can be anxiety-inducing, yet, equipped with the proper know-how and equipment, you can guarantee the safe and intact arrival of your bike at your intended location.
Before you even begin disassembling your bike, it’s crucial to check your airline’s policies regarding bike transportation. Each airline has its own rules and fees, so make sure to do your research well in advance.
Additionally, you’ll need to gather the necessary tools and materials, such as a bike box or bag, packing materials, and tools for disassembly. With these things in hand, you’ll be ready to take on the task of packing your bike for a flight.
Key Takeaways
- Research airline policies and fees well in advance and follow their rules and restrictions
- Invest in a durable bike case or bag and use packing materials to protect the bike during travel
- Properly disassemble and label bike parts before packing, and reassemble the bike correctly after the flight
- Remove any accessories before packing and store them separately, labeling the bike case or bag with name, contact info, and flight details.

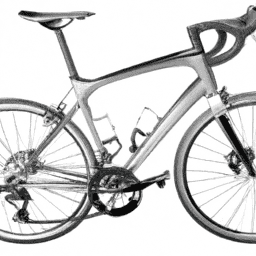
Schwinn Sporterra RX Gravel Bike, 700c Mens and Womens Bike, 14-Speed Drop Bar Gravel Bicycle, Mechanical Disc Brakes, Rigid Fork, Aerodynamic Riding Position, Quick Release Seat Post, Adult Bicycle
GRAVEL BICYCLE: Enjoy next level riding with the Sporterra RX by Schwinn. With 700c wheels, this mens and...
As an affiliate, we earn on qualifying purchases.
Check Your Airline’s Policies
You’ll wanna check your airline’s policies before ya start packin’ up your bike, just to make sure ya meet all their requirements. This is an important step that should not be overlooked.
Airlines often have specific guidelines when it comes to flying with bicycles. Some may require that you remove the pedals and handlebars, while others may have restrictions on the size and weight of the bike. Navigating these restrictions can be challenging, but by doing your research early, you can avoid any surprises at the airport.
Once you’ve familiarized yourself with your airline’s policies, it’s time to gather the necessary tools to pack your bike. This may include a bike box or bag, packing tape, and padding material such as bubble wrap or foam. It’s important to make sure you have everything you need before you start packing.
This will ensure that the process goes smoothly, and you don’t forget anything important.

monTEK Swivel Bike Wall Mount, Bike Hangers for Garage, Space-Saving Vertical Bike Rack, Sturdy Bike Storage Rack Holds Up to 66lbs, Easy to Install, 4 Pack
【Strong, Safe & Secure】 monTEK bike wall mount is made of heavy-duty solid steel are able to hang...
As an affiliate, we earn on qualifying purchases.
Gather the Necessary Tools
Before taking off, make sure you’ve got the right tools on hand to ensure a smooth travel experience. As an experienced traveler with my bike, I can attest that having the proper tools is essential. When packing your bike, you need to have a few essential accessories and bike-specific packing supplies.
To start with, you need a good quality bike box or bag. This will protect your bike from any damage during the flight. You can either purchase a bike box or bag from a bike shop or rent one from an airport or shipping company. Additionally, you will need a few bike-specific packing supplies such as bubble wrap, foam padding, and zip ties. These supplies will help you protect your bike’s delicate parts such as the derailleur, handlebars, and wheels. Here is a table that lists some of the essential accessories and bike-specific packing supplies you should have on hand:
| Essential Accessories | Bike-Specific Packing Supplies |
|---|---|
| Bike Box or Bag | Bubble Wrap |
| Zip Ties | Foam Padding |
| Allen Wrench Set | Pedal Wrench |
| Pliers | Wheel Skewers |
Having the right tools will make it easier and faster to pack your bike. In the next section, we will discuss how to disassemble your bike, which is the next step in preparing your bike for travel.

monTEK Swivel Bike Wall Mount, Bike Hangers for Garage, Space-Saving Vertical Bike Rack, Sturdy Bike Storage Rack Holds Up to 66lbs, Easy to Install, Black
【Strong, Safe & Secure】 MONTEK bike wall mount is made of heavy-duty solid steel are able to hang...
As an affiliate, we earn on qualifying purchases.
Disassemble Your Bike
Now it’s time to break down your trusty ride into pieces that fit in a box or bag, so you can take it with you wherever you go.
The first thing you need to do is remove the pedals, which are usually attached with a 15mm wrench. Remember, the right pedal is removed counterclockwise, while the left pedal is removed clockwise.
After that, loosen the stem bolt and remove the handlebars, taking care to keep the cables and housing intact. You can either leave the stem attached to the fork or remove it, depending on the size of your bag or box.
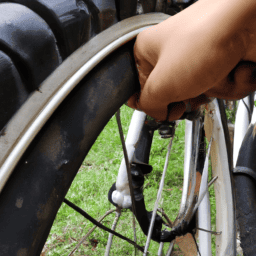
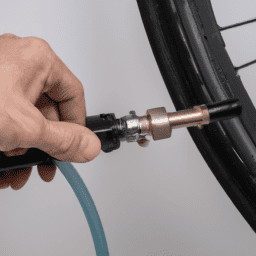
Next, remove the wheels by releasing the quick release levers or loosening the axle nuts with a wrench. Make sure to deflate the tires and remove them from the rims. If you have disc brakes, you may need to remove the rotors as well.
Finally, remove the seatpost and saddle, and wrap them separately to prevent damage.
Once you have disassembled your bike, make sure to label each part and keep them organized, so you can properly reassemble it later. If you’re not confident in your skills, consider asking for bike shop assistance before your trip.
With your bike disassembled, it’s time to pack it for your flight. But before we get into that, it’s important to note that proper reassembly is crucial to ensure your bike functions safely and correctly.
In the next section, we’ll discuss how to pack your bike and provide tips for reassembling it once you reach your destination.

monTEK Swivel Bike Wall Mount, Bike Hangers for Garage, Space-Saving Vertical Bike Rack, Sturdy Bike Storage Rack Holds Up to 66lbs, Easy to Install, 2 Pack
【Strong, Safe & Secure】 monTEK bike wall mount is made of heavy-duty solid steel are able to hang...
As an affiliate, we earn on qualifying purchases.
Pack Your Bike
Once disassembled, you’ll want to protect your bike parts from damage during transport. Bike protection is essential to ensure your beloved two-wheeler arrives at your destination in one piece. There are several packing materials you can use to keep your bike safe, such as foam tubing, bubble wrap, and packing peanuts.
To pack your bike, you’ll need to consider storage options for all the disassembled parts. Use a sturdy box that is slightly larger than your bike frame, and make sure it is properly labeled with your contact information and destination address. When packing the box, place the heavier parts at the bottom, and secure them with packing peanuts or foam tubing. Next, add the frame and fork, and wrap them in bubble wrap or foam tubing. Finally, add the wheels and any additional accessories, such as pedals or saddlebags, and fill any remaining space with packing materials. After the flight, be sure to assemble your bike carefully and properly to avoid any damage during post-flight assembly.
With these packing tips in mind, you can have peace of mind knowing that your bike is well-protected for its journey. For more tips on how to have a stress-free flight with your bike, read on.
Tips for a Stress-Free Flight
To make your travel experience less stressful, you might want to consider these helpful tips for flying with your bike.
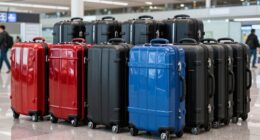
First and foremost, bike protection is crucial. Make sure to invest in a durable bike case or bag that can withstand the rigors of air travel. Some popular options include hard-shell cases, soft-shell cases, and bike bags. Whichever option you choose, make sure it has enough padding to protect your bike from scratches, dings, and other damage.
Secondly, think about storage solutions. Before packing your bike, remove any accessories such as pedals, handlebars, and seat post. These items can be packed separately or stored inside the bike case. Furthermore, consider investing in bubble wrap or foam padding to add an extra layer of protection.
Finally, label your bike case or bag with your name, contact information, and flight details to ensure that it arrives at your destination with you. By following these tips, you can enjoy a stress-free flight with your bike and arrive at your destination ready to ride.
- Invest in a durable bike case or bag
- Remove any accessories and store them separately
- Consider using bubble wrap or foam padding
- Label your bike case or bag with your name and flight details
- Pack your bike in an organized and efficient manner.
Frequently Asked Questions
Can I bring spare parts or tools in my carry-on luggage?
Yes, you can bring spare parts and tools in your carry-on luggage. However, be aware of carry on restrictions and pack accordingly. Use a small tool kit and avoid sharp objects. Ensure everything is secure and won’t shift during the flight.
What is the weight limit for a bike when checking it in for a flight?
The weight limit for a bike when checking it in for a flight depends on the airline regulations. However, it’s essential to factor in the weight of the packing materials used, so the bike doesn’t exceed the limit.
Do I need to remove the pedals before disassembling my bike?
When disassembling my bike for travel, I find it necessary to remove the pedals in order to make packing easier. The best disassembly method is to use a pedal wrench and turn counter-clockwise.
How far in advance should I start packing my bike before my flight?
Based on my experience, I suggest starting to disassemble your bike at least 2-3 days before your flight. This will give you time to properly pack your bike and make any necessary adjustments. Remember to follow proper disassembly techniques and use protective padding to prevent damage to delicate components.
Can I use a soft bike bag instead of a hard case for packing my bike?
I prefer using a hard case, but soft bike bag alternatives are lighter and easier to store. They offer less protection and require more disassembly. Secure the bike to prevent shifting and damage during flight.
Conclusion
Well folks, that’s all there is to it! Packing a bicycle for a flight may seem daunting at first, but with the right tools and a bit of know-how, it’s a breeze.
Just remember to check your airline’s policies before you start, and gather all the necessary tools and materials.
Disassembling your bike may take some time and effort, but trust me, it’s worth it to ensure that your trusty steed arrives at your destination unscathed.
And when it comes to packing your bike, take your time and be patient. Remember, a well-packed bike is a happy bike.
So go forth and conquer the skies, my fellow cyclists! With these tips and tricks, your bike will be soaring through the clouds in no time. And who knows, maybe your next adventure awaits on the other side of that flight.
Happy travels!