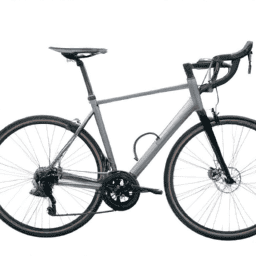
So, you own a bicycle that has certainly looked better and you’re interested in refreshing its appearance with a new paint job.
Or, maybe you want to add a personal touch to your ride and make it truly one-of-a-kind.
Whatever your motivation may be, painting a bicycle frame is a great way to achieve your desired result.
Before you get started, make sure you have all the necessary materials, such as sandpaper, primer, paint, and clear coat.
Once you have everything you need, it’s time to prepare the bike frame by removing any components that could get in the way and sanding down the existing paint to create a smooth surface.
From there, it’s all about applying the paint and adding any custom touches you desire.
With a little patience and attention to detail, you can have a freshly-painted bike that looks as good as new.
Key Takeaways
- Choose the appropriate paint type and color that complements the bike style.
- Properly prepare the frame by sanding, cleaning, and applying primer before painting.
- Use long, even strokes to apply paint and allow it to dry completely before applying a second coat.
- Reassemble the bike parts carefully and with proper lubrication, and perform regular post-assembly maintenance to keep the bike in top condition.
Gather Your Materials
Now that you’ve decided to paint your bike, you’ll need to gather all the materials you’ll need to get the job done. Start by choosing the colors you want to use and the type of paint you prefer.
There are various types of paint that are suitable for painting bike frames, such as enamel, acrylic, and powder coating. Each type has its advantages and disadvantages, so it’s best to research and choose the one that suits your needs and preferences.
Aside from paint, you’ll also need other materials such as sandpaper, masking tape, primer, and clear coat. Sandpaper will help you remove any old paint or rust on the bike frame, while masking tape will aid you in covering any parts you don’t want to be painted.
Primer will help the paint stick to the frame and provide a smooth surface for the paint to adhere to. Lastly, clear coat will protect the paint from scratches and fading.
Once you have all the materials, you can move on to preparing the bike frame for painting.
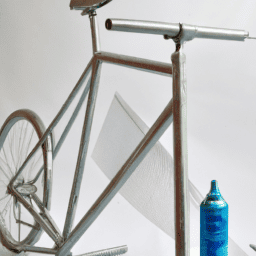
Prepare the Bike Frame
Before you begin, make sure to thoroughly clean and sand all surfaces to ensure a smooth and even finish. Start by removing any dirt, grease, or stickers from the bike frame using a degreaser, soap, and water. Dry the frame completely before moving on to the next step.
Once the frame is clean, use sandpaper with a grit of 220 to 400 to sand the surface. Sanding will help the new paint adhere better and create a smoother finish. Pay special attention to any rough spots or areas where the old paint is chipping away.
After sanding, wipe down the frame with a clean rag to remove any dust or debris. Cleanliness tips: Wear gloves and a mask to protect yourself from the fumes and particles. Sand in a well-ventilated area to minimize inhalation of dust.
- Clean the frame thoroughly before sanding.
- Use a degreaser to remove any dirt or grease.
- Dry the frame completely before sanding.
- Sand the frame with sandpaper of 220 to 400 grit.
Now that the frame is clean and sanded, it’s time to move on to the next step: applying the paint.
Apply the Paint
As you begin to add color to your two-wheeled masterpiece, imagine a blank canvas coming to life with every stroke of the brush. To achieve a smooth and even finish, it’s important to use proper painting techniques.
Start by applying a primer to the clean and dry frame, which’ll help the paint adhere better and prevent rust. Once the primer has dried, you can begin to apply the color of your choice.
When selecting a paint color, consider the overall aesthetic of your bike and choose a shade that complements its style. You can also opt for a glossy or matte finish, depending on your preference.
To apply the paint, use long, even strokes and make sure to cover the entire surface of the frame. Allow the paint to dry completely before applying a second coat, if necessary.
Once you’re satisfied with the color and finish, you can move on to adding custom touches to really make your bike stand out.
Add Custom Touches
To elevate the overall look of your ride, you may want to consider personalizing it with unique and custom touches. One way to do this is by adding custom decals to your bicycle frame. You can design and create your own decals with a vinyl cutter or purchase pre-made decals online.
Applying them is simple and can be done after the paint has dried. Make sure to clean the surface of the frame before applying the decals to ensure they stick properly.
Another way to add custom touches is by using spray paint techniques. You can use stencils, masking tape, or freehand to create unique designs and patterns on your frame. Experiment with different colors and techniques, such as fade effects or splatter paint, to achieve your desired look.
Remember to use a clear coat after the paint has dried to protect your design and ensure it lasts. Once you’ve added your custom touches, it’s time to move on to reassembling your bike.
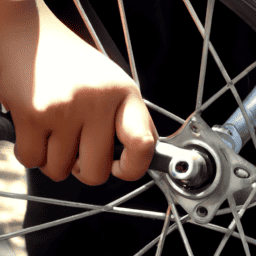
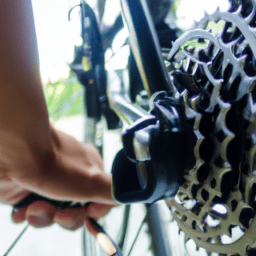
Reassemble the Bike
Now that all the parts are clean and dry, it’s time to put them back together, creating the perfect ride for your next adventure. Reassembling the bike may seem like a daunting task, but with a bit of patience and attention to detail, you can do it in no time. Start by laying out all the parts in an orderly manner, using a workbench or a clean surface to prevent any damage or loss of parts.
Before assembling, it’s crucial to perform a quick inspection of all the parts, checking for any damages or signs of wear and tear. Pay close attention to the frame, fork, and wheels, as these are the parts that undergo the most stress during your ride. Once you’re satisfied that everything is in good condition, it’s time to start assembling. Refer to the table below for a step-by-step guide on how to reassemble your bike. Remember to use proper lubrication on all the moving parts and to tighten all bolts and screws to their recommended torque settings. Once you’re done, take your bike for a short test ride, checking for any issues or loose parts. Finally, don’t forget to perform post-assembly maintenance regularly and apply rust prevention to keep your bike in top condition.
| Step | Action | Tools Required |
|---|---|---|
| 1. | Install the headset | Headset press, grease |
| 2. | Install the fork | Crown race setter, star nut setter, grease |
| 3. | Install the bottom bracket | Bottom bracket tool, grease |
| 4. | Install the crankset | Allen key, torque wrench |
| 5. | Install the front derailleur | Allen key |
| 6. | Install the rear derailleur | Allen key |
| 7. | Install the cassette | Cassette tool, chain whip, torque wrench |
| 8. | Install the wheels | Quick-release skewer, tire lever |
| 9. | Install the brakes | Allen key, torque wrench |
| 10. | Install the handlebars | Allen key, torque wrench |
| 11. | Install the saddle | Allen key |
| 12. | Adjust the brakes and derailleurs | Allen key, screwdriver, torque wrench |
Frequently Asked Questions
How do I choose the right type of paint for my bicycle frame?
When choosing paint for your bicycle frame, consider the application method. Spray paint is easier for even coverage, while brush application allows for more precision. Matte finishes hide imperfections, whereas glossy finishes show them.
Can I paint my bicycle frame without disassembling it?
"Before painting, consider pros and cons of disassembling the frame. If not, mask off parts to prevent paint from getting on them. Use painter’s tape and plastic bags. Don’t rush and take your time." ‘Ensuring a clean and smooth painting surface will result in a more professional and long-lasting finish.’
How long does the paint need to dry before I can ride my bike again?
After prepping the bike for paint, you’ll need to wait at least 24 hours before riding. Best paint brands offer quick-drying formulas, but avoid rushing the process. Warm, dry conditions will help the paint cure properly.
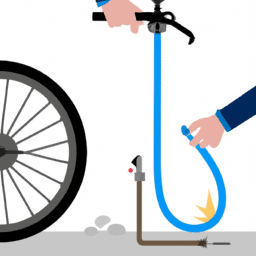
What safety precautions should I take when painting my bicycle frame?
Did you know that inhaling paint fumes can cause headaches, dizziness, and even nausea? That’s why it’s important to wear protective gear and work in a well-ventilated area when painting your bicycle frame. Don’t take any chances with your health.
Can I paint over rust on my bicycle frame?
Yes, you can paint over rust on your bicycle frame, but it is important to remove the rust first. Use rust removal techniques and apply a primer specifically designed for rusty surfaces before painting.
Conclusion
Congratulations, you did it! You’ve successfully painted your bicycle frame and transformed your ride into a unique masterpiece. Your bike is now the envy of all your friends and strangers passing by on the street.
Not only does it look great, but it also has a fresh layer of protection against the elements. As you ride your newly painted bike, you can’t help but feel like a pro cyclist, even if you’re just cruising around town.
The attention to detail and custom touches you added truly set your bike apart from the rest. You feel confident and proud as you ride, knowing that you put in the time and effort to create something special.
So go ahead, show off your new ride and let others know how you achieved this stunning look. Share your newfound knowledge and encourage others to take on the challenge of painting their own bike frames.
Who knows, maybe you’ll start a trend and soon everyone will be riding around on their own custom painted bikes. But for now, enjoy the feeling of accomplishment and the satisfaction of a job well done. Happy riding!