I’ve always had a passion for personalizing my bike to really make it reflect my personal style. A simple and cost-effective method to achieve this is through painting the bike rims.
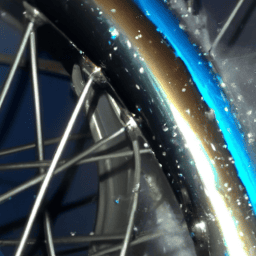
Not only does it give your bike a new look, but it also protects the rims from rust and corrosion.
Before you start painting, it’s important to choose the right paint and supplies for the job. You’ll need to prepare the rims properly to ensure the paint adheres properly, and then apply the paint in a methodical and careful manner.
In this article, I’ll guide you through the steps to paint your bicycle rims, so you can give your bike a fresh new look and ride in style.
Key Takeaways
- Choosing the right paint and supplies is crucial for a successful painting process
- Proper preparation of the bicycle rim, including cleaning and sanding, is necessary for a smooth finish
- Applying primer is necessary for rims with rust or chipping paint, and imperfections should be sanded down and covered with additional coats
- Proper drying and curing time is necessary to avoid cracking, peeling, or bubbling, and the rim should be completely dry and cured before reinstalling.
Choose Your Paint and Supplies
Let’s start by figuring out what you’ll need to get the job done right. First, you’ll need to choose your paint and supplies.
You can either use spray paint or brush paint. Spray paint is a popular choice because it’s quick and easy to use. However, it’s important to note that spray paint can be messy and it’s not as precise as brush paint. Brush paint, on the other hand, allows for more control and precision. It’s also a good choice if you want to use multiple colors or create designs on your bicycle rim.
Another thing to consider is the finish of the paint. You can choose between matte or glossy finish. Matte finish is a popular choice because it gives a more subtle and understated look. It’s also good for hiding imperfections on the surface of the rim. Glossy finish, on the other hand, adds shine and makes the color pop. It’s a good choice if you want a more eye-catching look.
Once you’ve chosen your paint and finish, it’s time to prepare your bicycle rim for painting.
Prepare Your Bicycle Rim
Before you can give your trusty steed a shining new coat of armor, you must first strip away any layers of rust or grime that have been clinging to its sturdy shield.
The first step in preparing your bicycle rim is to clean it thoroughly. You can use a variety of cleaning solutions, such as dish soap or degreaser, to remove any oil or dirt that has accumulated on the rim. Once the rim is clean, you must dry it completely before moving on to the next step.
Next, you need to rough up the surface of the rim using sandpaper. Sandpaper grit is measured in numbers, with higher numbers indicating a finer grit. For this task, you’ll need sandpaper with a grit between 60 and 80. You should use the sandpaper to gently sand the entire surface of the rim until it’s smooth and even. Be sure to remove any rough spots or burrs that may be present. Once the rim has been sanded, it’s ready for the next step – applying the paint.
Apply the Paint
Before applying the paint to my bicycle rim, I need to make sure that the surface is properly prepared and primed if necessary.
Once the preparation is complete, I’ll start by applying the base coat, which will serve as the foundation for the final color.
After the base coat is dry, I’ll then apply the top coat, which will give my rim its desired color and finish.
Applying Primer (if necessary)
If the rim has any rust or chipping paint, sand it down before applying primer so that the surface is smooth and ready for a fresh coat of paint. Once the rim is sanded, clean it thoroughly with soap and water to remove any dust or debris.
Now it’s time to apply the primer. Here are some tips to keep in mind when applying primer:
-
Choose the right type of primer for your rim. There are different types of primers available, such as self-etching primer, high-build primer, and epoxy primer. Each type has its own unique properties and is designed for specific surfaces. Check the label to make sure you’re using the right primer for your rim.
-
Apply the primer in thin, even coats. Don’t try to apply too much at once, or you’ll end up with drips and uneven spots. Instead, spray on a thin coat, let it dry, and then apply another coat. Repeat until you have full coverage.
-
Troubleshoot any problems as you go. If you notice any bubbles, drips, or other imperfections in the primer, sand them down and apply another coat. It’s better to take your time and get it right than to rush through the process and end up with a shoddy paint job.
With the primer applied, you’re now ready to move on to the next step of painting your bicycle rim: applying the base coat.
Applying the Base Coat
Now it’s time to start slathering on the base coat to give your ride a sleek and polished look! But before you begin, it’s important to consider two key factors: color selection and paint thickness. The color you choose will greatly impact the overall appearance of your bike, so take some time to consider your options. Do you want a bold and eye-catching color, or something more subtle and classic? Whatever you choose, make sure it complements the rest of your bike’s design.
Once you have your color selected, it’s time to start applying the base coat. Use the table below as a guide for the recommended paint thickness for your specific type of paint. It’s important to apply the paint evenly and smoothly, using long, even strokes. Be sure to cover all areas of the rim, and allow the paint to dry completely before moving on to the next step. With the right color and the right paint thickness, your bike will look as good as new!
| Type of Paint | Recommended Paint Thickness |
|---|---|
| Spray Paint | 2-3 coats, 8-12 inches away from surface |
| Brush-On Paint | 2-3 coats, 1-2 hours between coats |
| Powder Coat | 1 coat, professionally applied |
With the base coat applied, it’s time to move on to the final step: applying the top coat. This will protect the base coat and give your bike an extra glossy finish.
Applying the Top Coat
To give your ride an extra layer of protection and shine, you’ll want to apply a top coat that’s as smooth as a freshly waxed car. Begin by stirring the paint well and pouring it into a paint tray.
Using a clean paintbrush, carefully apply the top coat to the rim in thin, even strokes. Be sure to overlap each stroke slightly to ensure complete coverage. Avoid overbrushing or applying too much pressure, as this can cause bubbles or streaks in the finish.
Technique tips include using a high-quality brush and starting at the center of the rim and working outward. Troubleshooting tips include lightly sanding any imperfections before applying the top coat and using a tack cloth to remove any dust or debris.
Once the top coat is applied, allow it to dry for at least 24 hours before handling the rim. This will ensure proper curing and a long-lasting finish.
Allow Time for Drying and Curing
After applying the final coat of paint, make sure to give the rim plenty of time to dry and cure before handling it. Proper drying and curing will help ensure that the paint adheres properly to the surface of the rim and provides the desired finish. There are several drying techniques and curing methods that you can use to achieve the best results.
One effective drying technique is air drying. Simply place the rim in a well-ventilated area and let it dry naturally. For faster drying, you can use a fan or hair dryer on a low setting. When it comes to curing, heat curing is the most effective method. You can use an oven or heat gun to cure the paint. Refer to the manufacturer’s instructions for specific temperature and time requirements. It’s important to note that if you don’t allow proper drying and curing time, the paint may crack, peel, or bubble, which will ruin the finish. With proper drying and curing, your bicycle rim will look great for years to come.
Now that your rim is fully painted and dried, it’s time to reinstall it and enjoy your new look!
Reinstall Your Bicycle Rim and Enjoy Your New Look!
Congratulations on completing the painting process! You can now attach your newly refurbished wheel and take pride in your personalized ride. However, before you install your newly painted rim, make sure it’s completely dry and cured. It’s recommended to wait at least 24-48 hours before reinstallation to ensure the paint won’t smudge or scratch.
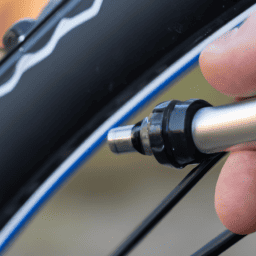
When reinstalling your bicycle rim, make sure to check the brake pads for any paint residue that could affect your braking performance. If there’s paint residue, use sandpaper or a razor blade to remove it.
Additionally, if you masked off areas during the painting process, make sure to remove the tape carefully to avoid any damage to the newly painted surface.
Lastly, if you noticed any rust on your rim before painting, make sure to remove it with a rust remover solution before starting the painting process. By following these tips, you can ensure your newly painted bicycle rim looks great and performs well.
Frequently Asked Questions
Can I use any type of paint on my bicycle rim or are there specific types of paint that are better suited for this task?
I recommend using a specific type of paint for painting bicycle rims. While some may believe any paint will do, specialized painting techniques and color options require a specific type of paint to avoid chipping and peeling.
How do I avoid getting paint on the spokes or other parts of my bicycle while painting the rim?
To avoid getting paint on other parts of my bicycle while painting the rim, I use masking tape to cover the spokes and nearby areas. Another technique is to carefully apply the paint with a brush or spray gun, ensuring to cover only the rim. Tips: Take your time and don’t rush the process.
Is it necessary to sand down the old paint on my bicycle rim before applying the new paint?
To ensure a smooth paint application, proper surface preparation is key. Painting techniques vary, but sanding down the old paint can improve adhesion and prevent chipping. However, it’s not always necessary – evaluate the condition of your rim and proceed accordingly.
How long should I wait before riding my bicycle after painting the rim?
After painting my bicycle rim, I need to wait for at least 24 hours before riding it. This waiting period is necessary to ensure the paint is completely dry and won’t be damaged during use. Safety concerns dictate that I avoid riding it prematurely.
Are there any specific maintenance steps I should take to keep the painted rim looking new?
To maintain a newly painted bicycle rim, I suggest using gentle cleaning techniques like soap and water. Applying a protective coating can also help prevent scratches and fading. Regularly inspect the rim for damage and touch up as needed.
Conclusion
Well, that’s it! Painting a bicycle rim is an easy and affordable way to give your ride a new look. With just a few simple steps and some basic supplies, you can transform your bike from drab to fab in no time.
Just remember to choose the right paint for your needs, prepare your rim properly, apply the paint evenly, and allow it to dry and cure before reattaching it to your bike.
As I’m admiring my newly painted bicycle rims, I can’t help but feel accomplished. Like an artist with a blank canvas, I’ve transformed these rims into a work of art, imbuing them with my own creativity and style.
And just like that, my bike has become an extension of myself, expressing my personality and individuality. So go ahead, give it a try! Paint your rims and let your bike reflect the unique and vibrant person that you are.