Fed up with your bike’s appearance? Perhaps it’s the perfect moment to apply a new layer of paint. Giving your bicycle a paint job is an easy and cost-effective strategy to rejuvenate its appearance and ensure it catches the eye among others. By properly preparing and applying the right technique, you can attain a finish that appears professional and will refresh your bike’s aesthetic.
Before you start painting, youll need to prepare your bike. This includes cleaning it thoroughly, removing the old paint, and sanding any rough spots. Youll also need to choose the right paint for your bike, as different types of paint have different properties and may require different application techniques.
Once you have everything you need, youll be ready to apply the paint and create a new look for your bike. Follow these steps and youll have a bike that looks like it just rolled out of the factory.
Key Takeaways
- Proper preparation is essential for a long-lasting and even finish, including cleaning, removing old paint, and sanding rough spots.
- Choosing the right paint is important, as different types have different properties, and high-quality paint can prevent fading or chipping. Priming is also essential for better adhesion and a longer-lasting finish.
- There are different painting techniques to consider, such as using spray paint for covering large areas quickly or brush-on paint for more precision and control. Sanding between coats and applying a clear coat can also help achieve a smooth and even surface, as well as extra protection and shine.
- Color selection is a personal preference, but it’s important to consider the overall look you want to achieve, research color schemes, and experiment with paint samples. Common mistakes to avoid include not properly prepping the surface before painting, painting in direct sunlight or on a windy day, and not letting each coat dry completely before applying the next.
Prepare Your Bike for Painting
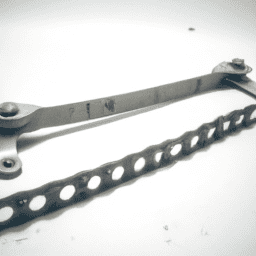
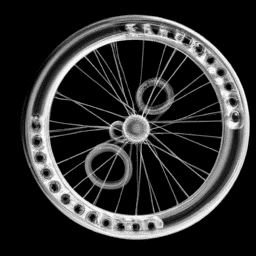
You’ll need to start by taking off the wheels and any other parts that you don’t want to paint, like the chain or handlebars. This will make it easier to reach all the areas that need to be painted and prevent any accidental paint splatter.
Once you’ve removed all the parts, you can start cleaning your bike. Use a degreaser to remove any dirt or grime that may have accumulated on your bike. After cleaning, rinse your bike with water and let it dry completely.
Next, you need to prime your bike. This is an essential step that’ll help the paint adhere better and last longer. There are different priming methods you can use, but it’s best to choose one that’s specifically designed for metal surfaces. Apply the primer in thin and even coats, allowing each layer to dry completely before applying the next one.
Once the primer has dried, you’re ready to choose the right paint for your bike.
Choose the Right Paint
You’re gonna want to grab the most vibrant color you can find to make your ride pop like a neon sign on a dark night. But before you rush out to the store, consider these four factors to help you choose the right paint for your bike:
-
Type of paint: There are two main types of paint for bicycles – spray paint and brush-on paint. Spray paint is great for covering large areas quickly, while brush-on paint allows for more precision and control.
-
Quality: Investing in high-quality paint will ensure a longer-lasting finish and prevent fading or chipping. Look for paints specifically designed for outdoor use and formulated for metal surfaces.
-
Color selection: The color you choose is a personal preference, but consider the overall look you want to achieve. Matte or metallic finishes are popular choices, but don’t be afraid to mix it up with a bold, unexpected hue.
-
Painting techniques: Whether you’re using spray paint or brush-on paint, make sure to follow the manufacturer’s instructions for proper application. Take your time and apply thin, even coats for a smooth finish.
Now that you’ve chosen the perfect paint, it’s time to apply it to your bike and transform it into a colorful masterpiece.
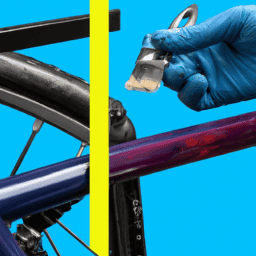
Apply the Paint
Once you have selected the perfect shade and type of paint for your ride, it’s time to get to work and bring your vision to life. But before you start, make sure you have all the necessary tools and equipment on hand. Painting techniques are crucial to achieving a smooth and even coat of paint. Here’s a table outlining the essential tools and steps for painting your bicycle:
| Tools and Equipment | Steps |
|---|---|
| Sandpaper (180 grit) | Sand the frame to remove old paint and rust |
| Primer | Apply a thin coat of primer and let it dry completely |
| Paint | Apply two to three thin coats of paint, allowing each coat to dry for a few hours |
Color selection can play a significant role in the final outcome of your project. While there are no hard and fast rules for choosing colors, it’s best to go with a color that complements your personality and style. You can also opt for a classic look with a single color or add some personality with a combination of colors. Remember to always test the color on a small section of the frame before painting the entire bike. Once you’re done, let the paint dry completely before reassembling the bike.
To avoid common mistakes and ensure a flawless finish, read on to the next section.
Avoid Common Mistakes
Avoiding common mistakes is crucial for achieving a flawless finish when giving your ride a new look. Did you know that over 60% of DIY painters make mistakes by not properly prepping the surface before painting?
Technique tips can help you avoid these mistakes and achieve a professional-looking finish. For instance, make sure to clean the surface before painting and use a primer to create a smooth base for the paint. Additionally, avoid painting in direct sunlight or on a windy day to prevent dust or debris from sticking to the wet paint.
Another common mistake is selecting the wrong color for your bike. Color selection can make or break the final result of your painting project. To avoid this mistake, consider the style and purpose of your bike. Are you going for a classic look or a modern one? Do you want your bike to stand out or blend in?
Take some time to research color schemes and experiment with paint samples before committing to a color. By avoiding these common mistakes, you can achieve a professional-looking finish on your newly painted bike.
Achieve a Professional-Looking Finish
To achieve a professional-looking finish on your painted bicycle, you should consider sanding between coats, applying a clear coat, and polishing your bike for a smooth finish.
Sanding between coats helps to create a smooth and even surface, while a clear coat adds an extra layer of protection and shine.
Finally, polishing your bike will remove any imperfections and give it a sleek, professional finish.
Sand Between Coats
Don’t forget to lightly sand between coats to ensure a smooth and professional finish on your bicycle. Use a fine sandpaper grit, such as 220 or 320, and gently sand the surface of your bike before applying another coat. This removes any imperfections or bumps that may have formed during the previous coat’s drying time.
To make the sanding process more enjoyable, try incorporating the following bullet points:
- Blast your favorite music and dance while sanding
- Take a short break and have a snack to recharge
- Encourage a friend to help you sand
- Reward yourself with a small treat after completing each coat
- Take before and after pictures to track your progress
Once you’ve completed sanding between coats, it’s time to apply a clear coat to protect the paint and give your bike a glossy finish.
Apply a Clear Coat
Applying a clear coat will give your bike a protective layer that will help prevent scratches and fading over time. There are two main types of clear coats, spray-on and brush-on. Spray-on clear coats are easier to apply and quicker to dry, but can be more difficult to control and may require multiple coats. Brush-on clear coats may take longer to apply and dry, but they offer more control and can be more evenly applied.
Benefits of using clear coat on a bicycle include not only protection but also a glossy finish that can make your bike look brand new. Clear coats can also help to repel dust and dirt, making it easier to clean your bike. According to a recent survey, bikes with clear coats last an average of 2 years longer than those without. So, if you want your bike to last, applying a clear coat is a must. Once your clear coat is applied, you can move on to polishing your bike for a smooth finish.
Polish Your Bike for a Smooth Finish
You can achieve a sleek and shiny look for your ride by using a polishing compound and a soft cloth. First, apply the polishing compound onto the cloth and then rub it onto the painted surface of your bike in circular motions. This will remove any scratches or swirl marks and give your bike a smooth finish. Remember to use light pressure to avoid damaging the paint.
To further enhance the shine of your bike, consider waxing it after polishing. Waxing helps to protect the paint from UV rays and other environmental factors that may cause damage over time. Apply a small amount of wax onto another soft cloth and then rub it onto the painted surface of your bike in a circular motion. Let the wax dry for a few minutes and then buff it off using a clean cloth.
Experiment with different buffing techniques to find the one that works best for you. With these polishing and waxing tips, your bike will look better than ever before.
Frequently Asked Questions
What kind of brush or paint roller should I use for painting my bike?
Grab a trusty paintbrush or roller and choose your favorite hue for your bike makeover. Painting techniques like sanding and priming will ensure a smooth finish. Happy painting!
Can I paint my bike without taking it apart completely?
Yes, you can paint your bike without taking it apart completely. Start by painting preparation and gather necessary equipment. Use a small brush for hard to reach areas and apply thin coats for a smooth finish.
How long does the paint need to dry before I can ride my bike again?
To ride your bike again after painting, the paint needs to be completely dry. Tips for speeding up the drying process include painting in a warm, dry area and using a fan. Appropriate weather conditions for painting are low humidity and moderate temperatures.
What should I do if I accidentally get paint on the tires or other non-paintable parts of my bike?
If you’ve accidentally gotten paint on non-paintable parts of your bike, don’t worry. Use cleaning techniques like rubbing alcohol or acetone to remove the paint. To prevent this, cover those parts with painter’s tape or remove them before painting.
Can I use spray paint instead of traditional brush-on paint for my bike?
Yes, you can use spray paint for your bike, but be cautious about spray paint safety. Spray paint may not offer the same durability as traditional brush-on paint, but it can be more convenient.
Conclusion
Congratulations! You’ve successfully painted your bicycle. With the right preparation, paint choice, and application techniques, you’ve achieved a professional-looking finish.
But before you hit the road with your newly painted bike, there are a few things you should know.
Firstly, did you know that painting your bike can actually increase its lifespan? In fact, a well-painted bike can last up to 10 years longer than its unpainted counterpart. So not only have you given your bike a fresh new look, but you’ve also added years to its life.
To maintain the longevity of your bike’s new paint job, it’s important to avoid common mistakes such as rushing the process, neglecting to clean and sand the surface properly, or using the wrong type of paint.
By following the steps outlined in this article, you’ve given your bike the care and attention it deserves. Now go out and enjoy your newly painted ride!