Imagine this: You’re riding your bike through the streets, with the wind in your hair and the sun shining on your back. However, something seems to be missing. The once colorful and attention-grabbing frame of your bike has now lost its shine.
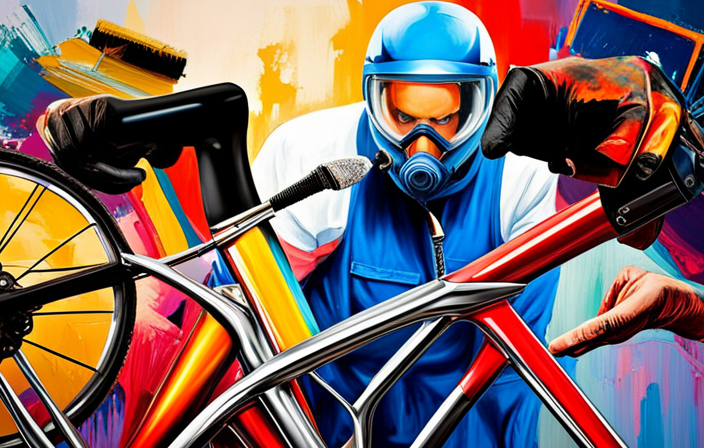
Fear not, for I am here to guide you through the process of painting your bicycle frame. In this detailed and informative article, I will provide step-by-step instructions on how to prepare, prime, and apply a fresh coat of paint to bring your beloved bicycle back to life.
So grab your brushes and let’s dive into the world of bicycle frame painting!
Key Takeaways
- Clear coat is important for bicycle frame protection as it enhances appearance, protects against scratches and UV rays, increases longevity of paint job, and provides resistance to wear and tear.
- Surface preparation is crucial before applying clear coat, including cleaning and prepping the frame surface thoroughly, ensuring optimal adhesion, removing dirt or debris, and smoothing out imperfections.
- When applying clear coat, it is recommended to apply multiple thin layers, allow ample drying time between coats, avoid thick or uneven application, use a high-quality clear coat product, and follow the manufacturer’s instructions.
- When choosing a suitable clear coat, consider factors such as durability and resistance to wear and tear, UV protection, compatibility with existing paint, and reading product reviews.
Prepare Your Bicycle Frame
You should start by removing all the components from your bicycle frame. This includes the wheels, pedals, chain, and any other accessories.
Once you have a bare frame, it’s time to prepare it for painting. First, you need to sand the frame to create a smooth surface for the paint to adhere to. Use a fine-grit sandpaper and work in circular motions to remove any rough spots or old paint.
After sanding, clean the frame thoroughly to remove any dust or grease. Use a degreaser or soapy water and a soft cloth to wipe down the entire frame. Make sure it’s completely dry before moving on to the next step of gathering your materials.
Gather Your Materials
First, make sure you have all the necessary materials ready.
When choosing the right paint color for your bicycle frame, consider your personal style and preferences. You can either go for a bold and vibrant color or opt for a more subtle and classic shade.
Before painting, it is important to remove any rust from the frame. Use a wire brush or sandpaper to gently scrub away the rusted areas. Make sure to wear protective gloves and a mask to avoid inhaling any rust particles.
Once the rust is removed, wipe down the frame with a clean cloth to remove any residue.
With your materials in hand and a rust-free frame, you are now ready to move on to the next step of disassembling your bicycle.
Disassemble Your Bicycle
To begin disassembling, start by removing the wheels from the bicycle. Before doing so, it’s important to clean your bicycle thoroughly. Use a mild detergent and water to remove any dirt or grime from the frame and components. This will ensure that the paint adheres properly.
Once the bicycle is clean, inspect the frame for any areas of rust. If you encounter stubborn rust, there are a few tips to help remove it. Use steel wool or a wire brush to gently scrub away the rust. For more stubborn rust, you can apply a rust dissolver or rust converter.
After disassembling and removing the wheels, you can move on to the next step of priming the frame.
Prime the Frame
Before applying a fresh coat of paint, it’s essential to prime the frame of your bicycle. Priming prepares the surface of the frame, ensuring that the paint adheres properly and lasts longer.
To begin, you’ll need to remove any existing paint or rust from the frame using sanding techniques. Start by using coarse-grit sandpaper to roughen the surface, making it easier for the primer to stick. Then, switch to a finer-grit sandpaper to smooth out any rough spots.
After sanding, wipe down the frame with a clean cloth to remove any dust or debris.
Next, apply a thin, even coat of primer using a brush or spray can, following the manufacturer’s instructions. Allow the primer to dry completely before moving on to the next step of applying the base coat.
Apply the Base Coat
After priming, it’s time to apply the base coat to the surface of your bike. This crucial step prepares the frame for the final color and ensures a smooth, professional finish.
Choosing the right color is important, as it sets the tone for your bike’s overall appearance. Consider a color that complements your style and stands out on the road.
To achieve a smooth finish, use these techniques:
- Start with thin, even coats to prevent drips or pooling.
- Apply the paint in long, smooth strokes, following the contours of the frame.
- Allow each coat to dry completely before applying the next layer.
By following these techniques, you’ll achieve a flawless base coat that serves as a foundation for the final look of your bike.
In the next section, we’ll discuss how to add additional layers to enhance the color and durability of your paint job.
Add Additional Layers
To enhance the color and durability of your bike’s paint job, you can add additional layers using these techniques.
When selecting colors for your additional layers, it’s important to consider the base coat and choose complementary shades. This will help create a vibrant and cohesive final look.
When applying the additional layers, it’s crucial to use the same painting techniques as before. Apply thin, even coats, allowing each layer to dry completely before adding the next. This will prevent any clumping or streaking.
Remember to use a high-quality paintbrush or spray paint for a smooth and professional finish.
After applying the desired number of additional layers, you can move on to creating designs or patterns (optional) to further personalize your bike’s appearance.
Create Designs or Patterns (Optional)
You can further personalize the appearance of your bike by creating designs or patterns. Here are some ideas to get you started:
-
Create stencils: Use stencils to add intricate designs to your bike frame. Simply place the stencil on the desired area and apply paint using a spray can or brush. This technique allows for precise and professional-looking patterns.
-
Use masking tape: Another way to create designs is by using masking tape. Apply the tape in different shapes and patterns on your bike frame, and then paint over it. Once the paint is dry, carefully remove the tape to reveal clean lines and sharp edges.
-
Experiment with colors: Choose contrasting or complementary colors to create eye-catching designs. Consider incorporating your personal style or favorite colors into the patterns.
-
Add unique touches: Don’t be afraid to get creative and add your own unique touches. Whether it’s painting your initials, a favorite quote, or a symbol that holds meaning for you, these small details can make your bike truly one-of-a-kind.
Now that you’ve created your designs or patterns, it’s time to allow the paint to dry before moving on to the next step.
Allow the Paint to Dry
Once the paint has dried, give it some time to fully set before proceeding. This is an essential step in the painting process, as rushing the drying time can result in a subpar finish.
To speed up the drying process, consider these tips: ensure proper ventilation by placing the painted frame in a well-ventilated area or using fans, use a heat gun or hairdryer on low heat to accelerate drying, or use a paint drying accelerator product.
Avoid common mistakes such as touching the painted surface too soon, as this can cause smudging or damage the paint job. Additionally, avoid exposing the frame to extreme temperatures or direct sunlight, as this can lead to cracking or fading of the paint.
Once the paint has fully dried and set, you can proceed to reassemble your bicycle, bringing it back to its former glory.
Reassemble Your Bicycle
After the paint has completely dried, it’s time to put your bicycle back together. Proper maintenance for bicycle reassembly is crucial to ensure a smooth ride. Here are some tips to help you achieve just that:
-
Clean and inspect all the components before reassembling. This will help identify any damage or wear that needs to be addressed.
-
Grease all the necessary parts, such as the bottom bracket, headset, and wheel axles. This will provide smooth operation and prevent unnecessary friction.
-
Double-check all the bolts and screws to ensure they are tightened to the recommended torque. Loose components can lead to poor performance and even accidents.
By following these steps, you can ensure that your bicycle is reassembled correctly and ready for a smooth ride. Now, let’s move on to the next section about applying a clear coat to protect your newly painted frame.
Apply a Clear Coat
To protect the fresh coat of paint on your bicycle frame, it’s time to apply a clear coat. The clear coat not only adds a glossy finish to your frame, but it also provides a layer of protection against scratches, UV rays, and other environmental factors. By applying a clear coat, you can ensure that your paint job will last longer and stay vibrant.
To achieve a smooth and durable clear coat finish, follow these tips:
- Clean and prep the surface of your frame before applying the clear coat to ensure optimal adhesion.
- Apply thin and even coats of clear coat, allowing ample drying time between each layer.
- Use a high-quality clear coat specifically designed for bicycle frames to ensure durability and resistance to wear and tear.
- Consider using a clear coat with UV protection to prevent color fading over time.
- After applying the clear coat, allow it to cure fully before reassembling your bicycle.
By following these tips, you can achieve a professional-looking clear coat finish that will protect and enhance the appearance of your bicycle frame.
Frequently Asked Questions
How long does it take for the paint to dry on a bicycle frame?
The drying time for paint on a bicycle frame depends on various factors, such as the type of paint used and environmental conditions. Generally, it can take anywhere from a few hours to several days for the paint to fully dry and cure. The drying process involves the evaporation of solvents in the paint, leaving behind a hardened and durable finish.
Can I use regular spray paint for my bicycle frame?
Yes, you can use enamel spray paint for your bicycle frame. Here are some tips for painting a bike frame without removing components: clean the frame, lightly sand it, apply primer, and then spray on the enamel paint in thin, even coats.
Do I need to sand my bicycle frame before applying the primer?
Yes, it is necessary to sand your bicycle frame before applying the primer. Proper sanding techniques ensure a smooth surface for the primer to adhere to. While alternative priming methods exist, sanding is highly recommended for optimal results.
What type of clear coat should I use for a glossy finish on my bicycle frame?
To achieve a glossy finish on your bicycle frame, it is crucial to choose the right clear coat. Avoid common mistakes like using the wrong type of clear coat or applying too many layers, which can result in a dull or uneven finish.
Is it necessary to remove all the components from the bicycle frame before painting?
Yes, it is necessary to remove all the components from the bicycle frame before painting. This ensures a thorough and even coverage, prevents damage to the components, and allows for easier access to all areas of the frame.
Conclusion
In conclusion, painting your bicycle frame can be a fun and rewarding project that allows you to give your bike a personal touch. By following the steps outlined in this article, you can achieve a professional-looking finish that will not only protect your frame but also make it stand out from the crowd.
So go ahead and unleash your creativity, whether it’s a sleek and modern design or a vibrant and eye-catching pattern. Get ready to turn heads as you ride your newly painted bike with pride.
Happy painting!
