When you’re cycling and unexpectedly notice the sound of air leaking from your tire, it can be both annoying and potentially hazardous, especially if you’re a good distance from home. However, don’t worry, because with the appropriate equipment and a little bit of knowledge, repairing a flat bike tire can be an easy and swift solution.
In this article, I will guide you through the step-by-step process of how to patch a flat bicycle tire so you can get back on the road with confidence.
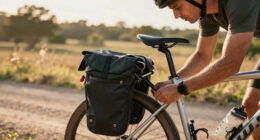
First and foremost, you’ll need the proper tools and materials to fix your flat tire. This includes a tire lever, a patch kit, a bike pump, and a wrench (if your bike has nuts instead of quick release skewers). Once you have all of these items gathered, it’s time to remove the wheel and tire to locate and patch the hole.
Don’t worry, it sounds more complicated than it actually is. With a little patience and some careful attention to detail, you’ll have your flat tire patched up in no time. Let’s get started!
Key Takeaways
- Proper tire inflation is crucial for preventing flats and different types of bike tires have different recommended tire pressure.
- Before patching the tube, ensure that your tire is inflated to the recommended pressure level.
- To locate the leak, inflate the tire to its maximum recommended pressure and listen for the hissing sound or submerge the tire in water to look for bubbles.
- Proper patch placement depends on the type of puncture. Sidewall punctures cannot be patched and require tire replacement.

Schwinn Sporterra RX Gravel Bike, 700c Mens and Womens Bike, 14-Speed Drop Bar Gravel Bicycle, Mechanical Disc Brakes, Rigid Fork, Aerodynamic Riding Position, Quick Release Seat Post, Adult Bicycle
GRAVEL BICYCLE: Enjoy next level riding with the Sporterra RX by Schwinn. With 700c wheels, this mens and...
As an affiliate, we earn on qualifying purchases.
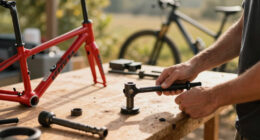
Gather Your Tools and Materials
Now it’s time to gather your tools and materials so you can get that flat tire fixed and hit the road again!
First, you’ll need to have a few different types of tire patches on hand. These patches can come in the form of adhesive patches or vulcanizing patches. Adhesive patches are great if you need a quick fix, as they can be applied without needing any additional tools. Vulcanizing patches, on the other hand, require a bit more work but offer a more permanent solution.
In addition to patches, you’ll need a few tools to properly inflate your tire. A bike pump is a must-have tool for any cyclist. It’s important to make sure you’re using the right type of pump for your tire – most bikes use either a Presta or Schrader valve. You’ll also want to have a pressure gauge on hand to ensure that you’re inflating your tire to the proper pressure.
With your patches and tire inflation tools ready to go, you’re ready to move on to the next step – removing the wheel and tire.

Mongoose Men's Elroy Adventure Bike 700C Wheel Bicycle, Blue, 54cm frame size
Versatile adventure touring bike features capable adventure bike geometry, a sleek alloy frame and steel fork for the...
As an affiliate, we earn on qualifying purchases.
Remove the Wheel and Tire
First, you’ll want to detach the wheel from your bike and take off the rubber casing, which can account for up to 80% of a tire’s total weight. This is done by first flipping your bike upside down and releasing the brakes. Use a wrench to loosen the bolts on the axle, then slide the wheel out of the dropouts. Next, use tire levers to pry the tire away from the rim, being careful not to damage the inner tube. Once the tire is removed, locate the hole or puncture in the tube before proceeding to the next step.
Proper tire inflation is crucial for preventing flats, so before patching the tube, ensure that your tire is inflated to the recommended pressure level. It’s also important to choose the right patch kit for your tire. There are several types of patch kits available, so be sure to read the instructions carefully and select the appropriate one for your tire type. With the wheel and tire removed, the punctured tube can now be patched. Once patched, check the tire and tube for any other defects before reassembling the wheel onto the bike and locating the leak.

AVASTA 700C Road Adult Step-Over Gravel Hybrid Bike Bicycle for Men Woman Male Female,Lightweight Aluminum Alloy Frame with 21-Speed Gearing for City Commuting,Dual Disc Brakes,19 inch Frame,White
🚴♂️【Durable Aluminum Alloy Frame】This lightweight yet strong frame is built to last, offering a perfect balance of durability...
As an affiliate, we earn on qualifying purchases.
Locate the Leak
Once you’ve successfully removed the wheel and tire, the next step is to track down the elusive leak causing all your problems. This is an essential part of bicycle maintenance and tire pressure management. Here’s how to do it:
-
Inflate the tire to its maximum recommended pressure: Before you start the search, inflate the tire to its maximum recommended pressure. This will make it easier to locate the leak as it will cause the air to escape faster.
-
Listen for the hissing sound: Once you’ve inflated the tire, listen for the hissing sound. This sound will help you identify the location of the puncture. Move the tire around and listen carefully to pinpoint the exact location.
-
Submerge the tire in water: If the hissing sound is not audible, then submerge the tire in water. Look for bubbles forming on the surface of the tire. This is a clear indication of the location of the leak.
Once you have located the leak, the next step is to patch the hole.

SAVADECK Carbon Gravel Bike - T800 Carbon Frame & Fork | Shimano U6000 11-Speed Groupset | Hydraulic Disc Brakes | 700CX40mm All-Terrain Tires | Men & Women Road/Off-Road Bicycle (Gray, 55cm)
【Ultralight T800 Carbon Performance】: Featuring a premium T800 R21 carbon fiber frame and fork weighing just 10.4kg (22.92...
As an affiliate, we earn on qualifying purchases.
Patch the Hole
To fix the puncture, you’ll need to grab your trusty tire repair kit and get to work, feeling the sticky texture of the adhesive as you carefully apply the patch over the hole. Before you start, make sure you have proper preparation by cleaning the area around the puncture with a cloth or sandpaper. This will ensure that the patch will adhere properly to the tire.
Once the area is clean, it’s time to patch the hole. Refer to the table below for proper patch placement. Peel the protective layer from the patch and place it over the hole, pressing down firmly. Hold it in place for a few seconds to ensure proper adhesion. Now that the hole is patched, it’s time to move on to the next step: reinstall the tire and wheel.
| Type of puncture | Patch placement |
|---|---|
| Pinhole | Center of patch directly over puncture |
| Larger puncture | Center of patch over puncture, with edges extending beyond the puncture |
| Sidewall puncture | Do not patch, replace tire |
Reinstall the Tire and Wheel
Now it’s time to get that wheel back onto your bike and feel the satisfaction of a job well done. Before you do so, it’s important to ensure proper inflation of the tire. Different types of bike tires have different recommended tire pressure, so make sure to check the manufacturer’s guidelines.
Proper inflation not only improves the performance of your bike, but also helps to prevent future flats. Once you have reinstalled the tire and wheel, it’s important to monitor tire pressure regularly. Use a tire pressure gauge to check the pressure and adjust as needed.
Keep in mind that underinflated tires can lead to increased rolling resistance and wear, while overinflated tires can result in decreased traction and a rougher ride. By routinely checking your tire pressure, you can ensure that your bike is performing at its best and avoid unnecessary flats.
Frequently Asked Questions
How often should I check my bicycle tires for leaks?
Regularly checking tire pressure is crucial for safe cycling. Signs of worn out tires include uneven wear, cracks, and bulges. I personally check my bicycle tires for leaks every week to ensure optimal performance and avoid potential accidents.
Can I use any type of patch kit for my bicycle tire?
When it comes to patching a bicycle tire, it’s important to choose the right patch kit. Patch kit options include glue-on patches or self-adhesive patches. Patching techniques vary, but the key is to ensure a tight seal for a long-lasting repair.
What should I do if I can’t find the leak in my bicycle tire?
If I can’t find the leak in my bicycle tire, possible causes include improper installation or a damaged valve. Troubleshooting involves submerging the tire in water to locate the leak. If unsuccessful, seeking professional help is recommended.
How long will a patched bicycle tire last?
The longevity of a patched bicycle tire depends on several factors, including the quality of the patch, the type of puncture, and the overall condition of the tire. The pros and cons of patching vs. replacing a tire should also be considered.
Can I ride my bicycle with a patched tire immediately after patching it?
The pros of riding a bicycle with a patched tire immediately are that it saves time, but the cons are safety risks. I recommend using the best brands for patching and waiting at least 24 hours before riding to ensure the patch has fully adhered.
Conclusion
Well, that’s it! I hope this guide has been helpful in teaching you how to patch a flat bicycle tire.
Remember, having a flat tire is a common occurrence when cycling, and it’s always best to be prepared with the right tools and knowledge to fix it.
In conclusion, fixing a flat bike tire is a simple task that anyone can do with a little practice. By following the steps outlined in this guide, you can quickly and easily patch your tire and get back on the road in no time.
So grab your tools, locate the leak, patch the hole, and you’ll be cruising down the road again in no time! And as always, ride safely and wear a helmet.
Happy cycling!
Rhetorical Device: Alliteration – ‘By following the steps outlined in this guide, you can quickly and easily patch your tire and get back on the road in no time.’ ‘And as always, ride safely and wear a helmet.’