
Reattaching a bike chain can appear challenging, yet it becomes straightforward with some practice. Being an avid biker, I’ve encountered this problem several times and have picked up a few techniques throughout my experiences.
Before we get started, it’s important to assess the situation. Is the chain completely off or just loose? Are any parts of the bike damaged or broken?
Once you’ve answered these questions, you can move on to the next step of loosening the rear wheel. With a few simple steps, you’ll have your bike chain back on and ready to ride in no time.
Follow along with me as I walk you through the process step-by-step.
Key Takeaways
- Assess the situation, check for damage, and determine the cause of the chain falling off before attempting to put it back on.
- Use proper tools to loosen bolts on the rear wheel and check the wheel alignment as the bolts are loosened to realign the chain by nudging the wheel and checking for proper lubrication and tension.
- After realigning the chain, tighten the rear wheel and check both the chain and gears for any issues before riding.
- Regular maintenance, including proper lubrication and wear checks, can prevent further damage to bike components and extend their lifespan, ensuring that the chain and gears operate smoothly.
Assess the Situation
You’re gonna want to take a quick look at the chain and gears to see if any of them are damaged or need to be replaced before you try to put the chain back on. Check for damage on the links of the chain, as well as the teeth of the gears. If any links are bent or twisted, or if the teeth are worn down or broken, you’ll need to replace them before putting the chain back on.
Determine the cause of why the chain fell off in the first place. Was it because of a gear shift, a bumpy road, or a sudden stop? Knowing the cause can help prevent the chain from falling off again in the future.
Once you’ve checked for damage and determined the cause, you can proceed to loosen the rear wheel to put the chain back on.
Loosen the Rear Wheel
As you loosen the bolts on the rear wheel, it’s like freeing a wild stallion from its pen. The wheel can move freely now, which is necessary for realigning the bicycle chain.
Here’s what you need to know about loosening the rear wheel:
-
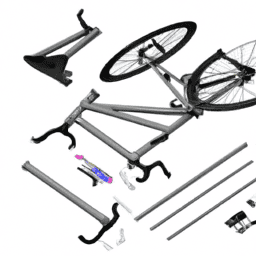
Before you start, make sure you have the right tools for the job. You’ll need a wrench that fits the bolts on your rear wheel.
-
Loosen the bolts on the rear wheel just enough to allow some movement, but not so much that the wheel falls off.
-
Once the bolts are loose, move the wheel slightly to create some slack in the chain.
-
Keep an eye on the wheel alignment as you loosen the bolts. If the wheel is not aligned properly, it can cause problems with the chain and affect your ride.
Now that the rear wheel is loosened, it’s time to realign the chain. This is an important step in chain maintenance that’ll keep your bike running smoothly.
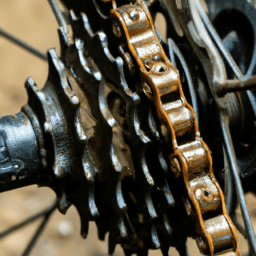
Realign the Chain
Now that the rear wheel is able to move freely, it’s time to make sure the chain is properly aligned by gently nudging the wheel until it lines up with the sprockets. It’s important to check the alignment of the chain, as a misaligned chain can easily slip off the gears and cause a potential accident. To check if the chain is aligned, use the table below to guide you through the process:
| Step | Action | Notes |
|---|---|---|
| 1 | Check Chain Lubrication | A well-lubricated chain can extend the life of your bike’s components |
| 2 | Check Chain Tensioning | A chain that is too loose or too tight can cause issues with gear shifting and put unnecessary stress on the chain |
| 3 | Align the Chain | Gently nudge the wheel until the chain lines up with the sprockets |
| 4 | Check Chain Alignment | Ensure the chain is properly aligned by checking the tension and making sure it runs smoothly |
Once you’ve aligned the chain, it’s time to move on to the next step: tightening the rear wheel. This will ensure that the chain stays in place and doesn’t slip off the gears while riding.
Tighten the Rear Wheel
To ensure a safe and smooth ride, it’s crucial to tighten the rear wheel which will keep everything in place while you’re cycling.
Start by loosening the bolts that hold the rear wheel in place, then pull the wheel back until the chain is taut. Next, tighten the bolts back up and check the chain’s tension. You want it tight enough so that there’s no slack, but not so tight that it’s difficult to pedal.
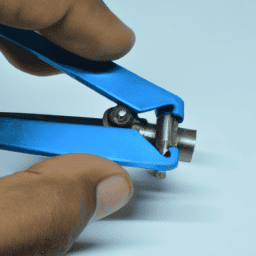
Adjusting tension may require using a chain tool to remove links from the chain or add a quick link to make it the right length. It’s important to note that the rear wheel should not be so tight that it puts unnecessary pressure on the hub bearings.
Once you’ve tightened the wheel, check the chain and gears to make sure everything is running smoothly before taking your bike out for a ride.
Test the Chain and Gears
After tightening the rear wheel, it’s important to ensure the chain and gears are smoothly operating like a well-oiled machine.
The first thing to check is the proper lubrication of the chain. Without proper lubrication, the chain can wear out quickly and cause damage to the gears. It’s important to use a high-quality chain lubricant and apply it evenly to the chain. Make sure to wipe off any excess lubricant to prevent attracting dirt and debris.
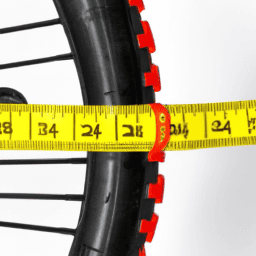
Next, check the chain for wear indicators. Over time, the chain can stretch and become loose, causing it to slip off the gears. There are several ways to check for chain wear, including using a chain wear indicator tool or measuring the distance between links.
If the chain is worn beyond the recommended limit, it’s important to replace it to prevent further damage to the gears.
By properly lubricating the chain and checking for wear indicators, you can ensure your bike chain stays on and your gears operate smoothly.
Frequently Asked Questions
What should I do if the chain keeps slipping off repeatedly even after I put it back on?
If my bike chain keeps slipping even after putting it back on, I will need to adjust the chain tension. If that doesn’t work, then the gears may be worn out and need replacing.
Can I use any lubricant for the chain or is there a specific type I should use?
I prefer using WD-40 as my go-to chain lubricant. It’s versatile and easy to find. Proper application techniques are crucial for optimal performance, make sure to clean the chain before applying and only use a small amount.
How do I know if my chain is too loose or too tight?
To check tension, I pull the chain away from the centerline of the bike. If it moves more than half an inch, it’s too loose. To adjust tension, I loosen the axle nuts and move the wheel back slightly until the chain has proper tension.
What should I do if I notice any damage or wear on the chain while fixing it?
As the saying goes, "A stitch in time saves nine."Inspecting the chain before fixing it is crucial. If there’s any damage or wear, replacing worn parts will be necessary to avoid further problems down the road.
Is it safe to ride the bike immediately after putting the chain back on or should I wait for a certain amount of time?
It’s important to perform regular chain maintenance to prevent derailment. After putting the chain back on, I recommend inspecting it for any wear or damage. It’s safe to ride immediately if the chain is in good condition.
Conclusion
Well, that was quite the adventure! After my bicycle chain came off, I had to put my problem-solving skills to the test.
But with a little know-how, I was able to get the job done.
Putting a bicycle chain back on may seem like a daunting task, but with the right tools and mindset, it’s actually quite manageable.
Just remember to assess the situation, loosen the rear wheel, realign the chain, tighten the rear wheel, and test the chain and gears.
And if you ever find yourself in a similar predicament, don’t worry! Just take a deep breath, follow these steps, and you’ll be back on the road in no time.
After all, a minor setback like this is just a small bump in the road of life.