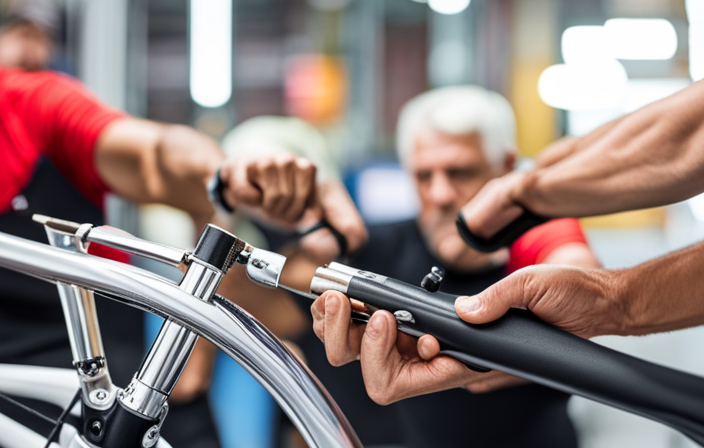

Installing a bicycle seat requires precision and attention to detail, much like fitting a puzzle piece perfectly into its designated spot. Just as a skilled craftsman meticulously places each component, I will walk you through the steps of putting a bicycle seat on.
With the right tools and knowledge, you can effortlessly ensure a secure and comfortable seat for your rides. So, let’s embark on this journey together and unlock the secret to a perfectly installed bicycle seat.
Key Takeaways
- Choose a seat that is the appropriate size and provides support for your sit bones.
- Ensure the seat is securely tightened and stable to avoid discomfort and risks during rides.
- Adjust the seat angle properly to enhance riding efficiency and maximize comfort.
- Consider individual body type, preferences, and weight distribution for even support and a better riding experience.

Hohem iSteady Pro 4 Action Camera Gimbal 3-Axis Splashproof Stabilizer for GoPro Hero 13/12/11/10/9/8/7/6/5/4/3,DJI OSMO Action,Insta360 ONE R,Sony RX0,Quick Mounting,14Hrs Runtime
🏆【Quick Bluetooth Connection & Low-energy Consumption】Wireless Connecting GoPro Hero 13/12/11/10/9/8/7/6/5, iSteady Pro 4 can control the camera's shutter...
As an affiliate, we earn on qualifying purchases.
Gather the necessary tools and equipment
You’ll need a few tools and equipment to put on a bicycle seat. First and foremost, it’s important to choose the right bicycle seat for your comfort and riding style. Take into consideration factors such as the width, padding, and shape of the seat. Additionally, ensure that the seat is compatible with your bike’s seat post.
Once you have the appropriate seat, gather a wrench or Allen key to loosen and tighten the bolts on the seat post clamp. It’s also helpful to have a tape measure or ruler to measure the height and position of the seat. Lastly, consider applying a lubricant to the seat post to prevent it from getting stuck.
Remember, choosing the right seat and properly maintaining it will ensure a comfortable and enjoyable ride. Now, let’s move on to positioning the bike and seat correctly.

RideZen Bike Camera Small Thumb Action Camera, IPX6 Waterproof, Wireless, with Bike Mount, for Cycling, Sports, Vlogging & Content Creation (Black)
Bike Camera THUMB-SIZED DESIGN: Compact and lightweight action camera built for cyclists and sports enthusiasts who need hands-free...
As an affiliate, we earn on qualifying purchases.
Position the bike and seat correctly
To ensure proper positioning, start by adjusting the bike and seat correctly. Positioning the bike and seat correctly is crucial for a comfortable and efficient ride. Here are some positioning tips to get you started:
- Align the seat with the center of the bike frame to maintain balance and stability.
- Adjust the seat height so that your legs have a slight bend at the bottom of each stroke, preventing strain on your knees.
- Tilt the seat angle slightly downwards to prevent sliding forward during rides.
Choosing the right seat is equally important. Consider factors such as padding, width, and shape to find a seat that suits your body and riding style.
Now that the bike and seat are properly positioned, let’s move on to locating the seat clamp on the bike frame.
SYMIK Motorcycle Handlebar Mount for Action Camera, Heavy Duty Clamp Mount for Bike Bicycle Motorcycle Handlebar w/ 360° Ball Heads for Gopro, Insta360 X5 X4 Air X3 Ace Pro 2, Osmo 360 Action 6 5 Pro
Grips Tighter, Holds Stronger: SYMIK 360° camera clamp mount is engineered with durable aluminum alloy and non-slip TPU...
As an affiliate, we earn on qualifying purchases.
Locate the seat clamp on the bike frame
Once you’ve positioned the bike and seat correctly, it’s time to locate the seat clamp on the bike frame.
The seat clamp is a crucial component that allows you to adjust the seat height and angle according to your preference.
To locate the seat clamp, start by looking underneath the seat where it connects to the frame. It is usually a metal or plastic mechanism that holds the seat securely in place.
Adjusting the seat height is typically done by loosening the seat clamp and sliding the seat up or down until you find the desired position. Similarly, adjusting the seat angle involves loosening the seat clamp and tilting the seat forward or backward.
Once you’ve located the seat clamp, you are ready to loosen it using the appropriate tool, which will be discussed in the subsequent section about how to ‘loosen the seat clamp using the appropriate tool’.

AKASO Brave 4 Action Camera 4K 30fps Ultra Hd Video 20MP Photo, EIS, WiFi, 2X Batteries, Waterproof Underwater Camera, Camcorder Bundle for Snorkel, Travel, Motorcycle, Bicycle, Helmet Accessories Kit
4K30fps Video & 20MP Photo: Capture every detail of life’s most beautiful moments with video resolutions from 4K...
As an affiliate, we earn on qualifying purchases.
Loosen the seat clamp using the appropriate tool
To loosen the seat clamp, use the appropriate tool. The seat clamp is a crucial component when installing a bicycle seat. It secures the seat post to the bike frame, ensuring stability and comfort during rides.
Common mistakes when installing a bicycle seat include using the wrong tool or not tightening the clamp enough, leading to an unstable seat. To avoid these mistakes, it is important to use the correct tool, such as an Allen wrench or a quick-release lever, depending on the type of seat clamp.
Different types of seat clamps include bolt-on clamps, quick-release clamps, and integrated clamps. Each type has its own pros and cons, such as ease of adjustment and security.
Once the seat clamp is loosened, the next step is to adjust the seat height and angle to your preference, ensuring a comfortable riding position.
Adjust the seat height and angle to your preference
You can easily customize the height and angle of your seat to find the most comfortable riding position.
To adjust the seat height, follow these steps:
- Loosen the seat clamp using the appropriate tool.
- Raise or lower the seat post to the desired height.
- Ensure that the seat post is securely tightened in place.
- Test the seat height by sitting on the bike and pedaling.
To find the right seat angle, follow these steps:
- Loosen the seat clamp again.
- Tilt the seat forward or backward to find a position that feels comfortable.
- Tighten the seat clamp to secure the seat in place.
- Test the seat angle by sitting on the bike and adjusting as needed.
Now that you have adjusted the seat height and angle, it’s time to align the seat rails with the seat clamp to ensure proper installation.
Align the seat rails with the seat clamp
After adjusting the seat height and angle, make sure to align the seat rails with the seat clamp for proper installation.
Proper seat alignment is crucial for optimal comfort while riding. To align the seat rails, first, locate the clamp underneath the bicycle seat.
Loosen the clamp using an appropriate tool, usually an Allen wrench. Next, position the seat rails onto the clamp, ensuring that they are aligned parallel to the ground.
Tighten the clamp securely, making sure the seat is stable and doesn’t move during rides. It’s important to avoid common mistakes when installing a bicycle seat, such as misaligning the seat rails or not tightening the clamp enough.
These mistakes can lead to discomfort and potential accidents. With the seat rails aligned, we can now proceed to the next step of tightening the seat clamp securely.
Tighten the seat clamp securely
Once the seat rails are aligned, be sure to tighten the clamp securely. This step is crucial to ensure proper seat positioning and prevent any unwanted movements while riding.
To achieve a secure tightening, follow these steps:
-
Use an appropriate tool, such as a wrench or an Allen key, to tighten the seat clamp bolt. Make sure to apply enough force to securely fasten the clamp without over-tightening it.
-
Check that the seat is level and aligned with the bike frame. A misaligned seat can cause discomfort and affect your riding posture.
-
Double-check the tightness of the clamp after a few rides, as vibrations and movements might cause it to loosen over time.
By tightening the seat clamp securely, you can avoid common seat installation mistakes and ensure a stable and comfortable ride.
Now, let’s move on to the next step of testing the seat for stability and comfort.
Test the seat for stability and comfort
To make sure the seat is stable and comfortable, try sitting on it and adjusting your position if needed. Test for stability by placing your weight evenly on the seat and rocking back and forth. If the seat feels loose or wobbly, you may need to tighten the seat clamp further.
Once you have determined the stability of the seat, find the right position by adjusting the seat height and angle. Ensure that your feet can touch the ground comfortably when you stop, and that your knees are slightly bent when pedaling. Additionally, make sure the seat is not tilted too far forward or backward, as this can cause discomfort and affect your overall balance.
Once you have tested the seat for stability and found the right position, you can proceed to make any necessary adjustments for optimal comfort and safety.
Make any necessary adjustments
You can adjust the seat height and angle to find the right position for optimal comfort and safety. To make necessary adjustments, start by loosening the seat clamp bolt underneath the seat with an Allen wrench.
Then, adjust the seat height by raising or lowering it until your leg is almost fully extended when the pedal is at the bottom of its rotation. Once you have set the height, tighten the seat clamp bolt securely.
Next, adjust the seat angle by loosening the seat angle adjustment bolt located at the front of the seat. Tilt the seat forward or backward until you find a comfortable position that supports your body weight evenly. Finally, tighten the seat angle adjustment bolt.
Choosing the right seat size is also important for comfort and stability. Ensure that the seat is wide enough to support your sit bones and provides enough padding to reduce pressure points.
With the necessary adjustments made and the right seat size chosen, you can enjoy your ride with a properly installed bicycle seat!
Enjoy your ride with a properly installed bicycle seat!
With a properly installed bike seat, you can fully enjoy your ride. When choosing the right bicycle seat for your body type, it is important to consider factors such as your weight, riding style, and personal preferences.
Look for a seat that provides adequate support and cushioning, as well as a design that suits your riding position. Common mistakes to avoid when installing a bicycle seat include not properly tightening the seat clamp, which can lead to instability and discomfort during rides. Make sure to securely tighten the bolts or quick-release mechanism to ensure a stable and safe seat.
Additionally, be mindful of the seat angle, as a seat that is tilted too far forward or backward can cause discomfort and inefficient pedaling. By taking these considerations into account and avoiding common mistakes, you can enjoy a comfortable and enjoyable ride with your properly installed bicycle seat.
Frequently Asked Questions
What tools and equipment do I need to gather to put a bicycle seat on?
To properly install a bicycle seat, you will need a 5mm Allen wrench, a seatpost clamp, and a seatpost. Avoid common mistakes like overtightening the bolts and not aligning the seat properly with the bike frame.
How do I properly position the bike and seat before installing the seat?
To properly position the bike and seat before installing, ensure the seat post is at the correct height and angle. Avoid common mistakes like setting the seat too low or at an uncomfortable tilt, which can affect your balance and riding experience.
Where can I find the seat clamp on the bike frame?
To find the seat clamp on the bike frame, look for a metal clamp near the top of the seat tube. Use an Allen wrench to loosen the clamp, adjust the seat height, and then tighten the clamp properly to secure the seat in place.
What tool should I use to loosen the seat clamp?
To loosen the seat clamp, I recommend using an Allen wrench or a socket wrench. These tools provide the necessary torque to loosen the clamp securely. Alternative tools like pliers or a adjustable wrench may also work, but be cautious to avoid damaging the clamp.
How do I adjust the seat height and angle to my preference?
To adjust the seat height, locate the seat post clamp and use an Allen wrench to loosen it. Raise or lower the seat to the desired height and tighten the clamp. To adjust the seat angle, loosen the seat bolt underneath and tilt the seat to the desired angle.
Conclusion
After following the step-by-step instructions for putting a bicycle seat on, I must say, it’s like finding the perfect puzzle piece to complete the picture.
Just like a skilled artist, I carefully adjusted the seat height and angle to ensure maximum comfort and stability.
With the seat securely tightened, I was ready to embark on my ride, knowing that every pedal stroke would be supported by a properly installed seat.
So, grab your tools and get ready to create your own masterpiece on two wheels!