Did you know that the chain on an electric bike can easily come off, causing inconvenience and potential damage?
Don’t worry, though, because putting the chain back on is a straightforward process.
In this step-by-step guide, we will show you exactly how to assess the damage, gather the necessary tools, and properly reattach the chain to the front chainring and rear sprocket.
Get ready to get your electric bike back on track and enjoy a smooth ride once again.
Key Takeaways
- Loosen rear wheel axle nuts or quick-release skewer.
- Realign the rear wheel to center within the frame.
- Align the wheel with the chain and brake pads.
- Securely tighten the axle nuts or skewer to ensure the wheel stays in place.
Assess the Chain Damage
You need to check the chain for any damage before putting it back on.
Start by inspecting the chain to identify any visible issues such as bent or damaged links, excessive rust, or signs of wear.
Ensure that the chain is properly aligned and tensioned. If you notice any tight spots or loose sections, it could indicate a problem with the chain’s length or tension.
Troubleshooting chain issues may also involve examining the chainring and cassette for wear or damage.
Additionally, check the jockey wheels on the rear derailleur for any signs of wear or misalignment.
Once you have thoroughly inspected the chain and identified any issues, you can proceed to gather the necessary tools for putting it back on.
Gather the Necessary Tools
First, make sure you have the required tools for the task at hand. To assess chain wear and troubleshoot chain slipping on your electric bike, you will need a chain wear indicator, a clean rag, and a pair of needle-nose pliers.
The chain wear indicator will help you determine if the chain needs to be replaced due to excessive wear. Start by placing the chain wear indicator in the middle of the chain and checking the measurement. If the measurement exceeds the recommended limit, it’s time for a new chain.
Additionally, inspect the chain for any damaged or bent links. Using needle-nose pliers, you can straighten out any bent links, but if the damage is severe, a replacement might be necessary.
Once you have assessed the chain, you can move on to the next step of loosening the rear wheel.
Loosen the Rear Wheel
To loosen the rear wheel, simply loosen the axle nuts on both sides using a wrench. Start by locating the axle nuts near the rear dropout of the electric bike frame. Use a wrench to turn the nuts counterclockwise until they are loose enough to allow movement of the wheel.
Once the nuts are loose, you can proceed to realign the rear derailleur. Gently push the wheel forward to create tension on the chain, then check the chain alignment. Ensure that the chain is properly aligned with the rear sprocket and that it is sitting on the teeth correctly.
Once you have confirmed the alignment, you can move on to the next step of threading the chain onto the rear sprocket.
Thread the Chain onto the Rear Sprocket
Once the axle nuts are loosened, the next step is to thread the chain onto the rear sprocket. Here’s how you can do it:
-
Adjusting Tension: Before threading the chain, make sure to adjust the tension by moving the wheel forward or backward in the dropout slots. This will ensure proper alignment and prevent the chain from slipping off again.
-
Troubleshooting Issues: If you encounter any issues while threading the chain, such as difficulty aligning it with the sprocket or it getting stuck, check for any debris or dirt on the sprocket teeth. Clean it thoroughly and try again.
-
Double-check: Once the chain is properly threaded onto the rear sprocket, give it a gentle tug to ensure it is securely in place. Check the tension again and make any necessary adjustments.
Now that the chain is securely on the rear sprocket, you can move on to reattaching it to the front chainring.
Reattach the Chain to the Front Chainring
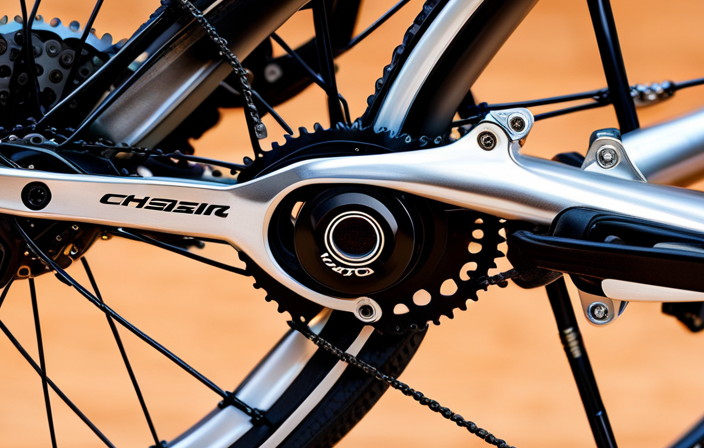
To reattach the chain to the front chainring, start by positioning the chain on the front chainring teeth.
Make sure the chain is securely in place on the chainring to avoid any potential issues during your ride.
This step is crucial to ensure proper functioning of your electric bike’s drivetrain system and to maintain a smooth and efficient ride.
Position the chain on the front chainring teeth
First, make sure the chain is properly positioned on the front chainring teeth. This step is crucial to ensure smooth and efficient pedaling on your electric bike.
Start by inspecting the front chainring for any signs of wear or damage. If you notice a worn chainring, it’s recommended to replace it before reattaching the chain.
Next, check the front derailleur adjustment to ensure it’s properly aligned with the chainring. Once you’ve confirmed these two factors, carefully place the chain onto the teeth of the front chainring, ensuring each link is engaged.
Take your time to guide the chain onto the teeth, making sure it’s properly seated and aligned. Once the chain is securely in place on the chainring, you can proceed to the next step of ensuring the chain is securely in place on the rear cassette.
Ensure the chain is securely in place on the chainring
Now that you have positioned the chain on the front chainring teeth, it is crucial to ensure that the chain is securely in place on the chainring. This step is essential to prevent the chain from slipping off while riding your electric bike.
To ensure a secure fit, follow these steps:
- Check the alignment of the chainring to ensure it is centered and straight.
- Verify that the chain is properly seated on all the teeth of the chainring.
- Gently rotate the pedal to ensure the chain moves smoothly and does not come off.
- Look for any signs of misalignment or looseness and make any necessary adjustments.
- Double-check that the chain is snug and secure on the chainring before proceeding.
By properly securing the chainring and ensuring the chain is correctly aligned, you can minimize the risk of the chain coming off during your ride.
Now, let’s move on to the next step: using the chain tool to reconnect the chain.
Use the Chain Tool to Reconnect the Chain
Once you’ve removed the broken link, you can simply use the chain tool to reconnect the chain. The chain tool is a handy device used for chain maintenance and troubleshooting common chain issues.
Here’s how you can use it to put the chain back on your electric bike. First, place the chain ends into the chain tool’s slots, ensuring they are aligned properly. Then, tighten the chain tool until it pushes the pins together, connecting the chain links. You may need to apply some force to ensure a secure connection.
Once the chain is reconnected, give it a gentle tug to check if it’s properly engaged. This will help you test the chain tension and ensure it’s ready for use.
Transitioning to the next section, let’s move on to testing the chain tension.
Test the Chain Tension
To test the chain tension, start by pushing down on the chain with your hand. If the chain moves up and down more than 1 inch, it is too loose and needs to be adjusted.
To make adjustments, locate the chain tensioner on your electric bike and use a wrench to either tighten or loosen it until the chain has the proper tension.
Remember to check the tension again after making adjustments to ensure it is neither too loose nor too tight.
Check the tension by pushing down on the chain
Check the tension by pushing down on the chain, making sure it is properly aligned. To ensure your electric bike’s chain is in proper working order, here are some key things to keep in mind:
- Misaligned chain can cause it to slip off the sprockets, leading to poor performance and potential damage.
- Checking chain tension regularly is crucial to prevent common chain problems such as skipping gears or excessive wear.
- A loose chain may cause it to come off during riding, posing a safety risk.
- Overly tight chains can put stress on the drivetrain components, resulting in premature wear.
After assessing the tension, you may need to make adjustments if the chain is too loose or too tight. This will ensure optimal performance and longevity of your electric bike’s chain system.
Make adjustments if the chain is too loose or too tight
To properly adjust the tension of your chain, you’ll need to ensure it is neither too loose nor too tight. Here are the steps to follow:
-
Start by checking the tension of the chain. If it is too loose, it can slip off the sprockets and cause damage. On the other hand, if it is too tight, it can put excessive strain on the chain and other components of your electric bike.
-
To adjust the tension, locate the rear wheel axle nuts or quick-release skewer. Loosen them slightly to allow for movement of the wheel.
-
Next, move the wheel forward or backward to adjust the tension. Find the desired tension and make sure it is not too loose or too tight.
-
Once you have achieved the desired tension, tighten the axle nuts or quick-release skewer securely.
This adjustment will help prevent common chain problems. Now, let’s move on to the next step of realigning the rear wheel.
Realign the Rear Wheel
To realign the rear wheel on your electric bike, start by loosening the quick-release lever or axle nuts on both sides of the wheel.
Next, adjust the position of the wheel until it is centered within the frame, making sure it is aligned with the chain and the brake pads.
Once the wheel is in the correct position, tighten the quick-release lever or axle nuts securely to ensure the wheel stays in place during rides.
Adjust the rear wheel to the correct position
First, make sure the rear wheel is in the correct position. Correct wheel alignment is crucial for troubleshooting chain issues on an electric bike.
Start by loosening the quick-release lever or axle nuts on both sides of the rear wheel.
Next, pull the wheel backward or forward until it is centered in the chainstay. Check the alignment by looking at the gap between the tire and the chainstay on both sides.
Once the wheel is properly aligned, tighten the quick-release lever or axle nuts securely. This will ensure that the wheel stays in the correct position while riding.
Now that the rear wheel is in the correct position, you can proceed to the next step of tightening the quick-release lever or axle nuts to secure the wheel in place.
Tighten the quick-release lever or axle nuts
Now that the rear wheel is properly aligned, you can securely tighten the quick-release lever or axle nuts. This step is crucial in maintaining the correct chain tension on your electric bike.
Chain maintenance is essential for smooth and efficient riding, as well as prolonging the lifespan of your bike’s drivetrain components. Tightening the quick-release lever or axle nuts ensures that the rear wheel stays securely in place, preventing any unnecessary movement that could lead to chain slippage or derailment.
It is important to note that the specific method of tightening will vary depending on the type of quick-release lever or axle nuts on your bike. Refer to your bike’s manual or consult a professional if you are unsure.
Once the quick-release lever or axle nuts are tightened, you can proceed to the next step of lubricating the chain.
Lubricate the Chain
Start by applying lubricant to the chain of your electric bike. Proper chain maintenance is crucial for the smooth operation and longevity of your bike. Regularly lubricating the chain prevents excessive wear, reduces friction, and improves shifting performance. To effectively lubricate the chain, follow these chain lubrication techniques:
-
Clean the chain: Use a degreaser and a brush to remove any dirt, debris, or old lubricant from the chain. Wipe it dry with a clean cloth.
-
Apply lubricant: Hold the lubricant bottle close to the chain and backpedal the bike while squeezing the bottle gently. Ensure that every link is coated with lubricant.
-
Let it penetrate: Allow the lubricant to penetrate the chain for a few minutes. This will ensure that it reaches all the moving parts and provides optimal lubrication.
-
Wipe off excess: Use a clean cloth to wipe off any excess lubricant. This prevents dirt and grime from sticking to the chain.
Once you have lubricated the chain, you can proceed to the next step of the process, which involves test riding and fine-tuning your electric bike.
Test Ride and Fine-Tune
To ensure optimal performance, take your electric bike for a test ride and fine-tune it accordingly. Start by checking the chain tension. The importance of proper chain tension cannot be overstated.
If the chain is too loose, it may derail or slip off the sprockets, causing damage to the bike or even injuries to the rider. On the other hand, if the chain is too tight, it can put excessive strain on the drivetrain components, leading to premature wear and decreased efficiency.
During your test ride, pay attention to any unusual noises or vibrations coming from the chain. If you notice any issues, stop and make the necessary adjustments. Also, be mindful of common mistakes to avoid during chain reattachment, such as improperly aligning the chain or not properly securing the quick link.
Taking the time to fine-tune your electric bike after reattaching the chain will ensure smooth and safe rides.
Frequently Asked Questions
How do I determine if my chain is damaged?
To determine if your chain is damaged, carefully inspect it for the following signs: rust, stretched links, excessive wear, or any missing or bent teeth on the chainrings or cassette. Troubleshoot and fix a broken chain by following these steps.
What tools do I need to gather before attempting to put the chain back on?
To put the chain back on, you’ll need a chain tool, a small screwdriver, and a pair of pliers. These tools are essential for fixing common chain issues like a broken or twisted chain.
How do I loosen the rear wheel to make it easier to work with the chain?
To loosen the rear wheel for easier chain maintenance, locate the axle nuts or quick release lever on either side of the wheel. Using a wrench or your fingers, turn the nuts counterclockwise to create slack in the chain.
How do I properly thread the chain onto the rear sprocket?
To properly thread the chain onto the rear sprocket, first ensure proper chain tension. Check for common chain issues like twisted links or excessive wear. Then, align the chain with the sprocket teeth and gradually rotate the pedals to guide the chain onto the sprocket.
How do I reattach the chain to the front chainring?
To reattach the chain to the front chainring, first, make sure the chain is properly threaded on the rear sprocket. Then, align the chain with the front chainring teeth and use your hand to guide it onto the chainring. If the chain keeps coming off, check for any bent or damaged teeth on the chainring and replace if necessary.
Conclusion
Congratulations! You’ve successfully learned how to put a chain back on your electric bike.
Remember, it’s important to assess the chain damage before proceeding.
Gather your tools and loosen the rear wheel carefully.
Thread the chain onto the rear sprocket and reattach it to the front chainring.
Test the chain tension and realign the rear wheel if necessary.
Don’t forget to lubricate the chain for smooth operation.
Now, it’s time for a test ride to ensure everything is working perfectly.
Happy riding!
