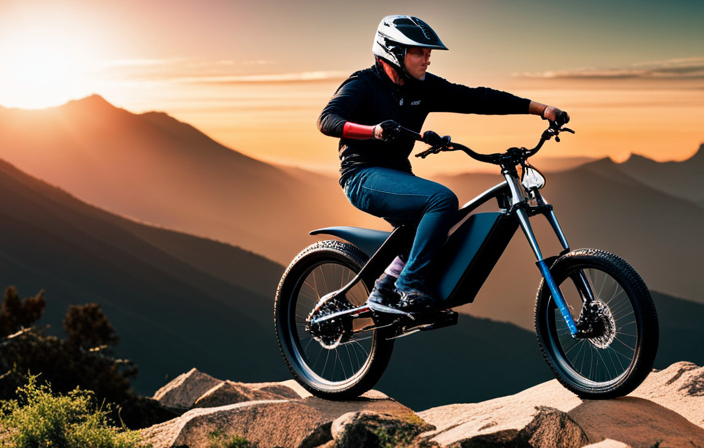
Did you know that adding an electric motor to your bike can increase your speed and take your cycling experience to a whole new level? With the right knowledge and tools, you can easily transform your regular bike into an electric-powered machine.
In this article, I will guide you through the step-by-step process of putting an electric motor on your bike, ensuring compatibility, safety, and optimal performance.
Get ready to enjoy the benefits of motor-assisted biking and explore new riding modes and features. Let’s get started!
Key Takeaways
- Test and adjust the electric motor and controller for optimal performance.
- Install a throttle or pedal assist sensor for direct control of the motor’s power output.
- Ensure proper safety measures and maintenance of the motor and electrical components.
- Explore different riding modes and features to customize the biking experience.
Assess Your Bike’s Compatibility
You’ll need to evaluate if your bike is compatible with an electric motor. Assessing compatibility involves determining the motor power that your bike can handle. To do this, you’ll need to consider factors such as the frame strength, wheel size, and weight capacity of your bike.
The first step is to check if your bike has enough space to accommodate the motor and battery. Measure the available space and compare it to the dimensions of the motor kit you are considering. Additionally, evaluate the bike’s weight capacity to ensure it can handle the additional weight of the motor and battery.
Assessing compatibility is crucial to ensure a successful electric motor conversion. Once you have determined your bike’s compatibility, you can move on to choosing the right electric motor kit for your needs and preferences.
Choose the Right Electric Motor Kit
Start by selecting the appropriate kit for your bicycle. When choosing the right electric motor kit, there are several considerations and options to keep in mind.
-
Power Output: Determine the power output you need based on your riding preferences and the terrain you’ll be covering. Higher power motors are ideal for hilly areas or off-road riding, while lower power motors are suitable for flat terrain.
-
Battery Capacity: Consider the range you want to achieve. Choose a battery with sufficient capacity to cover the distance you plan to ride without needing frequent recharges.
-
Motor Type: Decide between a front hub, rear hub, or mid-drive motor. Each type has its advantages and installation requirements, so choose one that suits your needs and bike frame.
-
Compatibility: Ensure that the motor kit is compatible with your bike’s frame and wheel size. Check the specifications provided by the manufacturer to avoid any compatibility issues.
Installing an electric motor on a bike is a step-by-step process that requires the necessary tools and equipment.
Transitioning into the subsequent section, gather the necessary tools and equipment to proceed with the installation.
Gather the Necessary Tools and Equipment
To gather all the required tools and equipment, make sure you have everything necessary for the installation process. When it comes to bike modifications and turning your bicycle into motorized transportation, having the right tools is crucial.
Here’s a list of items you’ll need:
- A wrench set to remove and tighten bolts
- A screwdriver set for various screws
- Pliers to hold or manipulate small objects
- Wire cutters to trim the excess wire
- A multimeter to check electrical connections
- A wire stripper to remove insulation from wires
- Zip ties to secure the wiring
- Electrical tape to insulate and protect connections
Don’t forget safety gear such as gloves and safety glasses.
With these tools at hand, you’ll be well-prepared to start the installation process and transform your bike into an electric-powered ride.
Prepare Your Bike for Installation
First, make sure your bicycle is ready for the installation process. Before upgrading bike components, it’s important to inspect your bike for any damage or wear that may affect the installation. Check for any loose or damaged parts, such as brakes, gears, or chains, and make any necessary repairs before proceeding.
Next, choose the right battery for your electric motor. Consider factors such as power output, weight, and battery life. Determine where you want to mount the battery on your bike, ensuring it is secure and won’t interfere with your pedaling or balance.
Once your bike is inspected and the battery is chosen, you can move on to the next step of the installation process: installing the electric motor on the front or rear wheel. This will be covered in the subsequent section.
Install the Electric Motor on the Front or Rear Wheel
Choose whether you want to install the electric motor on the front or rear wheel of your bicycle.
When opting for a front wheel installation, start by removing the front wheel from the bike frame. Attach the electric motor to the front wheel hub, ensuring it is securely fastened. Reinstall the front wheel onto the bike frame, making sure it is aligned properly.
On the other hand, for a rear wheel installation, begin by removing the rear wheel from the bike frame. Attach the electric motor to the rear wheel hub, ensuring a tight fit. Place the rear wheel back onto the bike frame, ensuring proper alignment.
Once the electric motor is securely installed on either the front or rear wheel, we can move on to connecting it to the battery and controller in the subsequent section.
Connect the Motor to the Battery and Controller
Once the motor has been securely installed on either the front or rear wheel, the next step is to connect it to the battery and controller. To ensure a proper battery connection, follow these steps:
-
Locate the positive (+) and negative (-) terminals on both the motor and the battery. Make sure to identify the correct terminals to avoid any electrical mishaps.
-
Connect the positive terminal of the motor to the positive terminal of the battery using a thick gauge wire. Use a reliable connector that can handle the current flow without overheating or melting.
-
Connect the negative terminal of the motor to the negative terminal of the battery using another thick gauge wire. Ensure a secure connection to maintain a continuous flow of power.
-
Set up the motor controller by connecting it to the battery and motor. Follow the manufacturer’s instructions for proper wiring and configuration.
With the motor successfully connected to the battery and controller, the next section will guide you on how to mount the battery onto your bike.
Mount the Battery onto Your Bike
Now that the motor is connected to the battery and controller, it’s time to mount the battery onto your bike.
The mounting position of the battery is crucial for maintaining balance and stability while riding. Choose a secure location that is easily accessible for charging and maintenance.
Make sure the mounting brackets or straps are tight and secure to prevent any movement or vibrations during rides. Additionally, consider the battery capacity and weight distribution to ensure optimal performance.
A well-mounted battery should not interfere with your pedaling or steering. Once the battery is securely in place, we can move on to the next step: routing and securing the wiring.
This will ensure a clean and organized setup, preventing any potential hazards and ensuring a smooth and efficient ride.
Route and Secure the Wiring
To ensure a safe and organized setup, it’s important to properly route and secure the wiring for the battery and controller. This step involves securing connections and managing excess wiring to prevent any potential hazards.
Securing connections is crucial to maintain a reliable and efficient electric motor setup. Use zip ties or adhesive mounts to secure the wiring along the frame of the bike, keeping it away from moving parts and potential sources of heat. Additionally, make sure to use electrical tape or heat shrink tubing to insulate and protect exposed wires from damage.
Managing excess wiring is essential for a clean and professional-looking installation. Use cable ties to bundle and secure any extra wiring, preventing it from getting tangled or caught in the bike’s mechanisms. Keep the excess wiring neatly tucked away to maintain a streamlined appearance.
By properly routing and securing the wiring, you can ensure a safe and efficient electric motor setup. With this step complete, it’s time to move on to testing the electric motor and controller to ensure everything is functioning correctly.
Test the Electric Motor and Controller
Make sure you test the motor and controller to ensure they’re functioning correctly. Here are the key steps to follow for testing procedures and troubleshooting tips:
-
Check the motor connections: Make sure all the wires are securely connected to the motor and controller. Fix any loose or damaged connections before proceeding.
-
Verify power supply: Ensure the battery is fully charged and providing the correct voltage to the controller. Use a multimeter to measure the voltage and check for fluctuations.
-
Test the throttle: Gradually increase the throttle and observe if the motor responds accordingly. Make sure the motor starts smoothly and accelerates without issues.
-
Monitor the controller: Keep an eye on the controller’s temperature while testing. Excessive heat could indicate a problem with the motor or controller.
Now that we’ve tested the motor and controller, let’s move on to adjusting the motor’s power and speed settings.
Adjust the Motor’s Power and Speed Settings
You can easily adjust the power and speed settings of the motor. To begin, locate the controller and identify the power output adjustment screws. These screws allow you to modify the power output of the motor, giving you the ability to increase or decrease its performance. By turning the screws clockwise, you can increase the power output, while turning them counterclockwise will decrease it. It is important to find the right balance that suits your needs and preferences.
Additionally, optimizing the speed settings is crucial for a smooth and efficient ride. Most controllers have a speed setting adjustment feature, allowing you to set the maximum speed of the motor. Adjusting this setting allows you to ride comfortably and safely.
Once you have adjusted the power and speed settings, you can move on to installing a throttle or pedal assist sensor for enhanced control and functionality.
Install a Throttle or Pedal Assist Sensor
Installing a throttle or pedal assist sensor enhances control and functionality on your electric bike. When installing a throttle, you will have the ability to control the motor’s power output directly using a hand-operated device. On the other hand, a pedal assist sensor detects your pedaling motion and adjusts the motor’s power accordingly.
To install a throttle, start by locating the appropriate handlebar position for easy access. Connect the throttle wires to the controller and secure them tightly. Troubleshooting common installation issues may involve checking for loose connections or faulty wiring.
When installing a pedal assist sensor, ensure it is positioned correctly on the bottom bracket. Connect the sensor wires to the controller and adjust the sensitivity settings as needed.
Remember to ensure proper safety measures and maintenance to keep your electric bike in optimal condition.
Ensure Proper Safety Measures and Maintenance
To ensure your safety and keep your ride running smoothly, it’s important to follow proper maintenance procedures. Safety precautions should be a top priority when installing an electric motor on your bike. Before each ride, inspect the motor and all electrical components for any signs of damage or wear. Make sure all connections are secure and properly insulated. Check the brakes to ensure they are in good working condition and adjust them if necessary. Regularly clean and lubricate the chain to prevent any issues with the motor’s performance.
Additionally, keep a maintenance checklist handy to ensure you don’t forget any important steps. By following these safety measures and properly maintaining your motor-assisted bike, you can enjoy the benefits of motor-assisted biking without any worries.
Transitioning into the subsequent section, let’s now explore how to fully enjoy the benefits of motor-assisted biking.
Enjoy the Benefits of Motor-Assisted Biking
Get ready to experience the many advantages of having a motor-assisted bicycle.
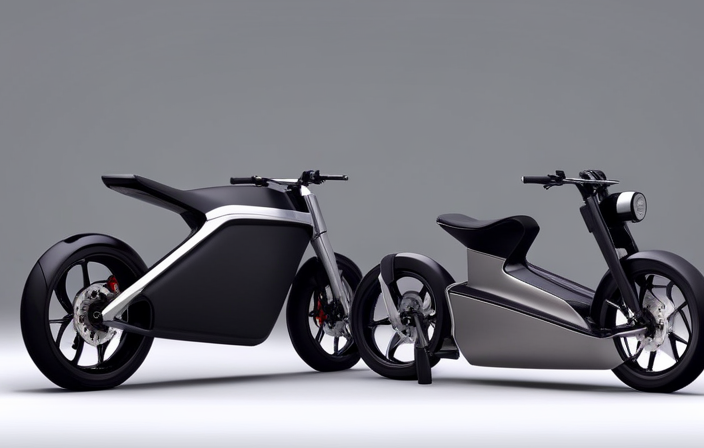
When it comes to converting your bike into an electric one, two key factors to consider are choosing the right battery capacity and comparing different motor types.
The battery capacity determines how far you can ride without recharging, so it is crucial to select one that suits your needs.
Additionally, comparing different motor types, such as hub motors or mid-drive motors, allows you to find the one that provides the best performance and efficiency for your riding style.
By carefully selecting the right battery capacity and motor type, you can enjoy a smooth and powerful ride on your motor-assisted bike.
In the next section, we will explore different riding modes and features to further enhance your biking experience.
Explore Different Riding Modes and Features
Discover the various riding modes and features that will enhance your biking experience even further.
-
Different Motor Types
-
Hub Motor: This type of motor is located in the wheel hub and provides a smooth and quiet ride.
-
Mid Drive Motor: Positioned in the crankshaft area, this motor offers better weight distribution and improved handling.
-
Friction Drive Motor: This motor sits on top of the rear wheel and provides easy installation and removal.
-
Advantages of Electric Motor
-
Increased Range: With an electric motor, you can cover longer distances without getting exhausted.
-
Hill Climbing Assistance: Electric motors provide extra power to help conquer steep inclines effortlessly.
-
Customization Options: Many electric motors come with adjustable settings to cater to individual preferences.
Exploring different riding modes and features allows you to optimize your electric bike for various conditions and riding styles.
Once you have mastered the different modes and features, you can share your experience and tips with others, helping them make the most of their electric biking adventures.
Share Your Experience and Tips with Others
Share your experiences and tips with others to help them make the most of their electric biking adventures.
When it comes to converting a bike with an electric motor, there are both pros and cons to consider. One major advantage is the added power and speed that an electric motor provides, making uphill climbs and longer distances more manageable. However, it’s important to note that the conversion process can be challenging and time-consuming.
Common challenges include finding the right motor and battery combination, as well as ensuring proper installation and wiring. To overcome these challenges, thorough research and planning are essential. Additionally, seeking advice from experienced electric bike enthusiasts or professionals can greatly simplify the installation process.
By sharing your own experiences and tips, you can help others navigate these potential hurdles and enjoy the benefits of electric biking.
Frequently Asked Questions
What are the benefits of motor-assisted biking?
The benefits of motor-assisted biking include increased speed and range, reduced effort on uphill climbs, and the ability to tackle longer distances. Choosing the right electric motor for your bike involves considering factors such as power output, battery capacity, and motor placement.
How do I adjust the power and speed settings of the electric motor?
To adjust the power and speed settings of the electric motor, locate the control panel or display on the bike. Use the provided buttons or menus to access the settings. Increase or decrease the power and speed levels as desired.
Can I install a throttle or pedal assist sensor on my bike?
When comparing throttle vs pedal assist, it’s important to consider personal preferences and specific needs. Throttle provides instant power control, while pedal assist offers a more natural riding experience by amplifying your pedaling effort. The choice depends on individual requirements and desired riding style.
What are some safety measures and maintenance tips for motor-assisted biking?
To ensure safety while motor-assisted biking, it is crucial to wear a helmet, use proper lighting, and follow traffic rules. Regular maintenance, such as checking tire pressure and lubricating the chain, will help prolong the lifespan of your motorized bike.
Are there different riding modes and features available with electric motor kits?
Different types of electric motor kits offer various riding modes and features. Pros of using an electric motor on a bike include increased speed and efficiency, while cons include additional weight and reliance on battery power.
Conclusion
In conclusion, adding an electric motor to your bike can greatly enhance your riding experience. With the right motor kit and proper installation, you can enjoy the benefits of motor-assisted biking.
For example, imagine effortlessly cruising up steep hills without breaking a sweat, or easily covering long distances without feeling fatigued. This can open up a whole new world of possibilities for exploring your surroundings and enjoying the outdoors.
So why not give it a try and transform your bike into a powerful and efficient mode of transportation?