
Alright, folks, let’s hop on the saddle and get this front wheel back on our electric bike. Trust me, it’s not as daunting as it may seem.
With a few simple steps and the right tools, you’ll be zipping down the road in no time. So, grab your wrench and let’s dive into the nitty-gritty of how to properly install that front wheel.
Ready? Let’s roll!
Key Takeaways
- Choose the right tools for the job (wrench or Allen key)
- Inspect the old wheel and fork for any damage before removing it
- Check the tire and new wheel for any signs of wear, cracks, or misalignment
- Secure the new wheel in place and double-check its alignment and stability.
Gather the necessary tools
First, make sure you have all the necessary tools to put the front wheel back on an electric bike. Choosing the right tools for the job is crucial to ensure a successful reinstallation. You will need a wrench or an Allen key, depending on the type of bolts used on your bike’s fork.
It’s important to ensure the bike is secure during the process. You can use a bike stand or simply lean it against a stable surface, making sure it won’t tip over.
To begin, position the bike in a stable location. This can be a level surface or a bike stand that provides stability. Next, locate the axle of the front wheel and loosen the bolts or nuts that secure it to the fork using the appropriate tool. Once the bolts are loosened, carefully remove the wheel from the fork, taking note of any washers or spacers that may be present.
Transition: Now that you have gathered the necessary tools and ensured the bike’s stability, it’s time to move on to the next step: positioning the bike in a stable location.
Position the bike in a stable location
Before you begin, make sure to find a sturdy spot to position your e-bike. This is important to ensure stability and safety while working on your front wheel.
Now that you have chosen the right tools and understand the importance of bike maintenance, it’s time to get started. Here’s a step-by-step guide on how to position your bike properly:
-
Find a flat, level surface: Look for an area with enough space to maneuver your bike comfortably. Avoid slopes or uneven ground, as this can make the process more challenging.
-
Secure the bike: Use a bike stand or lean the bike against a sturdy object, such as a wall or fence. Make sure it is stable and won’t tip over while you work.
-
Align the front wheel: Position the bike so that the fork dropouts are in line with the axle. This will make it easier to reinstall the wheel later on.
-
Lock the brakes: Engage the front brake to prevent the bike from rolling or tipping over while you work.
Now that your bike is securely positioned, you can proceed to the next step of loosening the axle nuts or quick release lever to remove the front wheel.
Loosen the axle nuts or quick release lever
To begin, make sure to loosen the axle nuts or use the quick release lever to remove the front wheel. Proper wheel alignment is crucial for optimal performance of an electric bike. When reinstalling the front wheel, there are common mistakes that should be avoided. Let’s discuss these ideas in detail.
When it comes to wheel alignment, it is important to ensure that the wheel is centered and straight within the fork. This ensures a smooth and stable ride, as well as efficient power transfer from the motor to the wheel. Misalignment can lead to uneven tire wear, decreased handling, and reduced efficiency.
Now, let’s take a look at the common mistakes to avoid when reinstalling the front wheel on an electric bike. These can include:
-
Forgetting to align the wheel properly: Make sure the wheel is centered and sits straight within the fork. This will ensure proper alignment and prevent any issues with handling or performance.
-
Over-tightening the axle nuts: While it’s important to secure the wheel, over-tightening the axle nuts can cause damage to the fork or hub. Use the manufacturer’s recommended torque specifications to ensure proper tightening.
-
Incorrectly installing the quick release lever: If your bike is equipped with a quick release lever, make sure it’s properly installed and tightened. This will prevent the wheel from coming loose during your ride.
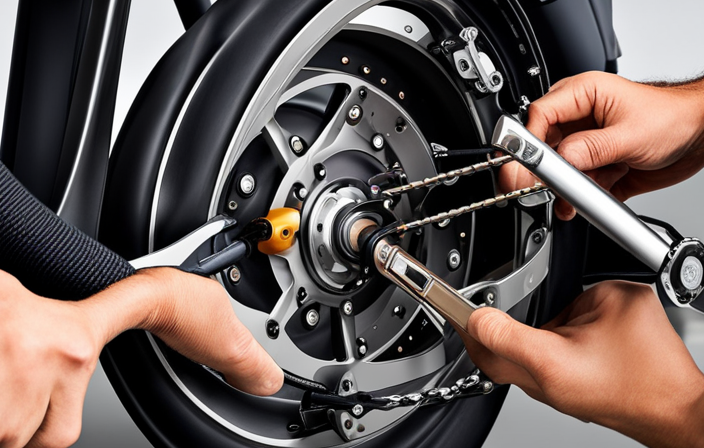
Remove the old wheel from the fork
Now, it’s time for you to carefully remove the old wheel from the fork. Before we begin, make sure you have the necessary tools: a wrench or Allen key, depending on the type of axle you have.
Step 1: Start by inspecting the fork for any damage. Look for any cracks, dents, or bends that could affect the performance of the new wheel. If you notice any issues, it’s important to address them before installing the new wheel.
Step 2: Loosen the axle nuts or quick release lever. Depending on your bike, you may need to use a wrench or simply release the lever. Turn the nuts counterclockwise or open the lever to release the tension on the axle.
Step 3: Once the nuts are loose, carefully slide the old wheel out from the fork. Pay attention to any washers or spacers that may be present. Keep them organized to ensure proper reassembly later.
Now that the old wheel has been removed, it’s time to inspect the wheel and tire for any damage.
Inspect the wheel and tire for any damage
Take a close look at the wheel and tire to check for any signs of damage. Inspecting the wheel and tire for any damage is an important step before putting it back on the electric bike. Start by examining the tire for any cuts, bulges, or excessive wear. Look for any embedded objects like nails or glass that could cause a puncture.
Next, inspect the wheel for any cracks, dents, or bends. These can affect the wheel’s structural integrity and cause problems during riding. Additionally, check the spokes to ensure they are properly tensioned and not loose or broken.
Once you have checked for any damage, it is time to test the wheel for proper rotation and alignment. Spin the wheel and observe if it rotates smoothly without any wobbling or rubbing against the brake pads. If there is any wobbling or rubbing, it may indicate a misaligned wheel or a bent axle that needs adjustment or replacement.
Align the new wheel with the fork dropouts
Make sure you align the new wheel with the fork dropouts to ensure proper installation. This step is crucial for maintaining the stability and safety of your electric bike.
Here’s a step-by-step guide on how to align the wheel with the fork dropouts:
-
First, locate the fork dropouts on the front of your bike frame. These are the openings where the wheel axle will fit into.
-
Hold the wheel with one hand and position it in front of the fork dropouts. Make sure the rotor or disc brake aligns with the brake caliper.
-
Gently slide the axle into the fork dropouts, making sure it goes all the way through.
-
Once the axle is in place, tighten the quick-release skewer or axle nut to secure the wheel. Ensure that the wheel spins freely without any wobbling.
Now that the wheel is aligned with the fork dropouts, you can proceed to the next step of inserting the axle into the fork dropouts. This will further secure the wheel and ensure a proper fit.
Insert the axle into the fork dropouts
After aligning the new wheel with the fork dropouts, gently slide the axle into place to secure the wheel. The axle is an essential component that holds the wheel firmly in position. Here’s a step-by-step guide on how to insert the axle into the fork dropouts:
-
Begin by ensuring that the axle is clean and free from any debris or dirt. This will help prevent any potential issues with the wheel alignment.
-
Hold the wheel firmly and position the axle between the fork dropouts. The dropouts are the slots on the front fork where the axle rests.
-
Slowly slide the axle into the dropouts, making sure it is aligned properly. It should fit snugly and not be crooked or misaligned.
-
Once the axle is fully inserted, you may need to adjust the position slightly to ensure the wheel is centered properly. This can be done by gently pushing or pulling on the wheel.
Troubleshooting common issues: If you encounter any difficulty sliding the axle into place, check for any obstructions or misalignment. Additionally, make sure the axle is the correct size for your bike.
Tips for maintaining a properly aligned wheel: Regularly check the alignment of your wheel to prevent any issues while riding. Ensure the axle is securely tightened, and the wheel is centered between the fork dropouts.
Now, you can proceed to tighten the axle nuts or secure the quick release lever to fully secure the wheel in place. This will be discussed in the next section.
Tighten the axle nuts or secure the quick release lever
To ensure the wheel is securely fastened, tighten the axle nuts or secure the quick release lever. This step is crucial for the proper functioning and safety of your electric bike.
Here’s a step-by-step guide on how to secure the front wheel using either the axle nuts or the quick release lever.
-
If your electric bike has axle nuts, locate them on both sides of the front wheel. Use a wrench to tighten them evenly, making sure they are snug but not overly tight. This will prevent the wheel from coming loose during your ride.
-
If your electric bike has a quick release lever, locate it on the side opposite the disc brake rotor. Open the lever by flipping it upwards or pulling it outwards, depending on the design. Then, insert the wheel into the fork dropouts, making sure it sits securely.
-
Close the quick release lever by pushing it downwards or pushing it back inwards until it is tightly secured. You should feel some resistance as you close it. This mechanism applies pressure to keep the wheel in place.
Proper wheel alignment is essential for a smooth and safe ride. After securing the front wheel, it’s important to check the alignment to ensure everything is in order.
Check the alignment of the wheel
Check if the alignment of your wheel is straight by visually inspecting it for any noticeable deviations. This step is crucial in troubleshooting wheel wobbling and ensuring a smooth ride. Here’s a detailed, step-by-step guide on checking wheel alignment:
- Stand in front of your bike and observe the front wheel closely.
- Look for any signs of misalignment, such as the wheel being visibly crooked or not centered between the fork blades.
- Check if the gap between the tire and the fork blades is consistent on both sides.
- Look for any rubbing or scraping marks on the fork blades, which could indicate an alignment issue.
By following these steps, you can easily identify whether your wheel is properly aligned or if it requires adjustment.
Once you’ve checked the alignment, you can move on to the next step: inflating the tire to the recommended pressure.
Inflate the tire to the recommended pressure to ensure optimal performance and safety.
Inflate the tire to the recommended pressure
Make sure you inflate your tire to the recommended pressure for optimal performance and safety. Maintaining proper tire pressure is crucial for both the performance and safety of your electric bike. When the tire is inflated to the correct pressure, it ensures that the bike handles well, provides good traction, and minimizes the risk of accidents or tire damage.
To choose the right tire pressure for different riding conditions and terrains, it’s important to consider the manufacturer’s recommendations and your own preferences. Lower tire pressure provides better grip and traction on rough terrains or in wet conditions. However, it may also increase rolling resistance and decrease efficiency on smooth surfaces. On the other hand, higher tire pressure reduces rolling resistance and improves efficiency on smooth roads, but it may result in a harsher ride and decreased traction on loose surfaces.
Here is a table that summarizes the recommended tire pressure for various riding conditions and terrains:
| Riding Conditions | Terrain | Recommended Tire Pressure |
|---|---|---|
| Smooth Roads | Asphalt | 40-60 psi |
| Off-road | Gravel | 30-40 psi |
| Wet Conditions | Mud | 25-35 psi |
Test the wheel for proper rotation and alignment
Once you’ve ensured the tire is properly inflated, it’s important to test the wheel for correct rotation and alignment. This step is crucial to ensure a smooth and safe ride on your electric bike.
To start, place the bike on a level surface and spin the wheel by hand. Observe the rotation and check if it spins freely without any wobbling or rubbing against the brake pads. If you notice any irregularities, it may indicate a misalignment.
To check the alignment, stand in front of the bike and look at the gap between the tire and the brake pads on both sides. They should be equal. If one side is closer or touching the tire, it means the wheel is misaligned.
To adjust the wheel alignment, loosen the axle nuts on both sides and gently tap the wheel with your hand until it is centered. Tighten the axle nuts and spin the wheel again to verify the alignment.
Once the wheel rotates smoothly and is properly aligned, you can proceed to the next step of adjusting the brake caliper if necessary.
Adjust the brake caliper if necessary
If needed, you can adjust the brake caliper by loosening the bolts and repositioning it to ensure proper alignment with the brake pads. This step is crucial in troubleshooting brake issues and ensuring that your electric bike’s brakes are functioning optimally.
Here’s a step-by-step guide on how to adjust the brake caliper:
-
Start by locating the brake caliper on your electric bike. It is usually positioned near the wheel, close to the brake rotor.
-
Use a wrench or an Allen key to loosen the bolts that secure the brake caliper to the frame of the bike. Be careful not to remove the bolts completely, as you only need to loosen them enough to allow the caliper to move.
-
Once the bolts are loosened, gently reposition the brake caliper so that it aligns with the brake pads. Make sure that there is an equal amount of space between the brake caliper and each brake pad.
-
After adjusting the position of the brake caliper, tighten the bolts firmly to secure it in place.
Now that you have successfully adjusted the brake caliper, it’s time to take a short test ride to ensure everything is working properly.
Take a short test ride to ensure everything is working properly
Now that you’ve adjusted the brake caliper, it’s time to take a quick test ride to make sure everything’s functioning properly. A test ride is crucial because it allows you to identify any issues that may have been missed during the adjustment process. It’s like a final check to ensure that your electric bike is safe and ready to hit the road.
During the test ride, pay close attention to the braking system. Test both the front and rear brakes to ensure they engage smoothly and provide enough stopping power. Listen for any unusual noises, such as squeaking or grinding, which could indicate a problem with the brake pads or rotors. Additionally, check the brake lever’s responsiveness and ensure it returns to its original position after being released.
Another benefit of a test ride is troubleshooting common issues. Pay attention to the bike’s overall performance and handling. Does it accelerate smoothly? Does it shift gears effortlessly? Are there any strange vibrations or wobbles? These issues can sometimes be indicative of misaligned components or loose connections.
As you complete your test ride, be mindful of any other potential problems that may arise. Once you’ve concluded the test ride and are satisfied with the bike’s performance, it’s time to move on to the next step: double-checking all the bolts and nuts for tightness.
Double-check all the bolts and nuts for tightness
Before moving on, make sure to go over all the bolts and nuts to ensure they’re tight. This step is crucial in ensuring the safety and functionality of your electric bike’s front wheel. Checking the bolt tightness will prevent any potential accidents or damage caused by loose components.
Here’s a step-by-step guide on how to check the tightness of your bolts and nuts:
-
Grab a wrench or a socket set that fits the size of the bolts and nuts on your front wheel.
-
Start with the axle nuts, which secure the wheel to the fork. Make sure they are tightened securely but not overly tight.
-
Move on to the brake rotor bolts. These bolts keep the rotor aligned with the caliper. Check each bolt for tightness and ensure they are properly aligned with the rotor.
-
Next, check the bolts on the brake caliper itself. Tighten any loose bolts and ensure the caliper is properly aligned with the rotor.
-
Finally, inspect the bolts on the fender or mudguard, if your electric bike has one. Tighten any loose bolts to ensure proper alignment and prevent rattling during rides.
Enjoy your ride with a properly installed front wheel on your electric bike!
Make sure to properly secure your front wheel before enjoying your ride on the electric bike. Here are some steps to follow to ensure a safe and smooth ride:
-
First, align the axle of the front wheel with the dropouts on the fork. Make sure the disc brake rotor is positioned correctly between the brake pads if your bike has disc brakes.
-
Once aligned, insert the axle into the dropouts and tighten the quick release skewer or axle nuts. Make sure it is tight enough so that the wheel is secure, but not too tight that it becomes difficult to remove later.
-
Next, test the bike’s suspension by gently pushing down on the handlebars and observing how the front fork compresses and rebounds. This will help you ensure that the suspension is functioning properly and that there are no issues with it.
-
Finally, don’t forget to regularly maintain the electric motor of your bike. Keep it clean and free of debris, and check for any signs of wear or damage. It’s also important to periodically lubricate the motor to keep it running smoothly.
Frequently Asked Questions
How do I gather the necessary tools to put a front wheel back on an electric bike?
To gather the necessary tools for putting a front wheel back on an electric bike, I would first assess the situation and troubleshoot any issues. Then, I would gather a wrench, a screwdriver, and a tire lever for removing and reinstalling the wheel.
What should I do if I notice any damage on the wheel or tire?
If I notice any damage on the wheel or tire, I should first assess the extent of the problem. To repair a punctured tire, I would need to locate the hole, remove the tire, patch it, and reinstall it. If the wheel is damaged beyond repair, I would need to replace it by removing the axle nuts, sliding out the old wheel, and sliding in the new one.
How do I align the new wheel with the fork dropouts?
To align the new wheel with the fork dropouts, first ensure compatibility between the fork and the wheel. Place the wheel between the fork dropouts, aligning the axle with the dropouts. Tighten the quick-release skewer or axle nuts to secure the wheel in place.
What is the recommended tire pressure for an electric bike?
Proper tire pressure is crucial for optimal electric bike performance. It’s like finding the perfect balance on a tightrope; too low and you’ll feel sluggish, too high and you risk a bumpy ride. Consider different riding conditions and adjust accordingly for a smooth and efficient journey.
How can I adjust the brake caliper if necessary?
To adjust the brake caliper and troubleshoot brake issues, start by locating the brake caliper bolts. Loosen them to allow for adjustment. Align the caliper with the rotor and tighten the bolts. Test the brakes for proper function.
Conclusion
I gathered all the necessary tools and positioned my electric bike in a stable location.
I loosened the axle nuts and removed the old wheel from the fork.
After inspecting the wheel and tire for any damage, I adjusted the brake caliper if needed.
Taking a short test ride ensured everything was working properly.
Finally, I double-checked all the bolts and nuts for tightness.
Now, with a properly installed front wheel, I’m ready to enjoy my ride!
Did you know that on average, an electric bike can reach speeds of up to 20 miles per hour?
Just imagine the exhilarating feeling of cruising along at that speed!
Related Posts:


Olivia’s writing is not only informative but also inspiring. She has a knack for telling stories that capture the essence of cycling and the joy it brings to people’s lives. Her writing has been praised by readers and industry experts alike for its clarity, depth, and authenticity.
In addition to her writing, Olivia is also an avid cyclist. She enjoys exploring new trails and routes and has participated in several cycling events and races. Her first-hand experience with cycling gives her a unique perspective on the sport, reflected in her writing.
Overall, Olivia is a talented writer passionate about cycling and dedicated to producing high-quality content for FlatironBike. Her contributions to the magazine have helped make it a go-to source for cycling enthusiasts worldwide.