I have always found the concept of adding a motor to my bicycle incredibly appealing. The idea of gliding along the street, feeling the breeze through my hair, all while cutting down on fuel costs and minimizing emissions, sounds like a dream realized. Nevertheless, acquiring a motorized bicycle often comes with a hefty price tag, which led me to seek an economical alternative. It was during this search that I stumbled upon the possibility of using a motor from a weed eater to propel my bike.
In this article, I’ll guide you through the process of putting a weed eater motor on your bicycle. It’s a relatively simple and inexpensive DIY project that can be completed in a few easy steps. With a little bit of mechanical know-how and some patience, you can have your own motorized bicycle in no time.
So, let’s dive in and get started on this exciting project!
Key Takeaways
- Using a weed eater motor to motorize a bicycle is a cost-effective and eco-friendly option.
- Before installing the motor, inspect the condition of your bicycle’s tires, brakes, chain, and accessories.
- To install the motor, mount the engine to the rear of the frame using the mounting bracket, attach the throttle cable and chain, and connect the fuel line to the carburetor.
- Regular maintenance, such as checking the oil level, cleaning the air filter, and checking tire pressure, is crucial for optimal performance and safety.
Gather Your Materials and Tools
Now it’s time to start gathering all the materials and tools you’ll need to transform your bicycle with a weed eater motor! Choosing compatible materials is crucial to ensure that your bike can handle the added weight and power of the motor.
You’ll want to find a weed eater motor that is compatible with your bicycle’s frame size and that can be mounted securely onto the frame. In addition to the motor, you’ll need a few essential tools for the job.
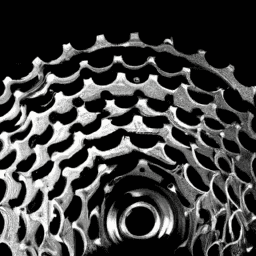
A set of wrenches, pliers, and screwdrivers will come in handy when attaching the motor to your bike’s frame. You’ll also need a chain breaker tool to resize your bike’s chain to fit the motor’s sprocket.
Don’t forget to also grab some zip ties, bolts, and nuts to secure the motor and other components onto your bike. With all your materials and tools gathered, it’s time to prepare your bicycle for the transformation.
Prepare Your Bicycle
Get your two-wheeled ride all set by making sure it’s in good shape and ready for some modifications. Before you start attaching the weed eater motor, you need to inspect your bicycle to ensure that it’s in good condition. Here are the steps to prepare your bicycle:
-
Inspecting Tires: Check your tires for damage, punctures, and excessive wear. Make sure they’re fully inflated to the recommended pressure. If you find any damage, replace the tire before proceeding.
-
Adjusting Brakes: Your brakes need to be in excellent working condition to ensure your safety. Check the brake pads for wear and replace them if necessary. Adjust the brake tension so that the pads are close to the rims.
-
Checking Chain: Inspect your bike’s chain for damage and wear. Make sure it’s properly lubricated and tensioned.
-
Removing Accessories: Remove any accessories that may get in the way of the motor installation, such as fenders, kickstands, and racks.
Once you’ve completed the above steps, your bicycle is ready for the weed eater motor installation.
Now that your bike’s in good shape, it’s time to install the weed eater motor.
Install the Weed Eater Motor
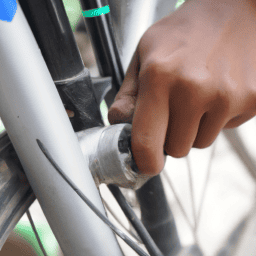
After inspecting and preparing your bike, it’s time to attach the motorized engine to your two-wheeled transportation.
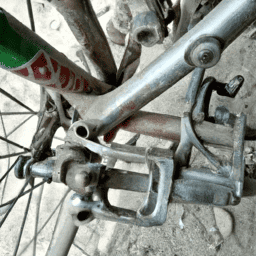
Begin by finding the correct place to mount the engine on the bicycle’s frame. In most cases, the motor will attach to the rear of the frame, where the wheel hub is located. Use the mounting bracket that comes with the motor to attach it securely to the bike’s frame, making sure it is level and centered.
Once the engine is mounted, connect the throttle cable to the carburetor and attach the chain to the sprocket on the motor. Tighten the chain, making sure it is properly tensioned.
Finally, attach the fuel line to the carburetor and fill the tank with gas. Before starting the engine, double-check that all connections are secure, and wear appropriate safety gear, such as a helmet and eye protection. Troubleshooting tips include checking for loose connections and ensuring that the spark plug is properly seated.
Always follow safety precautions when operating a motorized bicycle, including obeying traffic laws and wearing appropriate gear.
With the motor installed and all connections secure, it’s time to move on to the next step: testing your motorized bicycle.
Test Your Motorized Bicycle
To make sure your new ride is ready for the road, take it for a spin around the block to test its speed and handling. Before you begin the performance testing, make sure that you’ve taken all necessary safety precautions. Wear a helmet, gloves, and other protective gear to protect yourself from any unforeseen accidents. Also, check that your bike’s brakes are in good working condition, and that the engine is properly secured to the frame.
Once you’re ready to test your motorized bicycle, start with a low speed and gradually work your way up to higher speeds. Observe how the bike handles turns and sharp corners. Check that the engine is running smoothly and that there are no unusual noises coming from the motor. If you notice any problems, stop immediately and make the necessary adjustments.
By following these performance testing procedures, you can ensure that your motorized bicycle is both safe and enjoyable to ride.
As you finish up your performance testing, it’s important to keep in mind that regular maintenance is crucial to keep your bike running smoothly. In the next section, we’ll discuss how to maintain your motorized bicycle and keep it in top condition.
Maintain Your Motorized Bicycle
Make sure you keep up with regular maintenance of your motorized bike to ensure it stays in top condition and runs smoothly. A well-maintained motorized bike will also provide a safer ride for you and others on the road. Here are some troubleshooting tips and safety precautions to keep in mind:
| Maintenance Task | How Often | Tools Needed |
|---|---|---|
| Check oil level | Every 2 weeks | Dipstick |
| Clean air filter | Every 3 months | Screwdriver |
| Check tire pressure | Every 2 weeks | Tire gauge |
First, regularly check the oil level using the dipstick every two weeks. Low oil levels can cause damage to the engine and hinder performance. Second, clean the air filter every three months to ensure proper air flow to the engine. A clogged air filter can cause reduced power and fuel efficiency. Lastly, make sure to check the tire pressure every two weeks to ensure a safe and smooth ride. Low tire pressure can cause the bike to handle poorly and increase the risk of a blowout.
In addition to regular maintenance, it is important to take safety precautions when riding a motorized bike. Always wear a helmet and other protective gear such as gloves and closed-toe shoes. Follow traffic laws and signals, and use hand signals to indicate turns. Make sure to also use reflective gear and lights when riding at night or in low light conditions. By following these maintenance and safety tips, you can enjoy a smooth and safe ride on your motorized bike.
Frequently Asked Questions
Can any type of weed eater motor be used for this project?
Weed eater motor compatibility is crucial when undertaking a project like this. Installation process varies depending on the motor type. It’s important to research and ensure the motor is appropriate for the bicycle’s dimensions and weight requirements.
How fast can a motorized bicycle with a weed eater motor go?
Top speed and acceleration are affected by the use of a weed eater motor on a bicycle. The performance of the bicycle depends on the power output of the motor and the weight of the rider. The maximum speed achievable is limited by the motor’s power and the size of the bicycle’s wheels.
Is it legal to ride a motorized bicycle on the road?
I researched the legality of riding a motorized bicycle on the road. Pros include reduced traffic congestion and environmental impact. Cons include safety concerns for both the rider and other drivers. It’s important to follow local laws and wear appropriate safety gear.
Can the weed eater motor be easily removed from the bicycle?
Removing the weed eater motor from a bicycle can range in difficulty level depending on the specific setup. Alternative motor options, such as a bicycle-specific motor, may be easier to remove and install.
How long does the motor typically last before needing to be replaced or repaired?
As someone who has used a weed eater motor for various projects, I can say that proper motor maintenance is crucial for longevity. Regular oil changes, air filter cleanings, and proper fuel mixtures can extend the life of the motor. Repairs may be needed after several years of use.
Conclusion
In conclusion, putting a weed eater motor on a bicycle can be a thrilling and rewarding experience. It requires patience, skill, and the right tools. Like a surgeon, you must be precise in your movements and follow the steps carefully.
But once you’ve completed the process and start to feel the wind in your hair as you zip down the street, you’ll feel like a master mechanic. As you ride your motorized bicycle, you’ll feel like a bird soaring through the sky. The power of the motor will propel you forward, and the wind will whip around you like a symphony.
You’ll feel a sense of freedom and liberation that only comes from being in control of your own destiny. So gather your tools, prepare your bicycle, and take the plunge. Your motorized bicycle adventure awaits!