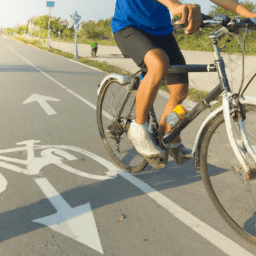
Whether you’re a passionate cyclist or simply enjoy leisurely bike rides, keeping your tires properly inflated is a crucial maintenance duty. Underinflated tires can compromise the comfort of your ride, damage your rims, and heighten the risk of tire punctures. Fortunately, the process of inflating your bike tires is straightforward and something you can quickly master.
In this article, we’ll guide you through the steps of putting air in your bicycle tires so that you can ride comfortably and safely.
Before you get started, you’ll need to gather a few supplies. The most important item you’ll need is a pump. You can use a floor pump, a hand pump, or a CO2 cartridge pump, depending on your preference and the type of valve on your tire. You’ll also need to know the recommended tire pressure for your bike, which you can find printed on the side of the tire or in your bike’s manual.
With these supplies in hand, you’re ready to get started inflating your bicycle tires.
Key Takeaways
- Choosing the proper valve head for the pump is crucial for inflating bike tires properly.
- Different types of tires require different levels of air pressure, and overinflating or underinflating can cause problems.
- Checking tire pressure regularly is crucial for safety and performance, as it affects bike stability, grip, and handling.
- Proper inflation techniques, avoiding common mistakes, and checking tire pressure accurately can help prevent punctures, flat tires, and wear down of tire tread.
Gather Your Supplies
You’ll need to grab a few supplies to ensure that you can properly inflate your bike tires. So, make sure you’ve got a bike pump, a tire gauge, and a valve adapter on hand. Using a bike pump is the most efficient way to inflate your tires, and a tire gauge will help ensure that you’re inflating to the proper pressure.
A valve adapter is also necessary if your pump doesn’t fit the valve on your bike. Proper inflation techniques are important to ensure a smooth and safe ride. Overinflating your tires can lead to a rough ride and increase the risk of a blowout, while underinflating can lead to poor handling and increased rolling resistance.
Common mistakes to avoid include using the wrong type of pump, not checking the pressure with a gauge, and not tightening the valve properly after inflating. Once you’ve gathered your supplies, the next step is to locate the valve on your bike.
Locate the Valve
First things first, gotta find that little sucker where the air goes in. Look for a tiny metal thing sticking out of your wheel. This is the valve that you need to open to pump air into your bike tire.
There are two main types of valves: Schrader and Presta. The Schrader valve looks like the valve on a car tire and is common on most bikes. The Presta valve is thinner and has a locking nut at the top. Make sure to identify which valve you have before proceeding.
If you’re having trouble locating the valve or if it’s not working properly, there are a few things you can do. First, make sure that the valve is not covered by dirt or debris. Use a cloth or brush to clean it off. If that doesn’t work, try unscrewing the valve cap and pressing down on the center pin to release any trapped air. If you still can’t get air into the tire, you may need to replace the valve or take your bike to a professional for further troubleshooting.
Now that you’ve located the valve and ensured that it’s in working condition, it’s time to connect the pump and start inflating your tire.
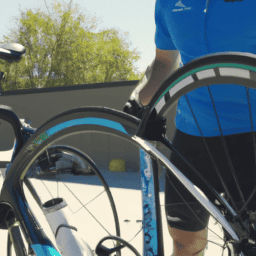
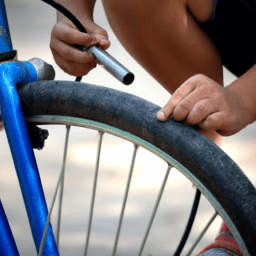
Connect the Pump
When connecting the pump to your bicycle tire, it’s important to choose the correct valve head that fits the valve on your tire. Look for either a Presta or Schrader valve head, and ensure that it matches the valve on your tire.
Once you have the correct valve head, securely attach the pump to the valve, ensuring that it is tightly fitted before beginning to pump air into the tire.
By following these key points, you can ensure a proper and effective inflation of your bicycle tire.
Choose the Correct Valve Head
Don’t worry, it’s easy to figure out which valve head your bike has. There are two main valve head types: Presta and Schrader. Here’s how you can identify which one your bike has:
-
Look at the shape: Presta valves are long and thin, while Schrader valves are shorter and more cylindrical.
-
Check the rim: Presta valves are typically found on high-performance bikes with narrow rims, while Schrader valves are more commonly found on wider rims, like those on mountain bikes.
-
Press the valve: If air comes out, it’s a Schrader valve. If not, it’s a Presta valve.
-
Look for a removable cap: Presta valves have a small, threaded cap that must be removed before inflating, while Schrader valves do not.
Once you’ve identified your valve head type, it’s important to make sure it’s compatible with the pump you’re using. Most pumps can accommodate both Presta and Schrader valves, but some require an adapter. Check the pump’s manual or packaging to see if an adapter is necessary.
Now that you know which valve head your bike has and whether it’s compatible with your pump, it’s time to securely attach the pump to the valve.
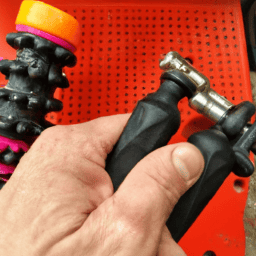
Securely Attach the Pump
Congratulations, you’ve successfully identified your valve head type and now it’s time to get that pump attached securely! Before you proceed, take a quick glance at your pump. Is it clean and free from debris? If not, give it a quick wipe down to ensure it’s in good working condition. Pump maintenance is crucial to keep it functioning properly, so make sure to clean it regularly.
Different pump types may have different attachment methods, but the most common is the thumb lock lever. This lever secures the pump onto the valve head and prevents air from escaping during inflation. Make sure to push the lever down firmly to ensure a tight seal. If you have a pump with a screw-on attachment method, make sure to thread it on tightly and check for any air leaks.
Once you’ve securely attached the pump, you’re ready to inflate the tires.
Keep in mind that different types of tires require different levels of air pressure. Refer to the recommended pressure range on the tire sidewall or check with your local bike shop for the appropriate levels. With the pump securely attached, begin to pump air into the tire and check the pressure regularly with a gauge. Once you’ve reached the desired pressure, remove the pump and replace the valve cap.
Congratulations, you’ve successfully inflated your bike tires!
Inflate the Tires
First things first, you gotta inflate those tires if you want to ride your bike like a pro! Just grab your pump and get ready to feel the rush of the wind in your hair.
Proper inflation techniques are important to ensure a smooth ride and avoid unnecessary punctures. Check the recommended pressure range for your bike tires, which is usually imprinted on the side of the tire.
When inflating, make sure the pump head is securely attached to the valve stem. Pump in short, sharp bursts and listen for the hiss of air entering the tire. Avoid over-inflating the tires, which can lead to a bumpy ride and can even burst the tire. On the other hand, under-inflated tires can cause friction and wear down the tread.
Once you feel the tire has been inflated properly, disconnect the pump and check the pressure.
Disconnect the Pump and Check the Pressure
Now that you’ve attached the pump to the valve stem and inflated the tires, it’s time to disconnect the pump and check the pressure. Checking the pressure of your bike tires is an essential step that you shouldn’t skip.
The importance of proper tire pressure can’t be overstated. It affects your bike’s stability, grip, and overall performance. Riding on underinflated tires can make your ride sluggish and increase the chances of getting a flat tire. On the other hand, overinflated tires can make the ride too bumpy and compromise your bike’s handling.
Therefore, it’s crucial to check the tire pressure regularly and ensure that it’s within the recommended range.
When checking the tire pressure, avoid making common mistakes that can affect the accuracy of the reading. For instance, don’t check the pressure immediately after riding your bike as the heat generated during the ride can increase the pressure and give you a false reading. Also, ensure that the valve stem is properly aligned with the gauge to prevent air leaks. Additionally, use a reliable gauge that’s calibrated to the correct pressure range for your bike.
By following these simple steps, you can ensure that your bike’s tire pressure is accurate, and enjoy a safe and smooth ride.
Frequently Asked Questions
How often should I put air in my bicycle tires?
Do you want to avoid punctures and increase performance? Checking tire pressure often is crucial. Signs of underinflated tires include slow speed and wobbly handling. Inflate to recommended psi for optimal performance.
Can I use any type of pump to inflate my bicycle tires?
To inflate your bicycle tires, you can use either a hand pump or an electric pump. Hand pumps are portable, but require more effort. Electric pumps are faster, but less portable. Recommended brands for optimal accuracy include Topeak, Lezyne, and Bontrager.
What is the correct air pressure for my specific type of bicycle tire?
Proper tire pressure is paramount for peak performance, preventing flats, and ensuring safety. Measure it accurately with a gauge. Look up the recommended pressure range for your tire type, then use a pump to inflate to the desired level.
What should I do if I accidentally over-inflate my bicycle tire?
If you accidentally over-inflate your bicycle tire, it’s important to release the excess air immediately to prevent damage. Use a pressure gauge to check the pressure and release air if necessary. Avoid over-inflation by following manufacturer’s recommendations.
How do I know if my bicycle tire has a puncture or leak?
Do you notice your bike feeling sluggish or wobbling? These are signs of a puncture or leak. Common causes include sharp objects, worn out tires, and incorrect inflation. Prevention tips include regular inspection and using puncture-resistant tires.
Conclusion
Congratulations! You’ve successfully pumped air into your bicycle tires!
Now, take a moment to appreciate the coincidence of this simple act. The air you just pumped into the tires is made up of molecules that have been around for billions of years, traveling through the atmosphere and sustaining life on our planet.
And now, those same molecules are helping you to ride your bike and explore the world around you. But don’t forget, proper tire pressure is crucial for a safe and efficient ride.
Be sure to regularly check and adjust your tire pressure as needed. With this newfound knowledge and skill, you can confidently hit the road and embark on new adventures on your trusty bicycle.
Happy riding!