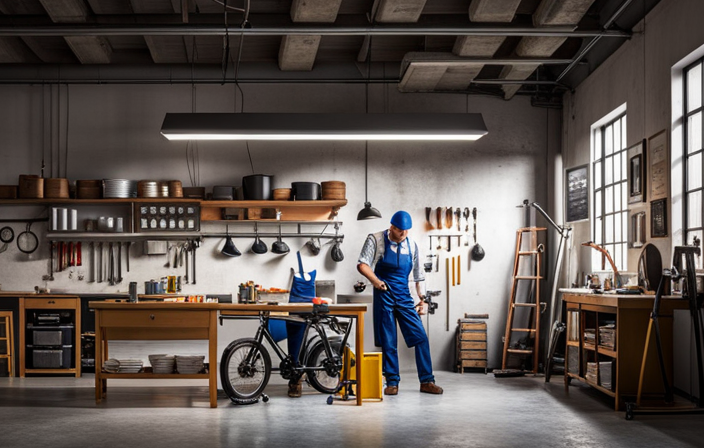

As I eagerly unwrap the box, the anticipation builds. Today, I will guide you through the process of assembling your very own electric bike.
With the right tools and a little patience, you’ll soon be cruising down the streets in style.
We’ll start by carefully inspecting each component, ensuring nothing is damaged.
From there, we’ll tackle the frame assembly, attaching the front fork and handlebars with precision.
So, let’s dive in and bring this electric dream to life!
Key Takeaways
- Installing drivetrain components and attaching pedals is an important step in assembling an electric bike.
- Properly installing the battery and connecting the wiring is crucial for the functioning of the electric bike.
- Adjusting the suspension, if applicable, is necessary to optimize the bike’s performance.
- Regularly checking and tightening bolts and screws ensures the safety and integrity of the electric bike.

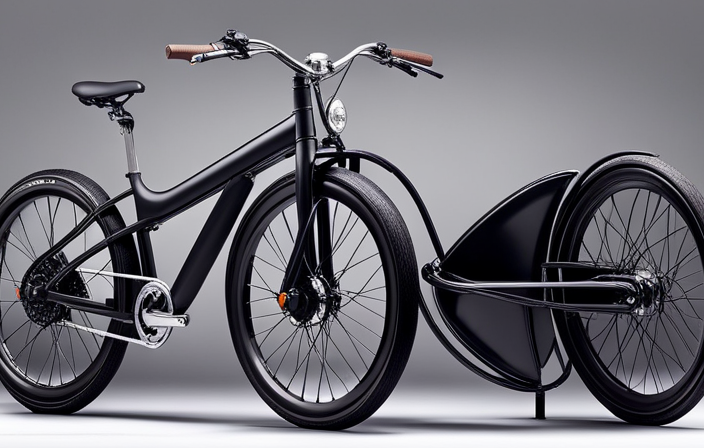
ANCHEER 27.5 '' Electric Bike for Adults, Peak 750W Ebike, 3 Hours Fast Charge, 60 Miles Electric Bicycle with 48V/499Wh Battery, Electric Mountain Bike with 21 Speed (Blue Trailblazer XT)
✅【499Wh High-Capacity Fast-Charging Battery】 – Enjoy a range of 25-60 miles per charge with the powerful 48V 10.4Ah...
As an affiliate, we earn on qualifying purchases.
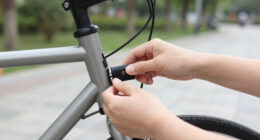
Gather all the necessary tools and equipment
You’ll need to gather all the necessary tools and equipment before you can start putting your electric bike together. To ensure a smooth and efficient assembly process, it’s crucial to have the right tools on hand. Here are the tools needed for the job:
-
Allen wrench set: This set will come in handy for tightening bolts and screws.
-
Screwdriver set: Make sure you have a variety of screwdrivers in different sizes to accommodate various components.
-
Adjustable wrench: This tool will be useful for adjusting nuts and bolts that require a more secure fit.
-
Wire cutters/strippers: These will be necessary for any electrical work that needs to be done.
Before you begin, it’s important to take some safety precautions. Wear protective gloves and goggles to prevent any injuries. Additionally, make sure to work in a well-ventilated area to avoid inhaling any fumes.
Now that you have all your tools and safety precautions in place, let’s move on to unboxing and inspecting all the components of your electric bike.

Electric Bike for Adults, 48V 20Ah Removable Battery, 1500W Peak & 100+ Miles Ebike, Dual Suspension Electric Motorcycle, 20'' Fat Tires All-Terrain UL 2849 for Mountain,Snow,Sand,Commuter
1500W PEAK POWER & HIGH TORQUE: Dominate challenging terrain with a 1500W high-torque motor engineered for powerful acceleration...
As an affiliate, we earn on qualifying purchases.
Unbox and inspect all the components of your electric bike
Once you’ve unboxed and inspected all the components, make sure everything is in good condition before proceeding. To ensure the proper functioning of your electric bike, follow these steps:
-
Check the frame: Look for any cracks or dents in the frame. Pay close attention to the welds and joints, as they should be smooth and secure.
-
Inspect the wheels: Spin each wheel and check for any wobbling or misalignment. Ensure that the spokes are tight and evenly tensioned. Look for any signs of damage or wear on the tires.
-
Examine the electrical components: Inspect the battery, motor, and wiring for any visible defects or loose connections. Make sure all connectors are securely attached.
Once you’ve thoroughly inspected all the bike components and ensured their good condition, you can proceed to the next section about starting with the frame assembly.

ASKGO Electric Bike for Adults, 1500W Peak Mountain Ebike with 25 MPH, 65 Miles Range, 48V 10.4Ah Removable Battery Ebike, 26" Electric Bicycle for Commute
Color-coded speed configurations: Features a 7-speed system for the Black and Blue models to handle various terrains, and...
As an affiliate, we earn on qualifying purchases.
Start with the frame assembly
To begin with the frame assembly, it’s important to ensure that all the components are in good condition and properly inspected. First, check the frame alignment by measuring the distance between the front and rear dropouts on both sides. The measurements should be equal, indicating a properly aligned frame. Next, secure the motor to the frame using the provided bolts and washers. Make sure to tighten them securely to prevent any movement during use.
To help you visualize the assembly process, here is a table showing the necessary steps:
| Step | Task |
|---|---|
| 1 | Inspect frame for any damage or defects |
| 2 | Measure frame alignment |
| 3 | Attach motor to frame securely |
| 4 | Double-check all connections and tighten as necessary |
Now that the frame assembly is complete, we can move on to attaching the front fork and handlebars. This will allow us to have a stable and functional electric bike.

Loeook Electric Bike for Adults, 26" Ebike with 1000W Peak Motor, 20MPH 50Miles Electric Mountain Bike with 48V Removable Battery, 7-Speed, Front Suspension, LCD Display, UL 2849 Certified
500W Powerful Brushless Motor: The electric bike is powered by a high-performance 500W motor (1000W peak), delivering robust...
As an affiliate, we earn on qualifying purchases.
Attach the front fork and handlebars
Now that the frame assembly is complete, it’s time to attach the front fork and handlebars to complete the assembly of your electric bike.
First, ensure that the front fork is aligned properly with the frame. Align the fork by inserting it into the head tube and tightening the headset.
Next, adjust the handlebar height to your desired position. Loosen the stem bolts and raise or lower the handlebars to a comfortable height. Make sure they are straight and aligned with the front wheel. Once the handlebar height is set, tighten the stem bolts securely.
With the front fork and handlebars properly attached, your electric bike is now taking shape.
Moving forward, we will move on to the next step of installing the seat and seat post.
Install the seat and seat post
With the front fork and handlebars securely attached, it’s time to install the seat and seat post. To ensure a comfortable riding experience, it’s crucial to install the seat post correctly and adjust the seat height appropriately.
Start by inserting the seat post into the frame’s seat tube and tightening the clamp bolt securely. Make sure the seat post is straight and aligned with the bike’s centerline.
Next, position the seat on top of the seat post and tighten the seat clamp bolt to secure it in place. Once the seat is attached, adjust the seat height by loosening the seat clamp bolt and sliding the seat up or down until you find the optimal position for comfort and proper leg extension.
Finally, tighten the seat clamp bolt to secure the seat in its adjusted position. With the seat and seat post installed, the next step is to mount the wheels and tires.
Now, let’s move on to mounting the wheels and tires.
Mount the wheels and tires
Once the seat and seat post are securely installed, it’s time to mount the wheels and tires.
To begin, locate the wheel axles and slide them through the dropouts of the fork or frame. Make sure the axles are aligned properly and fully inserted. Next, tighten the axle nuts or quick-release levers, ensuring that the wheels are centered and secure.
Now, it’s crucial to pay attention to tire pressure. Use a pressure gauge to check the recommended tire pressure, which is typically imprinted on the side of the tire. Inflate the tires to the specified pressure using a bicycle pump. Remember, proper tire pressure ensures optimal performance and smooth rides.
With the wheels and tires securely mounted, it’s time to move on to the next step: connecting the brakes and cables.
Connect the brakes and cables
To connect the brakes and cables, you’ll need to locate the brake calipers and attach them securely to the frame or fork using the provided bolts or screws. Once you have identified the brake calipers, follow these steps:
-
Proper maintenance of electric bike brakes and cables:
- Regularly inspect the brake pads for wear and replace if necessary.
- Clean the brake cables and lubricate them to ensure smooth operation.
- Adjust the brake lever tension to achieve optimal braking performance.
-
Common troubleshooting issues with electric bike brakes and cables:
- Squeaking or squealing brakes may indicate contamination or misalignment.
- Weak or ineffective braking could be due to worn brake pads or loose cables.
- If the brake lever feels spongy, there may be air in the brake system that needs to be bled.
Now that the brakes and cables are connected, let’s move on to installing the drivetrain components (chain, gears, and crankset).
Install the drivetrain components (chain, gears, and crankset)
Now that the brakes and cables are connected, it’s time to move on to installing the drivetrain components.
This step is crucial for the proper functioning of your electric bike.
To begin, you will need to attach the chain, gears, and crankset.
Start by placing the chain onto the rear cassette and threading it through the derailleur.
Next, position the chainring onto the crankset and secure it using the provided bolts.
Remember to install a chainring guard to protect your pants or skirt from getting caught in the chain.
Once the drivetrain is assembled, it’s important to adjust the derailleur settings to ensure smooth shifting.
This involves tweaking the cable tension and limit screws to achieve precise gear changes.
With the drivetrain components in place and properly adjusted, we can now move on to attaching the pedals seamlessly.
Attach the pedals
After securing the chain, gears, and crankset, it’s time to attach the pedals to complete the assembly. Pedals are crucial components of an electric bike as they allow the rider to transfer power to the drivetrain.
When attaching the pedals, it’s important to keep in mind some common issues that may arise. Here are a few key points to consider:
- Make sure to match the correct pedal with the corresponding side of the bike.
- Check the threading on the pedal and the crank arm to ensure they are compatible.
- Apply some grease to the pedal threads before installation to prevent corrosion.
- Use a pedal wrench or Allen key to securely tighten the pedals onto the crank arms.
- Double-check that the pedals are tightened properly before taking the bike for a ride.
Now that the pedals are securely attached, the next step is to install the battery and connect the wiring, ensuring a fully functional electric bike.
Install the battery and connect the wiring
With the pedals securely attached, it’s time to install the battery and connect the wiring for a fully functional electric bike. To ensure a smooth process, follow these steps:
-
Locate the battery compartment: Refer to the bike’s user manual or manufacturer’s instructions to find the designated area for the battery.
-
Connect the battery: Carefully place the battery into the compartment, ensuring it is securely positioned. Connect the battery to the bike’s wiring harness by aligning the connectors and firmly pushing them together.
-
Secure the wiring: Use zip ties or Velcro straps to fasten the wiring along the bike’s frame, keeping it tidy and out of the way of moving parts. This will prevent accidental damage or interference while riding.
Refer to the table below for a visual representation of the battery installation process:
| Step | Action |
|---|---|
| 1 | Locate the battery compartment |
| 2 | Connect the battery |
| 3 | Secure the wiring |
Now that the battery is connected and the wiring is secure, let’s move on to adjusting the suspension (if applicable).
Adjust the suspension (if applicable)
Once the battery is connected and the wiring is secure, you can proceed to adjust the suspension if your bike has this feature. Adjusting the suspension settings is crucial to ensure a smooth and comfortable ride. Here are the steps to follow:
-
Determine your riding style and terrain: Different suspension components are designed for specific riding styles and terrains. Consider factors such as downhill riding, cross-country trails, or urban commuting.
-
Choose the right suspension components: Based on your riding style, select the appropriate suspension fork, shock absorber, and other components that meet your needs and preferences.
-
Set the sag: Adjust the sag by compressing the suspension and measuring the amount of travel. This helps optimize the suspension’s performance and responsiveness.
-
Fine-tune the rebound and compression: Experiment with the rebound and compression settings to find the right balance between comfort and control.
Now that the suspension is adjusted, it’s important to check and tighten all bolts and screws to ensure everything is secure.
Check and tighten all bolts and screws
Make sure to check and tighten all bolts and screws to ensure that they are securely fastened. This step is crucial for the overall safety and performance of your electric bike.
Regular maintenance is essential to prevent any potential accidents or damage caused by loose bolts or screws. Neglecting this task can lead to parts becoming loose or even falling off during your ride, compromising your safety.
To avoid common mistakes, always use the appropriate tools and follow the manufacturer’s instructions when tightening the bolts and screws. Make sure not to overtighten them, as this can lead to stripped threads or damaged components.
By properly checking and tightening all bolts and screws, you are taking a proactive approach to maintaining the integrity of your electric bike.
Now, let’s move on to the next step: inflating the tires to the recommended pressure.
Inflate the tires to the recommended pressure
To ensure optimal performance, you should check the recommended tire pressure and use a tire pump to inflate them accordingly. Proper inflation techniques are crucial for a smooth and safe ride on your electric bike.
Start by locating the recommended tire pressure, which can usually be found on the sidewall of the tire or in the owner’s manual. Once you have the correct pressure, attach the pump to the valve on the tire and begin pumping. Keep an eye on the pressure gauge and stop when you reach the recommended level. It’s important not to overinflate the tires, as this can lead to a harsh ride and increased risk of punctures.
Once the tires are properly inflated, you can move on to the next step of testing the bike’s functionality and making any necessary adjustments.
Test the bike’s functionality and make any necessary adjustments
Check if the brakes are working properly by squeezing the brake levers and ensuring that the bike comes to a complete stop. This is a critical step in ensuring your safety during your test ride.
Safety precautions should always be a priority when assembling and using an electric bike.
Once you have checked the brakes, take your bike for a short test ride in a safe and open area. Pay attention to how the bike handles, if the gears shift smoothly, and if the motor engages properly. If you notice any issues, such as loose parts or unusual noises, make the necessary adjustments before continuing.
Taking the time to thoroughly test the bike’s functionality will ensure a smooth and enjoyable ride.
Now that you have tested your bike and made any necessary adjustments, it’s time to enjoy your newly assembled electric bike!
Enjoy your newly assembled electric bike!
Now that you’ve tested and adjusted your electric bike, it’s time to start enjoying your ride! Riding an electric bike can bring immense pleasure and a sense of freedom.
Here are some benefits of assembling your own electric bike:
-
Cost savings: By assembling your own electric bike, you can save money compared to buying a pre-built one.
-
Customization: Assembling your own electric bike allows you to customize it according to your preferences, such as choosing the frame, motor, battery, and other components.
-
Learning experience: Building your electric bike provides an opportunity to learn about its different parts, how they work together, and how to troubleshoot any issues that may arise.
-
Sense of accomplishment: Completing the assembly of your electric bike gives a great sense of satisfaction and accomplishment.
-
Sustainable transportation: Riding an electric bike reduces your carbon footprint and contributes to a more sustainable mode of transportation.
Frequently Asked Questions
How do I properly adjust the suspension on my electric bike?
To properly adjust the suspension on an electric bike, start by finding the suspension adjustment knobs. Experiment with different settings to achieve the desired balance between comfort and performance. Regularly check and maintain the suspension to ensure optimal performance and a smooth ride.
What is the recommended pressure for inflating the tires of my electric bike?
The recommended tire pressure for an electric bike is typically indicated on the sidewall of the tire. Proper tire inflation ensures optimal performance, increased stability, and improved handling, ultimately enhancing the overall riding experience.
How do I connect the brakes and cables on my electric bike?
To connect the brakes and cables on your electric bike, first, locate the brake levers and cable ports. Insert the cable ends into the corresponding ports, ensuring a secure fit. Adjust the brake tension if needed. To adjust the seat height, loosen the seat clamp, raise or lower the seat post to your desired height, then tighten the clamp. For installing the pedals, identify the left and right pedals, and thread them into the corresponding crank arms, using a pedal wrench. Make sure they are securely tightened before riding.
Are there any specific tools or equipment that I need to gather before assembling my electric bike?
To assemble an electric bike, you will need a set of necessary tools, including Allen wrenches, screwdrivers, pliers, and a torque wrench. These tools are essential for properly connecting all the components and ensuring a secure and safe assembly.
What are some common adjustments that may need to be made to the bike’s functionality after assembly?
After assembling an electric bike, common adjustments may include adjusting gears for optimal performance and troubleshooting electrical components for any issues. These steps ensure the bike functions properly and provides a smooth and efficient ride.
Conclusion
In conclusion, after gathering all the necessary tools and equipment, unboxing and inspecting all the components, and assembling the frame, front fork, handlebars, seat, and seat post, it is important to check and tighten all bolts and screws.
Additionally, inflating the tires to the recommended pressure is crucial for optimal performance.
Finally, testing the bike’s functionality and making any necessary adjustments ensures a safe and enjoyable ride.
By following these steps, you can confidently and successfully put together your electric bike and start enjoying the convenience and excitement it offers.