
Are you interested in turning your regular bike into a high-powered electric ride? You’ve come to the right place!
In this detailed guide, we’ll show you how to perform the ultimate bike upgrade: putting an electric motor on your trusty two-wheeler.
Get ready to experience the thrill of effortless speed and extended range as you effortlessly conquer hills and breeze through your daily commute.
With our step-by-step instructions and precise technical guidance, you’ll be on your way to an electrifying biking adventure in no time!
Key Takeaways
- Proper installation and adjustment of the electric motor is essential for optimal performance and safety.
- Prioritizing safety by equipping bike accessories, obeying traffic laws, and familiarizing oneself with the bike’s safety features is crucial.
- Understanding and complying with local laws and regulations regarding electric bikes can help avoid legal issues and ensure a safe riding experience.
- Regular maintenance and service, including checking battery charge level, tire pressure, and brake functionality, is necessary to keep the electric bike in good condition.
ShunTongDa 48V 10.4Ah 14Ah Folding Ebike Battery 48 Volt DCH-006 Built in Electric Bike Batteries with 30A BMS Totguard for 250W 500W 750W 1000W Motor Foldable E-Bike Battery (48V10.4Ah A Grade Cell)
①Battery Type: 18650 lithium ion batteries, Voltage: 48V, Capacity: 10.4Ah, Real High-Label Capacity. 30A BMS, Wattage at 500Wh,...
As an affiliate, we earn on qualifying purchases.
Assess Your Bike’s Compatibility
You’ll need to determine if your bike is compatible with an electric motor. Before installing an electric motor kit, there are a few things you need to consider.
First, check if your bike has a suitable frame and enough space to accommodate the motor. Make sure the frame is sturdy enough to handle the additional weight and stress that the motor will put on it.
Next, check the front fork to see if it has proper clearance for the motor. Additionally, consider the type of brakes on your bike and make sure they are compatible with the motor kit you plan to install.
Safety is of utmost importance when installing an electric motor on a bike, so ensure that you have a good understanding of the necessary safety precautions.
To proceed, let’s move on to choosing the right electric motor kit for your bike.
Amazon Product B0CYT6TBYX
As an affiliate, we earn on qualifying purchases.
Choose the Right Electric Motor Kit
To choose the appropriate electric motor kit for your bicycle, consider factors such as power requirements and compatibility with your bike’s specifications. Choosing the right motor kit is crucial in ensuring a smooth and efficient installation process.
Start by assessing the power output you desire, as different motor kits offer varying levels of power. Additionally, check if the kit is compatible with your bike’s frame and wheel size.
Installing the motor correctly is essential for optimal performance and safety. Follow the instructions provided by the manufacturer and make sure to secure the motor tightly to your bike’s frame.
As you move forward with the process, gather the necessary tools to complete the installation seamlessly.

Young Electric E-Bike Rack with Ramp, Hitch 2 Bike Rack, 200 lbs Capacity Electric Bike Carrier, Foldable Platform Mount for Cars, Trucks, SUVs, Minivans, Up to 5-Inch Fat Tire for 2'' Receiver
200LBS CAPACITY & V-GROOVE RAMP: The latest electric bike rack features an upgrade V-groove ramp for easy loading...
As an affiliate, we earn on qualifying purchases.
Gather the Necessary Tools
Make sure you have all the necessary tools ready for the installation process. To successfully put an electric motor on your bike, you will need the following tools: a wrench set, a screwdriver set, pliers, wire cutters, electrical tape, and a multimeter. These tools are essential for a smooth and efficient installation.
Now, let’s go through the step-by-step instructions on how to put the electric motor on your bike. First, start by removing the pedals and crankset using the wrench set. Then, detach the front wheel and loosen the bolts on the front fork using the wrench set and screwdriver set. Next, carefully mount the electric motor onto the bike frame, ensuring it aligns properly with the chain and sprockets. Secure the motor in place using the provided brackets and bolts, tightening them with the wrench set. Once everything is installed, refer to the user manual for details on how to turn on an ebike and test the motor to ensure it functions correctly.
Next, attach the electric motor to the front fork and secure it tightly using the wrench set. Finally, reconnect the front wheel and tighten the bolts.
With all the necessary tools at hand, you can now move on to the next section where you will prepare your bike for the electric motor installation.

Ebike Rack with Ramp for 2 E-Bikes 200 lbs Capacity Fits 5" Fat Tire, Hitch Bike Rack for Cars SUVs Trucks with 2" Receiver, Foldable Tilting Locking No Assembly Needed E-Bike Platform Carrier
COMPACT FOLDABLE DESIGN WITH 4 WHEELS: The Eco Pro Hitch 2 E-Bike rack is ready to use straight...
As an affiliate, we earn on qualifying purchases.
Prepare Your Bike
To prepare your bike for installing an electric motor, you’ll need to remove the front wheel if you’re using a hub motor. This will allow you to attach the motor to the fork and secure it properly.
If you’re planning to use a mid-drive motor, you’ll need to remove the bottom bracket to make space for the motor and ensure a proper fit.
Make sure to follow these steps carefully to ensure a successful installation.
Remove the Front Wheel (for Hub Motor)
First, you’ll need to detach the front wheel from your bike. This is necessary when installing a rear hub motor, as the motor will replace the front wheel. Follow these steps to remove the front wheel:
- Use a wrench to loosen the nuts or quick release lever that secures the wheel axle.
- Once loose, lift the front of the bike off the ground and pull the wheel out of the front fork dropouts.
- Set the wheel aside in a safe place.
Removing the front wheel is a crucial step in preparing your bike for an electric motor conversion. After this, you can move on to the next section, which will guide you through removing the bottom bracket for a mid-drive motor installation.
Remove the Bottom Bracket (for Mid-Drive Motor)
Once you’ve removed the front wheel, it’s time to tackle the next step in installing a mid-drive motor – removing the bottom bracket.
This crucial step is necessary for bike modification and will allow you to seamlessly integrate the electric motor into your alternative transportation.
To begin, grab your wrench and carefully loosen the bolts that hold the bottom bracket in place. Make sure to keep track of each component as you remove them, as they will need to be reinstalled later.
Once the bottom bracket is free, gently slide it out of the bike frame, taking care not to damage any surrounding parts.
Now that you have successfully removed the bottom bracket, you are one step closer to enjoying the benefits of an electric motor on your bike.
Next, we will move on to the exciting process of installing the electric motor.
Install the Electric Motor
To install the electric motor on your bike, you will first need to attach it either to the wheel or the bottom bracket, depending on the type of motor you have.
Make sure to follow the manufacturer’s instructions carefully to ensure proper alignment and secure attachment.
Next, connect the wiring from the motor to the battery, ensuring that all connections are tight and secure.
Finally, attach the battery to the bike frame, making sure it is positioned securely and out of the way of any moving parts.
Attach the Motor to the Wheel or Bottom Bracket
You can attach the electric motor to either the wheel or the bottom bracket. When considering the mounting options, it’s important to weigh the advantages and disadvantages of each.
Attaching the motor to the wheel offers a simpler installation process. It involves securing a hub motor directly onto the wheel, which provides more flexibility in terms of positioning. However, this option can add weight to the bike’s wheel, affecting its balance and handling.
On the other hand, attaching the motor to the bottom bracket allows for a more centralized and balanced design. This method involves replacing the bike’s existing bottom bracket with a motorized version. Although it requires more effort and technical expertise, it offers better weight distribution and preserves the bike’s original handling characteristics.
Now that you have attached the motor, it’s time to move on to the next step: connecting the wiring and battery.
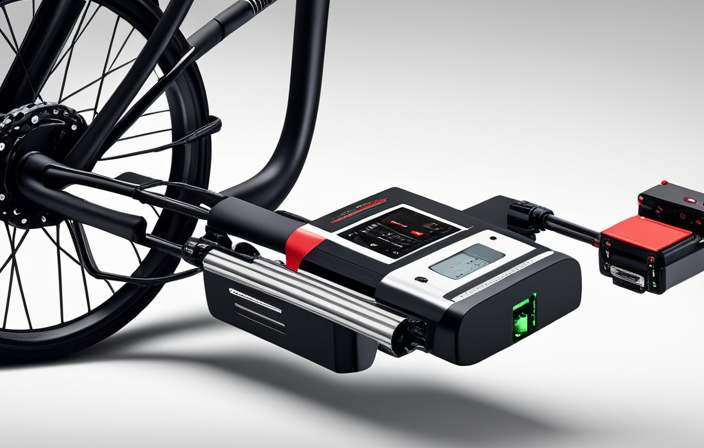
Connect the Wiring and Battery
Now that the motor is attached, it’s time to connect the wiring and battery.
Begin by identifying the wires coming out of the motor and the corresponding wires on the battery. Ensure that the positive and negative terminals match up correctly.
Use wire connectors or soldering to securely join the wires together. Double-check all connections to avoid any loose or faulty connections.
Troubleshooting common issues may include checking for loose wires, blown fuses, or damaged connectors. It is also important to extend battery life by properly charging and maintaining the battery. Follow the manufacturer’s instructions for charging and storage. Additionally, consider using energy-saving modes or adding a larger capacity battery if needed.
With the wiring and battery connected, you can now move on to testing the motor and ensuring it functions properly.
Test the Motor
First, make sure to connect the motor to a power source and check if it’s functioning properly.
To troubleshoot any issues, start by inspecting the wiring connections, ensuring they’re properly connected and secure.
Next, check the battery voltage to ensure it meets the motor’s requirements. Use a multimeter to measure the voltage and compare it with the motor’s specifications.
If the voltage is too low, recharge or replace the battery.
Once the connections and battery are confirmed, test the motor by turning it on and observing its performance. Pay attention to any unusual noises, vibrations, or overheating.
If any issues are detected, consult the motor’s manual for troubleshooting tips.
Finally, with a functioning motor, you can proceed to the next section to adjust and fine-tune its performance.
Adjust and Fine-Tune
To properly adjust and fine-tune, start by examining the various settings and making small tweaks as needed.
Proper alignment is crucial for the optimal performance of your electric bike. Ensure that the motor is aligned with the rear wheel and the chain is properly tensioned. Check the position of the motor mount and make any necessary adjustments to achieve the desired alignment.
Additionally, fine-tune the controller settings to match your riding preferences. Adjust the throttle sensitivity, pedal assist levels, and maximum speed to suit your needs. Experiment with these settings to find the perfect balance between power and efficiency.
Once you have made these adjustments, you are ready to ride and enjoy the enhanced performance of your electric bike.
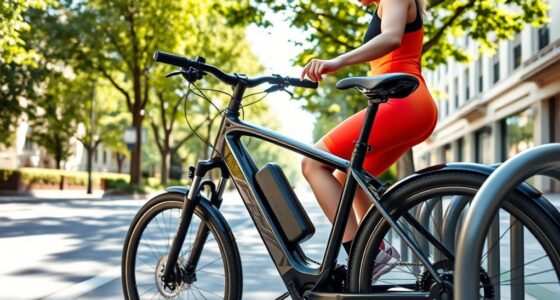
Ride and Enjoy
Once you’ve completed the necessary adjustments, hop on and start enjoying the ride!
Riding an electric bike is a thrilling experience that allows you to effortlessly cruise through the streets.
Before you embark on your adventure, make sure you have some fun bike accessories to enhance your ride. Consider investing in a comfortable saddle, a sturdy helmet, and a reliable lock to keep your electric bike safe.
Safety should always be a top priority, so remember to follow these tips: always wear protective gear, obey traffic laws, and be mindful of your surroundings. Additionally, familiarize yourself with the specific safety features of your electric bike, such as the emergency brake and lights. These precautions will ensure a smooth and enjoyable ride.
As you ride and have a blast, keep in mind that regular maintenance and servicing are crucial for the longevity of your electric bike.
Transitioning into the next section, let’s explore how to maintain and service your electric bike.
Maintain and Service Your Electric Bike
To maintain and service your electric bike, it’s important to regularly clean and lubricate the moving parts. This will ensure optimal performance and longevity of your electric bike. Here are three key steps for electric bike maintenance:
-
Clean: Use a mild detergent and water to clean the frame, wheels, and other components of your electric bike. Avoid using a high-pressure hose as it can damage the electrical components.
-
Lubricate: Apply lubricant to the chain, gears, and other moving parts of your electric bike. This will reduce friction and prevent premature wear.
-
Troubleshooting: If you encounter any issues with the electric motor, check the battery connection, throttle, and wiring. If the problem persists, consult a professional for repairs.
By following these maintenance steps, you can ensure a smooth and enjoyable ride on your electric bike.
Now, let’s transition to the next section about following local laws and regulations.
Follow Local Laws and Regulations
Following local laws and regulations is essential for ensuring a safe and legal ride on your e-bike. Understanding the legal limitations, safety precautions, and considerations is crucial to avoid any fines or accidents. To help you navigate these regulations, here is a table summarizing some common laws and regulations for e-bikes:
| Local Laws and Regulations | Description |
|---|---|
| Speed Limit | Most regions have a maximum speed limit for e-bikes, typically ranging from 20 to 28 mph. |
| Age Restrictions | Some areas require riders to be a certain age, usually 16 or 18, to operate an e-bike. |
| Helmet Requirement | Wearing a helmet is mandatory in many jurisdictions to ensure rider safety. |
| Pedal Assist vs. Throttle Control | Different regions may have specific regulations regarding the type of e-bike control allowed. |
| Bike Lane Usage | It is important to know if e-bikes are permitted in bike lanes or if there are any restrictions. |
By adhering to these laws, you can have a safe and enjoyable e-bike experience while avoiding any legal issues. Remember to always prioritize your safety and that of others when riding your e-bike.
Frequently Asked Questions
What are the safety precautions to consider when installing an electric motor on a bike?
To ensure safety when installing an electric motor on a bike, follow these precautions: 1. Use proper wiring and insulation techniques to prevent electrical hazards. 2. Wear appropriate protective gear, such as gloves and goggles, during the installation process.
Can I install an electric motor on any type of bike?
Not all bikes are compatible with electric motor installation. Some, like lightweight road bikes, may not have the necessary frame strength. Adding an electric motor affects handling and performance, increasing speed and adding weight.
How much does it cost to install an electric motor kit on a bike?
Installing an electric motor kit on a bike can cost anywhere from $200 to $2000, depending on the quality and features desired. However, the benefits of increased speed, reduced effort, and eco-friendliness make it a worthwhile investment.
Are there any weight restrictions for installing an electric motor on a bike?
Yes, there are weight restrictions when installing an electric motor on a bike. The motor’s weight should be compatible with different bike types to ensure proper functionality and stability during riding.
Can I switch back to a regular bike setup after installing an electric motor?
Yes, you can switch back to a regular bike setup after installing an electric motor. Bike motor compatibility allows for easy installation and removal. Switching to an electric bike offers the advantages of speed, reduced effort, and extended range.
Conclusion
To conclude, now that you’ve successfully installed an electric motor on your bike, you can enjoy the benefits of electric biking. Remember to maintain and service your electric bike regularly to ensure its longevity and optimal performance.
It’s also crucial to follow local laws and regulations regarding electric bikes to ensure your safety and legal compliance. Did you know that, according to a recent survey, the global electric bike market is projected to reach a value of $38.6 billion by 2025? This statistic highlights the growing popularity and demand for electric bikes worldwide.
So, get out there, ride your electric bike, and join the ever-growing community of electric bike enthusiasts.