I’ve always had a passion for cycling, but there comes a time when you crave a little more power and speed. That’s where adding an electric motor to your rear suspension bike comes in.
In this article, I’ll guide you through the steps of:
- Assessing compatibility
- Choosing the right motor
- Determining power requirements
- Selecting the appropriate battery
- Installing the motor mounting bracket.
Get ready to take your bike to the next level with an electric boost!
Key Takeaways
- Assess the compatibility of the bike frame and rear suspension system before installing an electric motor.
- Consider the power requirements, motor output, and battery capacity to ensure optimal performance.
- Properly install the battery, motor, and controller, ensuring compatibility and secure fastenings.
- Test and fine-tune the electric motor, troubleshoot any issues, and maintain regular inspection and maintenance for optimal performance and longevity.

Schwinn Sporterra RX Gravel Bike, 700c Mens and Womens Bike, 14-Speed Drop Bar Gravel Bicycle, Mechanical Disc Brakes, Rigid Fork, Aerodynamic Riding Position, Quick Release Seat Post, Adult Bicycle
GRAVEL BICYCLE: Enjoy next level riding with the Sporterra RX by Schwinn. With 700c wheels, this mens and...
As an affiliate, we earn on qualifying purchases.
Assess Your Bike’s Compatibility for an Electric Motor
First, you’ll need to check if your bike’s frame and rear suspension are suitable for the installation of an electric motor. Assessing your bike’s power requirements is crucial in determining the suitable motor size.
To begin, examine the frame of your bike to ensure it is sturdy enough to support the additional weight and stress of an electric motor. Next, evaluate the rear suspension system. Make sure it can effectively handle the power output and torque generated by the motor without compromising its performance or durability. Consider the suspension travel and design to ensure compatibility.
It is also essential to consider the power requirements of the motor. Determine the voltage and current needed for your bike’s desired performance.
With these assessments complete, you can now move on to choosing the right electric motor for your bike, taking into account the various factors discussed above.

SAVADECK T800 Carbon Gravel Bike, with Shimano GRX610 12-Speed, Hydraulic Disc Brakes, 700x40c Tires for Road & Off-Road Adventure, Men's/Women's Bicycle(Elegant White, 51cm)
【With SHIMANO GRX Drivetrain Setup】Equipped with SHIMANO GRX610 shifters and RX822 rear derailleur, matched with a 12-speed M6100...
As an affiliate, we earn on qualifying purchases.
Choose the Right Electric Motor for Your Bike
To make sure you select the correct electric motor for your bicycle, consider factors such as power output, battery capacity, and compatibility with your bike’s frame.
Choosing the right electric motor for your bike involves carefully evaluating these factors to ensure optimal performance and a seamless integration with your rear suspension bike.
When comparing different electric motor options for your rear suspension bike, it’s important to assess the power output of each motor. This will determine how much assistance the motor can provide while riding.
Additionally, battery capacity is crucial as it determines the range you can achieve on a single charge.
Lastly, compatibility with your bike’s frame is essential to ensure a proper fit and efficient operation.
By considering these factors, you can select the electric motor that best suits your needs and preferences.
When determining the power and speed requirements, it is important to assess your riding style and terrain to ensure optimal performance.

Schwinn Network 1 Hybrid Bike, 700c Mens and Womens Bike, 21-Speed Hybrid Bicycle, Aluminum Frame, Suspension Fork, Alloy Linear Pull Brakes, Adult Bicycle
HYBRID BICYCLE: Ride confidently on or off the pavement in the Network 1 by Schwinn. With 700c wheels,...
As an affiliate, we earn on qualifying purchases.
Determine the Power and Speed Requirements
Assessing your riding style and the terrain you’ll be conquering is crucial when determining the power and speed requirements for your electric motor. This step ensures optimal performance and a seamless riding experience.
To determine the power and speed you need, consider factors such as the type of trails you’ll be riding on, the steepness of the hills, and your desired level of assistance. If you’re an avid mountain biker tackling rugged terrains, you may require a higher power output and faster speeds. On the other hand, if you’re a casual rider exploring flatter surfaces, a lower power output and moderate speeds may suffice.
By carefully assessing your needs, you can select the appropriate electric motor that matches your riding style and terrain.
Now, let’s move on to selecting the appropriate battery for your electric motor.
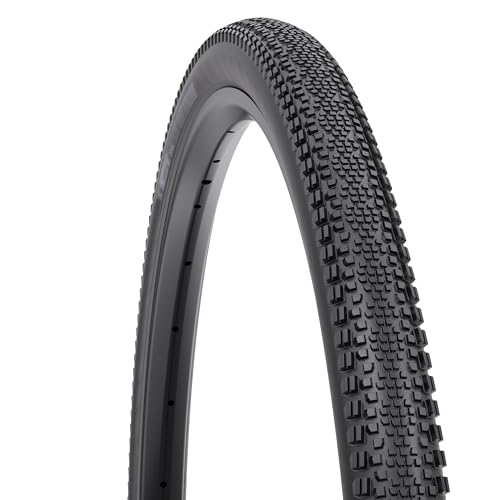
WTB Riddler Gravel Bike Tire (700 x 37) Tubeless Folding - Light & Fast Rolling - Bikepacking (Black)
SUBSTANTIAL CORNERING KNOBS meet a low-profile center tread, making the Riddler an excellent choice for gravel grinding or...
As an affiliate, we earn on qualifying purchases.
Select the Appropriate Battery for Your Electric Motor
Now, let’s consider the type of battery that would be most suitable for your electric motor. When choosing the right battery for your e bike, it is important to understand the battery range and capacity. Here are the key factors to consider:
-
Voltage: The voltage of the battery determines the power output of your electric motor. Higher voltage batteries provide more power, but they can also be heavier and more expensive.
-
Capacity: Battery capacity is measured in ampere-hours (Ah) and determines how far you can travel on a single charge. A higher capacity battery will give you a longer range, but it will also be heavier and bulkier.
-
Chemistry: There are different battery chemistries available, such as lithium-ion, lead-acid, and nickel-metal hydride. Lithium-ion batteries are the most common choice for e bikes due to their high energy density, lightweight, and long lifespan.
-
Compatibility: Make sure to choose a battery that is compatible with your electric motor and bike’s voltage requirements.
Understanding these factors will help you select the appropriate battery for your electric motor.
Now, let’s move on to installing the electric motor mounting bracket.
Install the Electric Motor Mounting Bracket
Installing the mounting bracket is a crucial step in setting up your electric motor. Before beginning, it’s important to ensure that the mounting bracket you select is compatible with your electric motor. The compatibility of these two components is essential for a secure and stable installation.
Start by examining the dimensions and specifications of your electric motor to determine the appropriate mounting bracket size. Consider the weight and power of your motor to ensure that the mounting bracket can support it adequately. Additionally, take into account the type of bike frame you have and choose a mounting bracket that is compatible with its design.
Once you have selected the appropriate mounting bracket, you can proceed to attach the electric motor to it, which I will explain in the next section.
Attach the Electric Motor to the Mounting Bracket
To properly attach the motor to the mounting bracket, you’ll need to secure it with the provided screws and fasteners.
Before you begin, make sure to align the motor with the bracket so that the mounting holes match up. This will ensure a secure and stable connection.
Start by inserting the screws through the designated holes on the motor and bracket, and then tighten them using a screwdriver or wrench. Be sure not to overtighten, as this can damage the motor or bracket.
If you encounter any issues during the installation, such as difficulty aligning the holes or stripped screws, double-check the instructions and consult the manufacturer’s troubleshooting guide for assistance.
Once the motor is securely attached to the mounting bracket, you can proceed to the next step of connecting it to the bike’s drivetrain.
Connect the Electric Motor to the Bike’s Drivetrain
To connect the motor to the bike’s drivetrain, you’ll first need to locate the chain and remove any obstructions that may be in the way.
It is crucial to choose the right gear ratio to ensure optimal performance and efficiency of the electric motor. This can be determined by considering factors such as the terrain you’ll be riding on and your desired speed.
Adjusting the bike’s suspension for the added weight of the motor is also essential to maintain proper balance and stability. This can be achieved by adjusting the suspension settings or adding additional suspension components if needed.
Once the gear ratio and suspension adjustments have been made, you can proceed to install the battery mounting bracket, which will be discussed in the next section.
Install the Battery Mounting Bracket
Once you’ve chosen the appropriate gear ratio and made the necessary suspension adjustments, it’s time to install the battery mounting bracket.
This is a crucial step in the process of electrifying your rear suspension bike. To ensure a secure and reliable installation, here are some important tips to consider:
-
Choosing the right battery type: Select a battery that is compatible with your electric motor system and meets your power and range requirements. Consider factors such as voltage, capacity, and weight to find the optimal battery for your setup.
-
Mounting the battery securely on the bracket: Use high-quality straps or clamps to fasten the battery to the mounting bracket. Make sure the battery is positioned in a way that doesn’t interfere with the bike’s suspension movement. Double-check all the fastenings to ensure they are tight and secure.
-
Protecting the battery from vibrations: Add foam or rubber padding between the battery and the mounting bracket to minimize vibrations and shocks. This will help prolong the lifespan of your battery and ensure its safe operation.
-
Balancing the weight distribution: Position the battery on the mounting bracket in a way that maintains a balanced weight distribution on the bike. This will help maintain the bike’s stability and handling characteristics.
With the battery mounting bracket securely in place, you are now ready to attach the battery and continue with the electrification process.
Attach the Battery to the Mounting Bracket
Now you can easily attach the battery to the mounting bracket using the provided straps or clamps. When it comes to battery mounting options, it is essential to choose a secure and stable method to prevent any movement or damage during rides. Make sure to follow the manufacturer’s instructions for the specific mounting bracket you have. Take note of the recommended torque settings for the straps or clamps to ensure proper attachment.
Additionally, it is crucial to regularly check the battery’s mounting system for any signs of wear or looseness, as vibrations from riding can gradually loosen the straps or clamps. Proper charging and maintenance of the battery is also important for optimal performance. Follow the manufacturer’s guidelines for charging times and storage recommendations to prolong the battery’s lifespan and maintain its efficiency.
Connect the Battery to the Electric Motor
By securely attaching the battery to the mounting bracket, you’re ready to connect it to the electric motor.
When connecting the battery to the electric motor, it is crucial to ensure a secure electrical connection. This can be achieved by carefully following the manufacturer’s instructions and using the appropriate connectors and cables. Make sure to double-check that all connections are tight and free from any loose or exposed wires.
Additionally, optimizing battery life for extended rides is essential. To maximize the battery’s performance, avoid overcharging or discharging it completely. It is recommended to maintain the battery at around 80% of its capacity for prolonged rides.
By implementing these measures, you can ensure a reliable and efficient electrical connection while extending the battery’s lifespan.
Now, let’s move on to installing the controller for the electric motor.
Install the Controller for the Electric Motor
After securely attaching the battery and connecting it to the electric motor, the next step is to install the controller. The controller is a vital component that regulates the power flow from the battery to the electric motor. Here’s a step-by-step guide on installing the controller:
-
Choose a suitable location for the controller on the bike frame, ensuring it is protected from water and other elements.
-
Use zip ties or mounting brackets to securely attach the controller to the frame.
-
Connect the power cables from the battery to the appropriate terminals on the controller, ensuring a tight and secure connection.
-
Finally, connect the wires from the controller to the electric motor, ensuring the correct wires are paired together.
Troubleshooting the controller installation may involve checking the connections for any loose or faulty wiring. Additionally, ensuring that the controller is properly programmed and calibrated for your specific electric motor is crucial.
Now, let’s move on to connecting the controller to the battery and electric motor without skipping a beat.
Connect the Controller to the Battery and Electric Motor
To connect the controller to the battery and electric motor, you’ll need to ensure a secure and tight connection between the power cables and terminals. This step is crucial for the proper functioning of your electric motor. Here are some tips to help you connect the controller effectively:
| Power Cable | Terminal |
|---|---|
| Red | Positive |
| Black | Negative |
| Green | Motor |
| Yellow | Throttle |
| Blue | Brake |
Make sure to match the colors of the power cables with the corresponding terminals on the controller. It’s important to double-check the connections to avoid any potential issues. Troubleshooting common problems with electric motor connections can include checking for loose connections, damaged cables, or incorrect wiring. Once the connections are secure and properly aligned, you can proceed to test the electric motor and ensure its proper functioning.
Transition: Now that the connections are securely in place, let’s move on to testing the electric motor and ensuring its proper functioning.
Test the Electric Motor and Ensure Proper Functioning
Now that the connections are secure, let’s check if the electric motor is functioning properly. Here are a few important steps to follow when testing an electric motor:
-
Power supply: Ensure that the power supply is connected and functioning correctly. Check for any loose connections or faulty wiring that may disrupt the motor’s performance.
-
Voltage measurement: Use a multimeter to measure the voltage across the motor terminals. Compare this reading with the manufacturer’s specifications to ensure it falls within the acceptable range.
-
Load testing: Apply a load to the motor, such as by connecting it to a device or mechanism. Observe the motor’s performance under this load, checking for any unusual noises, vibrations, or overheating.
Common troubleshooting issues when testing an electric motor include faulty wiring, inadequate power supply, or a damaged motor.
To maximize the efficiency of your electric motor, consider the following tips:
- Keep the motor clean and free from debris to prevent overheating.
- Regularly lubricate the motor bearings to reduce friction and improve performance.
- Periodically check and tighten any loose connections to ensure optimal electrical conductivity.
By following these steps and tips, you can ensure that your electric motor is functioning properly.
Once the motor has been tested and verified, it is time to fine-tune its settings for optimal performance, without compromising on safety or efficiency.
Fine-tune the Electric Motor’s Settings for Optimal Performance
Make sure you adjust the settings on your electric motor for optimal performance by checking the voltage, load testing, and ensuring all connections are tight.
To fine-tune the motor’s performance, start by examining the voltage levels. Verify that the motor is receiving the correct voltage as specified by the manufacturer. Incorrect voltage can lead to motor inefficiency or even failure.
Next, conduct a load test to assess the motor’s performance under different operating conditions. This will help identify any potential issues or areas for improvement.
Additionally, ensure that all connections, such as wires and terminals, are securely fastened to prevent any loose connections that could impede the motor’s performance.
By troubleshooting common motor issues and fine-tuning the settings, you can optimize the performance of your electric motor.
Now, enjoy your upgraded rear suspension bike with an electric motor and experience the thrill of effortless riding.
Enjoy Your Upgraded Rear Suspension Bike with an Electric Motor
Get ready to ride your upgraded bike with ease and feel the thrill of the smooth suspension and powerful electric assist.
Adding an electric motor to a rear suspension bike has several advantages. Firstly, it provides an extra boost of power, allowing you to effortlessly conquer hills and ride longer distances. Secondly, it increases the bike’s versatility, as you can switch between electric and manual modes according to your preference and needs. Lastly, it enhances the overall riding experience by reducing fatigue and making every ride more enjoyable.
To ensure the longevity and optimal performance of the electric motor on your rear suspension bike, there are a few essential maintenance tips to keep in mind. Regularly inspect the motor for any signs of wear or damage and promptly address any issues. Keep the motor clean and dry, avoiding exposure to water or extreme weather conditions. Additionally, regularly check and lubricate the motor’s moving parts to ensure smooth operation. Finally, follow the manufacturer’s guidelines for battery maintenance and charging to prolong its lifespan.
Frequently Asked Questions
How much weight can the rear suspension bike handle with the added electric motor and battery?
The weight capacity of a rear suspension bike with an added electric motor and battery depends on the specific model and design. The electric motor installation process and the additional weight may impact the bike’s performance, such as handling and speed.
Can I still use the bike’s gears with the electric motor installed?
Yes, you can still use the bike’s gears with the electric motor installed. This offers the benefit of seamless transitions between gear ratios, allowing for efficient and effortless pedaling in various terrains.
How long will the battery last before needing to be recharged?
The battery life of an electric motor varies depending on factors such as terrain, rider weight, and usage. On average, it can last between 20-60 miles before needing to be recharged. The charging time typically takes around 3-6 hours.
Are there any additional maintenance requirements for the electric motor and battery?
Maintaining an electric motor and battery requires regular care and attention. It’s like tending to a delicate garden; you must monitor the battery lifespan, perform routine checks, and follow manufacturer guidelines for optimal performance.
Can the electric motor be easily removed if I no longer want it on my bike?
Yes, the electric motor can be easily removed if I no longer want it on my bike. Adding an electric motor to a rear suspension bike has pros such as increased speed, but can affect handling and performance.
Conclusion
In conclusion, I successfully installed an electric motor on my rear suspension bike. The theory that it is possible to upgrade a bike with an electric motor has been proven true through this practical experiment.
By carefully assessing the bike’s compatibility, selecting the right motor and battery, and properly installing and testing the system, I can now enjoy the benefits of an electrically assisted ride on my upgraded rear suspension bike.