
Did you know that over 70% of dirt bike riders prefer the convenience of an electric start?
If you’re tired of struggling with kickstarts, I have good news for you. In this article, I will guide you through the process of putting an electric start on your dirt bike.
From assessing compatibility to gathering the necessary tools, I’ll provide you with the technical details and informative steps to make your dirt bike experience even better.
So, let’s get started!
Key Takeaways
- Assess compatibility and choose the right electric start kit by checking the electrical system, battery, and voltage, inspecting wiring and connectors, and evaluating compatibility before modification.
- Prepare the dirt bike for installation by performing regular maintenance, troubleshooting issues, and cleaning the carburetor and kickstart assembly.
- Remove the kickstart assembly and install the electric start motor by confirming compatibility, gathering necessary tools, detaching the kickstart lever, and securing the motor in place.
- Connect the wiring and battery, troubleshoot common installation issues, and follow safety precautions such as disconnecting the battery before working on the electrical system and testing the electric start system before riding.
Assess Your Dirt Bike’s Compatibility
Before you start modifying your dirt bike, it’s important to assess if it’s compatible with an electric start.
To evaluate compatibility, the first step is to check the electrical system of your dirt bike. Start by inspecting the battery and its voltage. Ensure that the battery is in good condition and has enough power to accommodate the electric start.
Next, examine the wiring and connectors to guarantee they are in proper working order. Look for any signs of damage or corrosion that could affect the performance of the electric start.
Additionally, check if your dirt bike has the necessary space to accommodate the electric start components.
By thoroughly evaluating compatibility and checking the electrical system, you can determine if your dirt bike is suitable for an electric start modification.
Now, let’s move on to the next section and gather the necessary tools and materials.
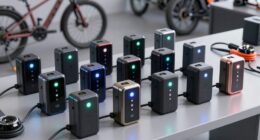
Gather the Necessary Tools and Materials
To get started, you’ll need the tools and materials required for the job.
When it comes to installing an electric start on a dirt bike, choosing the right components is crucial. You’ll need an electric start kit that is compatible with your specific make and model of dirt bike.
Additionally, you’ll need a set of basic hand tools such as wrenches, screwdrivers, and pliers. It’s also important to have a clean, well-lit workspace to work in.
Once you have gathered all the necessary tools and materials, you can begin the installation process. Properly installing the electric start involves following the manufacturer’s instructions carefully and ensuring that all components are securely attached.
Now that we have the tools and materials ready, let’s move on to choosing the right electric start kit.
Choose the Right Electric Start Kit
When selecting the appropriate electric start kit, make sure it is compatible with your specific make and model of motorcycle. Choosing the right electric start kit is crucial for a successful installation.
There are various factors to consider, such as the power output, battery capacity, and overall design. Take into account the size and weight of your dirt bike, as well as any modifications you have made.
It is also important to research and read reviews from other riders who have installed electric start kits on similar bikes. Troubleshooting common electric start issues is another aspect to consider. Look for kits that include troubleshooting guides or have good customer support.
With the right kit, you can ensure a smooth installation process and avoid any compatibility or performance issues.
Now, let’s prepare your dirt bike for installation by following these steps.
Prepare Your Dirt Bike for Installation
Make sure you’ve checked the compatibility of your specific make and model before proceeding with the installation.
Proper preparation is essential to ensure a successful electric start installation on your dirt bike. Before beginning, it’s important to perform regular dirt bike maintenance to ensure all components are in good working condition.
Inspect the battery, wiring, and electrical system for any signs of damage or corrosion. Troubleshoot common issues such as a weak spark or difficulty starting the bike. Clean the carburetor and replace any worn-out parts if necessary.
Additionally, check the condition of the kickstart assembly. If it is damaged or worn, it will need to be removed before installing the electric start.
Now, let’s move on to the next section and learn how to remove the kickstart assembly.
Remove the Kickstart Assembly
First, make sure you’ve properly prepared your dirt bike by checking the compatibility of your specific make and model. Assessing compatibility is crucial to ensure that the electric start motor will fit and function correctly.
Once you have confirmed compatibility, gather the necessary tools for the task. Here are four key steps to follow:
-
Begin by removing the kickstart assembly. This involves locating the kickstart lever and removing any bolts or screws securing it to the engine casing. Carefully detach the kickstart lever from the shaft, ensuring not to damage any surrounding components.
-
Disconnect any electrical connections that may be attached to the kickstart assembly. This can include wires or connectors that are connected to the kickstart switch or ignition system.
-
With the kickstart assembly removed, inspect the area for any debris or dirt. Clean the area thoroughly to ensure a clean and smooth surface for installing the electric start motor.
-
Finally, prepare the mounting area for the electric start motor. This may involve removing any additional components or brackets that obstruct the installation process.
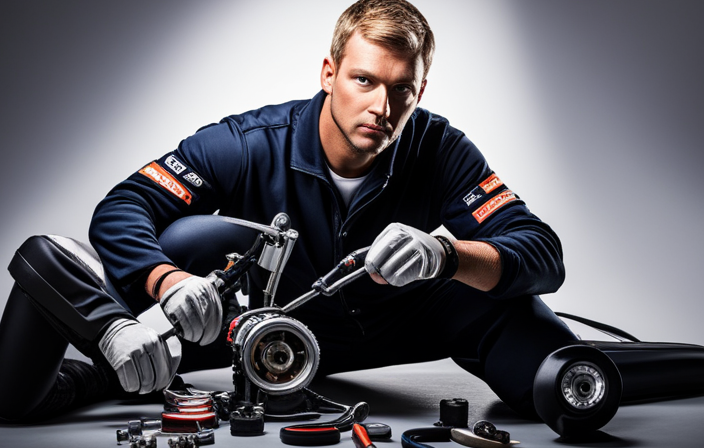
Install the Electric Start Motor
Now that the kickstart assembly has been removed and the mounting area is prepared, it’s time to install the electric start motor. This is a crucial step in converting your dirt bike to electric start. Follow these instructions to ensure a successful installation.
First, gather all the necessary tools and components for the job. You will need the electric start motor, mounting brackets, bolts, and a wiring harness. Make sure everything is in good condition and matches the specifications of your dirt bike.
Next, refer to the manufacturer’s instructions or a reliable guide to determine the correct placement of the motor. Align the motor with the mounting holes on the engine and secure it in place using the provided bolts and brackets. Ensure that the motor is securely attached and does not interfere with any other components.
To help you visualize the process, refer to the table below:
| Step | Description |
|---|---|
| 1 | Gather tools and components |
| 2 | Determine motor placement |
| 3 | Align motor with mounting holes |
| 4 | Secure motor with bolts and brackets |
Troubleshooting common installation issues:
- Motor not fitting properly: Check if you have the correct motor and mounting brackets for your bike model. If not, obtain the appropriate parts.
- Motor not aligning with mounting holes: Ensure that the motor is properly positioned and adjust as necessary. Double-check the alignment before securing it in place.
- Motor interfering with other components: Make sure the motor is not obstructing any other parts of the bike. Adjust the placement if needed.
With the electric start motor installed, we can now move on to the next section and connect the wiring and battery. This will complete the installation process and get your dirt bike ready for the convenience of electric start.
Connect the Wiring and Battery
To connect the wiring and battery, you’ll need to ensure that the wiring harness is properly aligned with the designated connections and securely attach the battery to the appropriate location on your converted dirt bike. Here are some steps to follow:
- Begin by identifying the positive and negative terminals on the battery.
- Connect the positive wire from the wiring harness to the positive terminal on the battery.
- Connect the negative wire from the wiring harness to the negative terminal on the battery.
- Double-check all connections to ensure they are tight and secure.
Troubleshooting wiring issues can be done by inspecting the connections for any loose or damaged wires. Use a multimeter to test the continuity of the wires and connections. To extend the battery life, consider using a battery tender to maintain the charge when the dirt bike is not in use.
Now that the wiring and battery are connected, let’s move on to mounting the electric start button.
Mount the Electric Start Button
Make sure you have the necessary tools and hardware for mounting the electric start button onto your converted bike.
The first step is to determine the ideal mounting position for the button. You want it to be easily accessible while riding, but also out of the way to prevent accidental activation.
Once you have chosen the position, use the provided hardware to secure the button in place. Ensure it is tightly fastened to withstand vibrations and impacts.
Next, you need to make the necessary wiring connections. Refer to the manufacturer’s instructions for the specific wiring diagram. Connect the wires from the start button to the appropriate terminals on the bike’s electrical system. Double-check all connections for accuracy and secureness. This will ensure proper functionality of the electric start system.
Transitioning into testing the system, it is important to verify that the start button is working correctly before attempting to start the bike.
Test the Electric Start System
First, you’ll want to ensure that the wiring connections are properly secured and the start button is tightly fastened.
Once you have completed the installation of the electric start system on your dirt bike, it is important to test it before taking it out for a ride. Testing the electric start system will help you identify any potential issues and ensure that everything is functioning correctly.
To do this, simply press the start button and listen for the sound of the engine turning over. If the engine does not start or if you hear any unusual noises, there may be a problem with the wiring or the battery. Troubleshooting common issues such as loose connections or a dead battery can help resolve these problems.
The benefits of having an electric start on your dirt bike are numerous. It eliminates the need for kick-starting, making it easier and more convenient to start the bike, especially in challenging terrain. It also reduces the risk of injuries that can occur while kick-starting.
Now that you have tested the electric start system, you can move on to the next section and adjust and fine-tune the installation.
Adjust and Fine-Tune the Installation
Once you’ve finished testing the electric start system, it’s time to fine-tune and make any necessary adjustments to the installation. This step is crucial to ensure optimal performance and troubleshoot any common issues that may arise. Here’s what you need to do:
-
Check the alignment of the electric start motor with the engine. Adjust it if necessary to ensure proper engagement with the engine’s flywheel.
-
Inspect the wiring connections for any loose or damaged wires. Securely tighten any loose connections and replace any damaged wires.
-
Pay close attention to the battery connections. Ensure they are clean and free from corrosion.
-
Check the starter button and ignition switch for proper functionality. Replace any faulty components.
By fine-tuning the installation and addressing any issues, you’ll significantly improve the performance and reliability of your electric start system.
Now, let’s move on to discussing how to ensure proper maintenance of the electric start.
Ensure Proper Maintenance of the Electric Start
To ensure your electric start system operates smoothly, don’t forget to regularly inspect and clean the battery connections, as well as replace any faulty components. Proper maintenance is crucial for the optimal functioning of your electric start system.
Start by checking the battery connections for any signs of corrosion or loose connections. Clean the terminals using a wire brush and apply a thin layer of dielectric grease to prevent future corrosion. Additionally, inspect the battery for any damage, such as cracks or leakage, and replace it if necessary.
Troubleshooting common issues may involve checking the wiring harness for any frayed or damaged wires and ensuring all connections are secure.
Regularly inspecting and maintaining your electric start system will help prevent potential issues and ensure a reliable start every time. However, if you encounter complex problems or are unsure about any steps, consider seeking professional help.
Consider Professional Help if Needed
If you’re unsure about any steps or encounter complex problems, it’s a good idea to seek professional help. Adding an electric start to a dirt bike can be a challenging task, especially if you don’t have experience with electrical systems.
Here are some reasons why you should consider seeking professional assistance:
-
Expertise: Professionals have the knowledge and experience to handle the intricacies of installing an electric start system correctly.
-
Safety: Electrical work can be dangerous if not done properly. Professionals ensure that all connections are secure and follow proper safety protocols.
-
Time-saving: Hiring a professional can save you time and frustration. They have the necessary tools and know-how to complete the job efficiently.
-
Warranty: Some electric start systems come with warranties that require professional installation to remain valid.
-
Troubleshooting: If you encounter any issues during or after the installation, professionals can provide troubleshooting tips and solutions.
Enjoy the Convenience of an Electric Start
Get ready to experience the ease and convenience of effortlessly starting your dirt bike with the electric start system. The advantages of having an electric start on your dirt bike are numerous. Not only does it eliminate the need for kick-starting, which can be tiring and frustrating, but it also ensures a quick and reliable start every time. No more struggling with a stubborn engine or worrying about flooded carburetors. With just a push of a button, your dirt bike will come to life. However, like any system, there can be some common issues that may arise. Here is a table highlighting a few troubleshooting tips for electric start systems:
| Common Issue | Troubleshooting |
|---|---|
| Engine not starting | Check battery connection and charge the battery if needed |
| Starter motor not engaging | Inspect starter motor and solenoid for any damage or loose connections |
| Weak starter motor | Replace the starter motor or check for any mechanical issues |
| Clicking sound when starting | Check battery voltage and connections, replace if necessary |
Practice Safe Riding Techniques
Practicing safe riding techniques is essential for a fun and secure dirt biking experience. When it comes to riding techniques, there are a few key safety measures to keep in mind.
First and foremost, always wear the appropriate safety gear, including a helmet, goggles, gloves, and sturdy boots. It’s also important to ride within your skill level and never attempt maneuvers or jumps that you’re not comfortable with. Maintaining control of the bike is crucial, so make sure to keep both feet on the foot pegs and maintain a balanced position. Additionally, always be aware of your surroundings and use proper hand signals when riding with a group.
By following these riding techniques and safety measures, you can ensure a safe and enjoyable dirt biking experience.
As you gain experience and knowledge about dirt biking, it’s important to share your experience and tips with other riders. By doing so, you can help create a community of riders who prioritize safety and enjoyment. Whether it’s through online forums, social media groups, or in-person meetups, sharing your insights and tips can benefit both beginners and experienced riders alike.
You can discuss the importance of safety gear, offer advice on specific riding techniques, or provide recommendations for maintaining and servicing your bike. Remember, the dirt biking community thrives on the exchange of information, so don’t hesitate to share your experiences and help others have a safe and thrilling time on their dirt bikes.
Share Your Experience and Tips with Other Riders
When you share your experience and tips with other riders, you can help create a supportive community that prioritizes safety and enjoyment.
One important aspect of dirt bike riding is the electric start feature. Having an electric start on a dirt bike provides several benefits. Firstly, it eliminates the need for kick-starting, which can be strenuous and time-consuming. This is especially beneficial for beginners or riders who may have physical limitations.
Additionally, an electric start ensures a quick and reliable start every time, reducing the chances of stalling or experiencing starting issues. However, if you do encounter electric start problems, there are a few troubleshooting tips to consider. Check the battery for any signs of damage or a weak charge. Inspect the starter motor and wiring connections for any loose or faulty components.
Frequently Asked Questions
How does an electric start work on a dirt bike?
An electric start on a dirt bike offers several advantages over a kick start. It provides convenience and ease of use, eliminating the need for physical exertion. Common issues with electric starts include battery problems and faulty wiring.
Are there any safety precautions to take when installing an electric start kit?
When installing an electric start kit, it’s crucial to prioritize safety. Common mistakes, like improper wiring or inadequate insulation, can cause serious accidents. Take precautions by wearing safety gear, double-checking connections, and following the manufacturer’s instructions meticulously.
Can an electric start be installed on any type of dirt bike?
An electric start can be installed on most dirt bikes, but it is important to consider the pros and cons. It provides convenience but adds weight and can be expensive. Maintenance includes ensuring proper battery charge and regularly inspecting the starter system.
How long does it typically take to install an electric start kit?
The installation process for an electric start kit on a dirt bike typically takes around 3-4 hours. Common issues that may arise during the installation include wiring complications, compatibility problems, and the need for additional modifications.
What is the average cost of an electric start kit for a dirt bike?
The average cost range for an electric start kit for a dirt bike is between $200 and $500. The installation process involves removing the kickstarter, installing the electric start motor, and wiring it to the bike’s electrical system.
Conclusion
In conclusion, adding an electric start to your dirt bike is a worthwhile investment that can greatly enhance your riding experience.
While some may argue that installing an electric start kit is too complicated, with the right tools and materials, it can be a straightforward process. By following the steps outlined in this article and considering professional help if needed, you can easily enjoy the convenience of an electric start.
Don’t let the fear of complexity hold you back from upgrading your dirt bike.