The concept of adding a motor to a bicycle has always intrigued me. There’s something exhilarating about the idea of breezing through the streets, feeling the wind whip through my hair as I go faster. But the notion of purchasing a motorcycle or scooter feels overly costly and not suited to my everyday travel needs. This is what motivated me to take control of the situation and figure out how to equip my bicycle with an engine.
Before we delve into the technicalities, let me tell you that this is not a beginner’s project. It requires some mechanical know-how, patience, and attention to detail. But, if you’re up for the challenge, it can be a fun and rewarding experience.
In this article, I’ll walk you through the steps of choosing the right engine, gathering the necessary tools and supplies, preparing your bicycle, connecting the components, and testing and fine-tuning the engine. So, let’s get started!
Key Takeaways
- Putting an engine on a bicycle requires mechanical know-how, patience, and attention to detail.
- Necessary supplies include a chain tensioner, throttle cable, engine mounting plate, carburetor, clutch lever, exhaust system, fuel tank, and spark plug.
- Safety precautions must be taken, such as properly securing the engine and checking oil levels.
- Regular maintenance is required, including checking oil levels, cleaning air filters, and checking spark plugs.
Choose the Right Engine
Before you start, make sure you’ve chosen the perfect engine for your bicycle! When it comes to engine types, there are two main options to consider: two-stroke and four-stroke.
Two-stroke engines are lighter, cheaper, and easier to maintain, but they’re also louder and less fuel efficient. Four-stroke engines, on the other hand, are quieter and more fuel efficient, but they’re also heavier and more expensive.
Depending on your budget considerations, you may want to opt for a two-stroke engine if you’re looking for a more affordable option, or a four-stroke engine if you’re willing to spend more for a smoother and quieter ride.
Once you’ve decided on the type of engine you want, it’s time to consider your budget. Engines can range in price from a few hundred dollars to over a thousand dollars, depending on their size and quality. Keep in mind that you’ll also need to purchase additional components, such as a mounting kit, fuel tank, and exhaust system, so factor those costs into your budget as well.
Ultimately, the engine you choose should be compatible with your bicycle frame and meet your performance needs while staying within your budget. With that in mind, let’s move on to gathering the necessary tools and supplies for the installation process.
Gather the Necessary Tools and Supplies
Before starting to put an engine on a bicycle, I need to make sure I have all the necessary tools and supplies. Some of the essential tools I’ll need include wrenches, screwdrivers, pliers, and a torque wrench.
Additionally, I’ll need to gather supplies such as engine oil, fuel, and wiring harnesses to ensure a successful installation.
Tools Needed
Tools needed:
To attach an engine to a bicycle, you’ll need a few essential tools. Firstly, you’ll need a wrench to tighten and loosen bolts and nuts. You’ll also need pliers to hold and turn objects with a firm grip. Finally, screwdrivers are important for tightening screws and adjusting components. It’s important to make sure that these tools are in good condition and the right size for the job.
Before using any of the tools, it’s crucial to take common mistakes and safety precautions into consideration. One common mistake is not properly securing the engine, which can lead to accidents and damage to the bicycle. Another mistake is not checking the engine’s oil level before use, which can cause the engine to wear out quickly. To avoid these mistakes, it’s important to follow the instructions provided and take the necessary safety precautions.
Additionally, once the engine is attached, it’s important to regularly maintain it. Tips for maintaining the engine include checking the oil level, cleaning the air filter, and checking the spark plug.
With these tools and safety precautions in mind, you can successfully attach an engine to your bicycle.
Moving on to the necessary supplies, the next step will be to gather all the parts required for the job.
Necessary Supplies
To successfully transform your bike into a motorized vehicle, you’ll need to gather various items such as a chain tensioner, throttle cable, and engine mounting plate. Budget options for these supplies are available, but it’s important to ensure that they meet safety standards and are compatible with your specific bike model.
Other necessary supplies include a carburetor, clutch lever, exhaust system, fuel tank, and spark plug. When selecting the supplies for your engine conversion project, it’s crucial to keep safety considerations in mind. Make sure to choose high-quality components that are designed to withstand the added stress of a motorized engine.
Additionally, be sure to follow all safety guidelines and protocols during the installation process. With the right supplies and proper precautions, you can successfully transform your bike into a motorized vehicle that will provide a smooth and efficient ride.
Once you have gathered all the necessary supplies, the next step is to prepare your bicycle for the engine installation process.
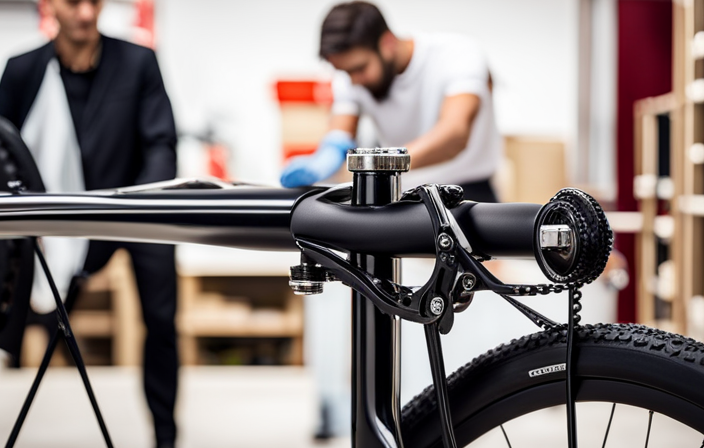
Prepare Your Bicycle
Now that you’ve got your bicycle stripped down to its bare bones, it’s time to give it a good cleaning before you start slapping on that engine like a coat of paint on a fresh canvas. You want to make sure that there’s no dirt or grime on your bike that could interfere with the installation or functioning of the engine. After all, you wouldn’t want to have to take everything apart again just because you missed a spot.
To prepare your bike for the engine, start by inspecting your tires and brakes. Make sure that your tires are properly inflated and that there are no punctures or signs of wear and tear. Check your brakes to make sure that they are functioning properly and that there is enough padding left on the brake pads. Additionally, check the frame alignment to ensure that everything is straight and aligned properly. Once you’ve given your bike a clean bill of health, you’re ready to move on to connecting the components.
Connect the Components
Now that I’ve got my engine mounted onto my bicycle, the next step is to connect the various components.
First, I’ll connect the throttle cable to the engine. This cable will allow me to control the speed of the engine.
Next, I’ll install the chain and sprocket, which will transfer the power from the engine to the rear wheel.
Finally, I’ll connect the fuel tank and carburetor to the engine to ensure that it has a supply of fuel for combustion.
Connect the Throttle Cable
First, locate the throttle cable and carefully feed it through the appropriate hole in the engine. Proper installation of the throttle cable is crucial to ensure smooth operation of the engine. Before connecting the cable, it is important to inspect it for any signs of wear or damage. Throttle cable maintenance is essential to avoid any potential issues down the road. If there are any issues with the throttle, it is important to troubleshoot them before connecting the cable to the engine.
To connect the throttle cable, attach it to the throttle grip and then to the carburetor. Adjust the cable tension by loosening the locknut and turning the adjustment screw until you achieve the desired tension. Make sure the cable is not too tight or too loose as this can affect the performance of the engine. Once the cable is connected and adjusted, test the throttle to ensure it is working properly. Troubleshooting throttle issues can be frustrating, but taking the time to properly connect the cable can save you time and frustration in the long run.
Now that the throttle cable is connected, it’s time to move on to the next step: installing the chain and sprocket.
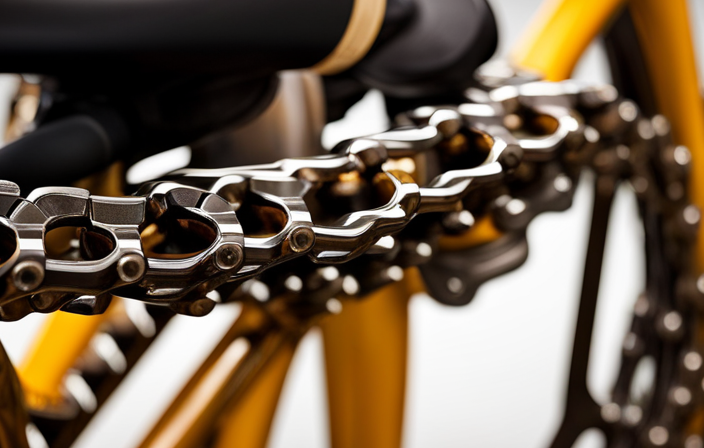
Install the Chain and Sprocket
You’re ready to tackle the next step: installing the chain and sprocket. First, you need to ensure that the chain fits snugly around both sprockets.
Begin by placing the sprocket onto the rear wheel hub, making sure it’s centered. Tighten the bolts to hold it in place.
Next, install the front sprocket onto the motor shaft, lining it up with the rear sprocket.
Once the sprockets are in place, you can install the chain.
To install the chain, wrap it around both sprockets, making sure it’s not too loose or too tight. Chain tensioning is important as it affects the bike’s performance.
A loose chain can cause the motor to work harder and wear out faster, while a tight chain can cause excessive noise and damage to the sprockets.
Once the chain is installed, adjust the tension as needed. Consider gear ratio optimization to get the best performance from your bike.
Finally, you can move on to the next step of connecting the fuel tank and carburetor.
Connect the Fuel Tank and Carburetor
After securing the chain and sprockets, it’s time to connect the fuel tank and carburetor. The fuel tank should be mounted securely and the fuel line should be connected to the carburetor. It’s important to make sure there aren’t any leaks in the fuel system, as this can cause serious problems.
Fuel system troubleshooting can be tricky, but it’s important to check for leaks and make sure the fuel is flowing properly.
The carburetor is a critical component of the engine and requires regular maintenance. Carburetor maintenance tips include cleaning it regularly to remove any buildup or debris. It’s also important to adjust it to ensure the engine is running smoothly.
Once the fuel tank and carburetor are connected and properly maintained, it’s time to move on to the next step. Test and fine-tune the engine to ensure optimal performance.
Test and Fine-Tune the Engine
Now that I’ve connected the engine to my bicycle, it’s time to test and fine-tune it.
First things first, I’ll need to start the engine and run it for the first time to see how it performs.
Then, I’ll need to adjust the carburetor and idle speed to ensure that the engine is operating at optimal levels.
Finally, I’ll take my motorized bicycle for a test ride to make sure everything is working properly and make any necessary adjustments.
Run the Engine for the First Time
Once the engine is installed, it’s important to remember that the first time you start it, there may be some smoke or fumes that come out, as this is normal for most engines.
To prevent any potential issues, it’s crucial to follow the manufacturer’s maintenance checklist and troubleshoot any problems that may arise. This includes checking the oil level, air filter, spark plug, and fuel lines before starting the engine for the first time.
It’s also important to note that the carburetor and idle speed may need to be adjusted after the engine is started for the first time. This will help ensure that the engine is running at its optimal level and prevent any potential damage.
By following these steps, you can successfully run your engine for the first time and enjoy the benefits of a motorized bicycle.
Adjust the Carburetor and Idle Speed
To ensure optimal performance, it’s crucial to adjust the carburetor and idle speed of your motorized bike’s engine. Carburetor maintenance is essential to ensure a smooth and efficient flow of fuel and air to the engine.
A dirty or clogged carburetor can cause poor engine performance, including stalling, hesitation, and rough idling. Cleaning the carburetor regularly and replacing worn-out parts can prevent these issues from occurring.
Troubleshooting idle issues is also important in maintaining your engine’s performance. If your engine’s idle speed is too low, it can cause the engine to stall or run rough. On the other hand, if the idle speed is too high, it can cause excessive wear and tear on the engine.
Adjusting the idle speed by turning the idle screw can help to find the perfect balance for your engine. Once the carburetor and idle speed are properly adjusted, your motorized bike’s engine will run smoothly and efficiently.
With the carburetor and idle speed adjusted, it’s time to test ride your motorized bicycle. In the next section, I’ll guide you through the necessary steps to ensure a safe and enjoyable ride.
Test Ride Your Motorized Bicycle
Get ready to feel the wind in your hair and the freedom of the open road by taking your motorized bike for a test ride. Before hitting the road, it’s important to make sure your bike is safe and ready for the ride.
Start by checking the tire pressure and adjusting the brakes. Properly inflated tires will provide a smoother ride and better handling, while well-adjusted brakes will ensure you can stop in a safe and timely manner.
Once you’ve checked the tires and brakes, take your motorized bike for a spin around the block. Pay close attention to how the bike handles and be sure to test out the throttle and brakes in a safe, open area.
Take note of any issues or concerns you may have, such as a wobbling wheel or uneven braking. By testing your motorized bike before hitting the open road, you’ll ensure a smooth and enjoyable experience.
Frequently Asked Questions
What is the average cost of putting an engine on a bicycle?
When comparing the cost of a DIY engine installation on a bicycle versus professional installation, the former is generally cheaper. However, professional installation ensures proper fitting and performance. The cost varies depending on the type of engine and additional components needed.
How long does the process of putting an engine on a bicycle usually take?
Putting an engine on a bicycle requires a significant amount of time and effort. Depending on the complexity of the installation, it can take anywhere from a few hours to several days. Specialized tools are necessary for the job.
What type of fuel is required for the engine?
To determine fuel type compatibility for an engine, consider the engine size limitations and the manufacturer’s recommendations. It’s essential to use the correct fuel to prevent engine damage and ensure optimal performance.
Can the engine be easily removed and transferred to another bicycle?
Transferring the engine to another bicycle may be possible, but compatibility issues can arise. Like trying to fit a square peg into a round hole, it requires precise measurements and adjustments. Technical knowledge and tools are necessary for a successful transfer.
Are there any legal requirements or restrictions for riding a motorized bicycle on public roads?
There are laws and regulations for riding a motorized bicycle on public roads, including requirements for helmets, licensing, and registration. Violations can result in lawsuit implications and safety concerns for both the rider and others on the road.
Conclusion
And that’s how you put an engine on a bicycle! It may seem like a daunting task, but with the right engine and tools, and a little bit of patience, anyone can turn their trusty bike into a powerful mode of transportation.
Remember to take your time and double-check all connections before testing out your new engine.
But why stop at just one engine? With the skills and knowledge you’ve gained from this project, imagine the possibilities of customizing and upgrading your bike even further.
What new adventures and challenges could you take on with your newly souped-up ride? The sky’s the limit, so get out there and start tinkering!