Did you know that electric bikes are becoming increasingly popular, with sales doubling in the last year alone? If you’re looking to join the trend and add electric power to your bike, you’ve come to the right place.
In this article, I will guide you through the step-by-step process of converting your regular bike into an electric one. From assessing compatibility to installing the electric components, I will provide you with all the technical details and precise instructions you need to successfully electrify your ride.
Let’s get started!
Key Takeaways
- Assess battery and motor compatibility for a smooth ride.
- Gather necessary tools for installation and remove existing components.
- Choose the right conversion kit based on motor power, battery capacity, and controller compatibility.
- Ensure secure attachment of the battery, proper wiring connection, and reassemble the bike correctly.

Schwinn Sporterra RX Gravel Bike, 700c Mens and Womens Bike, 14-Speed Drop Bar Gravel Bicycle, Mechanical Disc Brakes, Rigid Fork, Aerodynamic Riding Position, Quick Release Seat Post, Adult Bicycle
GRAVEL BICYCLE: Enjoy next level riding with the Sporterra RX by Schwinn. With 700c wheels, this mens and...
As an affiliate, we earn on qualifying purchases.
Assess Your Bike’s Compatibility
You’ll need to assess if your bike is compatible with electric power.
First, assess the battery compatibility. Check the type of battery your bike can accommodate. Some bikes may have limited space or specific battery requirements. Consider the weight and size of the battery as well.
Next, evaluate motor compatibility. Look at the motor specifications, such as voltage and power output, to ensure it matches your bike’s capabilities. Consider the position of the motor as well, as different bikes may require different mounting options.
Once you have assessed both the battery and motor compatibility, you can proceed to choose the right conversion kit. This will allow you to convert your bike into an electric-powered one, providing you with a smoother and more efficient ride.

SAVADECK T800 Carbon Gravel Bike, with Shimano GRX610 12-Speed, Hydraulic Disc Brakes, 700x40c Tires for Road & Off-Road Adventure, Men's/Women's Bicycle(Elegant White, 51cm)
【With SHIMANO GRX Drivetrain Setup】Equipped with SHIMANO GRX610 shifters and RX822 rear derailleur, matched with a 12-speed M6100...
As an affiliate, we earn on qualifying purchases.
Choose the Right Conversion Kit
To achieve the desired outcome, it is crucial to select the appropriate conversion kit for your bicycle. Here are the essential factors to consider when choosing the right kit:
-
Motor Type: Decide between a hub motor, which is easier to install but adds weight to the wheel, or a mid-drive motor, which provides better balance and performance but requires more complex installation.
-
Battery Capacity: Determine the range you need and choose a battery with sufficient capacity. Consider factors such as terrain, weight, and desired speed.
-
Compatibility: Ensure that the conversion kit is compatible with your bike’s frame, wheel size, and brake system. Some kits may require modifications or additional components.
-
Controller and Display: Check if the kit includes a controller and display, which allow you to control and monitor the motor’s performance.
Assessing compatibility is just the first step. The next section will discuss the necessary tools for the installation process.

SAVADECK Carbon Gravel Bike - T800 Carbon Frame & Fork | Shimano U6000 11-Speed Groupset | Hydraulic Disc Brakes | 700CX40mm All-Terrain Tires | Men & Women Road/Off-Road Bicycle (Gray, 53cm)
【Ultralight T800 Carbon Performance】: Featuring a premium T800 R21 carbon fiber frame and fork weighing just 10.4kg (22.92...
As an affiliate, we earn on qualifying purchases.
Gather the Necessary Tools
Make sure you have all the necessary tools on hand to gather before beginning the installation process. Assessing compatibility is crucial when choosing a conversion kit for your bike. To help you make an informed decision, refer to the table below which outlines the key features and specifications to consider when selecting a kit:
| Feature | Specification |
|---|---|
| Motor Power | Determine the desired motor power for your needs. |
| Battery Capacity | Choose a battery with sufficient capacity for your desired range. |
| Wheel Size | Ensure the kit is compatible with your bike’s wheel size. |
| Brake Compatibility | Check if the kit is compatible with your bike’s braking system. |
Remember, having the right tools and equipment is essential for a successful installation. Once you have gathered all the necessary tools, you can proceed to the next step of removing the existing components.
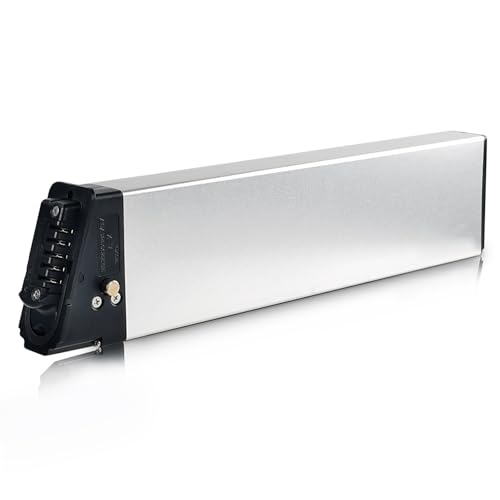
ShunTongDa 48V 10.4Ah 14Ah Folding Ebike Battery 48 Volt DCH-006 Built in Electric Bike Batteries with 30A BMS Totguard for 250W 500W 750W 1000W Motor Foldable E-Bike Battery (48V10.4Ah A Grade Cell)
①Battery Type: 18650 lithium ion batteries, Voltage: 48V, Capacity: 10.4Ah, Real High-Label Capacity. 30A BMS, Wattage at 500Wh,...
As an affiliate, we earn on qualifying purchases.
Remove the Existing Components
To begin the process of removing the existing components, I first remove the pedals, chain, and crankset. This is done by loosening the pedal bolts and using a crank puller tool to remove the crankset.
Next, I disconnect the brakes and derailleur by loosening the brake cable and derailleur cable bolts.
Finally, I take off any unnecessary accessories such as water bottle cages or bike racks, ensuring a clean and streamlined foundation for the electric power conversion.
Remove the pedals, chain, and crankset
First, it is important to assess the compatibility of your bike with an electric conversion kit. Make sure to choose a conversion kit that is suitable for your bike’s frame and components.
To remove the pedals, use a pedal wrench to turn them counterclockwise. Once the pedals are off, you can proceed to remove the chain. Use a chain tool to break the chain and remove it from the rear derailleur.
Next, remove the crankset by loosening the bolts with a crank puller tool. Once the crankset is removed, you are ready to move on to the next step of disconnecting the brakes and derailleur. This will ensure a smooth transition to the next phase of the conversion process.
Disconnect the brakes and derailleur
To successfully convert a bike into an electric-powered one, it is crucial to remove the pedals, chain, and crankset, as discussed in the previous subtopic. Now let’s move on to the current subtopic: disconnecting the brakes and derailleur.
First, I will replace the brake cables to ensure they are compatible with the electric system. This is important as the increased power from the electric motor may require stronger braking capabilities. Once the new cables are installed, I will adjust the derailleur. This step is necessary to ensure smooth gear shifting and prevent any issues during the bike’s electric operation.
To help you better understand the process, here is a table summarizing the steps involved in disconnecting the brakes and adjusting the derailleur:
| Step | Action |
|---|---|
| 1 | Replace brake cables |
| 2 | Adjust derailleur |
By completing these tasks, we can ensure a safe and efficient conversion. Now, let’s move on to the next section and discuss how to take off any unnecessary accessories.
Take off any unnecessary accessories
Remove any unnecessary accessories from your bike to streamline the conversion process. Before installing electric components, it is essential to assess the compatibility of your bike with the chosen conversion kit.
Start by taking off any accessories that are not required for electric power. This includes baskets, bells, reflectors, and any other attachments that do not contribute to the functioning of the bike. By eliminating these non-essential items, you will create space and reduce weight, allowing for a more efficient and effective conversion.
Additionally, it is crucial to choose the right conversion kit for your bike. Consider factors such as motor power, battery capacity, and controller compatibility. Once you have removed the unnecessary accessories and selected the appropriate conversion kit, you can proceed to the next step of installing the electric components seamlessly.
Install the Electric Components
To install the electric components, I first attach the motor to the frame using the appropriate mounting brackets. This ensures a secure and stable connection that will withstand the vibrations and movement of the bike.
Next, I mount the battery securely to the frame, making sure it is positioned in a way that doesn’t interfere with the bike’s balance or maneuverability.
Finally, I connect the wiring and controller, carefully following the manufacturer’s instructions to ensure proper functionality and safety.
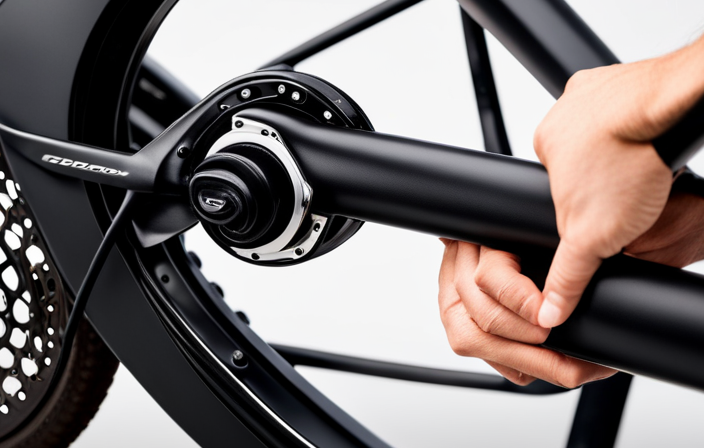
Attach the motor to the frame
Attach the motor to the bike frame by securing it with bolts. Before doing so, make sure you have chosen the appropriate mounting option for your specific bike model.
Once you have determined the correct position for the motor, align it with the frame and use the provided bolts to attach it securely. It is crucial to ensure that the motor is tightly fastened to the frame to prevent any unwanted movement during operation.
Additionally, it is important to regularly check and maintain the motor to ensure its optimal performance. This includes checking for any loose bolts or screws and lubricating the moving parts as necessary.
Once the motor is securely attached, we can move on to the next step of the process: mounting the battery securely.
Mount the battery securely
Make sure you securely mount the battery to ensure its safe and stable placement. There are several battery mounting options available for electric bikes.
One option is to use a battery rack, which attaches to the frame of the bike and provides a secure place to mount the battery. Another option is to use a battery bag, which is a pouch-like accessory that can be attached to the frame or the handlebars of the bike.
Whichever option you choose, make sure the battery is securely fastened and does not move or rattle during riding. This will prevent any damage to the battery and ensure a smooth and safe ride.
Once the battery is securely mounted, you can move on to the next step of connecting the wiring and controller.
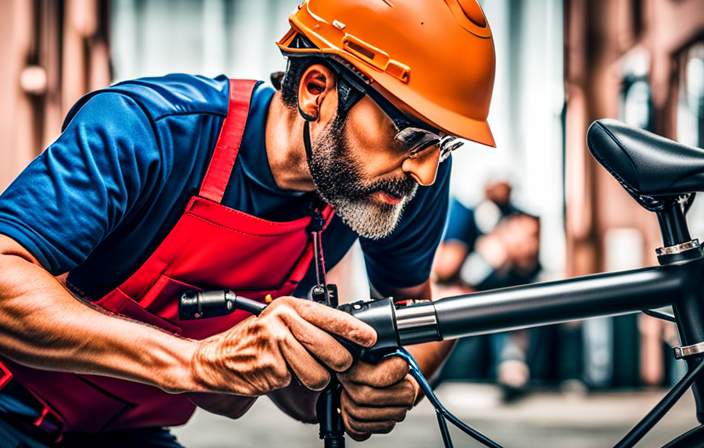
Connect the wiring and controller
Start by connecting the wiring and controller to ensure proper functioning of your electric bike. This step is crucial to ensure that all the components work together seamlessly.
Begin by identifying the wires coming from the motor and the controller. Match the colors and connect them securely using connectors or soldering. Make sure to double-check the connections to avoid any troubleshooting issues later on.
Additionally, it is important to take safety precautions while working with electrical components. Always disconnect the battery before handling any wiring and wear protective gloves to prevent any accidents.
Once all the connections are secure, you can proceed to the next step of reassembling the bike, making sure to follow the manufacturer’s instructions.
Reassemble the Bike
First, you’ll need to reassemble the bike. Once you have connected the wiring and controller, it’s time to put everything back together. Here are five crucial steps to follow:
- Align the frame and secure all the bolts tightly.
- Reattach the handlebars, making sure they are straight and secure.
- Install the pedals, ensuring they are tightened properly.
- Reconnect the components, such as the brakes, gears, and chain.
- Double-check all connections and make sure everything is in its proper place.
Once the bike is reassembled, it’s time for the exciting part – the test ride experience. Take the bike for a spin, paying close attention to how the electric power feels and performs. Is the acceleration smooth? Are the brakes responsive? Take note of any issues or adjustments that need to be made during the test ride.
Now, let’s move on to the next section to test and adjust the bike’s performance.
Test and Adjust
When testing the electric system for functionality, I will carefully inspect all the connections and ensure that the wiring is secure.
I will also check the battery to make sure it’s fully charged and functioning properly.
Once the system is deemed functional, I’ll proceed to adjust the motor and controller settings, making sure they’re optimized for performance and efficiency.
Finally, I’ll test the bike for smooth operation and proper braking, ensuring that all components are working together seamlessly to provide a safe and enjoyable riding experience.
Test the electric system for functionality
To make sure everything is working properly, you should check if the electric system on your bike is functioning correctly. First, check the battery voltage to ensure it is within the recommended range. A low voltage could indicate a weak or faulty battery that may need to be replaced.
Next, test the throttle sensitivity by gradually applying pressure and observing the response. It should smoothly increase the motor’s power output. If there are any delays or inconsistencies, adjustments may be needed.
Once you have confirmed the functionality of the electric system, you can proceed to the next section and fine-tune the motor and controller settings. This will allow you to optimize the performance of your electric bike without compromising safety or efficiency.
Adjust the motor and controller settings
Make sure you adjust the motor and controller settings to optimize your electric bike’s performance. Adjusting the motor power allows you to control the speed and torque of your bike, ensuring a smooth and efficient ride. To do this, refer to the manufacturer’s instructions and locate the motor power adjustment screws. Turning the screws clockwise increases the power, while turning them counterclockwise decreases it. Additionally, troubleshooting controller issues is crucial for a well-functioning electric bike. Check for loose connections, damaged wires, or faulty components that may affect the controller’s performance. Refer to the controller’s manual for specific troubleshooting steps. Once you have adjusted the motor and controller settings, you can ensure smooth operation and proper braking, providing a safe and enjoyable riding experience.
Ensure smooth operation and proper braking
After adjusting the motor and controller settings, it is crucial to ensure smooth operation and proper braking for a safe and efficient electric bike experience. To achieve this, proper battery maintenance is essential.
Regularly check the battery connections, clean any corrosion, and ensure that it is securely mounted. Additionally, keep an eye on the battery’s charge level and avoid completely draining it, as this can lead to reduced battery life.
Troubleshooting common issues is also important. If you encounter any problems with the motor or controller, refer to the manufacturer’s instructions or seek professional assistance.
Now that the bike is set up for optimal performance, it’s time to learn to ride with electric power seamlessly.
Learn to Ride with Electric Power
When learning to ride with electric power, it’s important to familiarize yourself with the controls and settings of the bike. Understanding how to operate the electric power system will allow you to maximize its potential and improve battery life.
Start by adjusting the pedal assist level according to your preference and the terrain. This feature allows you to increase or decrease the amount of electric power assistance provided while pedaling.
Additionally, be aware of the throttle control, which enables you to engage the motor without pedaling. However, make sure to always ride with caution and adhere to safety precautions, such as wearing a helmet and following traffic rules.
Understanding the capabilities of your electric bike will ensure a safe and enjoyable ride.
In the subsequent section about maintaining and caring for your electric bike, it’s crucial to keep specific aspects in mind to prolong its lifespan.
Maintain and Care for Your Electric Bike
To maintain and care for my electric bike, I need to make sure to regularly clean and lubricate the chain to prevent rust and ensure smooth operation.
Additionally, I must check and inflate the tires to the recommended pressure for optimal performance and to avoid any potential punctures.
When not in use, it is crucial to store the battery properly to maintain its longevity and overall health.
Regularly clean and lubricate the chain
Regularly cleaning and lubricating the chain helps to keep the bike running smoothly. To ensure proper chain maintenance, follow these lubrication techniques:
- First, wipe off any dirt or debris from the chain using a clean cloth.
- Apply a suitable bicycle chain lubricant, such as a dry or wet lubricant, depending on weather conditions.
- Use a lubricant applicator to evenly distribute the lubricant along the chain, ensuring that each link is covered.
By regularly cleaning and lubricating the chain, you not only extend its lifespan but also enhance the bike’s overall performance. A well-lubricated chain reduces friction, prevents rusting, and improves gear shifting efficiency. Neglecting chain maintenance can lead to excessive wear and tear, resulting in poor performance and potential breakdowns.
Now, let’s move on to the next step: checking and inflating the tires.
Check and inflate the tires
Make sure you check and inflate your tires regularly to maintain optimal performance. Inspect tire condition by looking for any signs of wear, such as cracks or bulges. Replace the tire if it appears damaged or worn out.
Additionally, check the tire tread depth to ensure sufficient grip on the road. Proper tire pressure is crucial for a smooth and safe ride. Refer to the manufacturer’s guidelines for the recommended pressure range, which is usually imprinted on the sidewall of the tire. Use a reliable pressure gauge to measure the current pressure and adjust it accordingly.
Underinflated tires can lead to increased rolling resistance and decreased battery range. Overinflated tires, on the other hand, may result in a harsher ride and reduced traction.
Now, let’s move on to the next section about storing the battery properly when not in use.
Store the battery properly when not in use
When you are not using your electric bike, remember to store the battery properly. Proper battery storage is crucial for maintaining the longevity and performance of your bike’s power source.
To ensure the battery remains in optimal condition, store it in a cool, dry place away from direct sunlight and extreme temperatures. Avoid storing it near flammable materials or in areas with high humidity.
Before storing, charge the battery to around 50% capacity to prevent over-discharge or overcharging. It is also recommended to remove the battery from the bike and store it separately in a secure location.
Additionally, regularly check the battery for any signs of damage or corrosion and clean it if necessary. By following these guidelines, you can ensure proper battery maintenance and prolong the lifespan of your electric bike.
Now, let’s move on to the next section and learn how to enjoy your electric bike to the fullest.
Enjoy Your Electric Bike
Get ready to have a blast with your electric bike! Now that you have stored the battery properly, it’s time to hit the road and enjoy the benefits of your electric bike.
To maximize the range of your electric bike, it is important to keep a few things in mind. Firstly, maintain a steady pace and avoid sudden acceleration or braking, as it can drain the battery faster. Additionally, be mindful of the terrain you are riding on. Riding on flat surfaces will help conserve the battery power compared to uphill or off-road riding.
It is also crucial to take safety precautions while riding your electric bike. Always wear a helmet, obey traffic rules, and be aware of your surroundings.
With these tips in mind, you can fully enjoy the thrilling experience of riding your electric bike.
Frequently Asked Questions
Can I install an electric conversion kit on any type of bike?
Yes, an electric conversion kit can be installed on most types of bikes. Pros include increased speed and range, while cons include added weight and cost. Factors to consider are compatibility, battery life, and the availability of spare parts.
How much does a typical electric conversion kit cost?
Electric conversion kit prices vary depending on the options chosen. Kits range from $200 to $1500, with higher prices usually indicating better quality and performance. Pros include increased speed and range, while cons include added weight and potential maintenance issues.
Do I need any specialized tools to install an electric conversion kit?
I don’t need any specialized tools for installing an electric conversion kit. The installation process involves simple steps such as mounting the battery, attaching the motor, and connecting the wiring.
Can I remove the electric components and revert my bike back to its original state?
Yes, you can remove the electric components and revert your bike back to its original state. This process involves disconnecting the battery, removing the motor, controller, and any additional wiring, and reinstalling the original bike components.
How long does it take to install an electric conversion kit on a bike?
Installing an electric conversion kit on a bike is a breeze! It only takes a mere 10 minutes to transform your ordinary bike into a powerful electric one. Enjoy the benefits of increased speed and effortless riding. To maximize battery life, charge regularly and avoid extreme temperatures.
Conclusion
In conclusion, transforming my bike into an electric powerhouse has been an exhilarating journey.
Assessing compatibility, selecting the right conversion kit, and gathering the necessary tools were the initial steps that laid the foundation for success.
Methodically removing the existing components and installing the electric ones required patience and precision.
After testing and adjusting, I was finally ready to ride with electric power, feeling like a modern-day explorer with the wind at my back.
Regular maintenance and care will ensure my electric bike continues to bring joy and convenience to my life.
Embrace the possibilities and join me on this electrifying adventure!