Imagine the scene: you’re cycling uphill, your brow drenched in sweat, legs aching from the effort. Out of nowhere, a slight buzzing noise catches your attention from behind. Glancing back, you spot another rider, smoothly ascending the hill on an electric bike with ease. A sense of envy inevitably creeps in.
But fear not, my friend! With the right tools and a bit of know-how, you too can transform your trusty bicycle into a motorized machine.
In this article, I’ll be sharing with you step-by-step instructions on how to put a motor on your bicycle. From understanding the different types of motors available to gathering the necessary tools and materials, we’ll cover everything you need to know to get your bike up and running with a motor.
So, grab a cup of coffee and let’s dive right in.
Key Takeaways
- There are two types of motors for bicycles: electric and gas-powered, each with their own advantages and disadvantages to consider.
- When choosing a motor type, factors to consider include personal preference, budget, and intended use.
- Proper installation of a motor requires tools such as wrenches, pliers, screwdrivers, and WD-40, as well as precautions such as wearing protective gear and ensuring the bike frame is cleaned and free from dirt.
- Safety is always a top priority when riding a motorized bicycle, including wearing protective gear, following traffic laws and signals, and being cautious in wet or slippery conditions.
Understand the Different Types of Motors Available
You gotta know the diff’rent types of motors you can use before you start puttin’ one on your bike.
There are two main types of motors available for bicycles: electric and gas-powered. Electric motors are powered by rechargeable batteries and are more environmentally friendly compared to gas-powered motors. They also require less maintenance and are relatively quiet. However, electric motors have limited range and require frequent recharging. They’re also more expensive compared to gas-powered motors.
On the other hand, gas-powered motors run on gasoline and are more powerful compared to electric motors. They have a longer range and can reach higher speeds, making them ideal for longer rides or off-road adventures. However, gas-powered motors require more maintenance and emit harmful gases into the environment.
Choosing the right motor type depends on your personal preference, budget, and intended use for the bike.
With that said, let’s move on to gather the necessary tools and materials.
Gather the Necessary Tools and Materials
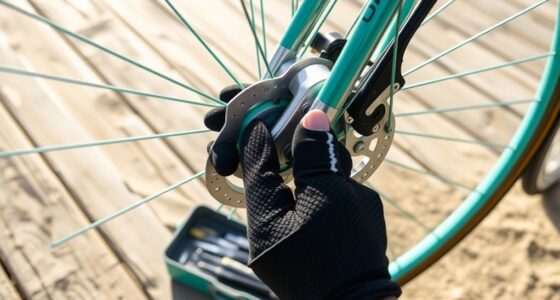
Alright, first things first – grab your toolbox and make sure you’ve got everything you need to get started, like a wrench, pliers, and a screwdriver. And don’t forget to grab some WD-40 to loosen up any stubborn bolts or screws that might be giving you trouble.
Before proceeding, it’s important to understand that different types of bicycles require different types of motors. Therefore, make sure that you’ve researched and selected the appropriate motor for your specific type of bicycle. Additionally, it’s important to take safety precautions when working with a motor. Make sure to wear protective gear such as gloves, goggles, and a helmet to prevent any injuries that might occur during the installation process.
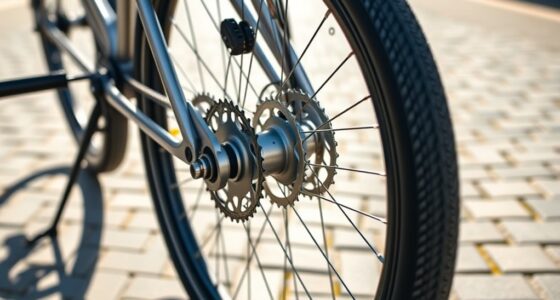
Once you have gathered all the necessary tools and materials, it’s time to prepare your bicycle for motor installation. This involves removing any unnecessary components such as the pedals, chain, and derailleur. It’s also important to clean the frame thoroughly to ensure that the motor can be installed properly.
By preparing your bicycle in this way, you’ll be able to install the motor with ease and ensure that your bike runs smoothly.
Prepare Your Bicycle for Motor Installation
Now it’s time to get your ride ready for some serious power, so roll up your sleeves and let’s make some magic happen!
Before installing a motor, it’s essential to prepare your bicycle by following some pre-installation steps. Firstly, make sure the surface where the motor will be installed is clean and free from any dirt, grease, or dust. A clean surface ensures that the motor is mounted securely and won’t come loose while riding.
Next, check your brakes and make sure they’re in good working condition. It’s crucial to have a reliable braking system when motorizing your bicycle to ensure your safety while riding.
Additionally, consider weight distribution when choosing the right motor placement on your bicycle. Placing the motor in an optimal position ensures that the weight is balanced and doesn’t affect the bicycle’s handling.
With these pre-installation steps completed, you’re now ready to install the motor and transform your bicycle into a powerful machine!
Install the Motor
Now that I’ve prepared my bicycle for motor installation, it’s time to move on to the next step: installing the motor.
This involves connecting the wires between the motor and the battery, testing the motor to ensure it’s working properly, and then securing it onto the frame of the bicycle.
It’s important to follow each of these steps carefully to ensure a safe and successful installation.
Connect Wires
First, you’ll need to connect the wires from the motor to the battery using the provided connectors. Before you start, make sure you have the right wire gauge selection for your motor and battery. Using wires that are too thin could lead to overheating and possible damage.
Once you have the right gauge, strip the ends of the wires and twist them together before inserting them into the connectors. Be sure to use proper insulation techniques such as heat shrink tubing or electrical tape to prevent any short circuits.
Next, it’s important to double-check your connections and make sure everything is secure. A loose connection could cause the motor to malfunction or even stop working altogether.
Once you’ve confirmed that everything is properly connected, it’s time to move on to the next step: testing the motor. With the motor connected to the battery, turn the throttle and see if the motor starts up smoothly. If it does, congratulations! You’ve successfully connected the wires and installed the motor on your bicycle.
Test Motor
After all the hard work of connecting the wires, it’s time to see if everything is functioning properly by testing the motor.
To begin, I should attach the motor to the bike’s rear wheel using the appropriate mounting system. Once that’s done, I can turn the bike upside down and spin the wheel by hand to check if the motor is spinning as well. If it is, then the motor is properly installed and functioning correctly.
If the motor isn’t spinning, then I’ll need to troubleshoot the issue. First, I should check the wiring connections to make sure they’re secure and properly connected.
If that doesn’t solve the issue, I can use a multimeter to test the voltage of the battery and the wires. If the voltage is correct, then the issue may be with the motor itself and I’ll need to take a closer look at it.
Once the motor performance is tested and confirmed, I can move on to securing the motor in place without any worries.
Secure Motor
Make sure your motor is locked in tight, so you can ride with confidence and feel the wind in your hair. There are several motor mounting techniques you can use to ensure your motor is secure on your bicycle.
One technique is to use a motor bracket that’s specifically designed for your type of motor. When choosing the right motor bracket, make sure it’s compatible with your bicycle’s frame and the size of your motor.
Another technique is to use metal clamps to hold the motor in place. These clamps can be tightened securely around the motor and the bicycle frame. Make sure the clamps are placed in a position that won’t interfere with the chain or any other moving parts of the bicycle.
Once you’ve securely mounted your motor, give it a shake to ensure it’s firmly in place.
With your motor now securely mounted, you can move on to the next step and enjoy your motorized bicycle!
Enjoy Your Motorized Bicycle!
Now that you’ve got your motorized bicycle, it’s time to hit the road and enjoy the ride! One of the benefits of having a motorized bicycle is that it can make commuting or running errands much easier and faster.
However, it’s important to remember to be safe while riding. Here are some tips for safe motorized biking:
- Firstly, always wear a helmet and other protective gear such as gloves and knee pads. This will help protect you in case of an accident.
- Secondly, make sure to follow traffic laws and signals, and stay in designated bike lanes when possible. Always signal your turns and be aware of your surroundings.
- Lastly, be cautious when riding in wet or slippery conditions, and avoid riding at night if possible.
By following these tips, you can enjoy your motorized bicycle while also staying safe on the road.
So, have fun and happy riding!
Having a motorized bicycle can be a great way to get around. It can save time and money while also being environmentally friendly.
However, it’s important to remember to be safe while riding. By wearing protective gear, following traffic laws, and being aware of your surroundings, you can enjoy your motorized bicycle to the fullest.
So, get out there and explore the world on your new ride!
Frequently Asked Questions
How fast can a motorized bicycle go?
I’ve found that the top speed of my motorized bicycle depends on factors like weight, terrain, and wind resistance. To optimize performance, I focus on acceleration and regularly maintain the engine. Safety considerations for high speed riding include wearing protective gear and obeying traffic laws.
Do I need a license to ride a motorized bicycle?
To ride a motorized bicycle, I need to check my state’s license requirements as they vary. Some states only require a regular driver’s license, while others need a special license or registration. Not having the proper license can lead to legal implications.
How much weight can a motorized bicycle carry?
I’ve found that the cargo capacity of a motorized bicycle can vary depending on the weight distribution. Generally, they can carry up to 200 pounds with proper balance and weight distribution.
Can I still pedal my bicycle with a motor installed?
I researched and found that a motorized bicycle can be equipped with either a pedal assist or throttle only installation. Pedal assist allows for pedaling while the motor provides assistance, while throttle only eliminates the need for pedaling. Each has its pros and cons.
How do I maintain and care for my motorized bicycle?
When it comes to motor maintenance, regular oil changes and air filter replacements are key. Troubleshooting tips include checking spark plugs and carburetor adjustments. It’s important to keep a toolkit handy and perform routine inspections to prevent larger issues.
Conclusion
Well, that’s it! I’ve successfully installed a motor on my bicycle and it’s a game-changer.
I feel like I’ve entered a new dimension of cycling. No more struggling up hills or arriving at work sweaty and tired. Now, I glide effortlessly through the streets, feeling like a superhero on wheels.
The installation process was surprisingly easy, especially with the right tools and materials. And the end result is simply amazing.
If you’re someone who loves cycling but wants a little extra power, I highly recommend putting a motor on your bike. Trust me, it’s worth every penny and every second spent on installation.