In terms of bicycle maintenance, regularly inspecting the chain is crucial. As time passes, the chain may wear down or sustain damage, affecting both the performance and safety of your bicycle.
If you’re in need of a new chain, don’t worry – putting on a bicycle chain is a relatively simple process that can be done with just a few tools and a bit of patience.
Before we dive into the steps, let’s gather the necessary tools. You’ll need a chain tool, which is used to break the old chain apart and connect the new one, as well as a new chain, chain lubricant, and a rag to clean up any excess grease or dirt.
With these tools in hand, we can move on to the process of removing the old chain and installing the new one.
Key Takeaways
- Proper chain maintenance is necessary for optimal performance and safety.
- The tools needed for putting on a chain include a chain tool, new chain, chain lubricant, and rag.
- Selecting the correct chain type and ensuring chain compatibility is crucial for your bike.
- Checking and adjusting chain tension and derailleur alignment are important steps in installing a new chain.
Gather the necessary tools
Before you can put on your bicycle chain, you’ll need to grab a few tools. Firstly, you’ll need to ensure that you have the correct type of chain for your bicycle. Chains come in different sizes, speeds, and widths, so it’s essential to know which one is right for your bike. Check your owner’s manual or consult with a bike mechanic if you’re unsure.
Next, you’ll need a chain tool. This tool is essential for removing and installing a chain. It makes the process much easier and ensures that the chain fits correctly. Using a chain tool also avoids the risk of damaging the chain or bike. There are many benefits of using a chain tool, such as the ability to adjust the length of the chain and remove links if necessary.
With these tools in hand, you’re ready to move onto the next step, removing the old chain.
Without further ado, let’s move onto the next step and remove the old chain.
Remove the old chain
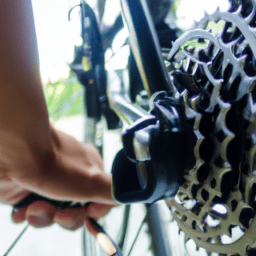
First things first, you gotta take off that worn-out old thing to make way for the shiny new one. To remove the old chain, I start by shifting the gears to the smallest chainring in the front and the biggest cog in the back. This loosens the tension on the chain, making it easier to remove.
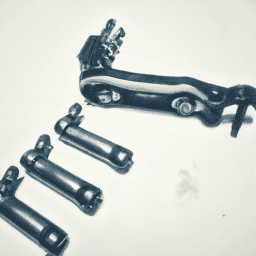
Next, I use a chain tool to break the chain at any link. I push the pin out until the link separates, and then I remove the chain from the bike. It’s important to note that if you plan to reuse the old chain links, you need to be careful not to damage the pins when removing them. You can use pliers to hold the pin while pushing it out to avoid bending or breaking it.
With the old chain removed, it’s time to install the new one. But before I get to that, I need to make sure the chain is the right length.
Install the new chain
Now that the old chain is removed, it’s important to ensure the new chain is the correct length before installing it. Chain compatibility is crucial to keep in mind when selecting a new chain. Make sure the new chain is compatible with your bike’s drivetrain. Using an incompatible chain can lead to poor shifting and can even damage your bike’s components.
Before installing the new chain, it’s important to lubricate it properly. Lubrication techniques can vary depending on the type of chain and lubricant used. It’s recommended to use a chain lubricant that’s specifically designed for bicycles. Apply the lubricant evenly along the length of the chain, avoiding excess buildup. Once the chain is lubricated, you can begin to install it onto your bike.
Now that the new chain is installed, the next step is to adjust the chain tension.
Adjust the chain tension
Before we can take our newly installed chain out for a spin, it’s important to check and adjust the chain tension.
The first step is to make sure the chain is neither too tight nor too loose. Too tight and it’ll put unnecessary strain on the chain and derailleur, too loose and it’ll be prone to slipping off.
Once the tension is correct, we can then adjust the derailleur to ensure smooth shifting between gears.
Check the chain tension
To check the tension of your chain, you’ll want to grab the chain at the midpoint between the front and rear sprockets and lift it up and down. The chain should move up and down about half an inch. If it moves too much, it may be loose and in need of tightening. If it doesn’t move at all, it may be too tight and in need of loosening. It’s important to check the chain tension regularly, as a chain that is too loose can slip off the sprockets, and a chain that is too tight can cause excessive wear on the chain and sprockets.
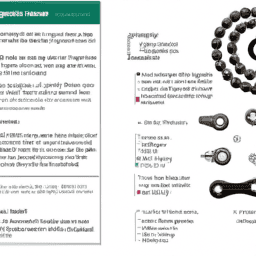
To make sure your chain is in good condition, it’s also important to perform regular chain maintenance. This includes cleaning the chain, lubricating it, and checking for any signs of wear or damage. The table below outlines some measuring techniques you can use to check the wear of your chain. By regularly checking the chain tension and performing maintenance, you can help ensure a smooth and safe ride. In the next section, we’ll go over how to adjust the derailleur to make sure your chain is shifting smoothly.
Adjust the derailleur
One way to ensure smooth shifting is by adjusting the derailleur, which involves fine-tuning the gears to move seamlessly from one to another. Here are some steps I follow to adjust the derailleur:
- Shift the chain onto the smallest chainring and the largest cog on the cassette.
- Loosen the cable pinch bolt on the derailleur and adjust the high limit screw until the jockey wheel is aligned with the smallest cog.
- Pull the derailleur cable tight and tighten the pinch bolt. Then, shift the chain onto the largest chainring and the smallest cog on the cassette.
- Adjust the low limit screw until the jockey wheel is aligned with the largest cog.
Common mistakes when adjusting the derailleur include over-tightening the cable, which can cause shifting problems, and adjusting the limit screws too far, which can cause the chain to fall off the cassette. If troubleshooting is necessary, try checking the derailleur hanger for damage or checking the cable for fraying or kinks.
To test the chain, shift through all the gears to ensure smooth shifting and proper alignment.
Test the chain
Now that I’ve adjusted the chain tension and put on the bicycle chain, it’s time to test it out.
I’ll shift through all gears to make sure the chain runs smoothly and doesn’t skip or slip.
I’ll check for any issues or problems before I hit the road, and then I can enjoy my ride with confidence that my bike is in good condition.
Shift through all gears
As I pedal my bike, I feel the satisfying click of the gears shifting smoothly through all the available options. To ensure that my bicycle chain is properly installed, I need to shift through all the gears.
This will help me practice shifting techniques and identify any common mistakes to avoid. When shifting through the gears, I make sure to use a light and smooth touch on the shifters. I also pay attention to any noises or resistance in the chain as I shift through each gear.
It’s important to note that shifting while pedaling too hard or too soft can cause the chain to slip or become misaligned. By shifting through all the gears, I can ensure that my bicycle chain is properly installed and ready for my next ride.
Now that I’ve tested the chain by shifting through all the gears, it’s time to check for any issues or problems before hitting the road.
Check for any issues or problems
To ensure a smooth and safe ride, it’s crucial to inspect for any potential problems or issues with the gear system. Before installing a new chain, inspect the old chain for any signs of wear or damage. Look for worn-out links, kinks, or stiff links that don’t move freely.
Additionally, check the chain for any rust or dirt buildup. These can cause unnecessary friction and damage to the chain and gears. If there are no issues with the old chain, proceed with installing the new chain. However, if there are any issues, troubleshoot them before proceeding with installation.
Some common chain issues include improper installation, chain elongation, and chain skipping. Ensure that the new chain is properly lubricated and tensioned before hitting the road. By taking these steps, you’ll be able to enjoy a smooth and safe ride without any gear issues.
Enjoy your ride!
You’re in for an exhilarating ride with your newly installed chain, giving you a smooth and effortless cycling experience that will make you feel like you’re flying through the wind.
But before you hit the road, here are some tips for maintaining a smooth ride and extending the lifespan of your chain:
-
Keep your chain clean: Dirt and debris can cause friction and accelerate wear and tear. Clean your chain regularly with a degreaser and a brush.
-
Lubricate your chain properly: A well-lubricated chain reduces friction and noise, and prevents rust and corrosion. Use a lubricant that is specifically designed for bicycle chains, and apply it sparingly.
-
Check your chain tension: A loose chain can slip off the gears, while a tight chain can cause premature wear and damage. Adjust your chain tension according to your bike’s specifications.
-
Inspect your chain regularly: Look for signs of wear, such as elongation, rust, or stiff links. Replace your chain if it is worn out or damaged.
Proper chain maintenance is essential for a smooth and efficient ride. Remember to lubricate your chain regularly and keep it clean, and don’t forget to check your chain tension and inspect your chain for wear and tear. With these tips, you’ll be able to enjoy your ride to the fullest.
Frequently Asked Questions
How often should I replace my bicycle chain?
I replace my bicycle chain every 2,000-3,000 miles as part of my regular bicycle chain maintenance routine. I also use chain wear indicators to monitor the wear and determine when it’s time for a replacement.
Can I reuse my old chain pins when installing a new chain?
I learned that reusing old chain pins when installing a new chain is not recommended due to chain pin compatibility issues. It’s important to ensure the chain is compatible with different gears to prevent damage and ensure optimal performance.
What type of lubricant should I use on my bicycle chain?
I prefer using wet lubricant on my bicycle chain because it provides better protection against dirt and moisture. Before applying, it’s important to clean the chain thoroughly to ensure maximum performance. Dry lubricant can be beneficial in dry conditions.
How do I know if my chain tension is correct?
To ensure correct chain tension, I measure chain wear and adjust slack accordingly. Chain slack adjustment involves loosening the rear axle and moving the wheel forward or backward. Proper tension prevents excessive wear and chain derailment.
Is it possible to put a chain on backwards?
Oh sure, it’s definitely possible to put a chain on backwards. But why stop there? Let’s also attempt to install it upside down and inside out while we’re at it. In all seriousness, chain orientation is a common mistake, so pay close attention to which way the chain is supposed to go when installing it.
Conclusion
In conclusion, putting on a bicycle chain may seem like a daunting task, but with the right tools and some patience, it can be easily accomplished.
Just like the chain links that connect the pedals to the wheels, we’re linked to the world around us. Each link represents a connection to something bigger than ourselves, whether it’s family, friends, or the environment. And just like a bicycle chain, we must ensure that each link is secure and functioning properly in order to move forward smoothly.
Remember, installing a new chain isn’t just about replacing a worn-out part. It’s about taking care of your bicycle and ensuring that it can take you on many more adventures. In the same way, taking care of our connections with others and the world around us is crucial for our own well-being and the well-being of those around us.
So, take the time to put on that new chain, adjust the tension, and test it out. And while you do, remember to appreciate the connections that keep us all moving forward.