Do you feel discomfort or pain when you’re biking? It might be the right moment to tweak the height of your handlebars.
Raising your bicycle’s handlebars can improve your posture, reduce strain on your back and neck, and make your ride more comfortable overall. In this article, we will guide you through the steps on how to raise your bicycle handlebars, so you can enjoy your ride without any discomfort or pain.
The process of raising your bicycle’s handlebars is relatively simple and can be done in a few easy steps. You will need a few tools such as an Allen wrench and a screwdriver, but no special skills are required.
By following these steps, you will be able to raise your handlebars to the desired height and enjoy a more comfortable ride. So, let’s get started and learn how to raise your bicycle handlebars!
Key Takeaways
- Raising handlebars can improve posture and reduce strain on back and neck while cycling.
- Adjusting handlebar height is a simple process that can be done with basic tools, but it’s important to take safety precautions and follow proper torque specifications.
- Nesting techniques can help determine the most comfortable handlebar height, and testing and making adjustments may be necessary to find the perfect height for individual riding styles.
- Comfortable handlebar height is crucial for enjoyment and safety while cycling, and perfect handlebar height can improve the overall riding experience.

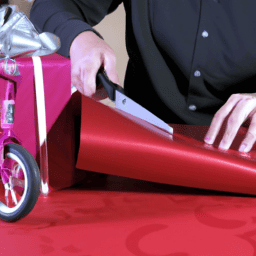
Outroad 26 Inch Folding Mountain Bike, 21 Speed Dual Disc Brake Non-Slip Folding Bikes, Full Suspension High-Carbon Steel MTB Foldable Bicycle for Adults/Men/Women, Black
- Includes Pedals and Seat: Free pedals and comfortable seat included
- Lightweight and Suitable for Many Riders: Weighs 39 lbs, supports up to 300 lbs, 5.3'-6.0' height
- Foldable 26-Inch Mountain Bike: Compact foldable design with 17-inch frame
As an affiliate, we earn on qualifying purchases.
Determine the Desired Height
So, you wanna figure out how high you want those handlebars to be, huh? Well, first things first, let’s determine the desired height.
To do this, you’ll need to consider both measuring techniques and ergonomic considerations. Measuring techniques involve finding the right height for your handlebars. This can be determined by measuring the distance between your saddle and handlebars, and adjusting accordingly.
Ergonomic considerations, on the other hand, involve finding the right angle for your handlebars. This can be determined by considering your riding style and comfort level. Once you have a clear idea of the desired height and angle, you can move on to the next step and loosen the stem bolts.
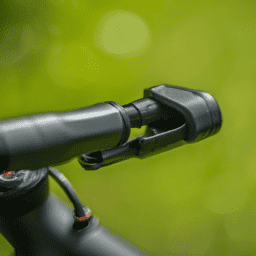
Loosen the Stem Bolts
To loosen the stem bolts, you’ll need a set of allen wrenches and a torque wrench. Before starting, make sure to wear protective gloves and eyewear to avoid injuries.
It’s important to ensure that your bicycle is stable and secured before proceeding with any adjustments.
Adjust the paragraph structure in the Input to logically group complete sentences on their own lines, with a double new line after.
Tools Needed
Well, aren’t you fancy? You’ll need some tools to raise those handlebars of yours.
To adjust the handlebar angle, you’ll need a 5 or 6mm Allen wrench to loosen the stem bolts. The stem bolts are usually located on the top of the handlebar stem, where it connects to the bike frame. You’ll also need a torque wrench to tighten the bolts to the recommended torque setting once you’ve adjusted the handlebar angle to your liking.
Choosing the right handlebar height is important for your comfort and safety while riding. To adjust the height, you’ll need a set of headset spacers and a 5 or 6mm Allen wrench. The headset spacers are located on top of the stem and can be added or removed to adjust the height of the handlebars.
Remember to always make small adjustments and test ride your bike to ensure the new handlebar position feels comfortable and safe. Now that you have the tools you need, let’s move on to some safety precautions to keep in mind while making these adjustments.
Safety Precautions
Before making any adjustments to the height or angle of your handlebars, it’s crucial to take some safety precautions to avoid any accidents or injuries while riding. Here are some steps to follow:
-
Check your grip: Make sure your hands are firmly gripping the handlebars before making any adjustments. Loose grip can cause your hands to slip, leading to accidents.
-
Learn proper handling techniques: Ensure you have proper control over your bicycle by learning the correct handling techniques. This includes balancing your weight, braking, and steering.
-
Choose the right handlebar size and shape: The size and shape of your handlebars can affect your comfort and control while riding. Make sure to choose the right one for your body type and riding style.
-
Wear protective gear: Always wear a helmet and other protective gear such as gloves to minimize the risk of injuries in case of an accident.
By following these safety measures, you can reduce the risk of accidents while riding.
Now that you know how to stay safe, it’s time to learn how to adjust your handlebars for optimal riding experience.
To adjust the handlebars, follow the manufacturer’s instructions for your particular bicycle model. It’s important to make sure the handlebars are securely tightened and adjusted to the correct height and angle for your body type and riding style.
Adjust the Handlebars
Firstly, it’s worth noting that handlebar adjustment techniques are crucial in ensuring maximum comfort and control while cycling. One common issue with handlebar height is that they may be too low, causing discomfort and strain on your back and neck.
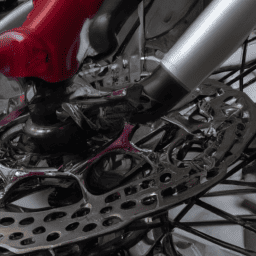
To adjust the handlebars, start by loosening the stem bolts located on the top of the stem. Use a hex wrench to loosen them, but not completely remove them, as you will need to adjust the stem’s position.
Once the stem bolts are loosened, adjust the stem to the desired height by either raising or lowering it. It’s essential to check the alignment of the handlebars with the front wheel to ensure they are straight.
When the handlebars are at the correct height, tighten the stem bolts using the hex wrench. With this step complete, you can now move on to the next section about how to tighten the stem bolts.
Remember that proper handlebar adjustment is key to achieving optimal comfort and control while cycling. Take the time to adjust the height to your liking, and always check that the handlebars are aligned correctly with the front wheel before tightening the stem bolts.
Tighten the Stem Bolts
To ensure a secure fit and prevent any accidents while riding your bike, it’s important to tighten the stem bolts properly. Make sure you use the right tool and follow the manufacturer’s specifications for the recommended torque.
Keep in mind that over-tightening can damage the bolts or the stem, while under-tightening can cause the handlebars to slip or rotate unexpectedly.
Ensuring a Secure Fit
Make sure you’ve tightened the bolts well, otherwise your handlebars might slip and cause an accident. Once you’ve tightened the stem bolts, you need to ensure that the handlebars are securely fitted onto the stem.
Here are some steps you can take to achieve a secure fit:
- Use a measuring technique to ensure that the handlebars are at the right height. This will help prevent unnecessary strain on your back and neck during rides.
- Consider different handlebar options that may provide a more comfortable fit. For example, adjustable stems or handlebars with ergonomic grips can help reduce discomfort during long rides.
- Double-check that all bolts and screws are tightened to their proper torque specifications. This will ensure that the handlebars remain secure for the duration of your ride.
By following these steps, you can ensure that your handlebars are securely fitted and ready for a safe and comfortable ride.
Next, we’ll discuss the importance of proper torque for your handlebar setup.
Proper Torque
Tightening the bolts to the proper torque is crucial for a tight and trustworthy handlebar setup. Adjusting handlebar angle is a simple task that can be done by loosening the stem bolts, adjusting the angle, and tightening the bolts back up. However, common mistakes to avoid during adjustment include over-tightening bolts, not using a torque wrench, and not properly aligning the stem and handlebars.
To ensure the correct torque is applied to the bolts, use a torque wrench and follow the manufacturer’s recommended torque settings. Over-tightening the bolts can cause damage to the stem or handlebars, while under-tightening can cause the handlebars to slip during use. Additionally, make sure the stem and handlebars are properly aligned before tightening the bolts. Misaligned components can cause stress on the bolts and lead to early failure.
Now that you have tightened the bolts to the proper torque and aligned the stem and handlebars, it’s time to test the new height.
Test the New Height
Now that you’ve adjusted the height of your bicycle handlebars, take a moment to test how the new height feels while riding. Testing techniques are essential to ensure that your bike is comfortable to ride and that you can maintain the correct position for long periods.
Here are some steps to follow in testing the new height:
-
Start by taking a smooth ride on a flat surface. This will give you an idea of how the new height feels while riding without any inclines or declines.
-
Next, try riding on a hill. This will test how the new handlebar height affects your climbing posture and overall comfort.
-
Take your bike on a bumpy road to see how the new height handles the vibrations.
-
Finally, try riding in a more aggressive position, such as a sprint or climbing position. This will test how the new height affects your speed and overall comfort.
By following these testing techniques, you can determine whether the new handlebar height is comfortable and suits your riding style.
Remember, making adjustments to your bike can take time to get used to, so don’t be discouraged if the first ride feels a bit awkward. Keep testing and making adjustments until you find the perfect height for you.
Testing the new height of your bicycle handlebars is crucial to ensure that you can ride comfortably and maintain the correct posture. By following the steps outlined above, you can get a better idea of how the new handlebar height feels while riding.
Keep in mind that everyone’s riding style is different, so take the time to test and make adjustments until you find the perfect height for you.
Frequently Asked Questions
Will raising the handlebars affect the bike’s stability or performance?
Raising the handlebars can affect posture and comfort, but not necessarily stability or performance. Adjust the height gradually, making sure the handlebars don’t become too high or too low. Test out different positions to find the optimal comfort.
Can I adjust the handlebars on any type of bike?
To maximize comfort and optimize performance, you can adjust the handlebars on most types of bikes. Benefits of raising handlebars include reducing strain on your back and neck. Adjusting handlebars for different types of riding can also enhance control and stability.
Do I need any special tools to raise the handlebars?
To properly raise your handlebars, you’ll need a set of hex wrenches and possibly a stem extender. Common mistakes include overtightening and not adjusting the brake and gear cables. Alternative methods, like adding spacers or a new stem, have their own pros and cons.
How often should I check the tightness of the stem bolts after adjusting the handlebars?
It’s important to regularly check the tightness of stem bolts after adjusting handlebars. Signs of loose stem bolts include wobbling or rattling handlebars. Use a torque wrench to tighten bolts to manufacturer’s specifications.
Is it possible to raise the handlebars too high and cause discomfort while riding?
Over raising your handlebars can cause discomfort while riding, as it affects your body posture. Optimal handlebar height varies for different riders and bikes. Consider the long-term effects on comfort before making adjustments.
Conclusion
Congratulations! You’ve successfully raised the height of your bicycle handlebars. This may seem like a small adjustment, but it can greatly improve your comfort and overall riding experience. Remember the adage, "a little change can go a long way."
Now that the stem bolts are tightened and the handlebars are adjusted to your desired height, take your bike for a test ride. Pay attention to how your body feels while riding. If you still feel discomfort, don’t hesitate to readjust the height until you find the perfect fit.
Keep in mind that even small adjustments can make a big difference in your comfort and performance while riding.
Always remember to take the time to properly adjust your bike to fit your body. This can prevent injuries and make for a more enjoyable ride.
Happy cycling!