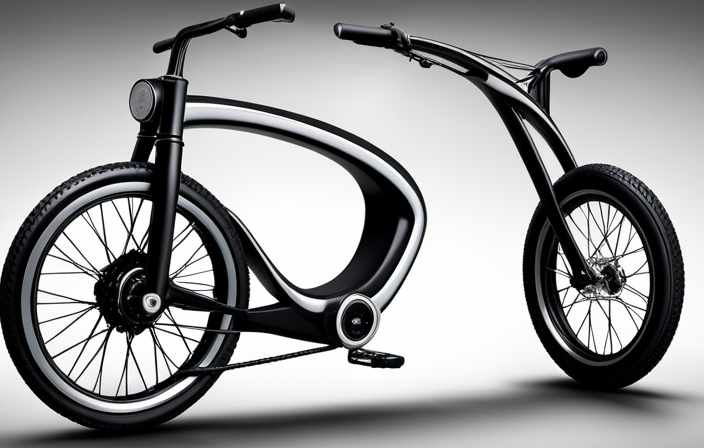

So, you’ve found yourself in a bit of a predicament with your electric bike rear wheel. Don’t worry, I’ve got you covered.
In this guide, I’ll walk you through the steps to reinstall your rear wheel with ease.
First, we’ll gather the necessary tools, remove the chain and derailleur, and loosen the axle nuts or quick-release skewer.
Then, it’s time to install the new rear wheel, tighten everything up, and reattach the chain and derailleur.
Trust me, with a little knowledge and precision, you’ll be back on the road in no time.
Key Takeaways
- Properly reinstalling the chain and derailleur is crucial for smooth and precise shifting, as well as preventing chain rubbing and maintaining proper tension.
- Checking wheel alignment is important to ensure the wheel is centered within the frame and the brake calipers are aligned with the wheel rim.
- Before reinstalling the rear wheel, it is essential to test the bike to ensure proper functionality of brakes, gears, motor, and battery performance, as well as to evaluate ride quality and handling.
- Test riding the electric bike after reinstalling the rear wheel allows for checking brakes, gears, motor functionality, identifying issues with noise, vibrations, or handling, verifying wheel alignment adjustments, and assessing battery performance and overall ride quality.
Gather the necessary tools and equipment
To reinstall an electric bike rear wheel, gather the necessary tools and equipment.
As someone who has experience with electric bike maintenance, I understand the importance of having the right tools to troubleshoot common rear wheel issues.
Firstly, you will need a wrench to loosen the nuts or quick-release skewer that secures the wheel to the frame. Additionally, make sure to have a pair of pliers to remove any chain tension or derailleur interference. It is also crucial to have a tire lever for removing and reinstalling the tire if needed. Lastly, don’t forget to have a pump on hand to inflate the tire to the recommended pressure once the wheel is back in place.
Now that we have gathered the necessary tools, let’s move on to removing the chain and derailleur.
Remove the chain and derailleur
Start by taking off the chain and derailleur.
To reinstall an electric bike rear wheel, follow these steps:
-
Remove the chain: Shift the gears to the smallest chainring and the smallest rear cog. Use a chain tool to disconnect the chain from the derailleur and carefully remove it from the bike.
-
Remove the derailleur: Unscrew the derailleur from the derailleur hanger using a wrench or Allen key. Gently pull the derailleur away from the bike frame and set it aside.
-
Troubleshoot common rear wheel issues: Inspect the rear wheel for any damage or misalignment. Check the spokes for tightness and ensure the wheel spins freely. If there are any issues, address them before reinstalling the wheel.
Loosen the axle nuts or quick-release skewer
First, you’ll need to loosen the axle nuts or quick-release skewer. This step is crucial in reinstalling an electric bike rear wheel. To do this, grab a wrench or an Allen key, depending on the type of axle nuts or quick-release skewer your bike has. Locate the nuts or skewer on either side of the rear wheel and turn them counterclockwise to loosen them. Make sure to loosen them enough so that the wheel can be easily removed later on.
Troubleshooting common issues with electric bike rear wheels may involve checking for loose nuts or skewers, as they can cause the wheel to feel wobbly or out of alignment. To maintain the performance of your electric bike rear wheel, periodically check the tightness of the axle nuts or quick-release skewer to ensure they are secure. This will help prevent any issues while riding.
Now that the axle nuts or quick-release skewer are loosened, we can move on to the next step: removing the old rear wheel.
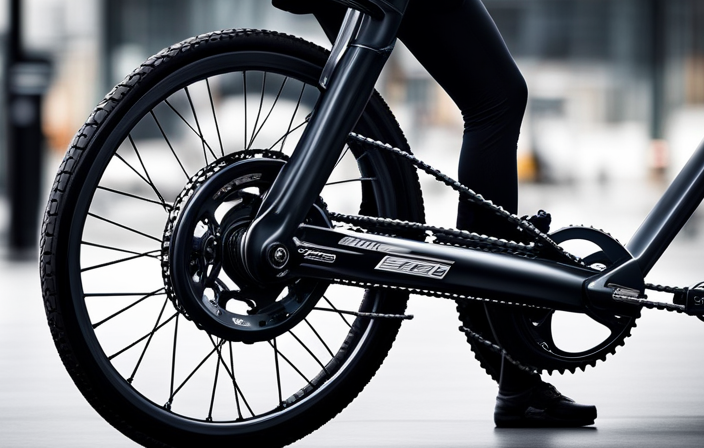
Remove the old rear wheel
Now that the axle nuts or quick-release skewer are loosened, you can proceed to remove the old rear wheel.
To do this, I will first shift the chain onto the smallest chainring and the smallest rear cog. This relieves tension on the derailleur and makes it easier to remove the wheel.
Next, I will lift the bike slightly off the ground and use one hand to hold the derailleur away from the wheel. With my other hand, I will grasp the wheel by the axle and gently pull it towards me. The wheel should come out smoothly, and I will set it aside.
Removing the old rear wheel is an essential step when installing a new rear wheel or replacing a damaged one.
Now, let’s move on to the exciting part – installing the new rear wheel.
Install the new rear wheel
To begin installing the new rear wheel, make sure the derailleur is positioned away from the bicycle frame. This is crucial for proper alignment techniques and to avoid common mistakes. Once the derailleur is in the correct position, place the wheel into the dropouts, making sure the axle is fully seated. Tighten the axle nuts or quick release lever to secure the wheel in place. Check that the wheel spins freely and does not rub against the brake pads or frame. Now, let’s take a moment to discuss proper alignment techniques and common mistakes to avoid.
| Alignment Techniques | Common Mistakes to Avoid |
|---|---|
| Check wheel centering | Improper axle placement |
| Ensure chain tension | Misaligning the derailleur |
| Verify brake clearance | Forgetting to tighten nuts |
Now that the new rear wheel is installed, let’s move on to aligning it properly with the frame and ensuring optimal performance.
Align the wheel properly
Make sure you align the wheel properly with the frame to ensure optimal performance. This step is crucial for a smooth and safe ride. Here are some key points to keep in mind when aligning the rear wheel:
-
Check the brake alignment: Ensure that the brake pads are properly aligned with the rim. Adjust them if necessary to avoid any rubbing or dragging.
-
Verify the wheel position: Make sure the wheel is centered between the frame’s dropouts. This will prevent any wobbling or instability while riding.
-
Confirm the axle alignment: Ensure that the axle is parallel to the frame. If not, adjust it by loosening the axle nuts or quick-release skewer and repositioning the wheel.
-
Troubleshoot common alignment issues: If the wheel seems misaligned, check for any bent or damaged components, such as the derailleur hanger or axle. Replace or repair them if necessary.
-
Test the brakes: After aligning the wheel, test the brakes to ensure they are functioning properly.
With the wheel properly aligned, the next step is to tighten the axle nuts or quick-release skewer securely. This will ensure that the wheel stays in place during your rides.
Tighten the axle nuts or quick-release skewer
After aligning the wheel properly, be sure to tighten the axle nuts or quick-release skewer securely. This step is crucial to ensure that the rear wheel stays in place and doesn’t come loose while riding your electric bike. Once the wheel is securely tightened, you can move on to the next steps.
The next steps involve adjusting the brake calipers and lubricating the wheel bearings.
To adjust the brake calipers, start by squeezing the brake lever to engage the brakes. Then, loosen the bolts that hold the calipers in place and position them so that they are centered on the brake rotor. Once in position, tighten the bolts back up to secure the calipers.
Next, it’s important to lubricate the wheel bearings to ensure smooth and efficient operation. Apply a small amount of lubricant to the bearings, making sure to distribute it evenly. This will help reduce friction and prolong the life of your wheel bearings.
With the axle nuts or quick-release skewer tightened, the brake calipers adjusted, and the wheel bearings lubricated, you can now move on to the next section.
The next section involves reinstalling the chain and derailleur.
Reinstall the chain and derailleur
Once you have tightened the axle nuts or quick-release skewer, you can now proceed to attaching the chain and derailleur.
Start by reinstalling the chain tensioner. This small device helps to maintain proper tension in the chain, ensuring smooth and efficient gear shifting. Simply position the tensioner on the derailleur hanger and tighten the bolt to secure it in place.
Next, adjust the derailleur position. This is crucial for accurate shifting and preventing the chain from rubbing against the derailleur cage. Use the barrel adjuster or limit screws to align the derailleur with the cassette gears. Make small adjustments until the shifting is precise and the chain runs smoothly.
With the chain and derailleur properly installed and adjusted, you can now move on to the next step of checking the wheel alignment and making any necessary adjustments to ensure a straight and centered wheel position.
Check the wheel alignment and adjust if necessary
To ensure proper alignment, you’ll want to check the position of the wheel and make any necessary adjustments.
Wheel alignment is crucial for a smooth and safe ride on your electric bike. Start by visually inspecting the wheel to ensure it is centered within the frame. If it appears off-center, loosen the axle nuts or quick-release skewer and gently adjust the wheel until it is aligned. You can use a ruler or measuring tape to ensure equal distances between the wheel and the frame on both sides.
Additionally, check the brake calipers to make sure they are aligned with the wheel rim. Troubleshooting wheel alignment issues may involve checking for bent or damaged components and correcting any issues before proceeding.
Once the wheel is properly aligned, you can move on to the next step of reinstalling the chain and derailleur. But before doing so, it’s essential to test ride the bike to ensure everything is working properly.
Test ride the bike to ensure everything is working properly
After ensuring the wheel alignment is correct, it’s time to test ride the bike to make sure everything is functioning properly. This step is crucial for the safety and performance of your electric bike.
Here are the reasons why the test ride is essential before reinstalling the rear wheel:
-
Ensuring proper functionality: Test riding allows you to check if the brakes, gears, and motor are working smoothly.
-
Identifying any issues: By riding the bike, you can easily detect any unusual noises, vibrations, or handling problems.
-
Verifying wheel alignment: The test ride provides an opportunity to confirm that the recent adjustments in wheel alignment were successful.
-
Testing the battery: Riding the bike helps you assess the battery’s performance, ensuring it provides sufficient power and range.
-
Confirming the overall ride quality: By test riding, you can assess the bike’s comfort and handling, making any necessary adjustments before reinstalling the rear wheel.
Frequently Asked Questions
What are the necessary tools and equipment needed to reinstall an electric bike rear wheel?
To reinstall an electric bike rear wheel, you’ll need a few necessary tools and equipment. These include a wrench, Allen key, and a torque wrench for tightening the bolts. Additionally, you’ll need a bike stand or a friend to help hold the bike steady during the process.
How do I remove the chain and derailleur before installing the new rear wheel?
To remove the chain, shift the gears to the smallest chainring and rear cog. Use a chain tool to break the chain. To remove the derailleur, loosen the bolt securing it to the derailleur hanger and slide it off.
Should I loosen the axle nuts or use a quick-release skewer to remove the old rear wheel?
I recommend using a quick-release skewer to remove the old rear wheel. It provides convenience and saves time. However, it’s crucial to avoid common mistakes like not tightening the skewer properly, which can lead to accidents while riding.
Can you provide step-by-step instructions on how to install the new rear wheel?
Using a quick release skewer has its pros and cons. It allows for easy removal of the rear wheel, but may not provide as secure of a connection as axle nuts. To maintain the chain and derailleur during the reinstall process, clean and lubricate them.
How do I properly align the wheel after installing the new rear wheel?
To properly align the wheel after installing the new rear wheel, begin by ensuring that the axle is fully seated in the dropouts. Then, check for any signs of misalignment, such as rubbing or uneven tire wear. Adjust the tension on the axle nuts or quick release lever as needed, and make sure the wheel is centered between the chainstays. If the alignment issues persist, consider seeking professional assistance for troubleshooting wheel alignment.
Conclusion
After going through the process of reinstalling an electric bike rear wheel, I feel a sense of accomplishment and satisfaction. The tools and equipment I gathered helped me tackle this task with ease.
Removing the chain and derailleur was a breeze, allowing me to smoothly remove the old rear wheel.
Installing the new wheel was a precise and meticulous process, ensuring a secure fit. Tightening the axle nuts or quick-release skewer provided the finishing touch.
With the chain and derailleur back in place, I checked the wheel alignment and made any necessary adjustments.
Finally, taking the bike for a test ride confirmed that everything was working perfectly. It’s incredible how a few simple steps can transform a bike and make it ready for many more exciting rides.