Picture yourself cruising on your 49cc pocket bike when suddenly, the electric starter stops working. No need to panic, taking out the starter is a simple task that you can manage easily.
In this article, we will guide you step-by-step through the precise and technical process of removing the 49cc pocket bike electric starter. With the right tools and materials, you’ll have your bike up and running in no time.
So, let’s dive in and get your bike back on the road!
Key Takeaways
- Locate the battery compartment under the seat before attempting to remove the electric starter.
- Disconnect the battery by removing the red wire from the positive terminal and the black wire from the negative terminal.
- Remove any debris or corrosion from the battery terminals before disconnecting the electric starter.
- Seek professional assistance if unsure or inexperienced in removing the electric starter to avoid causing further damage to the pocket bike.

RKJ Electric Bike for Adults, 2200W, 30/32MPH, 75 Miles, 48V 15.6AH Removable Battery, 7-Speed, 3 Modes, Full Suspension, Dual Disc Brakes, 20" All-Terrain Fat Tires, UL 2849 Certified Ebike
🔥 2200W PERFORMANCE: Powerful 750W motor (2200W Peak) delivers massive torque for 30° hills. Default 20MPH for city...
As an affiliate, we earn on qualifying purchases.
Gather the Necessary Tools and Materials
You’ll need a wrench, pliers, and a screwdriver to remove the 49cc pocket bike electric starter. Before you begin, make sure you have these tools readily available.
The wrench will be used to loosen and remove any bolts securing the starter to the engine.
Pliers will come in handy for disconnecting any electrical connections or wires attached to the starter.
Lastly, the screwdriver will be needed to remove any screws holding the starter in place.
Once you have gathered these tools, you can proceed to the next step of disconnecting the battery. It is important to ensure the battery is disconnected to avoid any electrical shocks or short circuits during the removal process.

TST Electric Bike for Adults, 1500W Peak Motor, 28 MPH, 20" x 4.0" Fat Tire E-Bike, 48V 15Ah Removable Battery, Dual Disc Brakes, Dual Suspension, LCD & APP, UL 2849 Certification
Powerful 1500W Peak Motor (90 N.m) – Conquer steep 30° inclines with ease, delivering explosive acceleration and a...
As an affiliate, we earn on qualifying purchases.
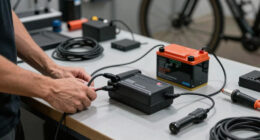
Disconnect the Battery
To begin, make sure the battery is disconnected. This is a crucial step to ensure your safety and prevent any electrical mishaps while working on your 49cc pocket bike’s electric starter. Refer to the table below for a list of tools and materials you will need for this process:
| Tools | Materials |
|---|---|
| Socket wrench | Safety gloves |
| Screwdriver | Battery disconnect tool |
| Pliers | Safety goggles |
Once you have gathered the necessary tools and materials, carefully disconnect the battery by using a battery disconnect tool. This will prevent any accidental power surges and keep you safe from potential electrical shocks. After successfully disconnecting the battery, you can proceed to the next step of removing the side fairings.

TST Electric Bike for Adults 1500W Peak 20" Fat Tire All- Terrain E-Bike 60 Miles 28 MPH Electric Dirt Bike - 48V 15 AH Battery Tested to Safety Tested to UL 2849 Powered Electric Bicycle
𝗣𝗼𝘄𝗲𝗿𝗳𝘂𝗹 𝗘𝗹𝗲𝗰𝘁𝗿𝗶𝗰 𝗕𝗶𝗸𝗲: This adult electric bike is equipped with a 1500W peak power motor and 90N.M torque,...
As an affiliate, we earn on qualifying purchases.
Remove the Side Fairings
Now, it’s time to take off the side fairings on your 49cc pocket bike. Carefully unscrew the bolts securing them in place.
Start by locating the bolts on both sides of the fairings. Use a screwdriver or a wrench to loosen and remove each bolt. Make sure to keep them in a safe place for reassembly later.
Once all the bolts have been removed, gently pull the fairings away from the bike. Be careful not to damage any wiring or components.
With the fairings removed, you will now have access to the inner workings of your pocket bike. This will allow you to locate and disconnect the starter motor wires, which we will discuss in the next section.
DEEPOWER QS7 Electric Bike for Adults, 2000W Peak Power 28MPH E-Bike, 48V 20Ah/35Ah/60Ah Battery Options, 35–180 Mile Range, 20” Fat Tire Ebike, 7-Speed All-Terrain Electric Bicycle
【High-Torque Electrified Thrills】 The Deepower electric motorcycle for adults delivers unmatched power with its Peak 2000W motor, reaching...
As an affiliate, we earn on qualifying purchases.
Locate and Disconnect the Starter Motor Wires
Once the side fairings are off, you can easily find and disconnect the wires of the starter motor. This step is crucial in the process of removing the 49cc pocket bike electric starter.
Follow these instructions to successfully locate and disconnect the wires:
- Step 1: Carefully examine the exposed area where the side fairings were attached.
- Step 2: Look for a bundle of wires leading towards the starter motor.
- Step 3: Identify the wire connectors that are attached to the starter motor.
- Step 4: Gently pull apart the connectors to disconnect them from the starter motor.
- Step 5: Inspect the connectors to ensure a clean break.
With the wires disconnected, you are now ready to proceed to the next section, where we will guide you on how to remove the starter motor itself.
Remove the Starter Motor
First, locate the bolts securing the starter motor in place. The starter motor is usually attached to the engine block or transmission housing with two or more bolts. Use a socket wrench or a suitable tool to loosen and remove these bolts. Once the bolts are removed, carefully disconnect any electrical connections or cables connected to the starter motor. Check the table below for a breakdown of the steps involved in removing the starter motor.
| Step | Action |
|---|---|
| 1 | Locate bolts securing the starter motor |
| 2 | Use a socket wrench to remove the bolts |
| 3 | Disconnect any electrical connections or cables |
After removing the starter motor, you can proceed to remove the electric starter gear.
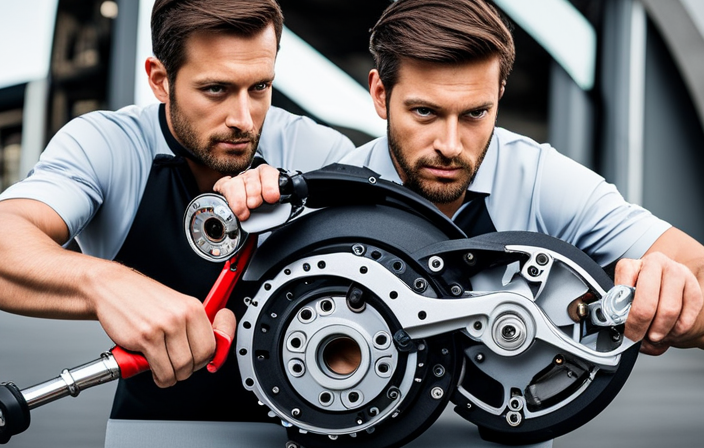
Remove the Electric Starter Gear
To disconnect the gear, carefully detach any remaining cables or connections.
Start by locating the electric starter gear, which is usually located near the engine. Inspect the gear for any bolts or screws that need to be removed. Using the appropriate tools, loosen and remove these fasteners.
Once the gear is free from any bolts or screws, gently pull it away from the engine, taking care not to damage any surrounding components. If the gear is stuck, you may need to wiggle it back and forth while pulling to release it.
Once the gear is fully disconnected, set it aside in a safe location.
Now that the electric starter gear has been removed, you can proceed to install the cover plate.
Install the Cover Plate
Before installing the cover plate, make sure there are no loose bolts or screws that need to be tightened. This will ensure a secure and stable installation.
Follow these steps to properly install the cover plate on your 49cc pocket bike:
- Align the cover plate with the designated mounting holes on the engine.
- Insert the bolts into the mounting holes and tighten them using a wrench or socket set. Make sure to tighten them evenly to avoid any imbalance.
- Check that the cover plate is flush against the engine and there are no gaps or misalignments.
- Double-check the tightness of the bolts to ensure they are securely fastened.
With the cover plate successfully installed, you can now move on to reassembling the side fairings. This will involve placing the fairings back onto the bike and securing them with the appropriate bolts or screws.
Reassemble the Side Fairings
Now that the cover plate is securely installed, it’s time to move on to the next step: reassembling the side fairings.
The side fairings are an important component of the pocket bike as they provide protection and aesthetic appeal to the vehicle. To begin, line up the side fairings with the corresponding slots on the frame. Ensure that all the mounting holes align perfectly.
Once aligned, insert the screws into the holes and tighten them using a screwdriver. Make sure not to overtighten the screws, as this may damage the fairings or the frame. Once all the screws are tightened, give the fairings a gentle push to check for any loose fittings.
Now that the side fairings are securely in place, we can move on to the next section: reconnecting the battery.
Reconnect the Battery
Once you’ve finished securing the side fairings, it’s time to reconnect the battery. This step is crucial to ensure that the electric starter functions properly. Follow the table below for the correct battery connection:
| Battery Terminal | Wire Color | Connector |
|---|---|---|
| Positive (+) | Red | Red Connector |
| Negative (-) | Black | Black Connector |
Start by locating the battery compartment, usually located under the seat. Ensure that the battery terminals are clean and free from corrosion. Connect the red wire to the positive terminal and the black wire to the negative terminal. Make sure the connectors are securely fastened to prevent any loose connections. Once the battery is properly connected, you can move on to testing the bike without the electric starter.
Without the use of ‘step’, you can now proceed to test the bike without the electric starter.
Test the Bike Without the Electric Starter
To test the bike without the electric starter, you can simply turn the key in the ignition and press the start button. Ensure that the bike is in neutral and that the kill switch is in the ‘on’ position.
Once you have done this, you should hear the engine cranking. If the engine fails to start, try checking the spark plug for any signs of damage or wear. Additionally, ensure that there is fuel in the tank and that the fuel valve is turned on.
If all these components are functioning properly and the engine still does not start, it may be necessary to troubleshoot further or seek professional assistance. Remember to always follow the manufacturer’s instructions and exercise caution when working on any vehicle.
Conclusion
Now that you’ve successfully removed the 49cc pocket bike electric starter, it’s time to put your theory to the test.
By following the detailed steps outlined in this article, you’ve acquired the necessary knowledge and skills to investigate the truth behind this theory.
Take this opportunity to grab the attention of your audience and delve into the technical aspects with precision.
Remember, the pursuit of truth requires meticulous attention to detail, so proceed with confidence and curiosity.