Were you aware that a recent poll indicates that more than half of all bike riders have never taken off their bike pedals themselves? Although it might appear to be a challenging job, pedal removal is, in fact, an easy operation that requires only a handful of tools and some basic knowledge.
In this article, I will walk you through the step-by-step process of removing a bicycle pedal so that you can easily maintain and upgrade your bike.
Before we get started, it’s important to note that there are two types of pedals: left and right. The left pedal is typically attached with a reverse thread, meaning you will need to turn it clockwise to loosen it, while the right pedal is attached with a standard thread, meaning you will need to turn it counterclockwise to loosen it.
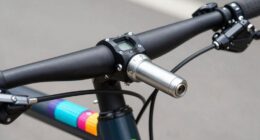
It’s also important to note that you will need a few specific tools to remove your pedals, including a pedal wrench or a 15mm open-end wrench, as well as some grease or thread locker for reinstallation.
With these tools in hand, let’s get started on removing your bicycle pedal!
Key Takeaways
- There are two types of pedals: left and right, with left pedal being attached with a reverse thread and the right pedal with a standard thread.
- Tools needed to remove pedals include a pedal wrench or a 15mm open-end wrench and some grease or thread locker.
- Pedal removal techniques can vary depending on the type of pedal, with clipless pedals requiring a specific tool and platform pedals usually able to be removed with a standard wrench.
- Pedal maintenance is crucial for a smooth and efficient pedal stroke, optimizing your cycling experience and ensuring pedals function properly.

Swagman Standard Fork Mount Rooftop Bike Carrier
EASY TO ASSEMBLE: The STANDARD is easy to assemble with no tools required, sets up in just minutes...
As an affiliate, we earn on qualifying purchases.
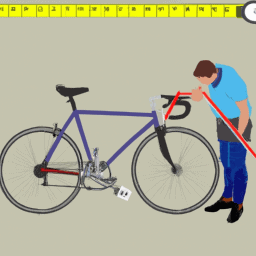
Gather Your Tools and Equipment
Before you start removing a bicycle pedal, you should gather all the necessary tools and equipment. Firstly, you need to choose a suitable wrench. It’s essential to pick the right size of wrench that will fit the pedal spindle.
A pedal wrench is specifically designed for removing pedals, and it usually has a long handle and a thin head. A flathead screwdriver is also useful to have on hand to help remove any dust or rust around the pedal threads. Additionally, you may want to use a rag to clean the pedal threads and keep your hands clean.
While gathering your tools and equipment, it’s also important to take some safety precautions. Wear gloves to protect your hands from getting injured or dirty. Ensure that you have a firm grip on the bike and that it is stable before you start working. It’s best to work on a level surface and use a bike stand if possible.
Once you have all the necessary tools and equipment, and you’ve taken the necessary safety precautions, you can proceed to the next step, which is positioning your bike.
Swagman UPRIGHT Roof Mount Bike Rack
EASY TO ASSEMBLE: The UPRIGHT roof rack installs in minutes following the instructions and carries one bike with...
As an affiliate, we earn on qualifying purchases.
Position Your Bike
First off, make sure your ride is securely propped up on a stand or against a wall before getting started. This will help you to avoid any accidents that may occur due to the bike falling over.
Once you have a stable setup, adjust the height of your bike so that the pedal you want to remove is at a comfortable height. This will make it easier for you to work on the pedal without straining your back or arms. Additionally, check the alignment of your bike before you start; it’ll ensure that the pedal is not bent or damaged, which could make removal more difficult.
Next, it’s important to position your bike correctly to avoid any damage to the frame or pedals. To do this, stand facing the pedal you want to remove, and position your body so that your dominant foot is closest to the pedal. This’ll allow you to apply the most force when loosening the pedal.
With your bike positioned correctly, you can now move on to the next step of the process and begin to loosen the pedal.

SYDSZ Roof Bike Rack Mount Upright Roof Bike Rack 1 Bike Carrier Car Roof Bicycle for Car Only Suitable for Removable Universal Crossbars
【COMPATIBILITY】Only applicable for installation on the driver's roof, fits 20" - 29" wheels. 64" long tray. Fits up...
As an affiliate, we earn on qualifying purchases.
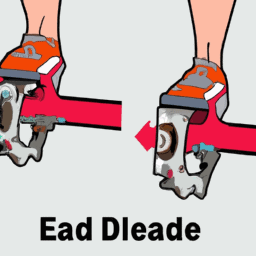
Loosen the Pedal
To start loosening the pedal, use a pedal wrench to turn it counterclockwise. Adjust the tightness of the wrench to get a better grip on the pedal and turn it more easily. Also, applying lubricant to the threads of the pedal can help loosen it.
When turning the pedal counterclockwise, use your dominant foot to apply pressure to the wrench. If you feel resistance, don’t give up, just apply more pressure until the pedal starts to turn. Once the pedal is loose, you can use your fingers to turn it the rest of the way off.
To remove the pedal completely, continue turning it counterclockwise until it comes off the crank arm. With one pedal removed, you can now repeat the process on the other pedal.

MaxxHaul Platform Bike Rack for 2 Bikes - Hitch Mounted Tray Carrier for SUV, Van, & Truck - Adjustable Tire Cradles & Foam Padded Hooks - Fits 2" Class III & IV Hitches (50027)
[Enhanced Durability]: Built to last, this hitch adapter fits standard 2" hitch receivers. It features robust construction and...
As an affiliate, we earn on qualifying purchases.
Remove the Pedal
Once the pedal is loosened, it’s important to keep applying pressure until it comes off completely, allowing for a smoother and safer ride. Pedal removal techniques can vary depending on the type of pedal. There are two main types of bike pedals: clipless pedals and platform pedals. Clipless pedals require a specific tool to remove them, while platform pedals can usually be removed with a standard wrench. It’s important to consult the manufacturer’s instructions or a bike mechanic if you’re unsure of how to remove your specific type of pedal.
Here’s a breakdown of the different types of bike pedals and the tools required for pedal removal:
| Type of Pedal | Pedal Removal Technique | Required Tool |
|---|---|---|
| Clipless Pedals | Loosen the retention bolt, then twist and pull the pedal off | Pedal wrench or Allen key |
| Platform Pedals | Loosen the axle nut, then use a pedal wrench to turn the pedal counterclockwise | Standard wrench or pedal wrench |
Now that the pedal is removed, it’s important to clean and maintain your pedals to ensure their longevity.
Clean and Maintain Your Pedals
Keeping your pedals clean and well-maintained is crucial for a smooth and safe ride. Pedal maintenance not only extends the lifespan of the pedals but also ensures that they function properly. Here are some tips on how to maintain your pedals:
-
Clean your pedals regularly with a mild soap and water to remove dirt and debris. Use a soft-bristled brush to scrub the pedals gently. Avoid using harsh chemicals or abrasive materials that can damage the pedals.
-
Lubricate the pedals with a bike-specific grease or oil to prevent rust and corrosion. Apply the lubricant to the pedal threads and bearings, and wipe off any excess with a clean cloth. This will ensure a smooth and efficient pedal stroke.
Choosing the right pedal is also an important aspect of pedal maintenance. There are different types of pedals available, including platform pedals, clipless pedals, and combination pedals. The type of pedal you choose depends on your riding style and preferences.
Platform pedals are suitable for casual riders or those who wear non-cycling shoes. Clipless pedals are ideal for road cycling or mountain biking as they provide a secure attachment between the shoe and pedal. Combination pedals offer both options, allowing you to clip in or ride with non-cycling shoes.
Pedal maintenance and choosing the right pedal are important for a safe and enjoyable ride. By following these tips, you can keep your pedals in good condition and optimize your cycling experience.
Frequently Asked Questions
How can I tell if my pedals need to be removed or replaced?
To tell if my pedals need to be removed or replaced, I check for signs of worn pedals such as a loose or wobbly feeling, clicking noises, or uneven wear. Then, I research and find compatible replacement pedals for my bike.
Can I remove the pedals without a pedal wrench?
Looking to remove pedals without a wrench? Alternative methods exist, but have pros and cons. Using a crescent wrench may damage the pedals, while using a 6mm Allen key may require more force.
How do I know which direction to turn the pedal to loosen it?
To loosen a bicycle pedal, turn it counterclockwise. If it’s stubborn, try using a pedal wrench or a long-handled wrench for more leverage. Apply some lubricant to the threads beforehand to make the removal easier.
What should I do if the pedal is stuck and won’t loosen?
If my bike pedal is stuck, I first try using lubricant and a longer wrench. If that fails, I take precautions by wearing gloves and eye protection, and try alternative tools like a pedal wrench or vice grips. To prevent future issues, I always clean and grease the threads before reinstalling.
Is it necessary to grease the threads of the pedal before reattaching it?
Yes, it is recommended to apply pedal grease to the threads before reattaching it. This ensures easy removal in the future and prevents rust buildup. Pedal spacers can also improve comfort and power transfer. Different types of grease vary in effectiveness.
Conclusion
Well, folks, that’s all there is to it. Removing a bicycle pedal might seem like a daunting task, but with the right tools and a little elbow grease, you’ll have those pedals off in no time.
And who knows? Maybe you’ll even enjoy the process. After all, what’s more satisfying than taking apart and putting back together something you use every day?
But let’s be real here. You’re not doing this for fun. You’re doing it because you need to. Maybe your bike is making a weird noise, or maybe you just want to switch out your pedals for something a little more stylish. Whatever the reason, just remember: the real challenge isn’t getting those pedals off. It’s figuring out what to do with your newfound freedom.
Will you go on a long ride through the countryside? Will you pop some sick wheelies in the park? Or will you simply use your bike as a mode of transportation, getting you from point A to point B with ease? The possibilities are endless.
So go forth, my friends, and pedal to your heart’s content.