Do you feel like you’re constantly stuck in a cycle that never ends? Don’t worry, I’m here to help you learn how to easily remove a bicycle wheel!
In this step-by-step guide, I’ll walk you through the process using simple tools and techniques.
From shifting gears to releasing the brake and adjusting the alignment, you’ll be a wheel removing pro in no time.
So, saddle up and let’s get rolling on this wheel-revolutionizing adventure!
Key Takeaways
- Gather the necessary tools (Allen wrenches, tire lever, spoke wrench)
- Shift the gears to the smallest chainring
- Release the brake and adjust brake pads if necessary
- Loosen the quick release lever or axle nuts

Under Armour Squeeze Water Bottles, 32 oz Water Bottles, Sideline Sports Water Bottle with Quick-Shot Lid, Quick & Easy Hydration, Gym Water Bottles, Squeeze Bottle, 1 32oz Bottle
- Easy Hydration: Quick-shot lid and one-way valve
- On-the-Go Use: One-hand operation for active hydration
- Measurement Markings: Ounces and milliliters for tracking
As an affiliate, we earn on qualifying purchases.
Gather the necessary tools
You’ll need a few tools to remove a bicycle wheel. First, make sure you have a set of Allen wrenches, as these will be necessary for loosening the bolts that hold the wheel in place.
You’ll also need a tire lever, which will help you remove the tire from the rim. Additionally, a spoke wrench will be useful for adjusting the tension of the spokes if needed.
Once you have these tools, you can begin the process of removing the wheel. Start by shifting the gears to the smallest chainring. This will relieve tension on the chain and make it easier to remove the wheel.
Now that you have the necessary tools and have shifted the gears, you’re ready to move on to the next step.
Shift the gears to the smallest chainring
Shift the gears to the smallest chainring before attempting any further steps. This ensures that the chain is properly aligned and reduces tension, allowing for easier removal of the bicycle wheel. To install new chainrings or troubleshoot gear shifting issues, it is important to start with the smallest chainring position.
Here is a table outlining the steps to shift the gears to the smallest chainring:
| Column 1 | Column 2 | Column 3 | Column 4 |
|---|---|---|---|
| Step 1 | Step 2 | Step 3 | Step 4 |
| Shift to | Locate | Adjust | Verify |
| smallest | the | the | proper |
| chainring | gear | derailleur | alignment |
By following these steps, you can ensure that the chain is properly aligned with the smallest chainring, preventing any gear shifting issues. Once the gears are in the correct position, you can move on to the next step of releasing the brake for further wheel removal.
Release the brake
To release the brake, simply squeeze the brake lever and pull it towards you. This action will cause the brake pads to separate from the wheel, allowing it to rotate freely.
Before removing the wheel, it’s a good idea to check the brake pads for wear and adjust them if necessary. To adjust the brake pads, locate the small screw on the side of the brake calipers. Turning this screw clockwise will bring the pads closer to the rim, while turning it counterclockwise will move them away.
It’s also important to regularly clean the brake calipers to ensure optimal braking performance. Use a clean cloth or brush to remove any dirt or debris that may have accumulated.
Once the brake is released and the brake pads are adjusted and clean, you can proceed to the next step of loosening the quick release lever or axle nuts.
Loosen the quick release lever or axle nuts
Loosen the quick release lever or axle nuts by turning them counterclockwise. To do this, you will need a wrench or an Allen key, depending on the type of release lever or nuts on your bike.
If you have a quick release lever, simply flip it open and rotate it counterclockwise until it is loose enough to remove the wheel.
If you have axle nuts, use a wrench or an Allen key to turn them counterclockwise and loosen them. Make sure to loosen both sides evenly to prevent any damage to the wheel or the bike frame.
Common mistakes include not fully loosening the nuts or lever, which can make it difficult to remove the wheel.
Once the quick release lever or axle nuts are loosened, proceed to the next step of lifting the bike off the ground, making it easier to remove the wheel.
Lift the bike off the ground
Once the bike is lifted off the ground, it becomes easier to continue with the wheel removal process. Proper lifting technique is crucial to avoid any unnecessary strain or injury.
To lift the bike, stand on the side opposite of the wheel you want to remove. Place one hand on the handlebars and the other hand on the saddle. Bend your knees and use your leg muscles to lift the bike off the ground, keeping your back straight. Maintain a firm grip on the bike while lifting, ensuring that it remains balanced and stable.
This lifting technique is not only important for wheel removal but also for general bike maintenance. With the bike off the ground, we can now move on to the next step: removing the wheel from the frame or fork.
Remove the wheel from the frame or fork
Next, we can take off the wheel from the frame or fork. To do this, follow these steps:
- Loosen the quick-release lever or remove the axle nuts, depending on the type of wheel attachment.
- Gently pull the wheel away from the frame or fork, ensuring that the chain clears the cogs or sprockets.
- Once the wheel is free from the frame or fork, carefully set it aside.
- If you are replacing a bicycle wheel, now is the time to install the new one by reversing the steps above.
Removing a bicycle wheel is a crucial step in replacing a damaged or worn-out wheel or troubleshooting common wheel issues. Once the wheel is off, inspect it for any damage or wear before proceeding to the next section.
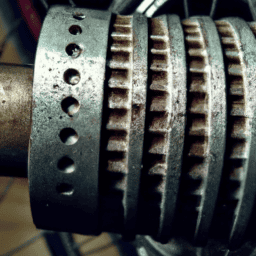
Inspect the wheel for any damage or wear
Now that the wheel is removed from the frame or fork, it’s important to thoroughly inspect it for any signs of damage or wear. This step is crucial to ensure the safety and functionality of the wheel.
Take a close look at the wheel, checking for any dents, cracks, or worn brake tracks. These issues can compromise the structural integrity of the wheel and should be addressed before further use.
Additionally, inspect the spokes for any signs of looseness or broken spokes. Ensure that they are evenly tensioned to maintain the wheel’s stability.
If any damage or wear is detected, it may be necessary to replace the wheel to prevent any potential accidents or further damage.
With the inspection complete, let’s move on to the next step of replacing the wheel if necessary.
Replace the wheel if necessary
If you find any damage or wear during the inspection, you should consider replacing the wheel to ensure your safety. Here are four reasons why replacing the wheel is necessary:
-
Safety: A damaged or worn wheel can compromise your control and stability while riding, increasing the risk of accidents.
-
Performance: A new wheel ensures optimal performance, allowing for smoother rides and better handling.
-
Efficiency: Installing new brake pads along with the new wheel enhances braking efficiency, reducing stopping distances.
-
Gear Shifting: Replacing the wheel provides an opportunity to adjust the derailleur, ensuring smooth and precise gear shifting.
Once you have decided to replace the wheel, you can proceed to install a new tire or fix a flat tire. This ensures your bicycle is in top condition for your next ride.
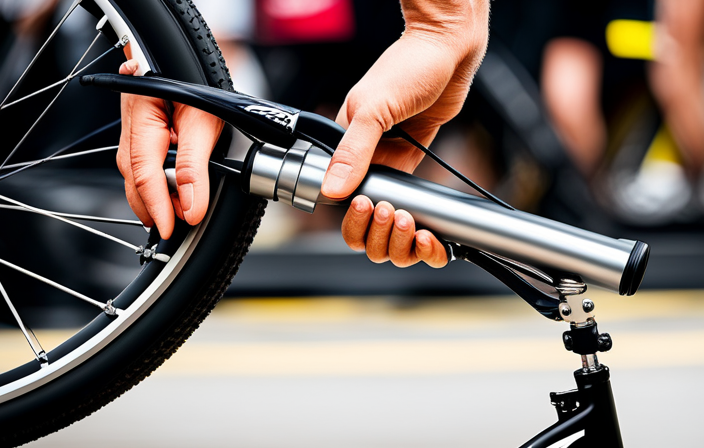
Install a new tire or fix a flat tire
To install a new tire or fix a flat tire, start by deflating the tube completely.
If you are installing tubeless tires, ensure that the rim is clean and free from any debris.
Then, carefully mount the tire onto the rim, making sure it is seated evenly all the way around.
Next, inflate the tire slowly, checking for any leaks or unevenness in the seating.
If you are patching a punctured inner tube, locate the hole by submerging it in water and looking for bubbles.
Once found, roughen the area around the hole with sandpaper and apply a patch using rubber cement.
Press the patch firmly onto the tube and allow it to dry completely before re-inflating.
Now, you are ready to reattach the wheel to the frame or fork, ensuring it is securely fastened.
Reattach the wheel to the frame or fork
Once you have finished fixing the flat tire, you can reattach the wheel to the frame or fork. Reattaching the wheel securely is crucial to ensure safe and efficient cycling. Start by aligning the axle with the dropouts on the frame or fork. Make sure the wheel is centered and straight. Then, tighten the quick release lever or axle nuts. A loose wheel can cause instability and potential accidents. To troubleshoot common wheel attachment issues, check if the quick release lever or axle nuts are properly tightened. Ensure that the wheel is seated properly in the dropouts and that the axle is fully inserted. Additionally, inspect the brake alignment and adjust if necessary. By following these steps, you can reattach the wheel securely and avoid any potential problems. Transitioning into the subsequent section about tightening the quick release lever or axle nuts, it is important to ensure proper wheel attachment for a safe and smooth ride.
Tighten the quick release lever or axle nuts
Make sure to tighten the quick release lever or axle nuts securely to ensure a safe and smooth ride. To tighten the quick release lever, flip it open and turn it clockwise until it feels snug. Avoid overtightening, as this can damage the wheel or frame. If your bicycle has axle nuts instead of a quick release lever, use a wrench to tighten them. Hold the wrench with one hand and turn the nuts clockwise with the other hand until they are tight.
Once you have tightened the quick release lever or axle nuts, you can move on to the next step of adjusting the brake if needed. This will ensure that your bicycle is in optimal condition for your ride.
Adjust the brake if needed
If the brake needs adjustment, you can easily fix it before your ride. To adjust the brake tension, follow these steps:
- Begin by locating the brake cable. It is typically connected to the brake caliper.
- Use a 5mm Allen wrench to loosen the cable anchor bolt on the brake caliper.
- Pull the cable tight and retighten the anchor bolt.
- Next, check the brake pads for wear. If they are worn down, replace them.
- Finally, test the brake by squeezing the brake lever. It should engage smoothly and stop the wheel effectively.
By adjusting the brake tension and troubleshooting any brake issues, you ensure optimal braking performance. Once you have completed this step, you can move on to testing the wheel for proper alignment and rotation.
Test the wheel for proper alignment and rotation
To ensure optimal performance, check if the wheel is aligned and rotates properly.
Start by placing the bike on a stable surface and spinning the wheel. Observe if there are any wobbles or uneven rotations.
If the wheel appears misaligned, loosen the axle nuts or quick release skewer and adjust the position of the wheel in the frame. Once aligned, tighten the nuts or skewer securely.
Next, test the rotation by spinning the wheel and listening for any unusual sounds or friction. If there is resistance, inspect the brake pads for misalignment or rubbing against the rim. Adjust the brake calipers if necessary.
Additionally, check for any loose or damaged spokes that could affect the wheel’s rotation.
Once you have confirmed proper alignment and rotation, you can move on to the next section about cleaning and lubricating the wheel components.
Clean and lubricate the wheel components
Start by cleaning and lubricating the components of your bike’s wheels to ensure they function smoothly. Proper cleaning techniques are essential to maintain optimal performance. Begin by removing the wheel from the bike frame, then use a mild detergent and a soft brush to gently scrub away dirt and grime. Pay extra attention to the spokes, hub, and rim surfaces. Rinse thoroughly with clean water and allow the components to dry completely before proceeding. Once dry, it’s time to apply the right lubricant. Choose a lubricant specifically designed for bicycle use, such as a dry or wet lubricant depending on your riding conditions. Apply the lubricant sparingly to the moving parts of the wheel, including the hub bearings and spoke nipples. Wipe off any excess lubricant. With clean and properly lubricated wheel components, you can enjoy your smooth and safe ride!
Enjoy your smooth and safe ride!
Now that your bike’s wheel components are clean and properly lubricated, you can sit back and enjoy your smooth and safe ride!
Safe cycling is not only about following traffic rules and wearing protective gear, but also about proper maintenance of your bicycle. By regularly cleaning and lubricating the wheel components, you ensure their longevity and functionality. This helps in reducing friction and wear, resulting in a smoother ride.
Additionally, proper maintenance also prevents rust and corrosion, which can compromise the structural integrity of the wheels. Regularly inspecting the wheel components for any signs of damage or wear is crucial for safe cycling. If you notice any issues, such as loose spokes or worn-out brake pads, make sure to address them promptly.
Remember, a well-maintained bicycle ensures a safe and enjoyable riding experience.
Frequently Asked Questions
How do I shift the gears to the smallest chainring?
To shift the gears to the smallest chainring, start by locating the shifters on the handlebars. Use the left shifter to move the chain onto the smallest chainring. Make sure to adjust the chainring properly for smooth gear shifting.
How do I release the brake on my bicycle?
To release the brake on my bicycle, I need to locate the brake lever and squeeze it firmly. This will disengage the brake pads from the wheel, allowing it to spin freely. Regular brake maintenance is crucial for optimal performance and safety.
How do I inspect the wheel for damage or wear?
To inspect a bicycle wheel for damage or wear, start by checking the tire pressure. Use a pressure gauge to ensure it is properly inflated. Then, visually inspect the spokes for any signs of breakage. Replace broken spokes promptly to maintain wheel integrity.
How do I adjust the brake on my bicycle?
To adjust the brake on my bicycle, I start by inspecting the brake pads for wear. Then, I use an Allen wrench to adjust the brake tension. If the brakes squeal, I troubleshoot by cleaning the pads and aligning them properly.
How do I clean and lubricate the wheel components?
As I dive into the intricate process of cleaning and lubricating my bicycle’s wheel components, I carefully select the right cleaning techniques and lubricants to ensure optimal performance and longevity.
Conclusion
And there you have it, folks! Removing a bicycle wheel may seem like a daunting task, but with the right tools and a little know-how, it can be a breeze.
By following these steps, you’ll be able to remove your bicycle wheel with ease, ensuring proper alignment and rotation for a smooth and safe ride.
So, what are you waiting for? Get out there and give it a spin – you’ll be riding like the wind in no time!