
Whether you’re a hardcore biking enthusiast or someone who likes a casual ride now and then, you understand how crucial it is to maintain your bicycle in pristine condition. A vital part of bicycle upkeep involves tuning the chain to guarantee its smooth operation.
However, sometimes you may need to remove a few links from your chain to achieve the perfect tension. This can seem like a daunting task, but with the right tools and some basic knowledge, it’s a fairly straightforward process.
In this article, I will guide you through the steps of removing bicycle chain links. I’ve been an avid cyclist for years, and I’ve had to adjust my chain countless times. Whether you’re a seasoned pro or a newbie, I hope this guide will help you tackle this task with confidence and ease.
So, let’s get started!
Key Takeaways
- Proper maintenance of the bike chain is crucial to prevent common chain issues and ensure better performance and longevity.
- Adjusting chain tension is necessary by removing links, and the calculation to determine how many links to remove is based on measurement.
- Tools like a chain tool, pliers, and lubricant are necessary for removing chain links, and precision and experience are required for pushing out the pin to separate the link.
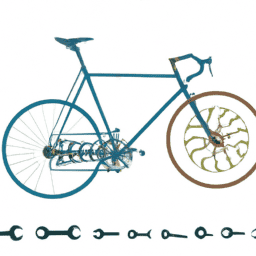
- Different types of bicycle chains, such as 1/8′ and 3/32′ chains, are used on single-speed and multi-speed bikes, and regular maintenance helps prevent rust, wear and tear, and noise, leading to a smoother and more enjoyable ride.

Seatylock FoldyLock Compact Folding Bike Lock - Award Winning Patented Lightweight High Security Bicycle Lock - Heavy Duty Anti Theft Smart Secure Guard with Keys & Case for Bikes or Scooters
TOP RATED LIGHTWEIGHT COMPACT BIKELOCK - Best Light Weight Folding Bike Lock. Portable Solid Key Bike Lock Protects...
As an affiliate, we earn on qualifying purchases.
Determine How Many Links to Remove
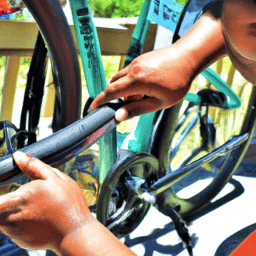
You’ll need to figure out how many links to take out, and it’s as easy as counting the links on the chain. However, there’s a measuring technique that can help you determine the correct length of the chain.
This technique involves wrapping the chain around the largest chainring and the largest cassette cog without going through the derailleur. Then, add two links to the length of the chain. This calculation will give you the correct length of the chain, and you can use it to determine how many links to remove.
Once you’ve calculated the correct length of the chain, you can gather the necessary tools to remove the excess links. These tools include a chain tool, which is used to push out the pins that hold the links together, and a pair of pliers, which can help you hold the chain in place while you work on it.
With these tools in hand, you’ll be ready to remove the links and get your chain back in working order.

Sportneer Bike Lock: 5 Digit Combination High Security Anti Theft Bike Chain Lock - 3.2/3.6/4ft Heavy Duty Keyless Bicycle Lock for Bike Motorcycle Scooter Door & Gate - Easy to Use, Bike Accessories
High Security & Keyless Design: Say goodbye to the hassle of carrying keys and hello to keyless convenience....
As an affiliate, we earn on qualifying purchases.
Gather the Necessary Tools
To get started, grab all the gear you need. Removing a bicycle chain link requires precision and the right tools. Here’s what you’ll need:
- Chain tool: This is a device that helps you push out the pin that holds the links together.
- Pliers: These will come in handy if you need to remove a stubborn link or if you need to hold the chain in place.
- Lubricant: It’s important to have lubricant on hand to help ease the process of removing the link.
When it comes to bicycle chains, there are different types you may encounter. The most common types are 1/8′ chains (used on single-speed bikes) and 3/32′ chains (used on most multi-speed bikes).
It’s also important to note that lubrication plays a crucial role in the removal process. Without it, removing the chain link can be more difficult and can even damage the chain.
Now that you have all the necessary tools and understand the importance of lubrication and types of bicycle chains, it’s time to move onto the next step: removing the chain link.

Kryptonite Folding Bike Lock, Compact Lightweight High Security Anti-Theft Foldable Bicycle Lock with 2 Keys and Mount for E-Bikes Scooter Road Mountain Bikes, 88.4cm (34.8 in)
HIGH-SECURITY DESIGN: This Anti-Theft folding bike lock is made from 3mm hardened steel bars with tightened rivets for...
As an affiliate, we earn on qualifying purchases.
Remove the Chain Link
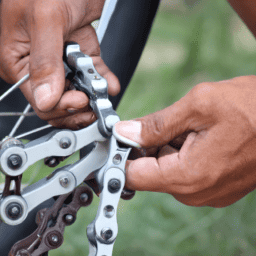
In order to remove a bicycle chain link, I first position the chain tool properly on the chain. This is crucial as it ensures that the chain pin is aligned with the tool’s punch.
Once in position, I then use the tool to push out the pin from the link that needs to be removed. Lastly, I carefully remove the link from the chain, taking care not to damage any of the surrounding links.
These steps require precision and experience, but with the right tools and technique, removing a chain link can be done quickly and easily.
Positioning the Chain Tool
First, make sure the chain tool is positioned correctly to begin removing links. Proper tool handling is essential to prevent damage to the chain and the tool itself.
The chain tool should be positioned so that the pin aligns with the chain link that you want to remove. It’s important to make sure that the chain is securely held in place in the tool. If it’s not, the link may not come apart cleanly, and you’ll have to troubleshoot issues by carefully realigning the tool and trying again.
Once the chain tool is in place, you can begin pushing out the pin. This is the most delicate part of removing a chain link, so take your time and be patient. Apply steady pressure to the tool, and turn the handle clockwise to push the pin out of the link.
As you push the pin out, the link will start to separate, and you can remove the link from the chain. With the link removed, you can now adjust the length of the chain to suit your needs.
Pushing Out the Pin
Now you’re ready to tackle the trickiest part: pushing out the pin to separate the link. Get ready for a tense moment as you apply pressure and turn the handle, inching closer to achieving the perfect chain length. To make this task easier, position the chain tool so that the pin is aligned with the center of the tool. This ensures that the pin is pushed out evenly, preventing any damage to the chain.
As you push out the pin, be sure to wear safety glasses to protect your eyes from any flying debris. Apply steady pressure to the handle, making sure not to force it too hard as this can cause the pin to break off inside the chain. If the pin is difficult to push out, you can use alternative methods such as using a pair of pliers to grip the pin and pull it out. However, this should only be done as a last resort as it can damage the chain.
With the pin successfully removed, you can now move on to removing the link from the chain. This process is relatively simple and just involves separating the outer plates of the link.
Removing the Link
Once the pin is out, you’re almost done adjusting the length of your chain and you can continue your bike ride without any issues.
Now, it’s time to remove the link that you want to get rid of. There are alternative methods to do this, but the most common one is to use a chain tool.
Place the chain tool over the rivet that’s next to the link you want to remove. If you’re not sure which link to remove, count the number of links in your chain and mark the link you want to remove with a marker or piece of tape.
Once the chain tool is in place, start turning the handle clockwise until the pin is pushed out completely. It’s important to keep the chain tool straight and make sure that the pin is being pushed out evenly. One common mistake is to push the pin too far out, which can damage the chain.
Once the pin is out, you can separate the chain and remove the link. Now that you’ve removed the link, it’s time to reconnect the chain.

Seatylock FoldyLock Compact Folding Bike Lock - Award Winning Patented Lightweight High Security Bicycle Lock - Heavy Duty Anti Theft Smart Secure Guard with Keys & Case for Bikes or Scooters
TOP RATED LIGHTWEIGHT COMPACT BIKELOCK - Best Light Weight Folding Bike Lock. Portable Solid Key Bike Lock Protects...
As an affiliate, we earn on qualifying purchases.
Reconnect the Chain
To reconnect the chain, you’ll need to use a chain tool to push the pin back into the chain link. This process requires a significant amount of pressure, usually up to 9 pounds. Here are the steps to follow when reconnecting a chain:
-
Align the chain ends: Before pushing the pin back into the chain link, make sure the two ends of the chain are aligned. This will prevent any damage or misalignment to the links.
-
Place the chain on the tool: Insert the chain into the slot of the chain tool, making sure the pin is lined up with the link you want to reconnect.
-
Push the pin: Slowly turn the handle of the chain tool to apply pressure to the pin. Keep pushing until the pin is fully inserted into the link.
After reconnecting the chain, it’s important to check for proper tension and chain lubrication. Troubleshooting chain issues is crucial to ensure smooth operation of your bicycle.
In the next section, we’ll discuss some maintenance tips to keep your chain in top condition.
Maintenance Tips
Keep your bike’s chain in top condition by regularly cleaning and lubricating it, which will ensure a smoother and more enjoyable ride. The importance of regular lubrication cannot be stressed enough, as it can prevent common chain issues that may arise over time. These issues can include rust, wear and tear, and noise.
To help you understand the importance of regular lubrication and common chain issues to watch for, refer to the table below:
| Common Chain Issues | Symptoms | Solutions |
|---|---|---|
| Rust | Orange or brown discoloration on the chain | Clean chain with a degreaser and lubricate with a rust inhibitor |
| Wear and Tear | Chain stretches and becomes loose | Replace the chain |
| Noise | Squeaking or clicking sound | Clean and lubricate the chain |
By regularly cleaning and lubricating your bike’s chain, you can prevent these common issues from occurring and ensure a smoother, safer ride. It is important to check your chain regularly for signs of wear and tear, and to address any issues promptly. With proper maintenance, your bike’s chain will last longer and perform better, providing you with a more enjoyable cycling experience.
Frequently Asked Questions
What is the most common reason for needing to remove a bicycle chain link?
As an experienced cyclist, I’ve found that the most common reason for needing to remove a bicycle chain link is due to neglecting chain maintenance tips and not preventing chain wear. It’s important to regularly clean and lubricate your chain to avoid this issue.
Can I use regular pliers to remove a chain link or do I need a special tool?
I wouldn’t recommend using regular pliers for chain link removal. A special tool designed for this task, such as a chain tool or master link pliers, provides better leverage and prevents damage to the chain.
How often should I clean and lubricate my bicycle chain?
My chain is the heart of my bike, so I clean and lubricate it every 100-200 miles. Dirt buildup causes wear and tear, and a noisy or rusty chain is a sign of neglect. Regular maintenance keeps me rolling.
Should I replace my chain or just remove links if it’s skipping or jumping gears?
When my chain skips or jumps gears, I weigh the pros and cons of chain replacement vs link removal. Replacing the chain ensures optimal performance, but removing links can be a temporary fix.
Is it possible to damage my bike chain if I remove too many links?
Removing too many links from a bike chain can lead to permanent damage. To avoid this, it’s important to follow chain maintenance tips and refer to a chain sizing guide. As an experienced cyclist, I know the importance of proper chain care.
Conclusion
Removing bicycle chain links may seem daunting, but with the right tools and a little bit of know-how, it can be an easy and straightforward task. Remember to always determine how many links you need to remove before starting the process. This can be done by counting the number of links in your chain and deciding where you need to make the cut.
Gathering the necessary tools, such as a chain tool, pliers, and a master link, is also crucial in successfully removing chain links. By following the steps of removing the link, reconnecting the chain, and properly maintaining it, you can ensure that your bike operates smoothly and efficiently.
Did you know that a dirty chain can decrease the efficiency of your bike by up to 20%? This means that regular maintenance and cleaning can make a huge difference in the performance of your bike and your overall riding experience.
As an experienced cyclist, I highly recommend taking the time to learn how to remove and maintain your bicycle chain. Not only will it save you money on repairs, but it will also prolong the life of your bike.
With the right tools and knowledge, you can easily remove chain links and ensure that your bike is running at its best. So, take the time to educate yourself and give your bike the TLC it deserves.