As someone who has passionately engaged in cycling for numerous years, I understand that one essential skill all cyclists must possess is the ability to detach a tire from their bicycle. This skill is crucial whether you’re looking to change a punctured tire or merely aiming to clean your wheels. Mastering tire removal is a straightforward task that can help you conserve both money and time.
In this article, I’ll walk you through the steps to remove a tire from your bike, from gathering the necessary tools to reassembling the wheel.
Before we begin, it’s important to note that removing a tire requires a bit of physical effort and attention to detail. If you’re not comfortable working with tools or have never done this before, it’s always best to seek help from a professional bike mechanic.
That being said, with a little patience and practice, you’ll soon be able to remove a tire with ease. So, let’s get started!
Key Takeaways
- Regular tire maintenance and proper brake maintenance are important for safety and can prevent issues.
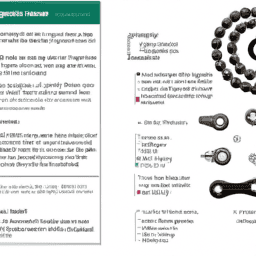
- Tools needed for removing a bicycle tire include a wrench, pliers, socket wrench, adjustable wrench, and a tire lever.
- Steps for removing a tire include inspecting the tire, identifying the type of brakes, releasing the tension on the brake cable or pads, flipping the bicycle over, using quick-release skewers or a wrench to loosen nuts, inspecting the wheel hub and spokes, inspecting the tire tread, using tire levers to pry the tire away from the rim, removing the tire from the rim, installing a new tube or patching the old one, and finally, properly inflating the tire to the recommended pressure.
- Regularly checking tire pressure and performing routine maintenance is essential, and it’s recommended to seek help from a professional bike mechanic if not comfortable with tools.

Swagman Standard Fork Mount Rooftop Bike Carrier
EASY TO ASSEMBLE: The STANDARD is easy to assemble with no tools required, sets up in just minutes...
As an affiliate, we earn on qualifying purchases.
Gather the Necessary Tools
You’ll need to grab a few tools before you can start removing your bike tire. First, make sure you have the appropriate tools for the type of bike tire you have.
If you have a quick-release tire, you’ll need a wrench or pliers to loosen the nut. If you have a bolt-on tire, you’ll need a socket wrench or adjustable wrench to remove the bolt.
Additionally, it’s a good idea to have a tire lever on hand to help remove the tire from the wheel.
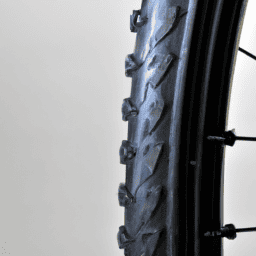
Before starting, take a moment to inspect your tire and make sure there are no punctures or damage. If you notice any issues, it’s best to address them before removing the tire.
Regular tire maintenance can also help prevent issues, such as keeping your tires properly inflated and checking for wear and tear.
With the necessary tools in hand, it’s time to release the brakes and get started.
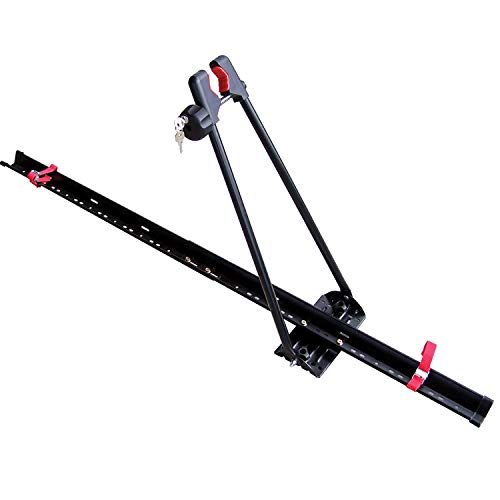
Swagman UPRIGHT Roof Mount Bike Rack
EASY TO ASSEMBLE: The UPRIGHT roof rack installs in minutes following the instructions and carries one bike with...
As an affiliate, we earn on qualifying purchases.
Release the Brakes
First, gotta loosen up those brakes before you can take off the wheel. Proper brake maintenance is important in ensuring your safety while cycling. Before removing the wheel, it’s essential to release the brakes properly to avoid any damage to the brake cables or housing. Here are the steps to do it:
-
Identify the type of bike brakes you have. The two most common types are rim brakes and disc brakes. Rim brakes are the traditional type that clamp onto the wheel’s rim, while disc brakes use a rotor attached to the hub and calipers on the fork or frame.
-
For rim brakes, locate the brake lever and squeeze it to release the tension on the brake cable. Then, find the small lever or button on the brake caliper that releases the arms that hold the brake pads. For disc brakes, locate the brake lever and squeeze it to release the tension on the brake pads.
-
Once you have released the brakes, check that they move freely and do not rub against the wheel or rotor. This way, when you put the wheel back on, the brakes will work correctly.
Now that the brakes are released, it’s time to remove the wheel.

SYDSZ Roof Bike Rack Mount Upright Roof Bike Rack 1 Bike Carrier Car Roof Bicycle for Car Only Suitable for Removable Universal Crossbars
【COMPATIBILITY】Only applicable for installation on the driver's roof, fits 20" - 29" wheels. 64" long tray. Fits up...
As an affiliate, we earn on qualifying purchases.
Remove the Wheel
Now that you’ve loosened up the brakes, it’s time to pop that wheel off and get to work! Start by flipping your bicycle over onto its handlebars and saddle so that the wheel you want to remove is off the ground.
If you have quick-release skewers, flip the lever to release the wheel from the frame. If your bike has nuts instead, use a wrench to loosen them before pulling the wheel out of the frame.
Once the wheel is off, take advantage of the opportunity to give your bike a quick inspection. Clean the wheel hub and inspect the spokes for any signs of damage or looseness. If necessary, tighten any loose spokes or replace any damaged ones.
While you’re at it, take a look at the tire tread and replace the inner tube if it’s punctured or worn out.
With all of this maintenance complete, you’re now ready to move onto the next step: removing the tire.
Without further ado, let’s get started on removing that tire from the rim.

TOOENJOY Rooftop Bike Rack for Car SUV, Upright Roof Mount Bicycle Rack with 2 Arms for Movable Crossbar, 1 Bike Carrier
Enhanced Bike Security: The dual rotatable load arms securely grip the bike by the wheels, ensuring zero contact...
As an affiliate, we earn on qualifying purchases.
Remove the Tire
With the wheel off the ground and the hub and spokes inspected, it’s time to dig into getting that rubber off the rim. First, ensure that the tire is properly inflated. This is important because if the tire is too deflated, it will be difficult to remove the tire from the rim. On the other hand, if the tire is overinflated, it can cause the tire to burst while trying to remove it, potentially causing injury.
To remove the tire, there are several techniques that can be used. One common technique is to use tire levers, which are small, curved plastic or metal tools designed to help pry the tire away from the rim. To use tire levers, insert one lever between the tire and the rim, then slide it around the circumference of the tire to loosen it from the rim. Repeat this process with a second lever on the other side of the tire. Once the tire is loosened, it can be removed from the rim by pulling it away from the wheel.
With the tire removed, it’s time to reassemble the wheel by installing a new tube or patching the old one.
Reassemble the Wheel
Assembling the wheel is a breeze compared to dismantling it. Start by lining up the valve stem with the hole on the rim and push the tire back onto the rim, making sure both sides are even.
Once the tire is in place, use your fingers to tuck the tire bead back into the rim groove. Then, use tire levers to finish the job. Be sure to avoid pinching the inner tube as you work the tire back on.
Properly inflate the tire to the recommended tire pressure, which can typically be found on the sidewall of the tire. Proper inflation is crucial for optimal performance, as it affects both the handling and rolling resistance of the bike.
Additionally, regularly check tire pressure and perform routine cleaning and maintenance to keep your bike in top condition. Tire pressure monitoring systems are also available for those who want to take the guesswork out of tire maintenance.
Frequently Asked Questions
How often should I replace my bicycle tires?
I determine if my bicycle tires need replacing by checking for wear indicators or if they have become damaged. To choose the right size, I consult my bike’s manual or measure the old tire.
Can I repair a punctured tire instead of replacing it?
I can repair a punctured tire instead of replacing it, but it depends on the severity of the damage and the puncture repair techniques used. Patching can be cheaper, but replacing provides a long-term solution. Pros and cons of patching vs replacing tire should be considered.
Should I use a specific type of tire for different terrains?
When choosing tire tread, it’s important to consider the terrain. For example, if I plan on mountain biking on loose or muddy surfaces, I would choose a tire with deep, aggressive tread for better traction and control.
Is it necessary to remove the tire completely to replace the inner tube?
Yes, it is possible to replace the inner tube without removing the tire completely. This can be done by partially removing the tire from the rim, allowing access to the inner tube for replacement.
How do I know if my brakes need adjustment after reassembling the wheel?
Before testing brakes, ensure proper wheel alignment. If the wheel is crooked, the brake pads may not be hitting the rim evenly. Brake troubleshooting includes checking for worn pads, cable tension, and proper cable routing.
Conclusion
In conclusion, removing a bicycle tire is not as daunting as it may seem. Anyone can do it with the right tools and a little bit of know-how. Just remember to gather all the necessary tools before beginning the process. A tire lever, wrench, and a pump are essential for this job.
Once you have the tools, release the brakes and remove the wheel. Then, carefully remove the tire using the tire lever and reassemble the wheel. As the old adage goes, "Practice makes perfect."So, don’t be afraid to try it out a few times until you get the hang of it. With a little bit of practice, you’ll be able to remove and replace your bicycle tire with ease.
Remember, safety should always come first when removing a bicycle tire. Always wear protective gear and take your time. Rushing through the process can lead to accidents and injuries. So, take your time and follow the steps carefully.
With these tips and tricks, you’ll be able to remove and replace your bicycle tire in no time.