Imagine yourself driving down the wide road, with the wind blowing through your hair and excitement of adventure filling your veins. However, all of a sudden, a troublesome chain problem stops your enjoyable ride.
Fear not, for I am here to guide you through the intricate process of removing a bicycle chain. With my expert knowledge, technical precision, and a few trusty tools, we’ll have that chain off in no time, allowing you to get back on the road and experience the freedom you crave.
Key Takeaways
- Gather the necessary tools: chain tool, pliers, small brush or rag, quick link or master link
- Properly align tools to avoid damage
- Identify the different colored or shaped link and use chain tool or pliers to disconnect it
- Shift gears to smallest chainring and smallest rear cog before removing the chain
Gather the Necessary Tools
You’ll need a few tools to remove the chain from your bicycle. Proper maintenance of the bicycle chain is crucial for optimal performance and longevity. Using the right tools for chain removal is of utmost importance to avoid damaging the chain or other components.
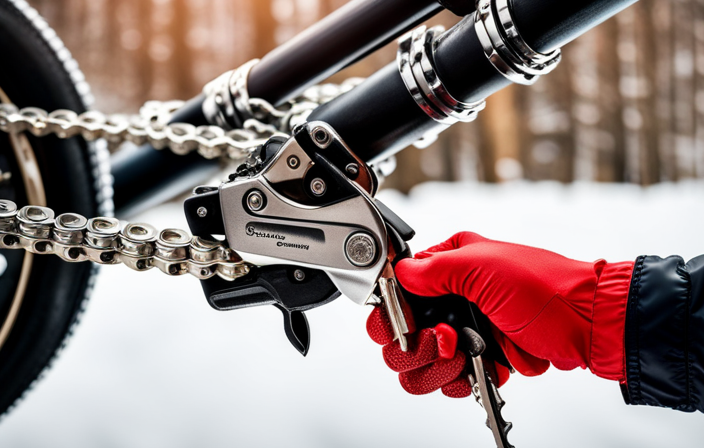
To start, you’ll need a chain tool, which allows you to push out the pins that hold the chain together. Additionally, having a pair of pliers can be helpful for gripping and manipulating the chain. A small brush or rag will be useful for cleaning the chain before removal.
Once you have these tools ready, you can proceed to locate the quick link or master link, which will allow for easy chain removal without using the chain tool.
Locate the Quick Link or Master Link
First, find the quick link or master link on your bike chain. These links are designed to allow for easy removal and installation of the chain. To locate the quick link, look for a link that is different from the others, usually with a different color or shape. Some chains may have a master link, which is larger and easier to spot.
Once you have located the quick link or master link, you will need a chain tool or a pair of pliers to disconnect it. Make sure you have the necessary tools before attempting to remove the chain. One common mistake is not properly aligning the link before disconnecting, which can cause damage to the chain.
Now that you have located the quick link or master link, you can proceed to the next step of shifting the gears to the smallest chainring and rear cog.
Shift the Gears to the Smallest Chainring and Rear Cog
To begin, shift to the smallest chainring and rear cog. This shifting technique ensures that the chain is in the optimal position for removal. When shifting to the smallest chainring, the chain will have less tension, making it easier to disconnect. Similarly, shifting to the smallest rear cog will align the chain with the chainring, allowing for a smoother removal process.
To paint a clear picture, follow these steps:
- Firstly, locate the gear shifters on the handlebars and shift the front derailleur to the smallest chainring.
- Next, use the gear shifters to shift the rear derailleur to the smallest rear cog.
- Finally, visually confirm that the chain is positioned on the smallest chainring and rear cog.
With the chain now properly positioned, we can move on to the next step of positioning the chain tool.
Position the Chain Tool
Once the chain is properly positioned, it’s time to place the chain tool in position. This step is crucial in the chain removal process as it requires precision and knowledge of the positioning technique.
Many people make common mistakes at this stage, which can lead to difficulties in removing the chain. To avoid these mistakes, it is important to ensure that the chain tool is aligned with the chain pin properly. The chain tool should be positioned so that the pin aligns with the chain pin, allowing for easy removal.
Care should be taken to avoid any misalignment, as this can cause damage to the chain or the tool itself. With the chain tool positioned correctly, we can now move on to the next step of aligning the chain tool pin with a chain pin, ensuring a smooth chain removal process.
Align the Chain Tool Pin with a Chain Pin
Aligning the chain tool pin with a chain pin ensures an easy and smooth removal process. To properly align the chain tool pin, follow these steps:
- Position the chain tool over the chain pin you want to remove.
- Make sure the chain tool pin is centered and aligned with the chain pin.
- Adjust the chain tool if necessary, ensuring a precise alignment.
Aligning the chain tool pin with a chain pin is crucial for proper chain maintenance and troubleshooting chain issues. By aligning them correctly, you minimize the risk of damaging the chain or the chain tool itself.
This step sets the stage for the next part of the process, where we begin turning the chain tool to push the pin out. This allows for the safe and efficient removal of the chain from the bicycle.
Begin Turning the Chain Tool to Push the Pin Out
Start by turning the chain tool to push out the pin. Make sure to do this smoothly and in a controlled manner. This technique is essential for safely removing the chain from the bicycle. As you turn the chain tool, you will gradually see the pin being pushed out of the chain link. Remember to maintain a steady pressure and avoid using excessive force, as this can cause damage to the chain or the tool itself. If you’re having difficulty turning the chain tool, you can try using alternative tools like pliers or a sturdy screwdriver to help push the pin out. Once the pin is fully removed, you can move on to the next step of taking the chain off the rear derailleur.
Remove the Chain from the Rear Derailleur
To detach the chain from the rear derailleur, gently release the tension and slide the chain off the derailleur pulley. This can be done by shifting the gears to the smallest chainring and smallest rear cog, which will relieve the tension on the chain. Once the tension is released, carefully slide the chain off the derailleur pulley, making sure not to damage any other components.
To help you visualize the process, here is a table that shows the steps involved in removing the chain from the rear derailleur:
| Step | Action |
|---|---|
| 1 | Shift gears to smallest chainring and smallest rear cog. |
| 2 | Release tension on the chain by gently pedaling backwards. |
| 3 | Slide the chain off the derailleur pulley. |
When reinstalling the chain or performing chain maintenance, it is important to remember to properly lubricate the chain and check for any damaged links.
Now, let’s move on to the next step of removing the chain from the front chainring.
Remove the Chain from the Front Chainring
When you’re ready to take off the chain from the front chainring, gently release the tension and slide it off the teeth. This can be done by lifting the rear wheel off the ground or by shifting into the smallest chainring and smallest rear cog.
To remove the chain from the front chainring, you will need a chain tool, a pair of chain pliers, and a clean rag. Common chain problems that may require chain removal include a broken chain, a bent or damaged chain link, or the need to replace the chain. To prevent any damage to the chain or the bike, it is important to use the proper tools and techniques.
Once the chain is removed from the front chainring, it is time to move on to the next step of cleaning the chain.
Transition: Now that the chain has been removed, it’s important to clean it thoroughly to ensure optimal performance.
Clean the Chain
After removing the chain, it’s important to thoroughly clean it to ensure optimal performance. Cleaning the chain is an essential maintenance task that can greatly extend its lifespan. There are several cleaning techniques that can be used, but the most effective method involves using a degreaser and a chain cleaning tool. First, apply the degreaser to the chain and let it sit for a few minutes to break down any dirt and grime. Then, use the chain cleaning tool to scrub the chain and remove the loosened debris. Rinse the chain thoroughly with water and dry it completely before moving on to the next step. Once the chain is clean, it’s important to apply proper lubrication to reduce friction and prevent rust. This will ensure smooth and efficient operation. Now, let’s move on to the next section and inspect the chain for any damage or wear.
Inspect the Chain for Damage or Wear
Take a close look at your chain to check for any signs of damage or wear. Inspecting the chain is an essential step in chain maintenance and will help determine if it needs replacement. Look for any loose or missing links, as well as excessive rust or corrosion. Check for elongation, indicated by a stretched chain that no longer sits tightly on the teeth of the front chainring.
Additionally, inspect the chain for any broken or damaged rollers, pins, or plates. If you notice any of these issues, it’s recommended to replace the chain. A chain replacement guide can provide step-by-step instructions on how to remove the old chain and install a new one.
Now that you have inspected the chain for damage or wear, let’s move on to reinstalling the chain on the front chainring.
Reinstall the Chain on the Front Chainring
To put the chain back on the front chainring, start by aligning the chain with the teeth of the chainring. This ensures that the chain sits properly and engages smoothly with the chainring during operation.
Here are some important steps to follow when reinstalling the chain on the front chainring:
- Make sure the chain is properly lubricated to reduce friction and improve performance.
- Carefully position the chain onto the teeth of the chainring, ensuring that it sits securely and evenly.
- Check for any twists or kinks in the chain and straighten them out if necessary.
- Ensure that the chain is properly tensioned by adjusting the front derailleur if needed.
- Test the chain by manually rotating the pedals to ensure smooth movement and proper engagement.
By following these steps, you can reinstall the chain on the front chainring and ensure optimal performance.
Now, let’s move on to the next step of reinstalling the chain on the rear derailleur.
Reinstall the Chain on the Rear Derailleur
Now, you’ll want to make sure the chain is properly aligned with the rear derailleur. This step is crucial for smooth shifting and optimal performance. To reinstall the chain on the rear derailleur, follow these steps:
| Step | Action |
|---|---|
| 1 | Shift the chain onto the smallest rear cog. |
| 2 | Loosen the bolt that connects the derailleur to the derailleur hanger. |
| 3 | Align the jockey wheels of the derailleur with the smallest rear cog. |
| 4 | Pull the chain through the derailleur, ensuring it is properly seated on the jockey wheels. |
| 5 | Tighten the bolt that connects the derailleur to the derailleur hanger. |
By reinstalling the chain and adjusting the derailleur, you’ll ensure smooth and precise shifting. Once the chain is properly aligned on the rear derailleur, you can move on to the next step of reconnecting the chain using the quick link or master link.
Reconnect the Chain Using the Quick Link or Master Link
After properly aligning the chain on the rear derailleur, you can proceed to reconnect it using either the quick link or master link.
If you are replacing a broken chain or troubleshooting common chain issues, it is essential to know how to reconnect the chain correctly.
The quick link is the easiest method, as it allows for a tool-free installation. Simply align the ends of the chain with the quick link, push them together, and apply pressure until you hear a click. Ensure that the link is fully engaged by giving it a gentle tug.
Alternatively, if your chain has a master link, you will need to align the ends of the chain with the master link plate, insert the retaining clip, and secure it with pliers.
Now that the chain is reconnected, we can move on to adjusting the chain tension if necessary.
Adjust the Chain Tension if Necessary
Check if the chain tension needs to be adjusted by examining how tight or loose it is. If the chain is too loose, it can result in poor shifting and chain skipping. To troubleshoot chain skipping, it is crucial to ensure proper chain tension. Here are five steps to adjust chain tension:
- Use a chain tension tool to measure the current tension.
- Loosen the axle nuts or quick-release lever to allow for adjustment.
- Move the rear wheel forward to tighten the chain or backward to loosen it.
- Recheck the tension using the chain tension tool.
- Once the desired tension is achieved, tighten the axle nuts or quick-release lever.
Having the correct chain tension is vital for smooth chain operation and prevents the chain from skipping gears.
Now, let’s move on to the next section and test the chain to ensure proper functioning.
Test the Chain to Ensure Proper Functioning
To ensure the chain is functioning properly, it’s important to test its performance. Start by checking the chain tension. A loose chain can cause slipping, while an overly tight chain can lead to increased wear and tear. To test the chain tension, simply press down on the middle of the chain with your finger. It should have a slight amount of give, but not too much.
Additionally, it’s crucial to lubricate the chain regularly. This helps reduce friction and extend the chain’s lifespan. Apply a small amount of lubricant to the chain, ensuring it reaches all the links. After lubricating, spin the pedals backward a few times to distribute the lubricant evenly.
By testing the chain tension and lubricating it regularly, you can ensure that your bicycle’s chain is functioning at its best.
Frequently Asked Questions
How do I gather the necessary tools to remove a chain from a bicycle?
To gather the necessary tools for removing a chain from a bicycle, I would start by acquiring a chain tool, a pair of pliers, and a small screwdriver. These tools are essential for a successful chain removal process.
What is a quick link or master link and how do I locate it on my bicycle chain?
A quick link, also known as a master link, is like a secret passage in the chain that allows easy removal and cleaning. To locate it, look for a small, removable link with a clip. Cleaning the chain properly involves using a degreaser and a brush to remove dirt and grime.
Why do I need to shift the gears to the smallest chainring and rear cog before removing the chain?
To remove a bicycle chain, it is important to shift the gears to the smallest chainring and rear cog. This allows for easier removal and prevents damage to the chain and gears. Avoiding common mistakes ensures a smooth process. Using a chain breaker tool offers benefits such as precise and controlled chain removal.
How do I align the chain tool pin with a chain pin when removing the chain?
To align the chain tool pin with a chain pin when removing the chain, position the chain tool over the pin you want to remove. Rotate the handle to push the pin out, ensuring the tool aligns with the pin to avoid damaging the chain.
What steps should I follow to adjust the chain tension after reinstalling the chain on the rear derailleur?
To adjust the chain tension after reinstalling the chain on the rear derailleur, I would start by shifting to the smallest rear cog. Then, I would loosen the derailleur mounting bolt and adjust the tension using the barrel adjuster until the chain has the proper tension.
Conclusion
In conclusion, removing a chain from a bicycle requires precision and the right tools. By following the steps outlined, one can successfully remove the chain and ensure proper functioning.
It is important to pay attention to details and make adjustments if necessary to maintain optimal chain tension. Remember, a well-maintained chain is crucial for a smooth and efficient ride.
So, take your time, be meticulous, and enjoy the rewards of a properly removed and reinstalled chain. Happy riding!


