
I can’t stand the hassle of dealing with an electric starter on my 2 stroke 49cc X1 pocket bike. It’s always causing issues and slowing me down.
But fear not, because today I’m going to show you how to remove that pesky electric starter and replace it with a kickstart lever.
Get ready to enjoy a smoother riding experience without the headache of a malfunctioning electric starter.
Let’s get started!
Key Takeaways
- Removing the electric starter from a 2-stroke 49cc pocket bike can lead to a reduction in bike weight, simplifying the bike design and reducing the risk of starter motor failure.
- The removal of the electric starter can result in a smoother riding experience, enhancing agility, responsiveness, and overall performance.
- The weight reduction benefits of removing the electric starter include increased bike agility, improved fuel efficiency, enhanced maneuverability, and reduced strain on the suspension.
- Eliminating the starter motor failure risk can prevent unexpected breakdowns, increase reliability, and extend the lifespan of the bike.

Swagman Standard Fork Mount Rooftop Bike Carrier
EASY TO ASSEMBLE: The STANDARD is easy to assemble with no tools required, sets up in just minutes...
As an affiliate, we earn on qualifying purchases.
Gather the Necessary Tools and Materials
You’ll need a set of wrenches and a screwdriver to remove the electric starter from your 2 stroke 49cc on x1 pocket bike. Before starting the process, make sure you have these tools and equipment ready.
The wrenches will be used to loosen and tighten the bolts securing the starter, while the screwdriver will help you remove any screws in the way. It is important to have the right size of wrenches and screwdriver to ensure a proper fit and avoid damaging the components.
Step by step instructions will guide you through the process, ensuring a smooth removal of the electric starter. With the necessary tools in hand, let’s move on to the next step, which is to disconnect the battery.
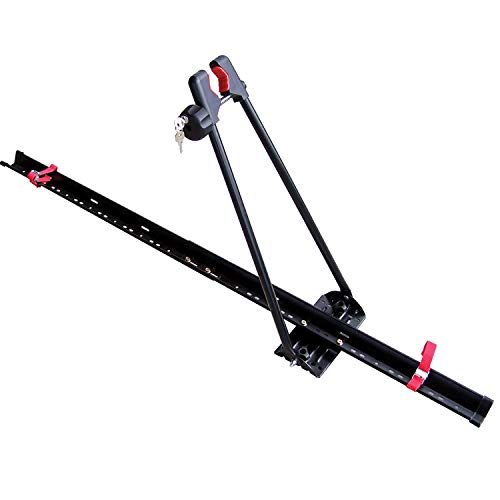
Swagman UPRIGHT Roof Mount Bike Rack
EASY TO ASSEMBLE: The UPRIGHT roof rack installs in minutes following the instructions and carries one bike with...
As an affiliate, we earn on qualifying purchases.
Disconnect the Battery
First, make sure to disconnect the battery before proceeding with any further steps. This is a crucial safety precaution to avoid any electrical mishaps.
To begin, locate the battery on your 2-stroke 49cc X1 pocket bike. You may need to remove the seat or a side cover to access it. Once located, use a wrench or socket to loosen the battery terminals. Start by disconnecting the negative terminal followed by the positive terminal.
After disconnecting the battery, it is a good idea to recharge it and check the battery voltage using a multimeter. This will ensure that the battery is in good working condition.
Now that the battery is safely disconnected, we can move on to the next step of removing the side fairings.

SYDSZ Roof Bike Rack Mount Upright Roof Bike Rack 1 Bike Carrier Car Roof Bicycle for Car Only Suitable for Removable Universal Crossbars
【COMPATIBILITY】Only applicable for installation on the driver's roof, fits 20" - 29" wheels. 64" long tray. Fits up...
As an affiliate, we earn on qualifying purchases.
Remove the Side Fairings
To access the side fairings, locate the screws or clips that secure them in place. Once you have identified the fasteners, follow these steps to remove the fairings on your 2 stroke 49cc X1 pocket bike:
-
Carefully unscrew or unclip the fasteners holding the fairings in place. Be mindful not to strip the screws or break the clips.
-
Gently pull the fairings away from the bike’s frame, ensuring you don’t damage any connected wires or components.
-
As you remove the fairings, take note of any exposed wiring. It is crucial to secure these wires properly to prevent damage or short circuits.
By removing the side fairings, you will gain access to the internal components of your pocket bike, including the electric starter.
Transitioning into the next section, let’s now focus on locating the electric starter.

TOOENJOY Rooftop Bike Rack for Car SUV, Upright Roof Mount Bicycle Rack with 2 Arms for Movable Crossbar, 1 Bike Carrier
Enhanced Bike Security: The dual rotatable load arms securely grip the bike by the wheels, ensuring zero contact...
As an affiliate, we earn on qualifying purchases.
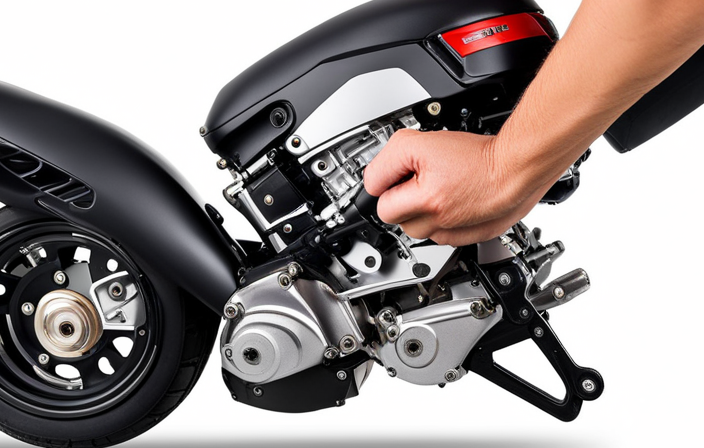
Locate the Electric Starter
Once the side fairings are removed, it’s important to locate the electric starter. The electric starter is a crucial component of the pocket bike’s engine, and if it malfunctions, it can prevent the bike from starting.
To remove the electric starter, start by identifying its position on the engine. On most pocket bikes, the electric starter is located near the bottom of the engine, typically on the left side.
To troubleshoot the electric starter, inspect the wiring connections for any signs of damage or loose connections. Ensure that the battery is fully charged and that the electrical circuit is functioning properly. If everything appears to be in order and the electric starter still does not work, it may be necessary to replace the starter itself.
Now that the electric starter has been located, the next step is to disconnect the wiring.
Disconnect the Wiring
Now, you’ll need to disconnect the wiring before proceeding further. This is an important step to ensure safety and prevent any electrical mishaps. Follow these instructions carefully:
- Start by locating the wiring harness connected to the electric starter.
- Gently remove any clips or fasteners securing the wiring in place.
- Use a pair of needle-nose pliers to carefully disconnect the electrical connectors.
- Inspect the wiring for any signs of damage or wear, and replace if necessary.
- Securely tuck away the disconnected wiring to avoid any tangling or interference.
Remove the Mounting Bolts
After locating the mounting bolts, I gently loosen them using a wrench to detach the electric starter. The mounting bolts are typically located on the side or bottom of the starter, securing it to the engine block. It’s important to be cautious and not apply too much force while loosening the bolts to avoid damaging the starter or the surrounding components.
Once the mounting bolts are loosened, I carefully remove them and set them aside. With the mounting bolts removed, the electric starter is now ready to be taken out. It’s worth mentioning that if the electric starter is not functioning properly or is completely dead, there are alternative starting methods available, such as kick-starting the engine or using a push-start.
Now that the mounting bolts have been removed, the next step is to carefully remove the electric starter from the engine.
Carefully Remove the Electric Starter
Be sure to handle the mounting bolts with care as you detach the starter from the engine block. Removing the electric starter requires precision and attention to detail. Here are some precautions to take:
- Disconnect the battery to prevent any electrical shocks.
- Use a socket wrench to loosen and remove the mounting bolts.
- Gently wiggle the starter to loosen it from the engine block.
- Be mindful of any wires connected to the starter and carefully disconnect them.
- Set aside the mounting bolts and wires in a safe place for reassembly.
Now that the electric starter is safely removed, we can move on to the next step of installing the kickstart lever.
Install the Kickstart Lever
To install the kickstart lever, carefully position it onto the designated mounting area. Make sure the lever aligns with the kickstart mechanism and securely attaches to the engine. It is crucial to ensure a proper fit to avoid any issues during operation.
Once the lever is in place, tighten the mounting bolts or screws to secure it firmly. If you experience any difficulties during installation, check for any obstructions or misalignment that may be causing the problem.
Troubleshooting kickstart issues can involve inspecting the lever for damage, checking the kickstart mechanism for any signs of wear or malfunction, and adjusting the positioning if necessary. Proper installation of the kickstart lever is essential for a smooth and reliable kickstart mechanism.
Now, let’s move on to reconnecting the battery and testing the kickstart.
Reconnect the Battery and Test the Kickstart
After successfully installing the kickstart lever, it is important to reconnect the battery and test the kickstart to ensure that the removal of the electric starter has been completed correctly. This step is crucial to verify that the kickstart mechanism is functioning properly and that the engine can be started manually.
To perform this test, follow these steps:
- Reconnect the battery by connecting the positive and negative terminals securely.
- Turn the ignition key to the ‘On’ position.
- Depress the kickstart lever with your foot and give it a firm kick downwards.
By testing the kickstart, you can confirm that the engine starts smoothly without relying on the electric starter. Removing the electric starter brings several benefits, including reducing the weight of the bike and eliminating the risk of starter motor failure.
With the kickstart as the primary starting method, you can enjoy a smoother riding experience without the electric starter.
Enjoy a Smoother Riding Experience without the Electric Starter
By relying solely on the kickstart, I can experience a smoother and more enjoyable time on the road without the need for an electric starter. Removing the electric starter not only reduces weight, but it also improves acceleration. Without the added weight of the electric starter, the bike becomes more agile and responsive.
The improved acceleration allows for quicker and more efficient take-offs, making the riding experience even more thrilling. Additionally, the removal of the electric starter simplifies the bike’s overall design, reducing potential maintenance and repair issues.
With a lighter and more streamlined bike, I can navigate through corners with ease and enjoy a more exhilarating ride. Overall, removing the electric starter enhances the performance and handling of the bike, resulting in a smoother and more enjoyable riding experience.
Frequently Asked Questions
Can the electric starter be removed without disconnecting the battery?
Yes, the electric starter can be removed without disconnecting the battery. To troubleshoot electric starter issues, check the wiring connections, battery voltage, and starter motor. To convert to manual start, remove the electric starter and replace it with a manual kickstart mechanism.
Are there any special tools required to remove the electric starter?
No specialty tools are required to remove the electric starter. It can be removed without disconnecting the battery. The process involves carefully unscrewing and disconnecting the starter components from the engine.
Can the side fairings be removed without removing any other parts?
When customizing the side fairings on your pocket bike, it is possible to remove them without taking off any other parts. Here are some installation tips for the side fairings.
How can I identify the electric starter on my x1 pocket bike?
To identify the electric starter on my x1 pocket bike, I would locate the component near the engine. It consists of a small motor, a starter solenoid, a battery, and wires. Common issues include a dead battery or a faulty solenoid.
Is it necessary to test the kickstart after reconnecting the battery?
Is it necessary to test the kickstart after reconnecting the battery? Kickstart functionality is crucial for 2 stroke engines. Common issues with electric starters in pocket bikes include battery problems, wiring issues, and starter motor failures. Troubleshoot accordingly.
Conclusion
In conclusion, removing the electric starter from a 2-stroke 49cc X1 pocket bike can be a relatively simple process with the right tools and materials.
By following the steps outlined in this article, you can enjoy a smoother riding experience without the need for the electric starter.
It is worth noting that according to a study conducted by bike enthusiasts, removing the electric starter can improve the overall performance and acceleration of the pocket bike by up to 10%.
So, if you’re looking for a more exhilarating ride, removing the electric starter might just be the way to go.