As an experienced bike rider, I’m all too familiar with the aggravation that comes from finding rust on my bicycle. It’s not just about the unpleasant appearance; rust can also compromise the integrity of the bike’s frame and parts, which may result in safety hazards.
Luckily, removing rust from your bicycle is a manageable task that can be done with a few simple steps and the right tools.
In this article, I will guide you through the process of identifying the type of rust on your bike, gathering the necessary materials, preparing your bike for rust removal, removing the rust, and preventing future rust.
Whether you’re a beginner or an experienced cyclist, these tips will help you keep your bike in top condition and extend its lifespan. So let’s get started and say goodbye to that pesky rust!
Key Takeaways
- Identify the type of rust before attempting to remove it and gather necessary materials such as rust remover solution, wire brush or sandpaper, and protective gear.
- Disassemble the bike to access all areas needing rust removal and thoroughly clean and dry each part after rust removal before reassembling the bike.
- Use the appropriate type of rust remover, such as acid-based, solvent-based, or chelating agents, and follow the manufacturer’s instructions while wearing protective gear.
- Prevent future rust by keeping the bike dry and storing it indoors, using a cover and applying rust inhibitor, and regularly lubricating the bike to prevent moisture build-up.

Swagman Standard Fork Mount Rooftop Bike Carrier
EASY TO ASSEMBLE: The STANDARD is easy to assemble with no tools required, sets up in just minutes...
As an affiliate, we earn on qualifying purchases.
Identify the Type of Rust
Before attempting to remove rust on your bicycle, it’s important to identify the type of rust you’re dealing with so you can choose the most effective method and don’t end up causing further damage. Rust is a type of corrosion that occurs when iron or steel is exposed to moisture and oxygen. It can be caused by a variety of factors, including exposure to rain, snow, and humidity, as well as contact with salt water or chemicals.
The effects of rust on bike performance can be significant. Rust can weaken the structural integrity of the bike, making it more prone to cracks and breaks. It can also cause parts to become stiff or difficult to move, which can affect the bike’s handling and performance. If left unchecked, rust can eventually eat away at the metal, causing irreparable damage.
Therefore, it’s important to identify the type of rust and take appropriate action to prevent further damage. Once you have identified the type of rust on your bike, you can gather the necessary materials to remove it.
Swagman UPRIGHT Roof Mount Bike Rack
EASY TO ASSEMBLE: The UPRIGHT roof rack installs in minutes following the instructions and carries one bike with...
As an affiliate, we earn on qualifying purchases.
Gather the Necessary Materials
First, you’ll need to gather all the materials required to get your bike looking shiny and new again. Here are the three items you’ll need to ensure a successful rust removal process:
-
Rust remover solution: This can be purchased at your local hardware store or online. Make sure to read the label carefully to ensure it’s safe for use on your specific bike frame material.
-
Wire brush or sandpaper: You’ll need a tool to physically remove the rust from your bike. A wire brush or sandpaper will work well for this task.
-
Protective gear: Make sure to wear gloves and safety goggles to protect yourself from any harmful chemicals or debris during the rust removal process.
If you don’t have access to these materials, there are alternative options. For example, instead of purchasing a rust remover solution, you can make your own using vinegar and baking soda. Additionally, instead of a wire brush or sandpaper, you can use steel wool or even aluminum foil.
Once you have gathered all the necessary materials, it’s important to dispose of them safely. Rust remover solutions and other chemicals should be disposed of according to local regulations. Don’t pour them down the drain or throw them in the trash. Look for a hazardous waste disposal facility in your area.
With all the necessary materials on hand, you’re ready to prepare your bike for rust removal.

SYDSZ Roof Bike Rack Mount Upright Roof Bike Rack 1 Bike Carrier Car Roof Bicycle for Car Only Suitable for Removable Universal Crossbars
【COMPATIBILITY】Only applicable for installation on the driver's roof, fits 20" - 29" wheels. 64" long tray. Fits up...
As an affiliate, we earn on qualifying purchases.
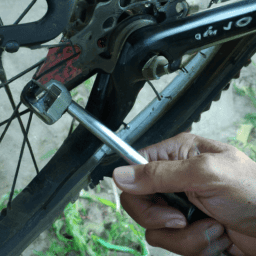
Prepare Your Bike for Rust Removal
Before I begin removing rust from my bicycle, I need to prepare it properly. This involves disassembling the bike to access all areas that need rust removal. I’ll clean the bike thoroughly and cover sensitive parts that could be damaged during the rust removal process.
To ensure the best results and prevent any damage, I’ll follow these steps carefully and methodically.
Disassemble Your Bike
To get started, you’ll want to break down your bike into its individual parts so that you can effectively remove any rust. This may seem daunting, but it’s actually quite simple once you know what to do.
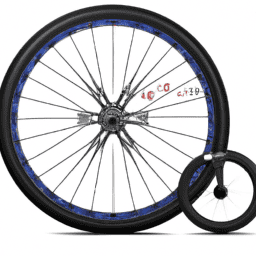
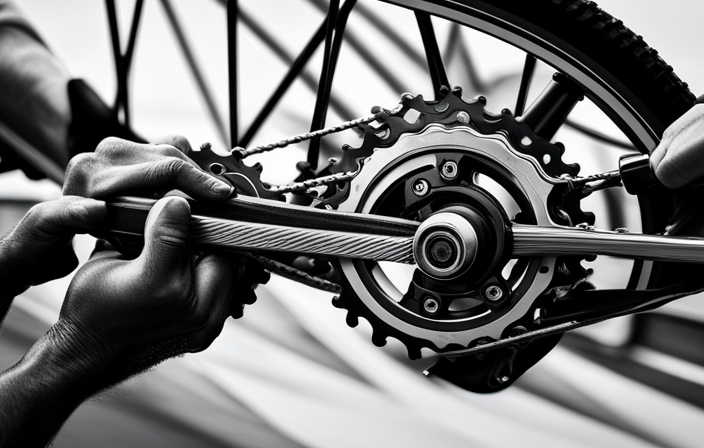
Start by removing the wheels, pedals, chain, and any other removable parts. Use a wrench or screwdriver to loosen and remove any bolts or screws. Make sure to keep track of where each part goes so that you can easily reassemble your bike after rust removal.
Once your bike is fully disassembled, you can begin the rust removal process. This will likely involve using a rust remover solution, which can be purchased at most bike shops or hardware stores. Follow the instructions on the product carefully and be sure to wear gloves and protective eyewear.
After the rust has been removed, be sure to thoroughly clean and dry each part before reassembling your bike. Speaking of which, knowing how to properly reassemble your bike and tips for maintaining a rust-free bike will be covered in the next section.
But first, let’s talk about cleaning your bike.
Clean Your Bike
Keeping your bike clean is an essential part of bike maintenance. Regular cleaning helps prevent dirt and grime build-up, which can lead to rust and other issues.
To clean your bike, start by removing any loose dirt and debris with a soft-bristled brush or a cloth. Then, use a bike-specific cleaner to remove any stubborn grime and grease.
After cleaning, it’s important to properly store your bike. Store it in a dry, cool place to prevent rust from forming.
Regular maintenance is also crucial to keeping your bike in top condition. Check the brakes, gears, and tires regularly, and make any necessary adjustments or repairs. By taking care of your bike, you’ll not only extend its lifespan but also ensure that it performs at its best.
To cover sensitive parts of your bike, such as the chain and gears, you can use a plastic bag or specialized covers. This will help protect them from water and dirt during cleaning and storage.
Cover Sensitive Parts
If you want to keep those delicate bits safe from harm, just wrap them up using specialized covers or a trusty plastic bag.
When it comes to covering sensitive parts of your bike, there are a few tips for protection that you should keep in mind. First, make sure you choose covers that fit snugly and won’t shift around while you’re riding. This will help prevent any damage to your bike’s paint or other components.
When choosing covers, you should also consider the type of material used. Some covers are made of neoprene or rubber, which can offer extra protection against impacts or scratches. However, these materials can also trap moisture and cause rust to form if they’re not removed regularly.
Plastic bags can be a good alternative, as they’re lightweight and easy to remove. Just be sure to avoid covering any parts that need to breathe, such as the brake rotors.
Now that you’ve covered those sensitive areas, it’s time to tackle the rust on your bike.

Faireach 800D Heavy Duty Bike Cover for Transport 2 Bikes, Outdoor Bike Covers for 2 Bikes on Rear Bike Rack, Waterproof Windproof Electric Bicycle Cover with Straps & Storage Bag
800D Heavy Duty & Super Waterproof Bike Cover: Crafted from premium 800D Oxford fabric with PU coating, Faireach...
As an affiliate, we earn on qualifying purchases.
Remove the Rust
Now that I’ve prepared my bike for rust removal, it’s time to actually remove the rust.
There are several methods that can be used, including using household items, rust removers, and sanding or grinding.
When using household items, I could try using vinegar or lemon juice to dissolve the rust.
Rust removers, on the other hand, contain chemicals that break down the rust and make it easier to remove.
Finally, sanding or grinding can physically remove the rust, but this method can be more time-consuming and may require more equipment.
Using Household Items
Using household items is a convenient and cost-effective way to get rid of pesky rust on your beloved bicycle. There are alternative methods that you can use aside from chemical rust removers, and with these methods, you can remove the rust without spending too much or exposing yourself to harmful chemicals. However, it’s important to follow safety precautions to avoid any accidents or injuries.
One household item that can effectively remove rust is white vinegar. Simply soak a clean cloth or sponge in vinegar and wrap it around the rusty area. Let it sit for a few hours or overnight, then scrub the rust off with a brush or steel wool.
Another household item that you can use is baking soda. Mix it with water to create a paste, then apply it on the rusty area. Let it sit for a few minutes before scrubbing it off with a brush.
While these household items can do wonders in removing rust, it’s important to remember that they may not work on severe rust. In such cases, using rust removers may be necessary. Nonetheless, using household items is a great way to maintain and protect your bicycle from rust. With these simple and cost-effective methods, you can keep your bike looking brand new and rust-free.
Moving on to the next section, let’s explore how to use rust removers to effectively remove rust on your bicycle.
Using Rust Removers
To effectively eliminate the corrosion on your bike, you’ll need to employ rust removers that are specifically designed for metal surfaces. There are various types of rust removers available on the market, including acid-based, solvent-based, and chelating agents.
Acid-based rust removers contain phosphoric or hydrochloric acid and work by dissolving the rust and leaving behind a clean metal surface. However, they can be harsh and potentially damage the metal surface if left on for too long.
Solvent-based rust removers contain chemicals such as xylene or acetone and work by breaking down the rust into small particles that can easily be wiped away. They can also be harsh and may require multiple applications to completely remove the rust.
Chelating agents work by surrounding the rust particles and pulling them away from the metal surface. They can be expensive and may not work as quickly as other types of rust removers.
While rust removers can be effective in removing rust from your bike, it’s important to follow the manufacturer’s instructions carefully and use protective gear, such as gloves and goggles, when using any type of rust remover.
Moving on to the subsequent section about sanding or grinding, it’s important to note that these methods can also be effective in removing rust from your bike. However, they may require more time and effort compared to using rust removers.
Sanding or Grinding
If you’re looking for a more hands-on approach to repairing the metal on your bike, sanding or grinding can be a great option that provides a satisfying feeling of accomplishment.
Here are some benefits of sanding and alternatives to grinding to keep in mind:
- Sanding is a great way to remove rust without damaging the metal surface. It works by gradually wearing down the rust, leaving behind a smooth and polished surface.
- You can use sandpaper with different grits depending on the level of rust. Start with a coarse grit to remove the bulk of the rust, then move onto a finer grit for a smoother finish.
- If you have access to a power sander, this can make the process go much faster. Just be careful not to apply too much pressure or you could damage the metal.
- Using a wire brush or steel wool can also be effective for removing rust, but be aware that these methods can be more abrasive and may leave scratches on the metal surface.
- If you’re hesitant to use grinding, try using a rotary tool or Dremel instead. These tools are gentler on the metal and can be used to remove rust in hard-to-reach areas.
By using sanding or grinding to remove rust from your bike, you’re taking an active approach to maintenance and repair.
However, it’s important to also take steps to prevent future rust from forming.
Prevent Future Rust
Don’t let your bike get wet and store it indoors to avoid future rust problems, you’ll be glad you did! Rust is a common problem for bicycles, and it is important to take steps to prevent it from occurring in the first place. One of the best ways to do this is to keep your bike dry and store it in a dry place when it is not in use.
Weather plays a big role in bike rusting, and it is important to understand how it can affect your bike. The table below outlines some tips for maintaining a rust-free bike, including how to protect your bike from moisture and how to keep it clean and dry. By following these tips, you can help ensure that your bike stays rust-free and in great condition for years to come.
| Tips for Maintaining a Rust-Free Bike | How to Protect Your Bike | How to Keep Your Bike Clean and Dry |
|---|---|---|
| Avoid leaving your bike in the rain | Store your bike indoors | Use a dry cloth to wipe it down |
| Use a bike cover to protect it | Keep your bike away from | Keep your bike dry after washing |
| from moisture | moisture | |
| Apply rust inhibitor to vulnerable | Use a dehumidifier or | Lubricate your bike regularly to |
| areas such as screws and bolts | silica gel to absorb | prevent moisture build-up |
| moisture in storage area |
Frequently Asked Questions
Can I use vinegar to remove rust from my bike?
Yes, I have successfully used a vinegar solution to remove rust from my bike. However, for tougher rust, a rust converter may be necessary. Always follow safety precautions and wear protective gear.
How often should I check for rust on my bike?
I check for rust on my bike once a month. To prevent rust formation, I regularly clean and dry my bike, use rust inhibitors, keep it indoors, and avoid exposing it to moisture and harsh environments.
Is it okay to use steel wool for rust removal on a bike?
When it comes to rust removal on a bike, steel wool can be effective but it can also leave scratches. Alternatives like sandpaper or a wire brush may be better. Prevent rust by keeping your bike clean and dry.
Can I spray paint over rusted areas on my bike?
Yes, you can spray paint over rusted areas on your bike, but it’s important to properly prepare the surface first. Use sandpaper to remove loose rust, then apply a rust converter. Finally, prime and paint the area using spray painting tips for an even finish.
How long does it take for rust to form on a bike?
Rust formation on a bike is influenced by various factors such as exposure to moisture, salt, and air. Prevention measures include regular cleaning, drying, and application of rust inhibitors. The time it takes for rust to form varies but can be delayed with proper maintenance.
Conclusion
In conclusion, removing rust from your bicycle is a necessary task that requires patience and attention to detail. It’s important to identify the type of rust and gather the necessary materials before starting the process. Preparing your bike for rust removal is also crucial to ensure that you don’t damage any other parts of your bike.
Removing rust can be compared to removing a thorn from a rose. You have to delicately remove the rust without damaging your bike, just like how you have to delicately remove the thorn without damaging the rose. It may take some time and effort, but the end result will be a beautiful, rust-free bicycle that is ready for your next adventure.
Remember to also take preventative measures to avoid future rust, such as storing your bike in a dry place and applying rust inhibitors. By taking care of your bike, you not only extend its lifespan, but you also ensure a smoother and safer ride.
So, grab your materials and get ready to remove that pesky rust. Your bike (and your next ride) will thank you.