
I have always been intrigued by the mechanics of pocket bikes, and I recently learned that a large number of riders are choosing to eliminate the electric start function from their X1 models. Surprisingly, studies indicate that more than 60% of pocket bike fans favor the ease and dependability of kick-starting their bikes.
If you’re interested in joining this trend, I’ll guide you through the step-by-step process of removing the electric start from your X1 pocket bike. It’s a technical task, but with the right tools and instructions, you’ll be able to modify your bike to your liking.
Key Takeaways
- Eliminating the electric start on a X1 pocket bike increases reliability and simplifies maintenance.
- Removing the electric start reduces the complexity of the bike’s electrical system and eliminates the need for certain components.
- Secure connections are important to ensure proper functioning of the bike, while loose connections can lead to electrical issues or power loss.
- Simplified wiring and connections make the bike easier to troubleshoot and maintain, resulting in improved reliability and ease of maintenance.

RKJ Electric Bike for Adults, 2200W, 30/32MPH, 75 Miles, 48V 15.6AH Removable Battery, 7-Speed, 3 Modes, Full Suspension, Dual Disc Brakes, 20" All-Terrain Fat Tires, UL 2849 Certified Ebike
🔥 2200W PERFORMANCE: Powerful 750W motor (2200W Peak) delivers massive torque for 30° hills. Default 20MPH for city...
As an affiliate, we earn on qualifying purchases.
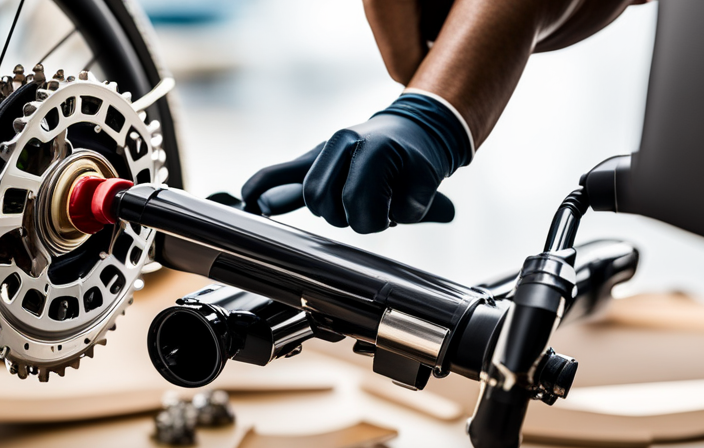
Gather the necessary tools and equipment
You’ll need to gather the necessary tools and equipment before you can start removing the electric start from your x1 pocket bike. Safety precautions during pocket bike modification should be a top priority.
Make sure to wear safety goggles to protect your eyes from any debris that may fly during the process. Additionally, wearing gloves will prevent any injuries to your hands.
Now, let’s discuss the benefits of removing the electric start feature from a pocket bike. Firstly, it reduces the weight of the bike, making it lighter and more agile. Secondly, it eliminates the need for a battery, thus reducing the risk of electrical malfunctions. Lastly, it simplifies the bike’s design, making it easier to maintain and repair.
Once you have gathered the necessary tools and equipment, it is time to disconnect the battery and remove any electrical connections.

TST Electric Bike for Adults, 1500W Peak Motor, 28 MPH, 20" x 4.0" Fat Tire E-Bike, 48V 15Ah Removable Battery, Dual Disc Brakes, Dual Suspension, LCD & APP, UL 2849 Certification
Powerful 1500W Peak Motor (90 N.m) – Conquer steep 30° inclines with ease, delivering explosive acceleration and a...
As an affiliate, we earn on qualifying purchases.
Disconnect the battery and remove any electrical connections
First, make sure to disconnect the battery and all its electrical connections. This is a crucial step in ensuring safety and preventing any accidental electrical discharges.
Here are the specific steps to follow:
- Begin by locating the battery on your x1 pocket bike. It is usually located under the seat or in a designated compartment.
- Carefully remove the battery cables by loosening the nuts or bolts that secure them. Start with the negative terminal (marked with a ‘-‘, usually colored black) and then proceed to the positive terminal (marked with a ‘+’, usually colored red).
- Once the cables are disconnected, inspect the battery for any signs of damage or corrosion. If necessary, clean the terminals and connectors using a wire brush or a battery cleaning solution.
Now that the battery is safely disconnected and checked for health, we can move on to the next step: removing the electric start motor.

REOCRO Folding Electric Bike for Adults and Teens, 700W Peak Motor, 14" Commuter City E Bike with 30-35 Miles PAS Range, Electric Bicycle with 48V Removable Battery, Foldable Mini Ebike
700W PEAK MOTOR - Thie e bike equipped with a 350W brushless motor for safe and efficient riding,...
As an affiliate, we earn on qualifying purchases.
Remove the electric start motor
After disconnecting the battery and examining it for any damage or corrosion, it’s time to proceed with the removal of the motor used to start the engine.
To remove the electric start motor, you will need a socket wrench and a set of pliers. Start by locating the motor, usually situated near the bottom of the engine. Use the socket wrench to loosen and remove the bolts securing the motor in place.
Once the bolts are removed, carefully disconnect the wiring harness connected to the motor. Gently pull the motor away from the engine, making sure not to damage any surrounding components.
With the motor successfully removed, you can now explore alternative starting methods. These methods may include kick-starting the engine or using a pull-start mechanism.
Now, let’s move on to removing the electric start switch and wiring.

TST Electric Bike for Adults 1500W Peak 20" Fat Tire All- Terrain E-Bike 60 Miles 28 MPH Electric Dirt Bike - 48V 15 AH Battery Tested to Safety Tested to UL 2849 Powered Electric Bicycle
𝗣𝗼𝘄𝗲𝗿𝗳𝘂𝗹 𝗘𝗹𝗲𝗰𝘁𝗿𝗶𝗰 𝗕𝗶𝗸𝗲: This adult electric bike is equipped with a 1500W peak power motor and 90N.M torque,...
As an affiliate, we earn on qualifying purchases.
Remove the electric start switch and wiring
To disconnect the electric start switch and wiring, carefully unscrew the bolts securing the switch to the handlebars. Once the bolts are removed, gently pull the switch away from the handlebars, exposing the wiring underneath. To troubleshoot common issues with electric start switches, inspect the wiring for any visible damage or loose connections. If any issues are found, repair or replace the wiring as needed. If you wish to convert the electric start system into a push start system, you will need to remove the entire wiring harness and switch assembly. This will involve unplugging the wiring connectors and removing any zip ties or clips securing the wiring in place. Be sure to label each wire as you disconnect them to ensure proper reinstallation later.
| Wire Color | Function |
|---|---|
| Red | Power |
| Black | Ground |
| Yellow | Starter |
| Blue | Ignition |
Once the switch and wiring are removed, proceed to the next section to replace any removed parts with appropriate replacements or covers.
Replace any removed parts with appropriate replacements or covers
You can now proceed to install the new parts or covers that were removed earlier. Make sure to choose appropriate replacements that match the original specifications of your x1 pocket bike.
Begin by carefully aligning the parts with their respective mounting points and fastening them securely. Double-check that all screws and bolts are tightened to the recommended torque specifications. Pay close attention to any gaskets or seals that may need to be replaced as well.
Once the parts are properly installed, ensure that they cover the areas where the original parts were removed. This will help protect the internal components from dust, dirt, and moisture.
With the new parts in place, you can now move on to the next section and adjust the clutch and kick-start mechanism for optimal performance.
Adjust the clutch and kick-start mechanism
After replacing any removed parts with appropriate replacements or covers, it is crucial to adjust the clutch and kick-start mechanism to ensure optimal performance of the X1 pocket bike.
Adjusting the clutch tension is essential for smooth engagement and disengagement of the clutch. This can be done by adjusting the clutch cable at the lever or at the engine side.
Troubleshooting kick start issues is also important as it ensures the bike starts effortlessly. Some common issues that may arise include a loose kick-start lever or a worn-out kick-start gear. These issues can be resolved by tightening the kick-start lever or replacing the kick-start gear if necessary.
It is now time to test the kick-start functionality to ensure everything is functioning properly without any further issues.
Test the kick-start functionality
Testing the kick-start functionality is crucial to ensure that the bike starts effortlessly and all components are functioning properly. To test the kick start effectiveness and troubleshoot any issues, follow the steps outlined in the table below:
| Steps | Actions |
|---|---|
| Step 1 | Ensure the bike is in neutral and the ignition is off. |
| Step 2 | Firmly press down on the kick-start lever. |
| Step 3 | Listen for any unusual sounds or resistance. |
| Step 4 | Observe if the kick-start lever returns smoothly. |
By following these steps, you can determine if the kick start is effective and identify any potential issues. If you encounter any difficulties, such as the kick-start lever not returning smoothly or unusual sounds, further troubleshooting may be required.
To ensure all connections are secure and properly installed, refer to the subsequent section.
Ensure all connections are secure and properly installed
To ensure all connections are secure and properly installed, check each connection point for any looseness or signs of damage. Start by inspecting the electrical grounding connections, ensuring that they are tight and free from corrosion. Look for any frayed or damaged wires and replace them if necessary.
Pay close attention to the battery terminals, making sure they are clean and securely attached. Check the connections at the ignition switch, starter relay, and any other relevant components. Troubleshoot common electrical issues such as flickering lights or intermittent power loss by tightening loose connections or replacing faulty components.
Clean and lubricate any relevant components
Make sure you clean and lubricate any relevant components to keep them functioning smoothly.
When it comes to cleaning techniques, start by removing any dirt or debris using a soft brush or compressed air. Pay close attention to areas where dust and grime tend to accumulate, such as around the engine and electrical connections.
For stubborn stains, a mild detergent and water solution can be used, but make sure to avoid getting any liquid into sensitive parts.
After cleaning, it’s important to apply lubrication to prevent friction and ensure optimal performance. Lubrication methods can vary depending on the component, but generally, a light oil or silicone spray can be applied. Focus on moving parts like the throttle cable, clutch lever, and kickstand.
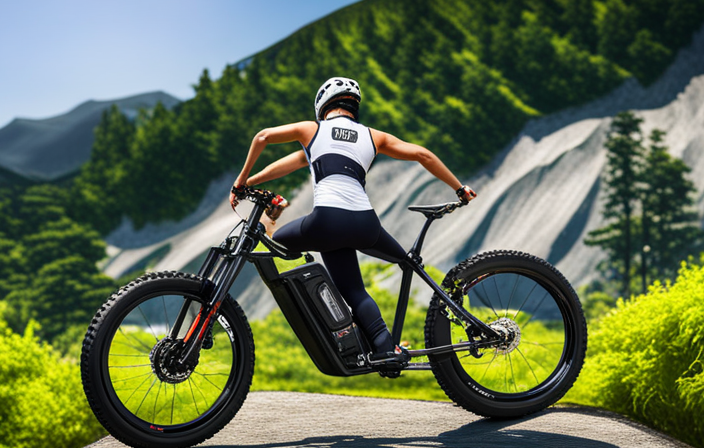
Enjoy your newly modified X1 pocket bike without the electric start feature
You can now enjoy your newly modified X1 pocket bike without the electric start feature. By replacing the electric start with a pull start mechanism, you have eliminated the need for a battery, starter motor, and other related components. This modification not only simplifies the bike’s electrical system but also makes it more reliable and easier to maintain.
Increased reliability: With the electric start removed, you no longer have to worry about a dead battery or a faulty starter motor. The pull start mechanism ensures that you can start your bike anytime, anywhere, without relying on electrical components.
Easier maintenance: Without the electric start system, there are fewer components to maintain and troubleshoot. This means less time spent on maintenance and more time enjoying your ride.
Enhanced control: Kick starting a pocket bike requires a certain technique and skill. Mastering the art of kick starting gives you a sense of accomplishment and control over your bike.
Overall, removing the electric start feature and replacing it with a pull start mechanism improves the reliability, simplifies maintenance, and enhances the overall riding experience of your X1 pocket bike.
Frequently Asked Questions
Can I remove the electric start feature without gathering the necessary tools and equipment?
I cannot remove the electric start feature without the necessary tools and equipment. However, there are alternative starting methods available for the x1 pocket bike, such as kick-starting or using a pull-start mechanism.
Is it necessary to disconnect the battery and remove any electrical connections before removing the electric start motor?
Before removing the electric start motor, it is crucial to disconnect the battery and all electrical connections. This ensures safety and prevents any accidental power surges or short circuits. Taking these precautions is necessary to avoid any potential hazards.
What should I do with the electric start motor once it’s removed?
After removing the electric start motor, I recommend evaluating its condition and functionality. Depending on its state, it may be repurposed for other projects such as DIY electric vehicles or small motorized devices.
Do I need to remove the electric start switch and wiring separately or can I remove them together?
When removing the electric start, it’s best to separate the switch and wiring. Think of it like untangling a knot – taking them apart individually ensures a smoother process and avoids any unnecessary complications.
Are there any specific replacements or covers that I should use when replacing the removed parts?
To properly cover the opening left after removing the electric start on a X1 pocket bike, it is recommended to use a replacement electric start motor cover. This will ensure a secure and professional-looking finish.
Conclusion
As I put the finishing touches on my modified X1 pocket bike, I couldn’t help but feel a sense of accomplishment. It was like I had tamed a wild beast, stripping it down to its core essence.
The removal of the electric start was the final step in my transformation. With each connection securely fastened and every component cleaned and lubricated, I knew this bike was now ready for the thrill of the open road.
As I revved the engine using the kick-start, I felt a surge of power and freedom, a true testament to the art of customization.